Monday, July 7, 2008
HOME AT LAST! AND RECIPE FOR ORANGE BEANPOT

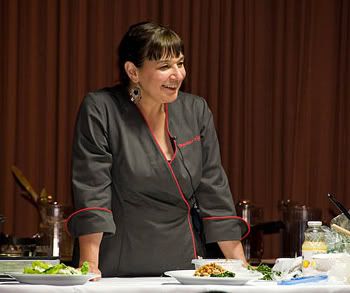
I'm finally catching up on things after arriving home. We had a great time in Santa Rosa, despite it being alot of work (9 1/2 hours prep one day). DH said he was growing a blister on his chopping hand!). John and Mary McDougall and their PA, Tiffany, were so kind and helpful, the staff at the Flamingo Hotel was fabulous (particularly the kitchen staff-- thank you especially to Maria and Marta!), and the participants were lovely. It is such a pleasure to cook for an eager and responsive audience.
I did two workshops:
"Brilliant Breakfasts"
Chai-Spiced Oat Crepes with Grilled Nectarines and Almond Ricotta update: (update: recipe in my book "World Vegan Feast")
Italian Scrapple (Polenta, Bean and Kale Slices) with Brown Gravy (made with oat and chickpea flour) (update: the recipes are in my book "World Vegan Feast" and also here)
Crispy White Bean and Oat Waffles with Banana and Strawberry Topping (update: there's a version of this recipe here, but with cornmeal as well as oats)
and "The Elegant Bean"
Orange-Rosemary White Bean Pot (recipe below)
Sundried Tomato Polenta Rounds with Braised Kale, Carmelized Onions, and White Beans with Dried Porcini Mushrooms (update: recipe here)
Red Lentil, Bulgur, and Dried Fruit Salad Balls in Lettuce Cups, with Creamy Basil and Garlic Dressing (update: recipe here)
Hummus, re-visited! (update: recipe here)
We were fed SO well-- three fabulous buffets each day (all no-fat, McDougall-style), with big fresh salads, including bowls of vegetables, beans, etc., to add on top, and a variety of dressings. There were usually at least two entrees, plus side dishes and lots of fruit, and a great dessert every evening.
Unfortunately, we didn't have time to take in any of the other presenters, but every chef seemed to be a hit with this crowd. I enjoyed meeting chefs Kevin Dunn and Eric Tucker once again. DH and I both were so happy we had the opportunity to meet, and spend time with, Susan Voisin, of fatfreevegan. I felt like I "knew" her already from some correspondence and her blog, but, trust me, in person is the best. What a wonderful woman! She was very nervous, this being her first cooking presentation, to which I could relate, as I used to have panic attacks in the "old days". We were able to see the first little bit of her workshop before we left and she was doing great. DH said, "She's a natural!" The crowd was loving her already!
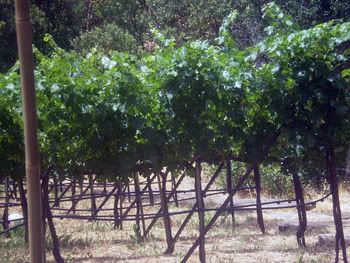
My brother's small home vineyard
After the event, we travelled to Northern Sonoma County to visit my brother Tim and his wife Louise, lazing around in the wine country and doing very little. The only way I can do this, usually, is to leave home and not be near a computer or my phone. We were very lucky to have breezy, comfortable weather the whole time. On the way home to our island, we spent a day in Vancouver and visited my cousin, his daughter and new grandaughter, and my youngest daughter and darling 4-year-old grandson.
Now I have to put my nose to the grindstone, but I feel nicely rested.
The following is one of the recipes I presented:

Printable Recipe
BRYANNA'S FAT-FREE ORANGE-ROSEMARY WHITE BEANPOT (a slow-cooker recipe)
Servings: 10
I was trying to think of interesting flavor combinations one day, and I had some oranges that needed using up, so I started thinking that orange and rosemary (which I have growing outside my door) are used with meat-- why not with beans? One of my favorite beans are white kidney or cannellini beans, which I thought would go well with this flavor combination. The result is absolutely delicious-- good enough for company!
750g (1.65 lbs.) dried white kidney, cannellini beans, Great Northern, or small white beans, soaked overnight in plenty of water and drained (navy beans, which are quite small, would be my last choice)
1 large green pepper, seeded and sliced thinly
1 large red pepper, seeded and sliced thinly
2 large onions, thinly-sliced
1 cup diced celery with leaves
6 cloves garlic, sliced
6 cups HOT chicken-style veggie broth
4 medium oranges, juice (makes about 1 cup juice) and grated zest (use a zester, if possible)
2 large carrots, scrubbed and cut into thin "fingers" about 3" long
4 sprigs fresh rosemary (4-5" long)
2 tsp salt
freshly-grated pepper to taste
Use a large, heavy skillet (use a non-stick, or hard-anodized aluminum [aluminum does not leak into food when hard-anodized], or well-seasoned cast iron, stainless steel or carbon steel skillet, or a well-seasoned spun-steel wok, preferably flat-bottomed). Spray your pan with oil from a pump sprayer if necessary. Steam-fry (see Cooking Tips below) the sliced peppers, onions, celery, and garlic. Stir-cook until the onion is tender, adding a splash of water as needed to keep the mixture from sticking. Do not brown the mixture. (See Microwave Alternative in the Cooking Tips below, too.)
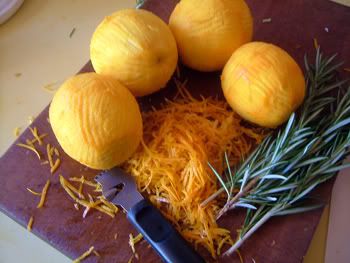
Add this to a large (6 qt) slow-cooker, along with the drained, soaked beans, the broth, juice and zest of the oranges (yes, the zest of all 4 oranges-- this is important!), carrot "fingers", rosemary sprigs, and salt.
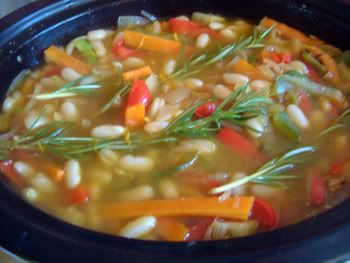
Cook on Low for 8-10 hours, or on High for 5-6 hours. Add freshly-ground black pepper to taste.
Nutrition Facts
Nutrition (per serving): 303.3 calories; 2% calories from fat; 0.9g total fat; 0.0mg cholesterol; 409.6mg sodium; 1628.6mg potassium; 58.1g carbohydrates; 14.3g fiber; 7.9g sugar; 43.7g net carbs; 18.9g protein; 5.3 points.
Recipe Source
Author: © Bryanna Clark Grogan 2008
Cooking Tips
HOW TO STEAM-FRY
You will often see the term "steam-fry" in my recipes. Here is a description of what it is and how to do it.
METHOD OF STEAM-FRYING:
"Steam-fry" simply means sauteing without fat. To do this, use a heavy skillet--use a non-stick, or hard-anodized aluminum [aluminum does not leak into food when hard-anodized], or well-seasoned cast iron, stainless steel or carbon steel skillet, or a well-seasoned spun-steel wok, preferably flat-bottomed. Spray your pan lightly with oil from a pump sprayer, or with cooking spray, if needed.
Heat the pan over high heat, add the chopped onions or other vegetables, and one or two tablespoons of liquid (water, low-sodium vegetarian broth, or wine), depending on the amount of vegetables. Do not crowd the pan, or your vegetables will "stew". Cook over high heat until the liquid starts to evaporate, stirring with a spatula or wooden spoon. Keep stirring until the vegetables are done to your liking, adding JUST ENOUGH liquid to keep the vegetables from sticking to the bottom of the pan.
You can brown onions perfectly by this method. As soon as the natural sugar in the onions starts to brown on the bottom and edges of the pan, add a little liquid and scrape up the brown bits, mixing them into the liquids and around into the cooking onions. Keep doing this until the onions are soft and brown, being careful not to scorch them.
TO "STEAM-FRY" IN THE MICROWAVE, use a glass dish, such as a round 10" Pyrex casserole dish or pie plate. Spray with oil from a pump sprayer or cooking spray. Add ther chopped onions, garlic, carrots, celery, or whatever vegetables you want to sautè. Cover the dish with a glas lid or microwavable plate, and microwave 5 minutes, or however long it takes to soften them. This method is convenient because you don't have to watch the vegetables- you can be preparing the rest of the recipe while they cook. Just add the softened vegetables to the recipe.
Enjoy!

750g (1.65 lbs.) dried white kidney, cannellini beans, Great Northern, or small white beans, soaked overnight in plenty of water and drained (navy beans, which are quite small, would be my last choice)
1 large green pepper, seeded and sliced thinly
1 large red pepper, seeded and sliced thinly
2 large onions, thinly-sliced
1 cup diced celery with leaves
6 cloves garlic, sliced
6 cups HOT chicken-style veggie broth
4 medium oranges, juice (makes about 1 cup juice) and grated zest (use a zester, if possible)
2 large carrots, scrubbed and cut into thin "fingers" about 3" long
4 sprigs fresh rosemary (4-5" long)
2 tsp salt
freshly-grated pepper to taste
Use a large, heavy skillet (use a non-stick, or hard-anodized aluminum [aluminum does not leak into food when hard-anodized], or well-seasoned cast iron, stainless steel or carbon steel skillet, or a well-seasoned spun-steel wok, preferably flat-bottomed). Spray your pan with oil from a pump sprayer if necessary. Steam-fry (see Cooking Tips below) the sliced peppers, onions, celery, and garlic. Stir-cook until the onion is tender, adding a splash of water as needed to keep the mixture from sticking. Do not brown the mixture. (See Microwave Alternative in the Cooking Tips below, too.)
Add this to a large (6 qt) slow-cooker, along with the drained, soaked beans, the broth, juice and zest of the oranges (yes, the zest of all 4 oranges-- this is important!), carrot "fingers", rosemary sprigs, and salt.
Cook on Low for 8-10 hours, or on High for 5-6 hours. Add freshly-ground black pepper to taste.
Nutrition Facts
Nutrition (per serving): 303.3 calories; 2% calories from fat; 0.9g total fat; 0.0mg cholesterol; 409.6mg sodium; 1628.6mg potassium; 58.1g carbohydrates; 14.3g fiber; 7.9g sugar; 43.7g net carbs; 18.9g protein; 5.3 points.
Recipe Source
Author: © Bryanna Clark Grogan 2008
Cooking Tips
HOW TO STEAM-FRY
You will often see the term "steam-fry" in my recipes. Here is a description of what it is and how to do it.
METHOD OF STEAM-FRYING:
"Steam-fry" simply means sauteing without fat. To do this, use a heavy skillet--use a non-stick, or hard-anodized aluminum [aluminum does not leak into food when hard-anodized], or well-seasoned cast iron, stainless steel or carbon steel skillet, or a well-seasoned spun-steel wok, preferably flat-bottomed. Spray your pan lightly with oil from a pump sprayer, or with cooking spray, if needed.
Heat the pan over high heat, add the chopped onions or other vegetables, and one or two tablespoons of liquid (water, low-sodium vegetarian broth, or wine), depending on the amount of vegetables. Do not crowd the pan, or your vegetables will "stew". Cook over high heat until the liquid starts to evaporate, stirring with a spatula or wooden spoon. Keep stirring until the vegetables are done to your liking, adding JUST ENOUGH liquid to keep the vegetables from sticking to the bottom of the pan.
You can brown onions perfectly by this method. As soon as the natural sugar in the onions starts to brown on the bottom and edges of the pan, add a little liquid and scrape up the brown bits, mixing them into the liquids and around into the cooking onions. Keep doing this until the onions are soft and brown, being careful not to scorch them.
TO "STEAM-FRY" IN THE MICROWAVE, use a glass dish, such as a round 10" Pyrex casserole dish or pie plate. Spray with oil from a pump sprayer or cooking spray. Add ther chopped onions, garlic, carrots, celery, or whatever vegetables you want to sautè. Cover the dish with a glas lid or microwavable plate, and microwave 5 minutes, or however long it takes to soften them. This method is convenient because you don't have to watch the vegetables- you can be preparing the rest of the recipe while they cook. Just add the softened vegetables to the recipe.
Enjoy!


Wednesday, June 25, 2008
AN EGGPLANT RECIPE FOR EGGPLANT HATERS & A SOLUTION TO EGGPLANT SOAKING UP OIL LIKE A SPONGE

This will be my last blog post until July 6th or so, when I get back from the McDougall "Celebrity Chef" Weekend in Santa Rosa, Ca. I'll be in good company, with Chef Kevin Dunn, executive chef and creator of the Vegetarian Awakening vegan chef's conferences; Susan Voisin from the fat free vegan blog; Colleen Patrick-Goudreau from the Compassionate Cooks blog; Jill Nussinow, "The Veggie Queen"; Miyoko Schinner from the Artisan Vegan Life blog; and Chef Eric Tucker of Millennium Restaurant in San Francisco. Wow!
We will all, along with Mary McDougall, be demonstrating flavorful, no-fat-added recipes for the participants to recreate at home. I'm doing a workshop on breakfast foods on Saturday morning, and a work shop on "The Elegant Bean" on Sunday.
So, I'll be filling you in when I get back! In the meantime, I'm posting a delicious eggplant dish that I made the other day. A medical practitioner recommended that my husband eat more eggplant. Now, I've been telling him that for ages, because eggplant is a great source of viscous fiber-- "the 'sticky' type of soluble fiber found in oats, barley and beans, and certain vegetables such as okra and eggplant. Viscous fibers help binding the cholesterol in your digestive tract and sweep it out of your body. In another word, soluble fiber act as a sponge, absorbing cholesterol and carrying it out of your system. People at less-developed countries (such as China) are less prone to having high blood cholesterol because their diet are high on viscous fiber." See: http://foodheal.blogspot.com/2006/07/eating-to-lower-cholesterol-1-viscous.html You can read more about this here: "Portfolio Diet".
I love eggplant, but DH has only eaten it reluctantly, except when I make Szechuan eggplant, which he does like. So I thought I'd start out with a stir-fry. I found the following recipe on a great website called "Ashbury's Aubergines" that has thousands of eggplant (aubergine) recipes!
I wanted to cut down the oil a bit, so I experimented with a technique I read about in Cook's Illustrated magazine. Eggplant soaks up oil like a sponge-- as the authors say, "it's essentially a sponge, ready to absorb anything, and it's packed with water. This one-two punch transforms the eggplant into oil-soaked mush before it has a chance to caramelize."
and:
"The Solution: First we needed to dehydrate the eggplant, but the traditional salting method didn't sufficiently dry it out. Combining salting and microwaving did work— after we put a few disposable coffee filters under the eggplant to keep it from poaching in its leached-out liquid. The eggplant (now reduced to a third its original size) could be sautéed in a much smaller amount of oil (1 tablespoon vs. nearly 1/2 cup). The eggplant plumped up nicely when added back to the other vegetables to stew, absorbing these other flavors instead of just oil."
So, what you do is, cut your eggplant into chunks or strips and toss it with a bit of kosher salt in bowl. Line entire surface of large microwave-safe plate with double layer of [unbleached] coffee filters and lightly spray with oil from a pump sprayer. Spread the eggplant in one even layer over the filters. Microwave on high until the eggplant is dry and shriveled to one-third of its size, 8 to 15 minutes (the eggplant should not brown). (If your microwave has no turntable, rotate the plate after 5 minutes.) Use in your recipe. It worked!
(PS: For anyone who is still afraid of using a microwave oven, here's some information you may be interested in reading.)

Printable Copy
BRAISED EGGPLANT WITH SUNDRIED TOMATOES, BRYANNA'S VERSION
Serves 2-4
This was delicious and DH loved it, even though heclaims to hat eggplant.
1 pound eggplant, peeled and cut into strips and prepared as above
1 tablespoons olive oil
3 garlic cloves, minced
1 jalapeno pepper, finely chopped
1/4 cup sun-dried tomatoes in oil, diced (I washed the oil off with hot water and patted them dry)
2 tablespoons low-sodium soy sauce
1 tablespoon balsamic vinegar
1 teaspoon sugar
1 small tomato, peeled
seeded and diced
1 tablespoon chopped fresh parsley or cilantro
Heat the oil in a large skillet. Add the garlic and jalapeno pepper and cook over high heat until the garlic is soft. Add the sun-dried tomatoes and prepared eggplant (see text above). Turn the heat to medium. Cook and stir for about 5 minutes until the eggplant is tender. Add the soy sauce, vinegar and sugar to the skillet. Cook until the liquid is almost absorbed. Add tomato and parsley or cilantro. Stir to combine. Remove from the heat.
I served this with brown basmati rice, but it would be great cold with baguettes or pita bread or rye crisp!
Enjoy and have a great week!

Thursday, June 19, 2008
A SPICY POTATO AND KALE SOUP

We've had company this week, and some unseasonably chilly weather, so soups have been on my table quite frequently. The following is one of our favorites (I made the Portuguese version this time)!
Printable Recipe
BRYANNA’S CALDO GALLEGO (SPANISH KALE AND POTATO SOUP-- WITH PORTUGUESE CALDO VERDE VERSION)
Serves 6-8
Kale and potatoes are made for eachother, as you’ll see when you try this wonderful soup. In Spain (and also Portugal, where it’s called Caldo Verde), this soup contains a spicy (but very fatty) sausage called chorizo, which is seasoned with garlic, dry red wine, chile, paprika, and cumin. I add these seasonings to the soup itself instead. Cubes of turnip are another characteristic Spanish touch.
NOTE: Don’t worry about the amount of garlic in this soup— it mellows out considerably during cooking.
1 T. extra-virgin olive oil
1/2 T. dark sesame oil
1 large onion, chopped
1 whole head of garlic, peeled and minced (or about 10 cloves from a jar, minced, or about 2-4 T. minced from a jar)
1 bay leaf
1 tsp. paprika
1 tsp. ground cumin
1/4-1/2 tsp. dried red chile flakes or a pinch of cayenne pepper (you may not need this if you use spicy Field Roast Chipotle vegan sausage-- see below)
6 c. vegan broth (see this post)
10-12 oz. kale, washed, trimmed and chopped (you could also use turnip greens or collards)
2 medium red-skinned potatoes, scrubbed (unpeeled) and thinly sliced
1 medium turnip, peeled and cubed in 1/2-inch dice
1 1/2 c. (or a 15 oz. can) cooked white kidney (cannellini) beans, drained
1/4 c. dry red wine OR 1 T. balsamic vinegar
Salt and freshly-ground black pepper to taste
OPTIONAL: sliced spicy vegan sausages (Field Roast Chipotle would be my choice, or a mixture of Chipotle and Italian)
In a heavy soup pot, heat the oils over medium-high heat. Add the onion and garlic and stir-fry for several minutes, or until the onion softens. Add a little water as needed to keep from sticking.
NOTE: You can also cook the onion and garlic with the oils in a microwave oven (place in a microwave-safe covered casserole, or Pyrex pie dish with another one on top for a lid) for about 10 minutes. This works well if you are doing a bunch of things at once, because you don't need to stir!

Add the bay leaf, paprika, cumin and chile flakes and stir for 2 minutes. Add the remaining ingredients, bring to a boil, cover and simmer for about 15 minutes,or until everything is tender. Taste for salt and pepper.
THE PORTUGUESE VERSION, CALDO VERDE:
Omit the turnip and use 4 potatoes instead. Use the sausage option and omit the beans. Use only 1/2 lb. kale.
Enjoy!
Saturday, June 14, 2008
VEGAN WHIPPED CREME, MARSHIE FLUFF-- THE POSSIBILITIES ARE ENDLESS!

See update here.
Sound too good to be true? It's not! Julie Hasson and I are working with some unusual ingredients and experimenting, in our own kitchens miles from eachother, and in our own ways, sharing our experiences, failures, and successes. The results so far have been pretty amazing, witness the following successful experiments:

"Whipped creme"!!

Only 27 calories per 1/2 cup!

Strawberry Shortcake with the above "whipped creme"

Vegan "Marshie creme or fluff"-- a spin-off from the "whipped creme" recipe!
UPDATE: The recipe is on this blog post!

It's sweet, sticky, fluffy and it lasts!

I couldn't resist trying it on small fat-free chocolate cakes (Light and Easy Chocolate Cake from my book "The Almost No-Fat Holiday Cookbook".

Can you see why we're excited? But there's alot of work to do, perfecting the recipes, figuring out the limitations, and the possibilities. Souffle? Angel Food Cake? Meringue? Pavlova? Mousse? Rocky Road Ice cream? Good thing there's no fat involved, or we would turn into blimps!
So stay tuned to both my blog and Julie's for more developments!
All the best!
Monday, June 9, 2008
HOW TO MAKE FLUFFY, "BUTTERY", NO-FAT VEGAN MASHED POTATOES

Why mashed potatoes when it's almost summer, you may ask? Because it's bloody freezing here! I'm still craving cold-weather foods. But, in any case, it gives me a chance to share something I just learned from Cook's Illustrated magazine. This magazine, BTW, is not vegetarian, but you can learn alot about food science from it, as well as good tips about cookware, ingredients, etc.
I love mashed potatoes, but I'm not about to put a stick of butter (or even my new palm-oil-free homemade vegan "butter") into a 2 lb. batch of mashed potatoes. I've been making them fat-free for years now, but I thought they could use a little "face-lift", so-to-speak. Then, I happened to read an article in Cook's Illustrated. Although their goal was not to make tasty fat-free mashed potatoes, the article helped me do just that.
They discovered that using a different cooking method from boiling worked better. In addition, they advised using a potato ricer to make the potatoes fluffier. Now, I have never owned a potato ricer, and my husband had never heard of it and thought I was nuts, but, then, he's used to me chasing after kitchen gadgets that take my fancy. I had just been talking to Julie Hasson about potato ricers and she told me they make great mashed potatoes. The article clinched it-- I was off to the local kitchen shop and laid down my $20 or so (including tax) for the nifty new model.
I often use Yukon Gold potatoes for mashed because they have a warm, slightly buttery look to them, and a rich flavor. And that's what the magazine recommended, for the same reasons. They added 1/4 cup of butter to their potatoes (instead of their usual 8 tablespoons), but I didn't use any, and they were still yummy. That way, you can either use a fat-free vegan gravy and be really virtuous, or you can melt some vegan marge (Update; try my new palm-oil-free homemade vegan "butter") on top and still not be ingesting THAT much fat.
Here is what the author had to say about the cooking method:
"Gluey potatoes are a result of starch granules that swell with water and then burst during cooking, releasing a gel that turns potatoes sticky. Cooking the potatoes with their skins on protects the starch granules, reducing the chance of a gummy mess. To give peeled potatoes the same protection [the magazine's cooks were trying to avoid needing to peel freshly-cooked hot potatoes before mashing BCG], we made two alterations to our usual technique. Steaming rather than boiling the potatoes exposes the potato pieces to less water, reducing the chance of the granules swelling to the point of bursting. Some granules, however, will inevitably burst; rinsing the potatoes midway through cooking removes the resultant gel. As a bonus, we found that this method requires less butter and dairy to achieve the same richness as conventional mashed potatoes."
It sounded a bit complicated, but it really wasn't-- and the results were great. Give it a try next time you cook potatoes for mashing.

Printable Recipe
FLUFFY FAT-FREE VEGAN MASHED POTATOES A LA COOK'S ILLUSTRATED
Serves 4
To make these even more rich-tasting, you can blend some extra-firm SILKEN tofu with your non-dairy milk to make a sort of fat-free cream. (Some people call for non-dairy creamer, but I find most too sweet for mashed potatoes.) Another suggestion-- add some roasted garlic while mashing.
2 lbs. Yukon Gold potatoes (4 to 6 medium), peeled, cut into 1-inch chunks, rinsed well, and drained
about 1/2 teaspoon salt
1/2 to 2/3 plain full-fat soymilk, or almond milk, warmed (2/3 cup made them a bit too soft for me, put that's a personal preference)
NOTE: You could also use hemp milk, if you like the taste-- it is quite creamy.
Freshly-ground black pepper
Place a metal colander or steamer insert in large pot or Dutch oven. Add enough water for it to barely reach bottom of colander. Turn heat to high and bring water to boil.

Add the potato chunks, cover, and reduce heat to medium-high. Cook the potatoes for 10 minutes.

Transfer the colander to the sink and rinse the potatoes under cold water until no longer hot, 1 to 2 minutes. (Or, if you use a steamer, place it in a colander in the sink and rinse as instructed, then transfer the steamer back to the pot.)
Return the colander and potatoes to the pot, cover, and continue to cook until potatoes are soft and tip of paring knife inserted into potato meets no resistance, 10 to 15 minutes longer. Pour off water from Dutch oven.
ENERGY-SAVING ALTERNATIVE: Micro-steam the potato chunks in a covered microwave-safe casserole. The amount for this recipe, cut as instructed above and cook at 100% power for about 12 minutes total, rinsing as instructed above after 6 minutes, and then returning to the casserole to finish cooking. You do NOT need to add water to the casserole, BTW.

Set the potato ricer over now-empty pot. Working in batches, transfer the potatoes to hopper of ricer or food mill and process, removing any potatoes stuck to bottom. Press all the potatoes through the ricer into the pot. (Use a food mill if you don't have a ricer.)

Using a spatula, stir in the salt until well-mixed. Stir in the warm non-dairy milk until the consistency you prefer. Season to taste with more salt, if necessary, and freshly-ground pepper. Serve hot with fat-free vegan gravy.
Enjoy!

Tuesday, June 3, 2008
MISO PÂTÉ, TWO WAYS

In any case, the following recipe contains a variation of a variation! The original recipe was from The Book of Miso, an amazing book by William Shurtleff and Akiko Aoyagi. I revised it to my own tastes many years ago and my version (with credit to the original) was published in my book, The Fiber for Life Cookbook. It is one of the two variations below, along with the newer okara variation. Both versions are much more delicious than the humble ingredients suggest, and are wonderful on celery sticks, crackers, and crusty rye bread or French bread.

Printable Recipe
BRYANNA’S MISO PÂTÉ, TWO WAYS
Adapted from a recipe in my book “The Fiber for Life Cookbook”. This recipe updated on June 7, 2019.
#1) Fiber for Life Cookbook Variation:
2 cups fresh, soft whole wheat breadcrumbs (Use a light-textured whole wheat bread for the crumbs.)
1/2 cup water
4 geen onions, roughly chopped
1 clove garlic, crushed or minced
1/4 cup tahini
2 1/2 Tablespoons light miso
pinch EACH of dried thyme, rosemary and sage
Optional: roasted (Asian) sesame oil or extra-virgin olive oil
A bit more minced green onion and/or parsley to sprinkle on top
In a small bowl, mash the water and breadcrumbs together with a fork until the crumbs absorb all the broth. Mince the onion and garlic in a food processor. Add the other ingredients and process JUST until everything is mixed. (Don't process too long or the breadcrumbs will make it too gummy.) Pack into a small serving bowl, cover and refrigerate for AT LEAST one hour (preferably overnight) before serving. If you like, drizzle the top with a little roasted (Asian/dark) sesame oil or extra-virgin olive oil, and sprinkle with more minced green onion or parsley before serving.
#2) Okara Variation:
1/2 cup fresh (soft, not dried) breadcrumbs (a light wholewheat is best; see above)
1 Tablespoon water
1 cup (squeezed) fresh okara
4 green onions, roughly chopped
1 clove garlic, crushed or minced
1/4 cup tahini1 clove garlic, crushed or minced
3 Tablespoons light miso
large pinch EACH of dried thyme, rosemary and sage
Optional: roasted (Asian) sesame oil or extra-virgin olive oil
A bit more minced green onion or parsley to sprinkle on top
In a small bowl, mash the water and breadcrumbs together with a fork until the crumbs absorb all the broth. Mince the onion and garlic in a food processor. Add the other ingredients to the processor and process JUST until everything is mixed. Pack into a small serving bowl, cover and refrigerate for AT LEAST one hour (preferably overnight) before serving. If you like, drizzle the top with a little roasted (Asian/dark) sesame oil or extra-virgin olive oil, and sprinkle with minced green onion or parsley before serving.
Enjoy!

Friday, May 30, 2008
A PRACTICAL WAY TO USE OKARA
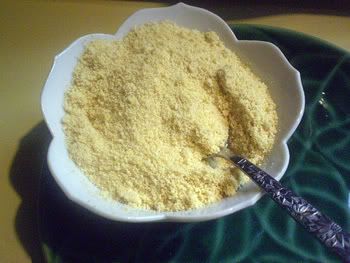
Okara "Parmesan"
What is okara? It's the pulp, or residue, leftover from making soymilk (see this blog post and this page on my website). If you make soymilk frequently you will have lots of it! Many people make interesting recipes with it, but, I must confess, I usually simply compost it!
Does it have any nutrition left? Yes, it does! It's full of fiber-- both soluble and non-soluble-- for one thing. It also contains some protein, calcium, iron and B vitamins. If you want to save it to use later, you can freeze it or dehydrate it (see the Tips in the recipe below).
The justhungry blog has some great ideas for using okara that I hadn't thought of (though not all vegetarian)! For instance, she mentions that you can rehydrate dried okara by simmering it in water or soymilk until soft, and then draining it. One great idea is to use fresh okara in polenta.
I never liked using fresh okara in breads, as it seems to sometimes "weigh them down". But justhungry suggest using dried okara in quick breads, etc., for a lighter texture-- sounds promising!
I just remembered that Dori from the Bakehouse blog (who has lots of okara recipes!)!) recommended using okara in my nut-based parmesan substitute recipe, but I never tried it. The other day I did, and it's good! Thanks, Dori! We can't get the Galaxy Foods Vegan Soy Parmesan up here anymore, so this is something I will definitely use often!
I'll post a few more okara recipes soon!
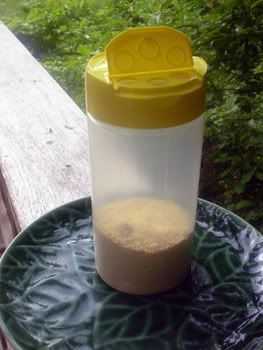
PS: for a new and improved version see this blog post!
BRYANNA'S OKARA PARMESAN SUBSTITUTE (Hat Tip to Dori from the Bakehouse blog!)
This is derived from my recipe for “Almonzano” (from my book "Nonna's Italian Kitchen"), but Dori from the bakehouse blog suggested using okara in it instead of almonds. The measurement for the okara is mine. This really looks like grated cheese and tastes "cheesey" (the miso adds a bit of fermented flavor). It shakes out easily, too. You can easily double, triple or quadruple the recipe and keep it refrigerated or frozen. IT'S ONLY 12 CALORIES A TABLESPOON!!
PS: By "squeezed", I mean okara that comes after squeezing and twisting the soymilk out of a cloth or cloth bag, or pressing through a fine filter. The okara left in the filter of a soymilk maker is much wetter and you would need to squeeze that further.
1 1/3 cups dried okara (2 cups fresh, squeezed) (see Cooking Tips below for how to dry and store)
4 tablespoons nutritional yeast flakes
1/2 teaspoon salt
2 teaspoons light miso
Process the okara, yeast and salt in a DRY blender until as fine as possible. Add the miso in tiny bits. Process again so that there are no lumps. Place in a covered container or shaker and keep refrigerated. (Make sure that the container is tightly closed so that no moisture gets in while in the refrigerator.)
Yield: 1 1/2 cups
Nutrition Facts
Nutrition (per tablespoon): 12.7 calories; 18% calories from fat; 0.3g total fat; 0.0mg cholesterol; 58.3mg sodium; 49.3mg potassium; 1.8g carbohydrates; 0.4g fiber; 0.0g sugar; 1.5g net carbs; 1.0g protein; 0.2 points.
Cooking Tips
DRYING OKARA:
If you have a large amount of okara, you can use a food dehydrator, or spread it on cookie sheets and set it in the oven at its lowest temperature, with the oven door cracked open a little to let out moisture, until dry, stirring now and then.
To dry a small amount in a microwave oven:
Get a microwave-safe plate, or use the carousel in your microwave. Line it with two sheets of paper toweling (this will absorb the moisture), and top that with a piece of cooking parchment cut to fit (this will keep the okara from sticking as it dries). Spread the okara evenly on that, breaking up clumps as much as possible. Leave a space in the center empty (it burns easily in the center of the plate).
Here's my set-up for microwave-drying small amounts:
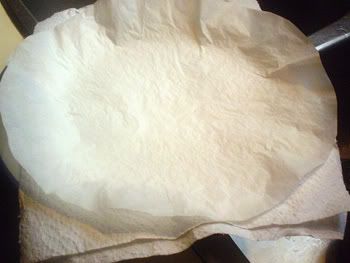
Microwave at half power (#5) in 5 minute increments, stirring after each one, until dried. I took away the paper toweling after the first 5 minutes because it was quite wet, and replaced it with new paper toweling.
Let it cool thoroughly before using or storing (in zip-lock bags).
Cheers!
Tuesday, May 27, 2008
UPDATED: NEW, CREAMIER SOYMILK RECIPE

UPDATES, January 2020: See this post about straining the milk; and this one.
Also, if you are looking for a soymilk maker, look for a filterless machine-- see 2020 reviews of filterless machines here and here. Filterless machines are so much easier to clean and some can make a thicker soymilk, with more beans, and NO burning!
The machines I use (the SoyQuick pictured below) is, unfortunately, not produced any longer. (You may be able to find a good deal on an un-used or gently-used SoyQuick machine on ebay or other similar sites.)

I have revised my recipe for soymilk using the filterless machine. Because you can use a larger amount of beans without burning the milk, you can make ultra-creamy soymilk with this new Soyquick machine. Even with the extra beans (organic), it's still costs UNDER $1 a quart!
I developed a new soymilk recipe that makes non-beany soymilk (using ordinary soybeans) that is creamy and silky-smooth and tastes great! DH, who previously did not really like homemade soymilk as a beverage, is now converted!
For each batch, use a total of 6 oz., or about 165 g, of dried soybeans, which have been soaked thoroughly (I soak them overnight-- or even for up to 3 days-- in large screw-top jars with water up to the bottom of the neck of the jar), and, if you like, the skins removed (see information below-- this is an easy but important step to improve the flavor of the finished product), PLUS 3 tablespoons of rolled oats, which add a creamy texture.
NOTE: You don't have to follow the intructions in the following section if you use Laura soybeans, which apparently have a less "beany" flavor. This is what I have been told-- I haven't tried them myself because they are not available in Canada, as far as I am aware. Link to order Laura Soybeans (USA) (non-GMO)-- they are a pretty good price.
BEFORE MAKING THE SOYMILK, I prefer to rub off most of the skins of the soybeans-- this neutrilizes the "beany" taste. ( The skins contain some of the bitter flavours and also some inhibiting enzymes, so removing the skins can positively affect the taste, while some "gas forming" or "digestion inhibiting" compounds may be reduced or eliminated.)
This procedure isn't as arduous as it sounds. Place the drained, soaked soybeans in a deep bowl in the sink. Cover with boiling water and let sit until it cools off to just warm. This helps loosen the skins. Remove the skins (or husks) by rubbing the soaked soybeans (still in the soaking water) between your hands with a back and forth motion. Stir the beans in a circular motion. The skins will float to the top and you can float them away while you drain off the water, leaving the beans behind. You need to do this a few times (adding more water each time) until most of the skins have come off (leaving a few behind is okay). (PS: To conserve water, you can drain the soaking water into another bowl and reuse it each time you float away more skins. See instructions and ideas at end of this post.)
The skins are great for your compost, BTW, and the okara (the soy pulp left over from squeezing out the milk) can be used in recipes. Check this blog's Recipe Link page for okara recipes, or use the search box on the main page using the word "okara". In addition, you can do a search in whatever search engine you use for "okara recipes"-- there are actually quite a few out there, such as Susan Voisin's vegan Okara "Crab" cakes or my Okara Waffles. There are some great okara recipes here, too!
Okara is full of fiber-- both soluble and non-soluble-- for one thing. It also contains some protein, calcium, iron and B vitamins. If you want to save it to use later, you can freeze it or dehydrate it
***NOTE: Do read the comments below-- lots of interesting and helpful information!
Now, follow the directions for your machine to make the soymilk.
Straining your soymilk:I like my milk smooth, so I want it strained well. Gold coffee filters, which is often recommended, are very slow and tedious. The mesh strainer that comes with many machines is just not fine enough for me and doesn't hold much at a time, so I gave up on that. Consequently, I use a metal "Chinois", or a conical strainer, to strain my soymilk with ease. (These are sometimes called "China caps", or a "8-inch Extra Fine Mesh Bouillon Strainer".) It has large capacity, is made of stainless steel and has extra fine mesh. If you do buy a conical strainer, opt for extra-fine mesh, NOT perforated steel. In Canada, you can buy this from amazon here. In the USA, you can order it from here.

**For extra-smooth milk, I also line the strainer with a fine mesh "jelly bag" or nut milk bag, which fits inside the strainer and can be secured by folding the top edge over the edge of the strainer. The string at the top of the bag can be secured by attaching it to the hook at the top of the metal strainer, across from the handle. Then your pulp can be pressed with the bottom of a jar or some sort of pestle (it will be too hot to squeeze by hand). These bags are easily available in cookware shops, online, and even in large supermarkets.

To flavor each batch after straining, use 1/2 teaspoon salt and 1-2 tablespoons organic sugar or sweetener of choice.
Note: Soymilk is naturally very low in sodium and sugars, which is why they are added to commercial soymilk. Dairy milk is naturally high in both—a taste most of us are used to, so most people prefer a little flavoring. Some people like to add vanilla, but I don't like the flavor of vanilla in my tea and cereal, etc..


EXTRA: If you make your own soymilk and/or tofu and you are having water problems, here are some ideas to conserve water during the very water-intensive process:
You can use the same 2 quarts or so of water to:
a.) float the skins off the soybeans;
b.) scald your equipment;
c.) wash your equipment after making the soymilk;and d.) water your plants or garden!
While rubbing the skins off of the beans before making the soymilk (removing the skins results in a product with a less "beany" taste), strain the water in which you are floating off the skins through a sieve into a pot or bowl each time. Re-use the same water for each round of rubbing off and floating off the skins and save the water after the last round. (NOTE: I have found that the age of the soybeans makes a difference in terms of removing the skins. For older, more shrunken soybeans, it takes me about 7 minutes to remove the skins; for nice plump newer soybeans it takes only about 3 minutes. I soak them in the refrigerator first for a few days. Freezing the soaked beans also helps the skins come off more easily.)
Now you can boil that same strained rinsing water and use it to scald your equipment in a basin. After making your soymilk, you can re-use the same water (in a washing basin and reheated) to wash out your straining cloth and clean and rinse your soymilk-making equipment. If you use dish soap, use a biodegradable one. You can then use this washing and rinsing water to water your plants or garden, or even flush your toilet, if water is very scarce.

Cheers!

Friday, May 23, 2008
NEW YORK, NEW YORK...GOOD VEGAN EATING!

Downtown Princeton, NJ, near where we stayed on our trip
I'm finally getting down to blogging about my trip back east! My sister Karin and I traveled to New Jersey in mid-May to visit an old friend of our father's near Princeton. On 3 of the 5 days we were there we traveled by train (an hour's ride) into New York City to see a few sights and sample some of the vegan restaurants I had researched ahead of time!
Our host is a Professor Emeritus at Princeton and he took us for a tour of the University on our first day. The weather was lovely, and the campus was lush and green, in contrast with the largely Gothic architecture! We had some pretty good vegan sushi at the student cafeteria for lunch. That evening our hosts took us to the Sunny Garden Chinese restaurant for a lovely meal of Shanghai Garlic Greens, steamed vegetarian dumplings, Sizzling Tofu and Vegetables, and brown rice.
After that, aside from breakfast and one lovely salad dinner on the deck of our hosts' home in the country, we ate the majority of our meals in New York, which is what this blog will be about. For three days of our visit, we took the train from Princeton Junction to the New York Penn Station each morning (an hour's ride), and then back home again in the evening. During our 3 days in New York we took just about every mode of transportation going except a ferry (I'm used to those, anyway!). We took the train, the subway, the municipal bus, a taxi, and even rode in a private hired car (a black Lincoln) on one occasion!
We took "hop-on, hop-off" bus tours on two of our city days, in addition to LOTS of walking downtown, and in the theater and financial districts. I felt a little foolish doing the "tourist" trip, but it was a good way to see the city in a hurry, and the guides were informative, kind, and very entertaining.
On our first day in the city we "hopped-off" near Washington Square in Greenwich Village and had lunch at The Red Bamboo Soul Cafe.

The interior of the Red Bamboo-- that's Karin at the desk.
I have to explain that, though my sister is a vegan, and likes to eat well, she is not a "foodie". She has more strict eating habits than I do, which I guess is why she is skinny and I'm not! So, you will see a contrast between her choices and mine!
For this first meal in New York, she chose the edamame starter, which she repeated in almost every restaurant we visited. It was a hard choice (check out the menu here!), but I decided to go all-out with the soul food theme and ordered Cajun Fried Shrimp ("Deep fried vegetarian shrimp seasoned with paprika, thyme and sage seared with a southern BBQ sauce").

This was good-- four big "shrimp" and the sauce was not sweet. (However, I prefer the vegetarian "shrimp" we get in Vancouver, BC at West Best Vegetarian [4934 Victoria Dr.], a small storefront that supplies Buddhist vegetarian restaurants and also sells Chinese "mock meats" to the public. Their product is firmer than the one I had at The Red Bamboo.)
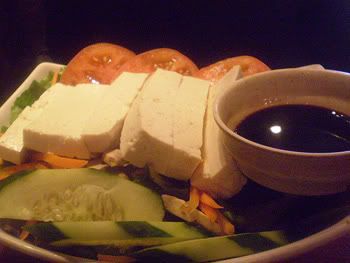
For the main dish, Karin ordered The House salad, but with the addition of tofu slices and Balsamic Vinaigrette:
I struggled to make a decision from the many tempting choices and finally settled on Butterfly Soy Chops ("Lightly breaded soy pork chips served with a fresh apple-raisin sauce, sauteed collard greens with veggie ham and sweet corn mashed potatoes"):

This was ALOT of food! There were three crunchy panko-covered chops under all that apple! I couldn't eat it all, and ended up taking half of the chops home with us, which I added to my salad on the night we ate at our hosts' home.

I liked the addition of corn to the mashed potatoes, and the collards with veggie "ham" were delicious. I found the "chops" a little lacking in taste (though the crunchy coating and the apples kind of made up for that) compared to my homemade ones-- sorry if that sounds like I'm blowing my own horn, but it's true!
It would have been nice to be in a group, so that I could have tasted more of the offerings! We had no room left to sample desserts, unfortunately, so we missed out on:
Chocolate covered Strawberry Shortcake
or
Peanut Butter Tandy Heaven
or
Chocolate Raspberry Mousse Cake
or
Brownie Bottom Cheesecake
or
Oreo Cookie Cheesecake
Darn it! Next time!
*************************
We worked up an appetite sight-seeing and walking for the rest of the day, and, at dinnertime, found ourselves in close proximity to one of the restaurants on my list, Franchia Teahouse & Restaurant, an extention of the award winning Korean vegetarian restaurant, Hangawi. It is a lovely, peaceful place with charming Asian decor. Here's a shot of the ceiling over our heads:

They have a nice sushi menu, so I ordered Crispy Tofu Skin Roll, and Karin ordered the Chicken Teriyaki Roll:

I didn't taste Karin's, but she said it was delicious. As for my sushi, I plan to try this at home myself! It was simple, just ordinary sushi rice rolled around crispy fried yuba and the nori seaweed, but it was a great contrast biting into the crisp yuba-- very pleasant and unexpected!
Only "light meals" are served at Franchia, but there is a great selection of dishes, and, once again , it was hard to make a decision! Since we had eaten a large lunch (at least, I had!), we ordered from the Appetizer menu. I ordered a plate of Assorted Dumplings (steamed, not fried), and Karin ordered the Summer Rolls with Mango Citron Sauce, and we shared. The dumplings were great! There were Soy and Grain 'Meat' Dumplings, Green Tea Vegetable Dumplings, Spicy Kimchi Dumplings, and Mixed Vegetable Dumplings, with a light soy sauce dip. I really can't decide which I preferred!
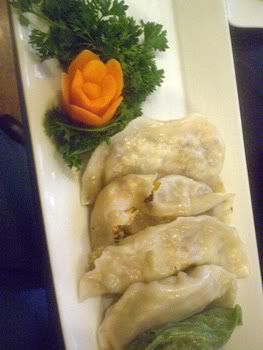
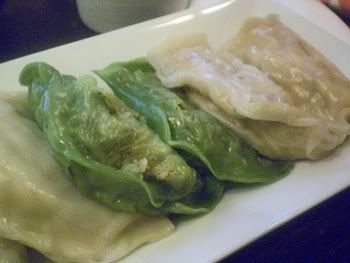

The "Summer Rolls" (above) were not quite what we expected, but they were light and tasty.
Again, we unfortunately couldn't manage dessert, tempting though they sounded, and had a Soy Chai Latte instead!

I would definitely recommend a visit to this charming teahouse if you are in the vicinity of 12 Park Ave.!
**********************************
On our second day in New York, we chose Zenith, which is a regular Japanese restaurant on one side, and an Asian-fusion vegetarian restaurant on the other! The menu is extensive, and maybe we didn't choose wisely, but this was my least-favorite meal in New York. It wasn't bad, but it wasn't memorable, and it was a very small portion for the bucks!
Karin had edamame, of course,

and vegetables and tofu braised in a black bean sauce with tomatoes, with brown rice:

It was tasty, but unremarkable. Here's my lunch, Mushroom-Stuffed Ravioli topped with vegetarian seafood and vegetable in a white sauce:

The ravioli did not seem homemade to me, and I think I got about 6 small squares. The sauce was just a very light cornstarch-based Chinese-style sauce with no discernible herbs or other flavoring. For $15, it was not a bargain! I was hungry an hour later! But, that's okay-- I made up for it the next day!
This was the night we ate back in Princeton, when our hostess set a lovely table on the deck overlooking the garden and served wholegrain toast with a romaine lettuce and tomato salad with roasted nuts and other goodies in it. Our hosts had sliced chicken in their salad and I sliced up my leftover "soy chops" from the Red Bamboo in mine, while Karin added browned, crumbled veggie burger to hers. (Our hostess confessed that she was "terrified" when she found out we were vegan, and surprised that we were so "easy" to please!)
****************************
Our last day in New York was our best eating day, in my opinion (I can't speak for Karin!). I had spoken to my friend, vegan pastry chef Fran Costigan, whom we were to meet later for dinner, and she recommended Candle 79 over its parent restaurant, Candle Cafe. We were planning to visit the Metropolitan Museum that day, and Candle 79 is located conveniently nearby, so that's where we headed for lunch!
It is an elegant restaurant and the lunch menu is small, but varied. (That makes it easier for me!) Karin chose the Hydrogarden Farm Edamame with Celtic Sea Salt, Chili, and Lemon for her starter, and the Fava Bean Vegetable Soup for her entree:
(Pardon the lackluster photos-- the lighting was poor!)

She was enthusiastic about the additions to the edamame, and I can attest that her soup was delicious!
I chose the BBQ Seitan Sandwich with avocado, caramelized onions, polenta fries, and mixed lettuces, partly because I wanted to taste their seitan, also because I love polenta! The sandwich was large, and the bread was a sort of focaccia, I think:

I'm sure the ketchup was homemade. The seitan was fantastic-- the sauce not too sweet, and you could have sworn you were eating "pulled pork" if you didn't know better! Nicely satisfying, delicious-- the best meal I had in New York!
We decided to have dessert, but the photo just did not turn out. We shared the House Made Sorbet & Ice Cream Sampler (chef's daily selection), which was vanilla-chocolate chip, blueberry, and banana. The vanilla was creamy and wonderful; the blueberry was a little flat-- not enough berries for my taste; and the banana was smooth and surprisingly good-- I say that because I usually hate banana ice cream. But it is often made with phony flavoring, and this was made with real bananas, no mistake!
For our last New York restaurant meal (which was my favorite second only to Candle 79!), we met up with Fran at Zabar's and had a quick look-round (it was rush hour and dinnertime, and the lines were long!), then bought some bagels for our breakfast the next morning at H&H Bagels, before heading for a favorite Turkish restaurant of Fran's, Turkuaz. I was looking forward to this-- I was missing this type of cuisine!
There was no bellydancer that night (I love seeing good bellydancing!), but the restaurant was charming and we sat at a low table on lounges decked with colorful pillows. Fran and I tried not to bore Karin too much with "foodie" talk, but I don't know how well we succeeded!
The menu is omni, but there are plenty of vegan options in Turkish cuisine! Fran and I decided to chose several dishes from the salad and appetizer menus and share them. The waitress kept baskets of Turkish flatbread coming, to dip into the light-spiced olive oil on the table. We chose Piyaz (White Bean Salad--Boiled white beans, tomato, red onion, red and green bell pepper parsley mixed in olive oil and vinegar); Patlıcan Salatası (Eggplant Salad--Char-grilled eggplant puree, red and green bell pepper, dill, freshly squeezed lemon juice and extra virgin olive oil); Imam Bayıldı (Imam Fainted-- Baby eggplant stuffed with onion, red and green pepper, currants, pine nuts and garlic); Zeytinyağlı Yaprak Dolması ( Stuffed Grape Leaves-- Grape leaves stuffed with rice, pine nuts, currants, and herbs); and Acılı Ezme (Spicy Mashed Vegetables-- A mixture of hot and spicy finely chopped vegetables, which also contained walnuts and reminded me of Muhamarra, the walnut, red pepper, pomegranate molasses and breadcrumb spread).
We were talking so much that I forgot to take pictures until we had already eaten most of our meal! I assembled what was left on one plate and took this picture (lighting was bad here, too):

Everything was absolutely scrumptious!
Karin chose the Türlü (Vegetable Casserole) with rice-- I forgot to take a picture of this before she ate it!
We had a quick visit with Fran at her apartment before we had to head to Lincoln Center to meet our hosts, who were attending the opera that night. We participated in the "scrum" at the curb, as everyone tried to find their hired cars, and went home to Princeton in style in the big black Lincoln, courtesy of our hosts!
So that was the end of our New York eating-- the less said about airport food (when you could find anything!), the better. It was a bit of a nightmare trip home, due to some delays and storms over the Great Lakes, but we made it home in one piece!
I was really glad to get home. It was a great visit, and I was so glad to have visited with my father's old friend and his wife, both very engaging, and to see Fran, even briefly. New York is exciting and we only scratched the surface! The Metropolitan Museum was amazing! And it is NOT true that New Yorkers are rude or unfriendly! We encountered helpful people everywhere! However, even though I was raised in San Francisco, and lived in Vancouver for 11 years, I am not a city girl anymore! It was too busy, noisy, and crazy for me! So here I am on my little island again, and grateful for the privilege of living in such a paradise!
To show you how lovely it is here, here are some pictures I took on the ferry as we were leaving Horseshoe Bay in West Vancouver, heading for Vancouver Island (I was so wiped that I was too lazy to go outside to take these, so there is some glare):


All the best!
Subscribe to:
Posts (Atom)