Showing posts with label no-fat. Show all posts
Showing posts with label no-fat. Show all posts
Tuesday, July 17, 2012
"HEART HEALTHY PIZZA" IMPRESSES


I ask you-- does that pizza look good or what? It WAS good, and that is high praise from me, because I am very picky about pizza. (I like traditional Italian-style pizza-- no pineapple!-- with homemade sauce and crust.) So, let me confess that I was actually a bit surprised at how good it was. It was from a new book that I have been wanting to review for a long time, but other projects kept getting in the way. And, truth be told, we haven't been eating much pizza lately because we're trying to watch our calories. But I really wanted to review it-- Mark is a great guy and he worked hard for 5 years to come up with an amazing 100+ plant-based AND fat-free pizzas to please vegans who don't use oils and fats, and their (probably skeptical) families. So I had to make the sacrifice and eat pizza last week!
The book is Heart Healthy Pizza; Over 100 Plant-Based Recipes for the Most Nutritious Pizza in the World, by Mark Sutton and is a great addition to any vegan's cookbook shelf. First, Mark gives you the "foundation" techniques and recipes-- how to make the dough and some helpful tips and 11 whole grain dough recipes (including some gluten-free varieties); tips for topping an saucing the dough and 18 unique sauce recipes (divided into red, white and green); and then the impressive 51 "No Nonsense Non-Cheeses" in Chapter 3! Chapter 4 is chock-full of clever suggestions for toppings, fillings, and combos, including recipes for a Parmesan sub, tempeh "anchovies", tofu "feta", TVP sausage, and a method for pre-roasting vegetables without fat in the oven for a juicy topping.
Check out Mark's website to learn more about the book, try sample recipes, etc..

When finally I embarked on my pizza-making foray, I decided to stick with my traditional pizza values (this time, anyway) and make the Whole Wheat Dough on p. 15 and the Classic Tomato Sauce (p. 25), for a start. I planned to use oven-roasted bell pepper and mushrooms with some fresh basil for a simple topping. My dilemma was choosing one of the creamy "non-cheeses" from Chapter 3, which is the longest chapter in the book. I scanned the recipes in this chapter a carefully, looking for a sauce that a.) sounded tasty and familiar and b.) contained ingredients that I had in the house. The recipes in this chapter are divided into various grain-based sauces (barley, millet, oat, quinoa and rice), legume-based sauce, tofu-based sauces, and vegetable-based sauces. I chose to make the Rice, Cannellini Beans, and Almonds Sauce on p. 67. I admit that I was a little skeptical about the dry mustard in it, and decided to skip the optional hot sauce, but it sounded like it had definite possibilities.
The white, creamy sauce was easy to make (I used the Vita-Mix, but the book suggests a food processor) and I made it ahead of time and refrigerated it until it was time to use it. Next I made the dough, using the optional oil and salt. Mark prefers to knead it in an automatic bread machine. I've done this before and it works beautifully, but this time I was rushing out the door and had only a few minutes to make it. So I took some liberties and used an almost-no-knead method (even though the dough is firmer than the usual no-knead type), kneading the dough by hand in the bowl for only a minute and leaving it in a covered bowl on the kitchen counter for about 5 hours. This long, slow rise develops the gluten as if it had been kneaded in the old way, and also develops a flavorful dough. (Sorry, Mark, for departing from the exact technique, but it worked really well both times I made it!)
When I got back home I made the Classic Tomato sauce (a double recipe, since I had a 28 oz. can of tomatoes). It is a full-flavored sauce, what I would call a "winter" sauce. Made with fresh tomatoes, it would have been lighter-- I'll try that when I have some decent fresh tomatoes.
I followed Mark's directions for baking, but I used a large cast iron skillet (preheated with the oven) instead of a baking sheet or pizza pan. I used my own method of stretching the dough to make two thin-crust "personal" pizzas. The result? As you can see from the pictures below, great-looking pizza, and you will have to take my word for it that it was just as delicious! Bravo, Mark!


 |
| I used a squeeze-bottle to apply the cheesey sauce over the tomato sauce, avoiding "blobs" or having the two sauces run into eachother. |
 |
I added some thin slices of fresh basil from a pot on my deck, and then topped it off with the juicy oven-roasted bell peppers and mushrooms (you can roast the veggies while the oven is preheating):
 
Baking the pizza in a large cast iron skillet, transferring the pizza using baking parchment:
 
The result!

Enjoy!

|


Thursday, January 28, 2010
MY NO-KNEAD BAGUETTES

I have tried hard not to give in to the urge to bake bread these days, as we are trying to lose the 5 Christmas pounds we both gained over the holidays. It's not that we don't eat bread-- we eat moderate amounts of DH's good mostly-wholewheat bread. But it's hard not to eat too much of it when you are faced with a crackly artisan loaf! But, I gave in last week-- gave in to the urge to attempt to make a really good baguette. I decided to try a no-knead baguette and I used the recipe at the King Arthur Flour website as a starting point.
I did make some changes, though--
1.) I used 1 cup of wholewheat flour
 and the rest (7 cups) Canadian unbleached white flour
 .
2.) I used dry active baking yeast
 (the same amount-- 1 tablespoon) instead of instant yeast
 , and I used slightly warmer water (3 cups) and dissolved the yeast in it first. I used the same amount of table salt (1 tablespoon).
3.) I didn't knead the dough at all in a mixer, as the recipe had instructed-- I wanted to keep it simple, like my other artisan-style bread, so I just stirred the ingredients together in a large bowl, then let the dough rise, covered, for 2 hours (you can actually let these no-knead doughs rise in a coolish kitchen for up to 18 hours before refrigerating, if you like), and stored it in the refrigerator in a container with plenty of room to rise.
4.) I changed the baking method-- more about that further down.

The dough (with 1/4 of it used already) after a few days in the refrigerator.
The dough is drier than my own no-knead bread, but I figured, what the heck-- you aren't using alot of expensive ingredients in this bread!
The recipe is a little confusing about how much it makes, but it does make 4 baguettes. I made one loaf up after about 3 days in the refrigerator, and I rested and shaped and rose the bread as per the recipe (there are pictures for shaping here). I rose and baked it in a parchment-lined dark baguette pan at 450 degrees F, as the recipe instructed. It turned out pretty good, crackly crust and moist inside, but not enough holes for me.
Forming the baguettes (sorry about the odd coloring in these photos!):


I made a batch of 2 baguettes last night and I tried something different with the baking. I shaped them as instructed and rose them inside of "troughs" made with heavy tea towels, lined with baking parchment
 (which I sprinkled with flour), instead of in the pans.

I placed the shaped baguettes into the "troughs" with the seam-side-up this time, because what I wanted to try was heating the baguette pans
 in the oven first, along with a large rectangular roasting pan to use as a cover, and I'd have to turn the baguettes into the hot pan. I figured that this might create more of a "mini brick oven" atmosphere, as we do when baking round or oval loaves in a preheated covered pot.
When the baguettes had risen in their "troughs" for 1 1/2 hours on my kitchen counter, I heated the oven, with the baguette pan and the roasting pan in the oven (to 475 degrees F this time) for half an hour, giving the loaves a full 2 hours to rise. Then I removed the hot pans from the oven, sprinkled the baguette pan with a little flour, and up-ended the risen loaves carefully into the hot baguette pan
 "troughs", seam-side-down, using the parchment they rose in as a "carrier". It worked!
I sprinkled the tops with a bit more flour, slashed the tops with a razor blade, sprayed them with warm water, and hurried them into the hot oven. Then I turned the hot roasting pan over the baguette pan to form a cover. The whole affair was not covered on the very ends because there is a handle on the baguette pan which was longer than the pan, but I figured mostly covered was possibly better than not covered at all!
I set the timer for 25 minutes and left it alone, hoping for the best! After 25 minutes, I removed the cover-- they had risen beautifully! They were nicely browned on the bottom, but needed a little more browning on top, so I turned them over and let them bake, uncovered, for another 5 minutes before placing them on racks to cool. The crust was great-- you could hear it crackling as it cooled!


When we finally cut into it (so hard to wait!) we were rewarded with a moist, holey interior and excellent flavor from the longer fermentation in the refrigerator.

I have one loaf's worth of dough left-- maybe I'll make a few hard rolls with it!
Give this a try-- so yummy, and so simple. The absolute basic bread ingredients-- water, flour, yeast and salt-- turn into this wonderful creation with hardly any work. Really!
PS: Oh, and check out Yeastspotting, "a weekly showcase of yeasted baked goods and dishes with bread as a main ingredient." I just discovered it and there's alot of beautiful bread out there...whew!
Enjoy!

Monday, July 7, 2008
HOME AT LAST! AND RECIPE FOR ORANGE BEANPOT
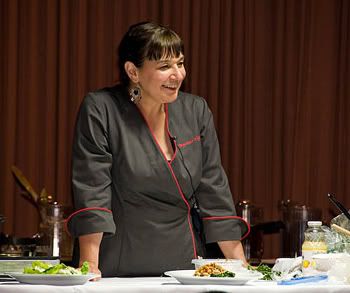
I'm finally catching up on things after arriving home. We had a great time in Santa Rosa, despite it being alot of work (9 1/2 hours prep one day). DH said he was growing a blister on his chopping hand!). John and Mary McDougall and their PA, Tiffany, were so kind and helpful, the staff at the Flamingo Hotel was fabulous (particularly the kitchen staff-- thank you especially to Maria and Marta!), and the participants were lovely. It is such a pleasure to cook for an eager and responsive audience.
I did two workshops:
"Brilliant Breakfasts"
Chai-Spiced Oat Crepes with Grilled Nectarines and Almond Ricotta update: (update: recipe in my book "World Vegan Feast")
Italian Scrapple (Polenta, Bean and Kale Slices) with Brown Gravy (made with oat and chickpea flour) (update: the recipes are in my book "World Vegan Feast" and also here)
Crispy White Bean and Oat Waffles with Banana and Strawberry Topping (update: there's a version of this recipe here, but with cornmeal as well as oats)
and "The Elegant Bean"
Orange-Rosemary White Bean Pot (recipe below)
Sundried Tomato Polenta Rounds with Braised Kale, Carmelized Onions, and White Beans with Dried Porcini Mushrooms (update: recipe here)
Red Lentil, Bulgur, and Dried Fruit Salad Balls in Lettuce Cups, with Creamy Basil and Garlic Dressing (update: recipe here)
Hummus, re-visited! (update: recipe here)
We were fed SO well-- three fabulous buffets each day (all no-fat, McDougall-style), with big fresh salads, including bowls of vegetables, beans, etc., to add on top, and a variety of dressings. There were usually at least two entrees, plus side dishes and lots of fruit, and a great dessert every evening.
Unfortunately, we didn't have time to take in any of the other presenters, but every chef seemed to be a hit with this crowd. I enjoyed meeting chefs Kevin Dunn and Eric Tucker once again. DH and I both were so happy we had the opportunity to meet, and spend time with, Susan Voisin, of fatfreevegan. I felt like I "knew" her already from some correspondence and her blog, but, trust me, in person is the best. What a wonderful woman! She was very nervous, this being her first cooking presentation, to which I could relate, as I used to have panic attacks in the "old days". We were able to see the first little bit of her workshop before we left and she was doing great. DH said, "She's a natural!" The crowd was loving her already!
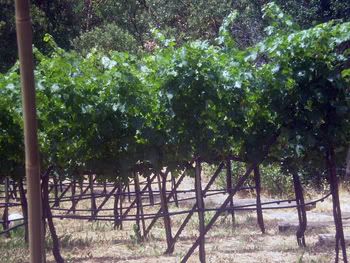
My brother's small home vineyard
After the event, we travelled to Northern Sonoma County to visit my brother Tim and his wife Louise, lazing around in the wine country and doing very little. The only way I can do this, usually, is to leave home and not be near a computer or my phone. We were very lucky to have breezy, comfortable weather the whole time. On the way home to our island, we spent a day in Vancouver and visited my cousin, his daughter and new grandaughter, and my youngest daughter and darling 4-year-old grandson.
Now I have to put my nose to the grindstone, but I feel nicely rested.
The following is one of the recipes I presented:

Printable Recipe
BRYANNA'S FAT-FREE ORANGE-ROSEMARY WHITE BEANPOT (a slow-cooker recipe)
Servings: 10
I was trying to think of interesting flavor combinations one day, and I had some oranges that needed using up, so I started thinking that orange and rosemary (which I have growing outside my door) are used with meat-- why not with beans? One of my favorite beans are white kidney or cannellini beans, which I thought would go well with this flavor combination. The result is absolutely delicious-- good enough for company!
750g (1.65 lbs.) dried white kidney, cannellini beans, Great Northern, or small white beans, soaked overnight in plenty of water and drained (navy beans, which are quite small, would be my last choice)
1 large green pepper, seeded and sliced thinly
1 large red pepper, seeded and sliced thinly
2 large onions, thinly-sliced
1 cup diced celery with leaves
6 cloves garlic, sliced
6 cups HOT chicken-style veggie broth
4 medium oranges, juice (makes about 1 cup juice) and grated zest (use a zester, if possible)
2 large carrots, scrubbed and cut into thin "fingers" about 3" long
4 sprigs fresh rosemary (4-5" long)
2 tsp salt
freshly-grated pepper to taste
Use a large, heavy skillet (use a non-stick, or hard-anodized aluminum [aluminum does not leak into food when hard-anodized], or well-seasoned cast iron, stainless steel or carbon steel skillet, or a well-seasoned spun-steel wok, preferably flat-bottomed). Spray your pan with oil from a pump sprayer if necessary. Steam-fry (see Cooking Tips below) the sliced peppers, onions, celery, and garlic. Stir-cook until the onion is tender, adding a splash of water as needed to keep the mixture from sticking. Do not brown the mixture. (See Microwave Alternative in the Cooking Tips below, too.)
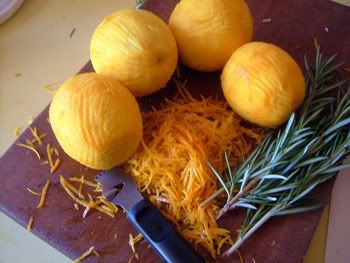
Add this to a large (6 qt) slow-cooker, along with the drained, soaked beans, the broth, juice and zest of the oranges (yes, the zest of all 4 oranges-- this is important!), carrot "fingers", rosemary sprigs, and salt.
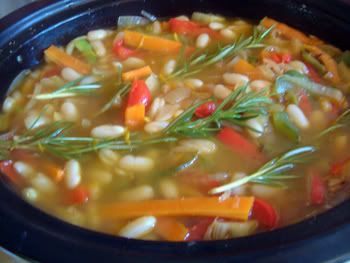
Cook on Low for 8-10 hours, or on High for 5-6 hours. Add freshly-ground black pepper to taste.
Nutrition Facts
Nutrition (per serving): 303.3 calories; 2% calories from fat; 0.9g total fat; 0.0mg cholesterol; 409.6mg sodium; 1628.6mg potassium; 58.1g carbohydrates; 14.3g fiber; 7.9g sugar; 43.7g net carbs; 18.9g protein; 5.3 points.
Recipe Source
Author: © Bryanna Clark Grogan 2008
Cooking Tips
HOW TO STEAM-FRY
You will often see the term "steam-fry" in my recipes. Here is a description of what it is and how to do it.
METHOD OF STEAM-FRYING:
"Steam-fry" simply means sauteing without fat. To do this, use a heavy skillet--use a non-stick, or hard-anodized aluminum [aluminum does not leak into food when hard-anodized], or well-seasoned cast iron, stainless steel or carbon steel skillet, or a well-seasoned spun-steel wok, preferably flat-bottomed. Spray your pan lightly with oil from a pump sprayer, or with cooking spray, if needed.
Heat the pan over high heat, add the chopped onions or other vegetables, and one or two tablespoons of liquid (water, low-sodium vegetarian broth, or wine), depending on the amount of vegetables. Do not crowd the pan, or your vegetables will "stew". Cook over high heat until the liquid starts to evaporate, stirring with a spatula or wooden spoon. Keep stirring until the vegetables are done to your liking, adding JUST ENOUGH liquid to keep the vegetables from sticking to the bottom of the pan.
You can brown onions perfectly by this method. As soon as the natural sugar in the onions starts to brown on the bottom and edges of the pan, add a little liquid and scrape up the brown bits, mixing them into the liquids and around into the cooking onions. Keep doing this until the onions are soft and brown, being careful not to scorch them.
TO "STEAM-FRY" IN THE MICROWAVE, use a glass dish, such as a round 10" Pyrex casserole dish or pie plate. Spray with oil from a pump sprayer or cooking spray. Add ther chopped onions, garlic, carrots, celery, or whatever vegetables you want to sautè. Cover the dish with a glas lid or microwavable plate, and microwave 5 minutes, or however long it takes to soften them. This method is convenient because you don't have to watch the vegetables- you can be preparing the rest of the recipe while they cook. Just add the softened vegetables to the recipe.
Enjoy!

750g (1.65 lbs.) dried white kidney, cannellini beans, Great Northern, or small white beans, soaked overnight in plenty of water and drained (navy beans, which are quite small, would be my last choice)
1 large green pepper, seeded and sliced thinly
1 large red pepper, seeded and sliced thinly
2 large onions, thinly-sliced
1 cup diced celery with leaves
6 cloves garlic, sliced
6 cups HOT chicken-style veggie broth
4 medium oranges, juice (makes about 1 cup juice) and grated zest (use a zester, if possible)
2 large carrots, scrubbed and cut into thin "fingers" about 3" long
4 sprigs fresh rosemary (4-5" long)
2 tsp salt
freshly-grated pepper to taste
Use a large, heavy skillet (use a non-stick, or hard-anodized aluminum [aluminum does not leak into food when hard-anodized], or well-seasoned cast iron, stainless steel or carbon steel skillet, or a well-seasoned spun-steel wok, preferably flat-bottomed). Spray your pan with oil from a pump sprayer if necessary. Steam-fry (see Cooking Tips below) the sliced peppers, onions, celery, and garlic. Stir-cook until the onion is tender, adding a splash of water as needed to keep the mixture from sticking. Do not brown the mixture. (See Microwave Alternative in the Cooking Tips below, too.)
Add this to a large (6 qt) slow-cooker, along with the drained, soaked beans, the broth, juice and zest of the oranges (yes, the zest of all 4 oranges-- this is important!), carrot "fingers", rosemary sprigs, and salt.
Cook on Low for 8-10 hours, or on High for 5-6 hours. Add freshly-ground black pepper to taste.
Nutrition Facts
Nutrition (per serving): 303.3 calories; 2% calories from fat; 0.9g total fat; 0.0mg cholesterol; 409.6mg sodium; 1628.6mg potassium; 58.1g carbohydrates; 14.3g fiber; 7.9g sugar; 43.7g net carbs; 18.9g protein; 5.3 points.
Recipe Source
Author: © Bryanna Clark Grogan 2008
Cooking Tips
HOW TO STEAM-FRY
You will often see the term "steam-fry" in my recipes. Here is a description of what it is and how to do it.
METHOD OF STEAM-FRYING:
"Steam-fry" simply means sauteing without fat. To do this, use a heavy skillet--use a non-stick, or hard-anodized aluminum [aluminum does not leak into food when hard-anodized], or well-seasoned cast iron, stainless steel or carbon steel skillet, or a well-seasoned spun-steel wok, preferably flat-bottomed. Spray your pan lightly with oil from a pump sprayer, or with cooking spray, if needed.
Heat the pan over high heat, add the chopped onions or other vegetables, and one or two tablespoons of liquid (water, low-sodium vegetarian broth, or wine), depending on the amount of vegetables. Do not crowd the pan, or your vegetables will "stew". Cook over high heat until the liquid starts to evaporate, stirring with a spatula or wooden spoon. Keep stirring until the vegetables are done to your liking, adding JUST ENOUGH liquid to keep the vegetables from sticking to the bottom of the pan.
You can brown onions perfectly by this method. As soon as the natural sugar in the onions starts to brown on the bottom and edges of the pan, add a little liquid and scrape up the brown bits, mixing them into the liquids and around into the cooking onions. Keep doing this until the onions are soft and brown, being careful not to scorch them.
TO "STEAM-FRY" IN THE MICROWAVE, use a glass dish, such as a round 10" Pyrex casserole dish or pie plate. Spray with oil from a pump sprayer or cooking spray. Add ther chopped onions, garlic, carrots, celery, or whatever vegetables you want to sautè. Cover the dish with a glas lid or microwavable plate, and microwave 5 minutes, or however long it takes to soften them. This method is convenient because you don't have to watch the vegetables- you can be preparing the rest of the recipe while they cook. Just add the softened vegetables to the recipe.
Enjoy!
Subscribe to:
Posts (Atom)