Friday, November 29, 2013
CRISPY LOWER-FAT OATMEAL COOKIES (WITH CHICKPEAS USED INSTEAD OF MOST OF THE FAT!)


We felt in the mood for oatmeal cookies the other night, so I decided to experiment with some changes to my recipe for Chewy Fat-Free Oatmeal Raisin Cookies, a recipe in which pureed beans substitute for the usual butter or margarine. I had noted on that recipe that quick oats and a little bit of vegan butter might have improved them, so this time I did use quick oats and only 3/4 cup bean puree (and chickpea instead of white bean puree), along with 1/4 cup of my vegan butter. I also decided to cut out the 3/4 cup granulated sugar in the first recipe. We loved the results-- they were certainly sweet enough, and nice and crunchy. I love using beans in baking, too!

BRYANNA'S CRISPY
LOWER-FAT OATMEAL COOKIES (WITH VARIATIONS)
Yield: 32 three-inch cookies
Note: You can bake only 1/4 of the dough or 1/2 of the dough and freeze the rest for another time, if you like. If the extra dough is formed into flattened balls and frozen that way (on parchment, with parchment in between the layers, in a large freezer storage container with a tight lid), they will thaw out quickly.
Note: You can bake only 1/4 of the dough or 1/2 of the dough and freeze the rest for another time, if you like. If the extra dough is formed into flattened balls and frozen that way (on parchment, with parchment in between the layers, in a large freezer storage container with a tight lid), they will thaw out quickly.
Wet Mix:
3/4 cup puréed (rinsed and drained) cooked or canned chickpeas (add a bit of water if they are too
dry to purée) OR pureed well-cooked split yellow peas
1/4 cup vegan butter (try my homemade palm oil-free vegan "Buttah")
1 cup brown sugar (or coconut sugar)
1/4 cup brown rice syrup
2 vegan "eggs" (see Note below for suggestions)
Dry Mix:
1 1/2 cups whole wheat *pastry* flour
1/2 tsp salt
1/2 tsp baking
powder
1/4 tsp grated nutmeg
3 cups quick oats
Optional: (choose 1)
1 1/2 cups vegan (dairy-free) chocolate chips
OR
OR
1 1/2 cups raisins or other dried fruit (small or cut up)
Other option:
1 cup chopped nuts
NOTE: Vegan “Egg” Alternatives (choose one-- each choice below equals 2 vegan "eggs"):
1.) 1/4 cup water whisked with 2 teaspoons powdered egg replacer (Ener-G or Orgran) until frothy, with no lumps;
2.) 1/4 cup water water blended with 1 teaspoon Vegg powder until smooth (use an immersion blender);
3.) If you have the book “The Cornbread Gospels” by Crescent Dragonwagon, you can use her recipe for “Eggscellence” homemade egg replacer, which is really excellent. If you don’t have the book (which is well worth purchasing) you can read the recipe on the amazon.com “Look Inside” function for the book (scroll down to pps. 352-353) . Use 3 tablespoons of the Eggscellence powder whisked with 3 tablespoons water and 2 teaspoons liquid lecithin (soy or sunflower);
4.) 2 tablespoons flax seeds blended in a small blender jar with 6 tablespoons water until frothy and "gloppy" like egg white.
5.) 6 tablespoons aquafaba (liquid from cooking chickpeas), beaten a bit until frothy.
Instructions:
Beat together the Wet Mix ingredients until smooth in a medium bowl with an immersion blender or an electric hand-held beater. In another bowl, whisk together all of the Dry Mix ingredients EXCEPT the oats. When they are well-mixed, stir in the oats. Add any Optionals you might be using and stir to distribute. Pour in the Wet Mix and stir well until thoroughly combined.

Preheat the oven to 375°F. Divide the dough into 32 equal-sized balls. (Wet your hands a little if the dough is sticking.) Place the balls a couple of inches apart on baking parchment-lined baking sheets.

Use a flat-bottomed glass (dampen the bottom a bit to keep it from sticking to the dough) to flatten the balls evenly to about 3 inches across.

Bake the cookies for about 15 minutes, or until golden brown.

Place the cookies on cooling racks and cool thoroughly before serving.
Nutrition Facts (with no optionals)
Nutrition (per
cookie): 106.8 calories; 17% calories from fat; 2.1g total fat; 0.0mg
cholesterol; 51.7mg sodium; 92.2mg potassium; 20.8g carbohydrates; 1.7g fiber;
10.1g sugar; 19.1g net carbs; 2.5g protein; 2.0 points.
VARIATIONS:
Nutrition (per cookie
with raisins only): 129.9 calories; 14% calories from fat; 2.1g total fat;
0.0mg cholesterol; 52.6mg sodium; 150.1mg potassium; 27.0g carbohydrates; 2.0g
fiber; 14.6g sugar; 24.9g net carbs; 2.7g protein; 2.4 points.
Nutrition (per
serving with raisins &nuts): 153.8 calories; 25% calories from fat;
4.5g total fat; 0.0mg cholesterol; 52.7mg sodium; 166.3mg potassium; 27.5g
carbohydrates; 2.3g fiber; 14.7g sugar; 25.2g net carbs; 3.2g protein; 3.0
points
Nutrition (per
serving with chocolate chips only): 144.5 calories; 25% calories from fat;
4.4g total fat; 0.0mg cholesterol; 52.6mg sodium; 92.2mg potassium; 25.8g
carbohydrates; 2.2g fiber; 10.1g sugar; 23.6g net carbs; 2.8g protein; 2.8
points.
Nutrition (per
serving) with chocolate chips & nuts): 168.4 calories; 34% calories
from fat; 6.8g total fat; 0.0mg cholesterol; 52.7mg sodium; 108.3mg potassium;
26.3g carbohydrates; 2.4g fiber; 10.2g sugar; 23.9g net carbs; 3.3g protein;
3.4 points.
Nutrition (per
serving)with nuts only): 130.7 calories; 29% calories from fat; 4.4g total
fat; 0.0mg cholesterol; 51.8mg sodium; 108.3mg potassium; 21.3g carbohydrates;
2.0g fiber; 10.2g sugar; 19.4g net carbs; 3.0g protein; 2.6 points.
Mmmmmmmmmmmm...

Enjoy!

Thursday, November 21, 2013
HULI HULI SAUCE & BEAN-FLOUR-BASED GRAVIES + YOUR BROILER MAY BE A LOWFAT COOK'S BEST FRIEND
 |
| A very easy and yummy low-fat vegan dinner: steamed broccoli, baked tofu with Huli Huli Sauce, Corn Pudding, brown basmati rice and roasted squash. |
HULI HULI SAUCE:
The first thing I need to post is the Huli Huli sauce. I posted the photo above on my Facebook page a couple of weeks ago and promised to post the recipe for the Huli Huli Sauce "soon". Well, I am finally getting around to it-- sorry to be so slow! Huli Huli Sauce is of Hawaiian origin and the "Huli Huli" part derives from the meaning, "to turn". The sauce was used on food turning on a spit-- hence, the name. Judging by the ingredients (which vary a little from version to version), the sauce has been a bit Americanized over the years, and the sauce is used as a type of barbecue sauce. This is my own particular version, which we think is quite yummy.
 |
| Baked tofu with Huli Huli Sauce (recipe below) |
BRYANNA'S VERSION OF HULI-HULI SAUCE
Servings: 4 Yield: about 1 cup
Use as a grilling, baking or BBQ sauce
1/4 cup water
1/4 cup brown sugar or coconut sugar
1/4 cup soy sauce (can be low-sodium)|
2 Tbs dry or medium sherry
2 Tbs ketchup (can be low-sodium)
2 tsp dark sesame oil
1 Tbs grated fresh ginger
a few shakes of hot sauce
a few shakes of liquid smoke
1 large clove garlic, crushed
Whisk together the ingredients. Marinate your tofu, seitan, Soy Curls, tempeh or whatever in the sauce for a while, if you have time. Then grill, bake (at about 450 °F), BBQ or broil your food until the sauce soaks in and your food has nicely browned. I didn't have time to marinate it, so I just baked thick firm tofu slices until they soaked up most of the sauce and browned a bit.
Nutrition Facts (sauce only):Nutrition (per 1/4 recipe): 100.6 calories; 19% calories from fat; 2.3g total fat; 0.0mg cholesterol; 539.1mg sodium; 128.1mg potassium; 17.9g carbohydrates; 0.3g fiber; 15.2g sugar; 17.6g net carbs; 1.0g protein; 2.2 points.
*******************
BEAN-FLOUR-BASED GRAVIES:I've been experimenting lately with using bean flours for thickening sauces, gravies and soups (more recipes to come). Using bean flours instead of white flour thickens mixtures such as this while adding fiber, protein and other nutrients to what might have been an almost empty calorie condiment. It's also handy for converting your sauces and gravies and cream soups to gluten-free and soy-free, and great for diabetics and those on low-glycemic and low-fat diets. The results have good depth of flavor and a lovely creaminess. So, far, I've only used chickpea flour and white bean flour, which are very versatile. You can substitute white bean flour measure-for-measure in place of white flour for thickening purposes. (Still checking chickpea flour sub amounts.)
 |
| Freshly-milled white bean flour from my new Wonder Mill-- you can also buy this flour in some natural food stores and online. Bob's Red Mill and Barry Farms are well known brands that carry it. I mill it from white navy beans, which are less expensive than the white kidney beans I usually use for cooking. |
 |
| Broiled Soy Curls, onions and mushrooms on toast with bean-based GF Rich Brown Yeast Gravy (from my book "World Vegan Feast", but recipe below) |
BRYANNA’S RICH BROWN YEAST GRAVY (GLUTEN-FREE, BEAN-BASED)
Makes 2 1/2 cups
This fat-free and delicious brown gravy will become a
low-fat staple. It lends itself to many variations!
1/3 cup nutritional yeast flakes
2 tablespoons oat flour (can be GF) (grind rolled or quick oats in a dry
blender or electric coffee/spice mill)
4 tablespoons chickpea flour (besan)
(OR use 1/3 cup white bean flour in place of the oat and chickpea flour)
(OR use 1/3 cup white bean flour in place of the oat and chickpea flour)
2 tablespoons soy sauce
2 1/2 cups water
1/2 teaspoon salt
Optional: several shakes of gravy browner, such as Kitchen Bouquet
In a 1 1/2 to 2 quart microwave-safe batter bowl or measuring
pitcher, mix the flours and yeast. Toast this in the microwave on full power
for 2 to 3 minutes, uncovered. Whisk in the water, soy sauce, salt, and gravy
browner, if using. Cover and cook on full power for 3 minutes. Whisk well. Cook
again for 3 minutes on full power. Whisk one last time.
Alternatively, in a heavy saucepan over high heat, whisk the
yeast and flours together until they smell toasty. Remove from the heat briefly
to whisk in the water, soy sauce, salt, and gravy browner, if using. Stir
constantly over high heat until it thickens and comes to a boil. Reduce the
heat and simmer for 2 to 5 minutes.
This gravy can be made ahead and reheated.
Nutrition (per 1/2-cup
serving): 26.6 calories; 13% calories from fat; 0.4g total fat; 0.0mg
cholesterol; 218.0mg sodium; 113.5mg potassium; 3.5g carbohydrates; 1.4g fiber;
0.3g sugar; 2.1g net carbs; 3.0g protein; 0.3 points.
 |
| Freshly-milled chickpea flour from my new Wonder Mill with an adapter for milling bean flours. If you don't have a mill, you can buy chickpea or garbanzo bean flour (or besan) in health food stores and Indian grocery stores, as well as online. |
My latest gravy recipe is a new bean-based version of my Southern-style biscuit gravy. You can bulk it up with Soy Curls (read about Soy Curls here) or other chicken subs, or vegan sausage, if you like. DH went crazy over it! (And, if you are counting calories, nix the biscuits and serve it on a steamed or baked potato, or whole grain toast or fat-free waffles.)
 |
| Creamy-smooth Vegan Southern-Style Bean-Based Biscuit Gravy (with Soy Curls) on a potato |

Printable Recipe
BRYANNA'S
VEGAN SOUTHERN-STYLE BEAN-BASED BISCUIT GRAVY
Servings:
6
Yield:
3 cups (without additions)
1/3 cup
white bean flour
1/4 cup
nutritional yeast flakes
1/2 tsp
salt
1 1/2 cups water
1 cup plain nondairy
milk
1/2 Tbs soy sauce
1/2 Tbs
"chicken-style" vegetarian broth powder or paste (you can use
a GF and/or SF version, if necessary), such as Better Than Bouillon No-Chicken Vegan Soup Base
2 tsp
dark sesame oil (Optional, but gives a smokey flavor)
freshly-ground black pepper
OPTIONAL: (any or all)
2 cups
reconstituted Soy Curls or other vegan chicken sub strips OR crumbled
vegan breakfast sausage (about 2 large links or 4 small), browned a bit under a
broiler
1/2 tsp
dried rubbed sage (not powdered)
1/2 tsp
dried thyme leaves (not powdered)
2
green onions, thinly sliced
 |
| Freshly-milled white bean flour |
Blend together all of the gravy
ingredients (EXCEPT optionals) until smooth.
Place in a heavy medium saucepan. Whisk over high heat until it starts to boil,
then reduce the heat to medium and whisk constantly for several minutes. Bean
flour takes a little longer than grain flour to cook through. Use taste and smell to discern whether or not
the gravy is finished. There should be no
“beany” taste or smell if it’s done.
 |
| Making the gravy |
If you are adding any of the optionals, do
so at this point, heat through and taste for seasoning. Serve hot over hot
split biscuits, toast, plain waffles, or potatoes.
 |
| The Gravy (with Soy Curls) on a potato; broiled leeks mixed with broth-sauteed broccoli with sundried tomatoes |
LAST, BUT NOT LEAST---BRING BACK THE BROILER!
I've been utilizing my oven's broiler ALOT these days, as we have been watching our calories. I spread veggies, or sliced tofu in a marinade, or reconstituted Soy Curls, etc. on a cookie sheet sprayed with a little oil from a pump sprayer, add any seasoning I might want, spray with a little oil from the pump sprayer again and place about 4-5 inches under the hot broiler. In just a few minutes they start to char a little and vegetables soften. I stir them around and cook for a few more minutes. In about 6 to 8 minutes, my food it cooked through and browned, with virtually no fat and not much effort.
Sometimes I use this method for a simple vegetable side dish an sometimes I use it as an alternate to stir-frying. I love doing leeks this way-- they get so soft and sweet and juicy. Give it a try!
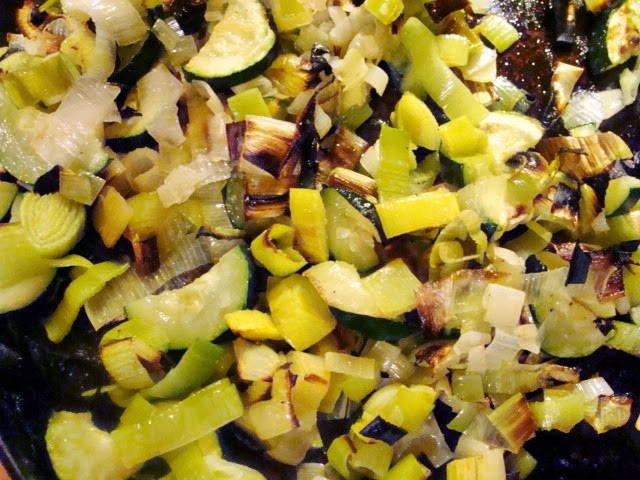 |
| Broiled leeks and zucchini |
 |
| Broiled Soy Curls, mushrooms and onions, ready to be topped with Rich Brown Gravy. |
 |
| Broiled leeks |
Enjoy!
Friday, November 15, 2013
HOT PINK DELICIOUSNESS-- VEGAN SHORBAT RUMMAN (IRAQI POMEGRANATE SOUP WITH BEETS)

What a beautiful soup, in every way-- sweet-and-sour deliciousness, and vibrant hot pink color with contrasting flecks of green. It’s a meal in itself, and very easy to make. I developed my vegan version of this traditional Iraqi recipe during the last war in Iraq. I was so upset about the war and the devastation and my feelings of helplessness around it that I began researching Iraqi history, culture and, of course, cuisine, which goes back some 3,000 years to the Sumerians, Babylonians, Assyrians and ancient Persians. When Baghdad was the capital of the Abbasid Caliphate (750-1258), this sophisticated cuisine was at its zenith.
This soup always reminds me of that sorrowful time, but it's beauty, healthfulness and delicious taste reminds me that peace is worth striving for. It also is a great illustration of how food can bring us together at the global table, celebrating our differences and our similarities. And it is also an excellent example of how very simple, common ingredients (except, perhaps, for the pomegranate molasses, which is common in the Middle East and now becoming better known in North America) can be used to create a sublime eating experience.

Printable Recipe
BRYANNA’S VEGAN
SHORBAT RUMMAN (IRAQI POMEGRANATE SOUP)
From my book, World Vegan Feast (Vegan Heritage Press, 2011)
Serves 6
From my book, World Vegan Feast (Vegan Heritage Press, 2011)
Serves 6
1 tablespoon olive oil
1 cup chopped onion
8 cups vegan broth (you may need another cup or two of broth if the soup seems too thick for you in the end)
1 tablespoon yeast extract, such as Marmite
1/2 cup yellow split peas, picked over, rinsed, and drained
3 medium beets, peeled and cut into 1/2-inch dice
1 1/2 cups cooked brown basmati rice
1 small bunch green onions, coarsely chopped
1/2 cup minced parsley
2 tablespoons lemon juice or 3 tablespoons lime juice
2 tablespoons pomegranate molasses OR 1 cup pomegranate juice
2 tablespoons sugar
1 pound fresh spinach, cleaned and trimmed, and sliced 1/4-inch thick
Optional: 1/4 cup minced fresh cilantro
Garnish—mix together:
1 tablespoon dried mint, crumbled
1/4 teaspoon cinnamon
1/4 teaspoon freshly-ground black pepper
Heat the olive oil in a large pot. Add the onions and sauté over medium-high
heat until the onions wilt. Add the
broth, Marmite, and split peas to the pot and bring to a boil over high heat.
Skim off any foam that gathers on top. Reduce the heat, cover and simmer for 1
hour. Add the beets and cooked rice and
cook 30 minutes.
Add the green onions, sugar, lemon or lime juice, parsley, and pomegranate molasses or juice. Simmer for 10 minutes.

Bring the soup to a boil again, and add the spinach, stirring as it wilts. Stir in cilantro, if you are using it. Add more broth if it seems too thick to you, and taste for salt.
Serve hot, sprinkling each serving with some of the Garnish, and plenty of Arabic-style flat breads, pita, (recipes here and here) or crusty bread, alongside.
| Nutrition Facts |
| Nutrition (per serving): 226.2 calories; 12% calories from fat; 3.3g total fat; 0.0mg cholesterol; 1131.5mg sodium; 942.8mg potassium; 38.6g carbohydrates; 9.0g fiber; 11.9g sugar; 29.6g net carbs; 11.2g protein; 4.0 points. |
Enjoy!
Wednesday, November 6, 2013
CHICKPEA FLOUR HUMMUS, & RADIATORE WITH SNAP PEAS & HUMMUS PESTO SAUCE
NOTE: YOU DO NOT NEED A MILL TO MAKE THESE RECIPES! YOU CAN USE PURCHASED CHICKPEA FLOUR.


Frankly, it sounded yucky to me! But, I looked it up on the Internet and there were quite a few recipes and some good reviews (not all, but I'll get to that later), so I figured it was worth a try. But first I wanted to grind some chickpea flour and see what it was like. I was told in the video that John provides online to use the "coarse" setting, which seems odd at first because you want the flour to be fine. (NOTE: this video was made before he developed the Bean Adapter I have-- he is using a prototype made with a small plastic cup, but the idea and the method is the same.) But, I followed the directions and was rewarded with this lovely powdery-fine flour:

In the recipes for chickpea flour hummus I read online, several bloggers complained about whisking the flour into the hot water-- it got lumpy and hard to stir. It also seemed to take quite a long time to cook- about 15 minutes. Not great for a recipe that is supposed to save time. I had some ideas for remedying both problems, but you'll see what I did in the recipe. Other bloggers seemed to have problems with it being too thick, even solid. I like my hummus very creamy-smooth, NOT thick and pasty, so I knew I'd have to work on that.
And then there was the taste. I wasn't sure what to expect, but I knew what I wanted. Using my No Oil Hummus recipe (it does contain tahini) as a guide (but not sure of amounts), I achieved what I had in mind in two tries-- not bad! I ended up needing to use a little more tahini, lemon juice and seasonings than in my recipe using whole cooked chickpeas.
I think this stream-lined recipe is excellent (and one I will be repeating often), but you might be asking, "Why use chickpea flour-- why not just use chickpeas, as usual?" I think the concept came from food storage circles-- a way to use dried beans with less cooking time and water, perhaps. And, of course, even if you aren't into emergency preparedness food storage, you might like to save water and energy (the fuel kind, I mean!) But, for the average person, I think it's just another handy option if you want hummus, but you don't have any canned chickpeas/garbanzo beans in the house and you don't have time to cook them, you don't have a pressure cooker, etc.. (And, believe me, no store-bought hummus is as good as homemade!)
Of course, you don't have to grind your own chickpea flour (though a mill is worth saving up for if you use different types of flours and eat lots of whole grains and legumes, and it will save you money in the long run). You can keep a bag of chickpea/garbanzo bean flour (also called besan), double-bagged, in your freezer (to prevent rancidity) for just this sort of recipe.

The second recipe below was a spur-of-the-moment lunch that I made with some of the first batch of Chickpea Flour Hummus I made. I felt like making a quick pasta dish with some snap peas and other vegetables I had around. I was about to make a creamy pasta sauce with some homemade pesto and silken tofu when it occurred to me that the garlicky, lemony creamy pesto sauce I had in mind could be made with some of the smooth and creamy hummus that I had just made with chickpea flour. After all, I had made creamy sauces from cooked beans before, hadn't I? So, that's what I did and it was delicious! In fact, it gave me some ideas for making more sauces with bean flour, so stay tuned.
So, here's my new Hummus recipe..

Printable Recipe
BRYANNA'S SMOOTH AND CREAMY CHICKPEA FLOUR HUMMUS
Makes about 2 1/2 cups
The seasonings in this recipe are my preference-- you can play around with them to suit your own taste.
2 3/4 cups cold water
3/4 cup chickpea/garbanzo flour (besan), freshly-ground or commercial
NOTE: Store chickpea/garbanzo bean flour (also called besan), double-bagged, in your freezer to keep it fresh.
5 Tbsp fresh lemon juice (or bottled organic)
1/4 cup tahini
2-3 large cloves garlic, peeled1 1/2 tsp fine salt
3/4 tsp ground cumin
large pinch cayenne
Possible Garnishes:extra-virgin olive oil to drizzle over the top
paprika or smoked paprika (hot or sweet)
chopped fresh parsley or parsley sprigs
chopped green onions
toasted pine nuts or almonds
grated organic lemon zest
See this post for Hummus flavor variations, using slightly larger amounts than those given

Place the water and chickpea flour into your blender container and blend at medium-high speed until well- blended. Pour into a microwave-proof 2 qt. batter bowl or something similar. Microwave at 100% power for 3 minutes. Using a large whisk, whisk vigorously to make a smooth mixture. Microwave for another 3 minutes at 100% power and repeat whisking. Microwave for 2 minutes at 50% power and whisk again. NOTE: If you don't have a microwave, you will have to cook the blended mixture in a heavy saucepan over medium heat until it has thickened, whisking all the time so that it doesn't stick or clump. This may take up to 15 minutes. (Afraid of microwave ovens? Please read this document I have compiled.)
The mixture will foam up while it cooks in the microwave and then "deflate". You can see in the picture below how the mixture rose up the sides and then down again.

Scoop the mixture into a shallow bowl or baking dish. If you aren't in a hurry, place it in the refrigerator until it has cooled and is a rather solid mass. To speed up this process, place your dish in the freezer. This took about 45 minutes cooling time for me. Make sure the mixture is a cool solid mass and not runny and warm.
Now, break up the chickpea flour mixture and place it in a blender or food processor, along with lemon juice, tahini, garlic, cumin and cayenne. Blend or process until the mixture is very smooth and creamy. Place in a bowl and cool down to room temperature before serving, or refrigerate for future use.
IMPORTANT: The mixture will firm up a bit, so, before spreading it in a shallow serving bowl (like a soup plate) for serving, whisk it vigorously to make it creamy again.
Nutrition Facts:
Nutrition (per 1/4 cup serving): 52.8 calories; 45% calories from fat; 2.8g total fat; 0.0mg cholesterol; 243.8mg sodium; 79.6mg potassium; 5.2g carbohydrates; 1.1g fiber; 0.8g sugar; 4.1g net carbs; 2.2g protein; 1.1 points.
*******************************************************
And here's that pasta recipe featuring the Hummus Pesto Sauce...

BRYANNA'S SUPER-QUICK RADIATORE WITH SNAP PEAS, SPINACH, GRAPE TOMATO AND CREAMY HUMMUS PESTO SAUCE
Serves 5
The lemony flavor of the hummus added an extra accent to the simple garlicky pesto sauce.
3/4 lb (12 oz.) dry radiatore pasta (or you could use penne, gemelli, fusilli, etc., instead)
8 oz. snap peas, cut into about 3/4-inch pieces (I used kitchen scissors for this)
4 oz. frozen spinach, thawed, squeezed and fluffed
about 12 grape tomatoes, cut in half lengthwise
Sauce:
1 1/2 cups hummus
1 cup of the hot pasta cooking water
1/4 cup pesto (use homemade or commercial vegan pesto)
Serve with:
freshly-ground black pepper
vegan parmesan, soy based, nut based or homemade
Bring a large pot of salted water to a boil and add the pasta. Cook for about 9 minutes, then add the peas and cook for another 3 or 4 minutes. Drain in a colander placed in a large bowl to catch the cooking water, which you should save. Return the drained pasta and peas to the cooking pot, add the spinach and tomatoes, toss together and cover.
Whisk together the sauce ingredients. It should not be too thick. Pour the sauce into the pot with the pasta and vegetables, toss well and serve immediately.
| Nutrition Facts |
| Nutrition (per serving): 361.1 calories; 11% calories from fat; 4.9g total fat; 0.0mg cholesterol; 388.1mg sodium; 502.5mg potassium; 64.3g carbohydrates; 5.5g fiber; 3.0g sugar; 58.8g net carbs; 14.8g protein; 6.8 points. |
Enjoy!
Subscribe to:
Posts (Atom)