Showing posts with label besan. Show all posts
Showing posts with label besan. Show all posts
Wednesday, November 6, 2013
CHICKPEA FLOUR HUMMUS, & RADIATORE WITH SNAP PEAS & HUMMUS PESTO SAUCE

NOTE: YOU DO NOT NEED A MILL TO MAKE THESE RECIPES! YOU CAN USE PURCHASED CHICKPEA FLOUR.


Frankly, it sounded yucky to me! But, I looked it up on the Internet and there were quite a few recipes and some good reviews (not all, but I'll get to that later), so I figured it was worth a try. But first I wanted to grind some chickpea flour and see what it was like. I was told in the video that John provides online to use the "coarse" setting, which seems odd at first because you want the flour to be fine. (NOTE: this video was made before he developed the Bean Adapter I have-- he is using a prototype made with a small plastic cup, but the idea and the method is the same.) But, I followed the directions and was rewarded with this lovely powdery-fine flour:

In the recipes for chickpea flour hummus I read online, several bloggers complained about whisking the flour into the hot water-- it got lumpy and hard to stir. It also seemed to take quite a long time to cook- about 15 minutes. Not great for a recipe that is supposed to save time. I had some ideas for remedying both problems, but you'll see what I did in the recipe. Other bloggers seemed to have problems with it being too thick, even solid. I like my hummus very creamy-smooth, NOT thick and pasty, so I knew I'd have to work on that.
And then there was the taste. I wasn't sure what to expect, but I knew what I wanted. Using my No Oil Hummus recipe (it does contain tahini) as a guide (but not sure of amounts), I achieved what I had in mind in two tries-- not bad! I ended up needing to use a little more tahini, lemon juice and seasonings than in my recipe using whole cooked chickpeas.
I think this stream-lined recipe is excellent (and one I will be repeating often), but you might be asking, "Why use chickpea flour-- why not just use chickpeas, as usual?" I think the concept came from food storage circles-- a way to use dried beans with less cooking time and water, perhaps. And, of course, even if you aren't into emergency preparedness food storage, you might like to save water and energy (the fuel kind, I mean!) But, for the average person, I think it's just another handy option if you want hummus, but you don't have any canned chickpeas/garbanzo beans in the house and you don't have time to cook them, you don't have a pressure cooker, etc.. (And, believe me, no store-bought hummus is as good as homemade!)
Of course, you don't have to grind your own chickpea flour (though a mill is worth saving up for if you use different types of flours and eat lots of whole grains and legumes, and it will save you money in the long run). You can keep a bag of chickpea/garbanzo bean flour (also called besan), double-bagged, in your freezer (to prevent rancidity) for just this sort of recipe.

The second recipe below was a spur-of-the-moment lunch that I made with some of the first batch of Chickpea Flour Hummus I made. I felt like making a quick pasta dish with some snap peas and other vegetables I had around. I was about to make a creamy pasta sauce with some homemade pesto and silken tofu when it occurred to me that the garlicky, lemony creamy pesto sauce I had in mind could be made with some of the smooth and creamy hummus that I had just made with chickpea flour. After all, I had made creamy sauces from cooked beans before, hadn't I? So, that's what I did and it was delicious! In fact, it gave me some ideas for making more sauces with bean flour, so stay tuned.
So, here's my new Hummus recipe..

Printable Recipe
BRYANNA'S SMOOTH AND CREAMY CHICKPEA FLOUR HUMMUS
Makes about 2 1/2 cups
The seasonings in this recipe are my preference-- you can play around with them to suit your own taste.
2 3/4 cups cold water
3/4 cup chickpea/garbanzo flour (besan), freshly-ground or commercial
NOTE: Store chickpea/garbanzo bean flour (also called besan), double-bagged, in your freezer to keep it fresh.
5 Tbsp fresh lemon juice (or bottled organic)
1/4 cup tahini
2-3 large cloves garlic, peeled1 1/2 tsp fine salt
3/4 tsp ground cumin
large pinch cayenne
Possible Garnishes:extra-virgin olive oil to drizzle over the top
paprika or smoked paprika (hot or sweet)
chopped fresh parsley or parsley sprigs
chopped green onions
toasted pine nuts or almonds
grated organic lemon zest
See this post for Hummus flavor variations, using slightly larger amounts than those given

Place the water and chickpea flour into your blender container and blend at medium-high speed until well- blended. Pour into a microwave-proof 2 qt. batter bowl or something similar. Microwave at 100% power for 3 minutes. Using a large whisk, whisk vigorously to make a smooth mixture. Microwave for another 3 minutes at 100% power and repeat whisking. Microwave for 2 minutes at 50% power and whisk again. NOTE: If you don't have a microwave, you will have to cook the blended mixture in a heavy saucepan over medium heat until it has thickened, whisking all the time so that it doesn't stick or clump. This may take up to 15 minutes. (Afraid of microwave ovens? Please read this document I have compiled.)
The mixture will foam up while it cooks in the microwave and then "deflate". You can see in the picture below how the mixture rose up the sides and then down again.

Scoop the mixture into a shallow bowl or baking dish. If you aren't in a hurry, place it in the refrigerator until it has cooled and is a rather solid mass. To speed up this process, place your dish in the freezer. This took about 45 minutes cooling time for me. Make sure the mixture is a cool solid mass and not runny and warm.
Now, break up the chickpea flour mixture and place it in a blender or food processor, along with lemon juice, tahini, garlic, cumin and cayenne. Blend or process until the mixture is very smooth and creamy. Place in a bowl and cool down to room temperature before serving, or refrigerate for future use.
IMPORTANT: The mixture will firm up a bit, so, before spreading it in a shallow serving bowl (like a soup plate) for serving, whisk it vigorously to make it creamy again.
Nutrition Facts:
Nutrition (per 1/4 cup serving): 52.8 calories; 45% calories from fat; 2.8g total fat; 0.0mg cholesterol; 243.8mg sodium; 79.6mg potassium; 5.2g carbohydrates; 1.1g fiber; 0.8g sugar; 4.1g net carbs; 2.2g protein; 1.1 points.
*******************************************************
And here's that pasta recipe featuring the Hummus Pesto Sauce...

BRYANNA'S SUPER-QUICK RADIATORE WITH SNAP PEAS, SPINACH, GRAPE TOMATO AND CREAMY HUMMUS PESTO SAUCE
Serves 5
The lemony flavor of the hummus added an extra accent to the simple garlicky pesto sauce.
3/4 lb (12 oz.) dry radiatore pasta (or you could use penne, gemelli, fusilli, etc., instead)
8 oz. snap peas, cut into about 3/4-inch pieces (I used kitchen scissors for this)
4 oz. frozen spinach, thawed, squeezed and fluffed
about 12 grape tomatoes, cut in half lengthwise
Sauce:
1 1/2 cups hummus
1 cup of the hot pasta cooking water
1/4 cup pesto (use homemade or commercial vegan pesto)
Serve with:
freshly-ground black pepper
vegan parmesan, soy based, nut based or homemade
Bring a large pot of salted water to a boil and add the pasta. Cook for about 9 minutes, then add the peas and cook for another 3 or 4 minutes. Drain in a colander placed in a large bowl to catch the cooking water, which you should save. Return the drained pasta and peas to the cooking pot, add the spinach and tomatoes, toss together and cover.
Whisk together the sauce ingredients. It should not be too thick. Pour the sauce into the pot with the pasta and vegetables, toss well and serve immediately.
| Nutrition Facts |
| Nutrition (per serving): 361.1 calories; 11% calories from fat; 4.9g total fat; 0.0mg cholesterol; 388.1mg sodium; 502.5mg potassium; 64.3g carbohydrates; 5.5g fiber; 3.0g sugar; 58.8g net carbs; 14.8g protein; 6.8 points. |
Enjoy!

Thursday, December 15, 2011
VEGAN SPANISH TORTILLA DE PATATAS (SPANISH POTATO OMELET) AND ROMESCO SAUCE

This blog post is going to be truly short and sweet, as I am recuperating from my first cold in 2 years and trying to summon up enough energy to organize and clean my house, and plan menus and make-aheads for my holiday guests.
I want to share a brunch recipe from my new book, The World Vegan Feast. (Actually, you can serve it any time of the day, and it's often served as a bar snack in Spain.) It's a Spanish omelet that is similar to an Italian fritatta, but it always contains potato. In Spain this omelet is called a tortilla de patatas or tortilla española.
I had developed a tortilla española recipe earlier on, but I'm always trying to improve on recipes. I was in the mood for a hearty Spanish potato omelet one day when we were taking lunch over to our friends Jane and Matsuki's house. I chose to make this dish because it’s a perfect choice for toting to potluck meals and picnics, given that it can be eaten hot or at room temperature. It's also open to many variations-- for instance, you might want to add sliced roasted red bell peppers or cooked artichoke hearts. But I thought that my recipe lacked something, so I changed my formula to add some chickpea flour-- bingo! Firmer texture and more eggy flavor-- just what I was after.
Just a little aside about spelling: "Omelet" or "Omelette"?

Printable Recipe
BRYANNA'S TOFU AND CHICKPEA FLOUR TORTILLA DE PATATAS (SPANISH POTATO OMELET) WITH ROMESCO SAUCE
From my book “World Vegan Feast” © Bryanna Clark Grogan
Serves 4 to 6
This recipe may become a staple in your
house, as it is in ours. The Romesco Sauce (a vegan version of a classic Spanish sauce), though not traditionally served with this, is a tangy, nutty, tomato-ey
surprise! (NOTE: This is not Spanish, but another excellent condiment to serve with the tortilla, is Ajvar, a Balkan eggplant and pepper sauce [my recipe
is posted here], widely available, in mild or hot versions, in ethnic grocery stores and gourmet stores, and online).
1 tablespoon olive oil
Batter:
8 ounces (1 cup) medium-firm tofu, or extra-firm silken tofu, drained and crumbled
1/4 cup nondairy milk
1/4 cup chickpea flour (besan)
3 tablespoons unbleached white flour (or 2
tablespoons brown rice flour)
1 tablespoon dry sherry, white wine or
water
2 tablespoons Homemade Tofu Scrambler Mix (see recipe below)
1/2 teaspoon baking powder
1/4 teaspoon salt
Additions:
1 large onion, thinly sliced
4 medium cooked thin-skinned potatoes,
peeled and sliced 1/4-inch thick
freshly-ground black pepper
9 slices commercial vegan "ham"
or "bacon"cut into thin slivers
Romesco Sauce (see recipe below)
Preheat the oven to 450°F. Add the olive
oil to a 10-inch cast iron skillet or pie pan and place the pan in the oven
while the oven heats up.
Blend all of the Batter ingredients in a food processor until very smooth. Scoop the Batter into a medium bowl and stir
in the sliced "ham" or "bacon".
Add the sliced onion to the hot oil in the
pan in the oven, salt lightly and toss it to coat with the oil, spreading it
out evenly. Bake the onions for about 5 minutes. Transfer the onions to the
Batter and fold in. Lower the oven temperature to 350°F.
Distribute the sliced cooked potatoes
evenly in the same hot cast iron skillet or pie pan, brushed with a little more
olive oil and spread the batter evenly over the potatoes and out to the edges
of the pan. Grind black pepper over the top.
Bake the tortilla for 20 to 30 minutes or
until the batter is set. Cool the pan on a rack for 10 minutes, then loosen the
bottom of the omelet carefully with a thin spatula-turner and cut it into 6
wedges. Eat warm with the Romesco Sauce served on the side. The leftovers are
good cold and can be made into a delicious sandwich on crusty bread.
Nutrition FactsNutrition (per
serving): 234.4 calories; 15% calories from fat;
4.2g total fat; 0.0mg cholesterol; 707.5mg sodium; 829.8mg potassium; 25.9g
carbohydrates; 2.7g fiber; 2.1g sugar; 23.2g net carbs; 23.5g protein; 4.5
points.
BRYANNA'S ROMESCO SAUCE
From my book “World Vegan Feast” © Bryanna Clark Grogan
From my book “World Vegan Feast” © Bryanna Clark Grogan
Makes approximately 1 1/2 cups
There are many versions of this classic
Spanish sauce of Catalonian origin, which is usually served with seafood, but we used my personal
version the Spanish Potato Omelet, to our delight.
2 tablespoons olive oil
1/4 cup chopped onions
3 cloves garlic, chopped
1/4 cup slivered blanched raw almonds
1 large roasted red pepper from a jar,
seeded, rinsed and patted dry
4 large sun-dried tomato halves in oil,
rinsed with hot water and patted dry
5 tablespoons water
2 tablespoons dry sherry
1 tablespoon dry red wine
1 tablespoon red wine vinegar
1 teaspoon vegan broth powder
1 pinch cayenne pepper
Heat the oil in a small skillet and add the
onion and garlic. Sauté over medium heat until the onion is wilted. Transfer
the onions to a food processor along with the remaining ingredients. Process
the mixture until smooth. Taste for salt. Serve at room temperature.
Nutrition (per 1/8th recipe): 70.6 calories; 68% calories from fat; 5.7g
total fat; 0.0mg cholesterol; 77.0mg sodium; 95.5mg potassium; 3.4g
carbohydrates; 0.8g fiber; 0.8g sugar; 2.6g net carbs; 1.4g protein; 1.7
points.
BRYANNA'S HOMEMADE TOFU SCRAMBLER MIX
From my book “World Vegan Feast” © Bryanna Clark Grogan
1 cup nutritional yeast flakes
1/3 cup onion powder
4 tsp curry powder
4 tsp salt
4 tsp turmeric
4 tsp ground cumin
Mix in a DRY blender. Store in a covered jar. Yield: 1 ¾ cups
BRYANNA'S HOMEMADE TOFU SCRAMBLER MIX
From my book “World Vegan Feast” © Bryanna Clark Grogan
1 cup nutritional yeast flakes
1/3 cup onion powder
4 tsp curry powder
4 tsp salt
4 tsp turmeric
4 tsp ground cumin
Mix in a DRY blender. Store in a covered jar. Yield: 1 ¾ cups
Enjoy!

Saturday, March 20, 2010
PANELLE: SOUTHERN ITALIAN "CHICKPEA FRIES'" (WITH LESS OIL)

I love chickpeas and chickpea flour. One of the tastiest, cheapest, easiest snacks (or sides) in the world is an ancient recipe from Southern Italy, called panelle or panelle di ceci (panelli or paneddi in Sicily). They are also popular in Southern France, where they are known as panisse. They are basically a street snack, often eaten inside of a bread or roll. The recipe is of Arabic origin, which makes sense when you think of the origins of chickpeas and the influence of Arabic cooking on Southern Italian cooking.
Wouldn't it be great if this kind of a snack became popular here in North America as a "takeout" snack instead of "popcorn chicken"? Well, we can dream! Upscale restaurants have been serving these, but that's not really where they belong. They are so easy to make and so delicious, and so open to different seasonings that they would make great street cart food.
In the meantime, make them at home. They are basically chickpea flour (besan in Indian stores) and water, with a few seasonings. My version is pan-fried, but with much less oil than usual. They still have a nice crust and the lovely olive oil flavor.
Printable Recipe
BRYANNA'S PANELLE (CHICKPEA "FRIES")
Servings: 4
Double or triple this if you like.
2 cups water
1 cup chickpea flour
1 tablespoon extra-virgin olive oil
1 teaspoon sea salt
freshly-ground black pepper to taste
SEASONING OPTIONS:
smoked paprika
crushed garlic
cayenne
dried red chili flakes
chopped Italian parsley
chopped fresh herbs
FOR COOKING:
1 tablespoon extra-virgin olive oil
FOR SERVING (OPTIONAL):
lemon wedges for squeezing
vegan mayonnaise with some vegan pesto whipped into it
vegan aioli (garlic mayonnaise)
a good, simple homemade tomato sauce
Romesco sauce (this is Spanish, not Italian, but yummy)
Oil an 8" square pan
Bring the water to a boil in a medium saucepan. Gradually whisk in the chickpea flour so that it doesn't form lumps. Turn the heat to low and whisk in the oil, salt and pepper. Cool for another minute or so, stirring all the time with a wooden spoon, until the mixture thickens.
Spread the hot mixture evenly in the oiled pan, smoothing the top. Refrigerate until the mixture is solid.
Loosen the edges and turn the square out onto a cutting surface.

Slice the square into 16 "fingers".

Heat the last tablespoon of oil in a large, heavy nonstick skillet
Nutrition Facts
Nutrition (per serving): 148.7 calories; 49% calories from fat; 8.3g total fat; 0.0mg cholesterol; 487.3mg sodium; 194.6mg potassium; 13.3g carbohydrates; 2.5g fiber; 2.5g sugar; 10.8g net carbs; 5.1g protein; 3.2 points.
Enjoy!

Thursday, May 7, 2009
FARINATA OR FAINÁ (ITALIAN CHICKPEA PANCAKE), TOFU YOGURT, AND OTHER THINGS WE'VE EATEN LATELY
Here are some pics of things we've been eating lately. Below the photos are a couple of recipes and details about them.
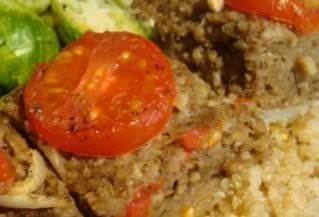
A "Baked Kibbeh" or Middle Eastern-style "Grain Meatloaf", topped with sliced fresh tomatoes and sliced onions, a little olive oil, salt and pepper before baking (UPDATE: You can use this recipe for the base of this dish)
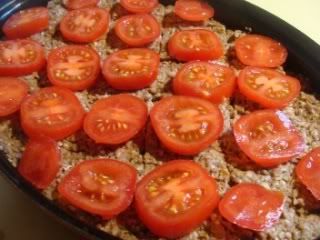
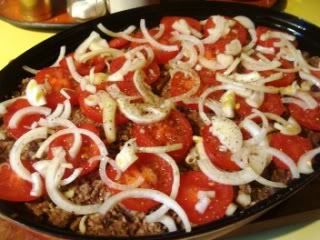
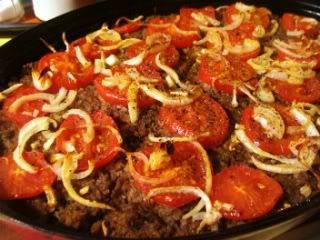
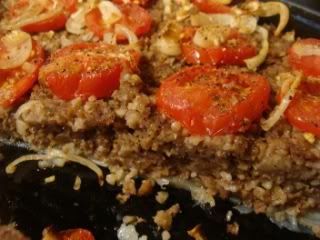
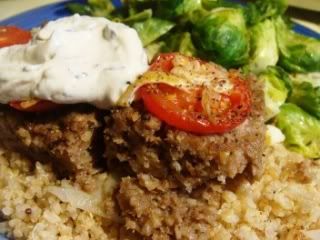
Serve with Creamy Tofu Tahini/Mint Sauce.
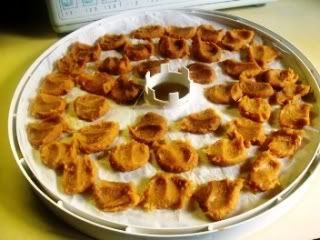
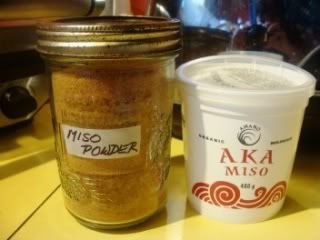
Making miso powder for my New, Improved Okara Parmesan (the directions for making the miso powder are in the same post):
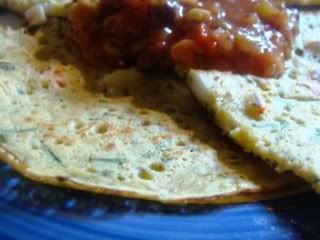
Experimenting with a vegan "tortillita" (Spanish chickpea pancake usually made with seafood--I used vegan "shrimp"). It wasn't as tasty as I would have liked, perhaps because I wasn't using much oil. I'm still working on this!
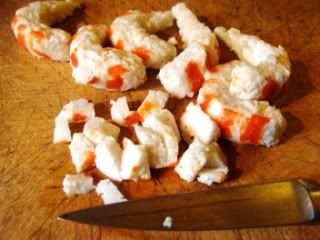
Vegan "shrimp" from an Asian grocery
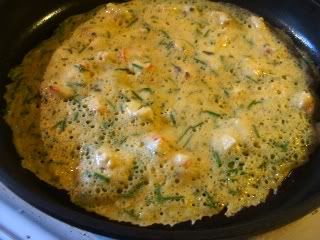
The "tortillita" before turning over.
A simple Cantonese "shrimp" stirfry with the vegan "shrimp":

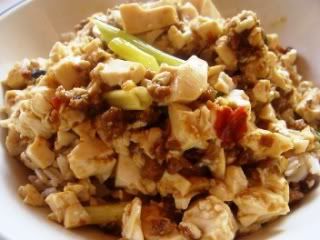
A Japanese version of a Chinese recipe-- Mapo Doufu:
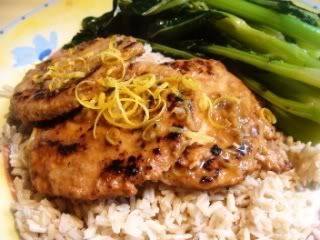
Chinese Lemon "Chicken" Cutlets with gai lan (Chinese broccoli) (the cutlets are the type they serve in Buddhist vegetarian restaurants-- we found them at an Asian grocery store):
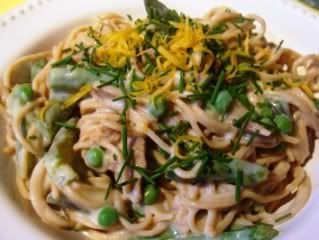
Pasta with Lemon, Asparagus, Peas and Vegan "Ham" (UPDATE: recipe here):
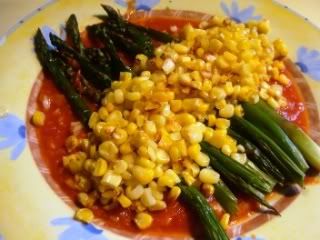
A grilled asparagus and corn dish with a tomato-curry sauce, adapted from a recipe from Vij's cookbook (**I considerably reduced the fat** and it was still yummy!):

Dal Soup with vegetables in it (made from leftover Red Lentil Dal from my "Fiber for Life Cookbook") with poppadoms toasted on a dry cast iron skillet instead of frying them in oil:
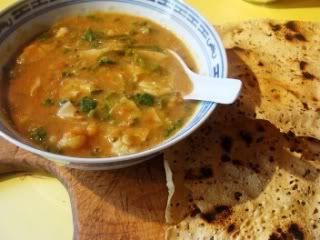
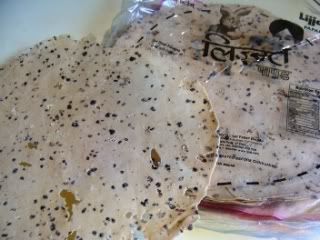
A poppadom (or papad)is a South Indian wafer made from lentil flour. They are inexpensive and take only seconds to dry-toast or grill or fry. Very crunchy and yummy!
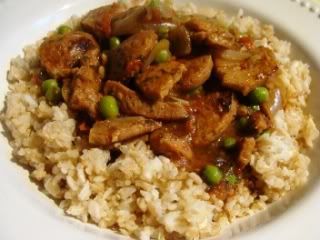
A Middle Eastern-style stew with peas and tomatoes, made with textured soy protein chunks:
NOW, THOSE RECIPES:
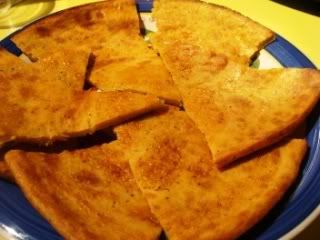
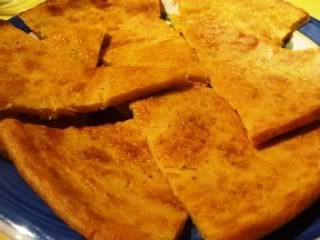
Freshly-baked chickpea flour Farinata or Fainâ
I've been fooling around with chickpea flour alot these days, because it's a legume flour which we can eat on the WW Core plan without having to count extra points for it! One of my favorite chickpea flour dishes is Farinata, a dish from the region of Italy where my fraternal grandmother's family originated.
My father called it Fainâ, and for years I thought that was because his mother’s family was originally from the Genoa region of Italy. But I have just discovered that it is called Fainá in South America. The dish is popular in Uruguay and Argentina, and, apparently, also in Peru, where my father was born. (There are a surprising number of Italians in those countries, and many people from the Genoa area immigrated to South America in the 1800's.) Fainâ or Fainá, the name undoubtedly resulted from a slurring of the more general Italian term for the dish, Farinata. Which is odd, because “farina” actually means white flour in Italian, not chickpea flour. Scholars guess that this was a reflection of the dish’s origins among the poorest population—to these peasants, who never saw white flour, all flour was chickpea flour. (They had the last laugh, though, because high-protein chickpea flour is a lot more nutritious than white flour!)
The dish migrated to Tuscany, where it is called Cecina (from the Italian for chickpea, ceci) or “Calda, Calda” (meaning "hot, hot"); to Livorno (Torta di Ceci); across the border to Monaco and Nice, in France, where it is called Socca; to Sardinia (la fainé genovese); and to Gibraltar (Calentita).
So what is this mysterious “pancake”? It’s a delicious and nourishing snack food, a flatbread, really. In Nice, their version, Socca, is a street food, cooked huge copper pans over wood burners (rather than baked), pieces eaten out of hand like French fries in a cone of paper with lots of pepper. In Italy, it is eaten at home, with a knife and fork, or at a bar. In Genoa, there are farinata bakeries everywhere. In Argentina, they eat it on pizza! Both Italians and Niçois will tell you that it should not be made at home and it won’t taste the same if it’s not made over a wood-fired stove or in a wood-fired oven, but, trust me, a very reasonable approximation can be made and enjoyed at home!
It’s basically a chickpea flour and water batter with some salt, olive oil, and sometimes garlic and fresh herbs. Some people make it thinner than others— there are many versions. Farinata is sometimes eaten with sliced onions or artichokes. Modern chefs are now using it as a base for imaginative toppings, even salads.
It couldn’t be simpler, and yet it will raise your status with knowledgeable “foodies”, if that is what gives you a thrill. It’s one of those ancient, nourishing peasant dishes (like polenta) that one now encounters in trendy, expensive city restaurants, perhaps to be nibbled with wine. But that’s okay— it can’t hurt for more people to learn to love this dish, because it’s delicious, nutritious, inexpensive and very easy to make at home, and, besides, we grow a lot of chickpeas in Canada (in southern Alberta and Saskatchewan, mostly).
I hope I’ve intrigued you sufficiently to try out my version of it. Whenever I serve it to guests they are mystified, but they love it! We eat it hot or cold for a snack. (On the WW Core Plan, 1/6th of the "the 'pancake' uses1 teaspoon of your 2-teaspoon daily oil allowance; or, if you've used that up, you use up 1 point-- not bad for alot of satisfaction!)
UPDATE: Here's another great way to serve farinata-- farinata with toppings!

(Chickpea flour, by the way, can be purchased in Indian food stores under the name “besan” or “chana flour”, as well as in health food stores, and in the Indian food section of some large supermarkets.)
Printable Recipe
BRYANNA’S FARINATA (FAINÁ) (ITALIAN CHICKPEA FLOUR "PANCAKE")
Serves 6
This from my book Nonna's Italian Kitchen.
This is a thin version, which I prefer. You can sprinkle the top with chopped garlic and rosemary, thyme or sage before baking, if you like. Ligurians, who eat it with a knife and fork, sometimes also top it with thinly sliced onions or green onions, or even slices of baby artichoke. I like the leftovers cold, too. (UPDATE: Here's another great way to serve farinata.)
1 1/2 cups chickpea flour or plain besan
1 1/2 cups water
3/4 tsp. salt
freshly-ground black pepper to taste
OPTIONAL: 2 teaspoons crushed garlic
2 tablespoons extra-virgin olive oil
2 hours before cooking, mix the water and chickpea flour in a medium bowl, cover, and let stand in a cool place for 2 hours.
Preheat the oven to 475° F (450° with convection). Coat a 14" pizza pan (or an 11 x 15” rimmed cookie sheet) with 1 tablespoon of the olive oil.
Stir the salt and pepper (and optional garlic, if using) into the batter, which should be like a pancake batter (add water if too thick). Pour the batter into the pan and drizzle with the remaining oil. (If you like, sprinkle with some of the items suggested in the text, above.)
Bake for 10 minutes, then place under the broiler for a few minutes to brown the top. Grind more pepper on top, if you wish, and cut into wedges to serve. Serve hot.
Nutrition Facts
Nutrition (per serving): 128.8 calories; 41% calories from fat; 6.0g total fat; 0.0mg cholesterol; 251.0mg sodium; 194.6mg potassium; 13.3g carbohydrates; 2.5g fiber; 2.5g sugar; 10.8g net carbs; 5.1g protein; 2.6 points.
THE SECOND RECIPE:
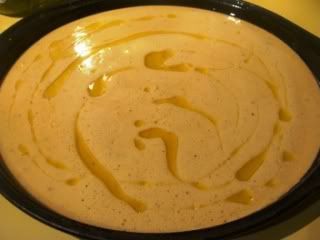
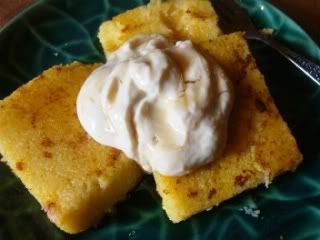
This is nothing very earth-shaking, but I had a craving this morning for a really rich, Greek or Bulgarian-style whole milk yogurt! I like soy yogurt, but it's more like a low-fat or no-fat yogurt. So I made a recipe that I generally use as a yogurt substitute in Greek and Middle Eastern cooking, just because it tastes so rich and is so stable when cooked. The recipe is for Tofu Yogurt, made with silken tofu. It is is almost all of my cookbooks. I made a little change, though. I had used the same recipe last night for the "Yogurt/Mint sauce" to go with the "Grain meatloaf" pictured above, and I put just a little bit of tahini in it. It tasted to rich, and yet you could not detect the tahini taste, so I decided to add some tahini to the yogurt recipe for eating. It is delicious! I just added a spoonful of low-sugar jam to it and ate some that way, and used the rest as a sauce on some polenta squares browned in a non-stick pan. Yummy!
I know that silken tofu can be expensive, so I won't eat it this way often, but it was sure a treat! (I buy silken tofu by the case from a local food co-op and save about $1 a box, though.)

Printable Recipe
BRYANNA'S TOFU YOGURT, RICH "BULGARIAN-STYLE"
Servings: 6
Yield: 1 3/4 Cups
Silken tofu makes a smooth, rich-tasting mixture which can be used anywhere you would normally use yogurt, including cooking. The little bit of tahini adds richness and edge, but you can use a neutral oil, if you prefer..
If you like, you can add some dairy-free acidopholis powder.
1 box (12.3 oz.) extra-firm SILKEN tofu
1/4 cup fresh or organic bottled lemon juice
1 tablespoon tahini (or neutral cooking oil)
1/2 tsp unbleached organic sugar (UPDATE: If you like it a little sweeter, use up to 2 tablespoons agave nectar)
scant 1/4 tsp salt
Process all of the ingredients in a blender until VERY smooth. Keep in a covered container in the refrigerator for up to a week.
For a snack or topping for fruit, sweeten with Grade A light maple syrup, fruit-sweetened jam, agave nectar, fruit juice concentrate, and/or fruit liqueur.
Nutrition Facts
Nutrition (per generous 1/4 cup): 47.7 calories; 42% calories from fat; 2.3g total fat; 0.0mg cholesterol; 116.8mg sodium; 100.6mg potassium; 2.2g carbohydrates; 0.3g fiber; 0.9g sugar; 1.9g net carbs; 4.7g protein; 1.1 points.
Enjoy!

Subscribe to:
Posts (Atom)