Showing posts with label Wondermill. Show all posts
Showing posts with label Wondermill. Show all posts
Thursday, January 30, 2014
TAGLIATELLE WITH RAPINI, ONION, CHICKPEAS & CREAMY WHITE BEAN FLOUR-BASED VEGAN BECHAMEL


I have been miserably unproductive lately-- January blahs, I guess. But one thing I've been working on intermittently is cooking with bean flours. A few months ago I got a new WonderMill Electric Grain & Bean Mill, so I can now mill fresh bean flour in my new machine. It has a new Bean Adapter and also a Small Grain Adapter-- see photo below. (PS: The Bean Adapter is very new, so enquire about it via the WonderMill website. Here's what this mill will grind.) You can also line the canister that the flour goes into directly from this grinder with a bag, which makes it so easy to clean up. And you just twist-tie the bag and place it in the freezer (I keep bean flour in the freezer so it doesn't go rancid).

I've really been enjoying cooking with fresh chickpea flour and fresh white bean flour, as well as my own whole wheat flour. Here are some posts I've done so far on: wheat flour one, two, three, four ; chickpea flour one, two ; and white bean flour one. That was a white bean flour-based vegan Southern-style white biscuit gravy and it was delicious.
 |
| Freshly-milled white bean flour-- you can use navy beans or Great Northern beans. This batch was made with navy beans. |
Today I was trying to figure out what to make for a quick lunch. I had rapini that needed using-up (rapini doesn't keep very long), so I decided a simple creamy pasta dish with rapini, onions and a few chickpeas would be a a good idea. I've been wanting to make a fat-free vegan white bean flour-basted bechamel sauce for a while, so this seemed like a good time to try it.
It turned out to be so easy and so good-- I don't know why I haven't tried it before this! This will be my go-to Bechamel from now on!

Printable Recipe
BRYANNA'S TAGLIATELLE WITH RAPINI, ONION, CHICKPEAS & CREAMY WHITE BEAN FLOUR-BASED VEGAN BÉCHAMEL
Can be gluten-free, soy-free, nut-free and/or fat-free if you wish.
4 servings
This is a simple whole-meal recipe, but it's very satisfying and nutritious with a little kick, if you use the chile flakes). Serve with some vegan parmesan sub to sprinkle on top (we like Go Veggie! soy parmesan).
Note: You can use more or less bean flour for other versions of this basic sauce, depending on the thickness you are going for.
Fat-Free, Creamy Vegan White Bean Flour-Based Béchamel:
2 cups non-dairy milk of choice (use Original type)
1 teaspoon vegan chicken-style broth powder or paste (I like Better Than Bouillon No-Chicken Vegan Broth Base)
1/4 cup white bean flour (or white urad dal flour)
1/4 teaspoon salt
1 pinch grated nutmeg
freshly-ground pepper to taste
Other Ingredients:
8 oz dry egg-free tagliatelle pasta (NOTE: Tagliatelle is a dry flat pasta, often sold rolled up in "nests"-- check labels, as it is often made with eggs.) OR use linguine or fettucine, or any GF flat pasta
1 tablespoon olive oil (see fat-free tip below)
1 medium onion, chopped
1 cup canned or cooked chickpeas, rinsed and drained
3 cloves garlic
1/2 teaspoon red chili flakes (optional, but recommended)
2 cups chopped lightly-cooked rapini (or you could substitute mustard or turnip greens, or kale)
To make the Béchamel sauce, place all of the Béchamel ingredients in a blender and blend until very smooth. I cook the sauce in the microwave, in a large ceramic or Pyrex batter bowl. I cook it on 100% power for three minutes, then whisk it then repeat for 3 minutes more. If you prefer, you can cook it in a heavy saucepan over medium-high heat, stirring constantly, until the sauce boils and thickens. Note: If you make it ahead of time, reheat gently on the stove or in the microwave.

Place a large pot of salted water on the stove to come to a boil. When it boils, add the pasta and boil until just al dente-- 9 to 10 minutes. When it's ready, drain in a colander and leave it there.
While the pasta cooks, heat the oil in a large heavy skillet (seasoned carbon steel, seasoned cast iron, or hard-anodized) over medium-high heat. Add the onions and saute until they start to wilt and maybe brown a bit. Add the chickpeas, garlic and chile flakes, and saute a bit more. Lower the heat and stir in the chopped rapini and sprinkle on a bit of salt. Stir the mixture until heated through.

Fat-Free Tip: If you prefer not to use any fat in this dish you can either steam-fry the onions in a nonstick pan over medium-high heat, adding a squirt of water every now and then to keep it from sticking, and keeping it moving, until the onion starts to wilt-- then proceed as directed. OR you can place the onion in a covered microwave-safe casserole and cook on 100% power for about 4 minutes. OR you could broil them quickly on a baking sheet about 4" under your oven's broiler (watch carefully!) until they start to brown and get limp.
Then add the chickpeas, garlic and chile flakes, cover and cook for 1 more minute.
Rinse the cooked pasta with hot water, shake to drain well, and add the pasta to the skillet, along with the Béchamel. Using a large spoon and a pasta rake, mix the ingredients until well-distributed. Serve in heat pasta bowls along with the vegan parmesan.

Nutrition Facts
Nutrition (per serving): 397.4 calories; 14% calories from fat; 6.6g total fat; 0.0mg cholesterol; 658.4mg sodium; 592.3mg potassium; 69.1g carbohydrates; 7.0g fiber; 6.9g sugar; 62.1g net carbs; 17.1g protein.
With no olive oil, the Nutrition Stats are as follows: 367.6 calories; 7% calories from fat; 3.3g total fat; 0.0mg cholesterol; 658.3mg sodium; 592.3mg potassium; 69.1g carbohydrates; 7.0g fiber; 6.9g sugar; 62.1g net carbs; 17.1g protein.
Enjoy!


Thursday, November 21, 2013
HULI HULI SAUCE & BEAN-FLOUR-BASED GRAVIES + YOUR BROILER MAY BE A LOWFAT COOK'S BEST FRIEND
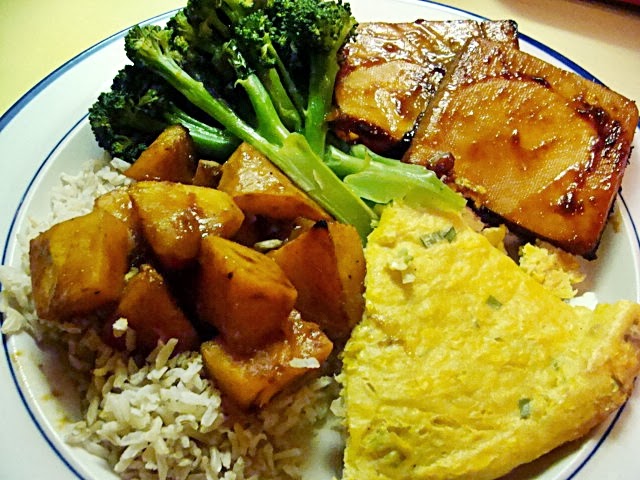 |
| A very easy and yummy low-fat vegan dinner: steamed broccoli, baked tofu with Huli Huli Sauce, Corn Pudding, brown basmati rice and roasted squash. |
HULI HULI SAUCE:
The first thing I need to post is the Huli Huli sauce. I posted the photo above on my Facebook page a couple of weeks ago and promised to post the recipe for the Huli Huli Sauce "soon". Well, I am finally getting around to it-- sorry to be so slow! Huli Huli Sauce is of Hawaiian origin and the "Huli Huli" part derives from the meaning, "to turn". The sauce was used on food turning on a spit-- hence, the name. Judging by the ingredients (which vary a little from version to version), the sauce has been a bit Americanized over the years, and the sauce is used as a type of barbecue sauce. This is my own particular version, which we think is quite yummy.
 |
| Baked tofu with Huli Huli Sauce (recipe below) |
BRYANNA'S VERSION OF HULI-HULI SAUCE
Servings: 4 Yield: about 1 cup
Use as a grilling, baking or BBQ sauce
1/4 cup water
1/4 cup brown sugar or coconut sugar
1/4 cup soy sauce (can be low-sodium)|
2 Tbs dry or medium sherry
2 Tbs ketchup (can be low-sodium)
2 tsp dark sesame oil
1 Tbs grated fresh ginger
a few shakes of hot sauce
a few shakes of liquid smoke
1 large clove garlic, crushed
Whisk together the ingredients. Marinate your tofu, seitan, Soy Curls, tempeh or whatever in the sauce for a while, if you have time. Then grill, bake (at about 450 °F), BBQ or broil your food until the sauce soaks in and your food has nicely browned. I didn't have time to marinate it, so I just baked thick firm tofu slices until they soaked up most of the sauce and browned a bit.
Nutrition Facts (sauce only):Nutrition (per 1/4 recipe): 100.6 calories; 19% calories from fat; 2.3g total fat; 0.0mg cholesterol; 539.1mg sodium; 128.1mg potassium; 17.9g carbohydrates; 0.3g fiber; 15.2g sugar; 17.6g net carbs; 1.0g protein; 2.2 points.
*******************
BEAN-FLOUR-BASED GRAVIES:I've been experimenting lately with using bean flours for thickening sauces, gravies and soups (more recipes to come). Using bean flours instead of white flour thickens mixtures such as this while adding fiber, protein and other nutrients to what might have been an almost empty calorie condiment. It's also handy for converting your sauces and gravies and cream soups to gluten-free and soy-free, and great for diabetics and those on low-glycemic and low-fat diets. The results have good depth of flavor and a lovely creaminess. So, far, I've only used chickpea flour and white bean flour, which are very versatile. You can substitute white bean flour measure-for-measure in place of white flour for thickening purposes. (Still checking chickpea flour sub amounts.)
 |
| Freshly-milled white bean flour from my new Wonder Mill-- you can also buy this flour in some natural food stores and online. Bob's Red Mill and Barry Farms are well known brands that carry it. I mill it from white navy beans, which are less expensive than the white kidney beans I usually use for cooking. |
 |
| Broiled Soy Curls, onions and mushrooms on toast with bean-based GF Rich Brown Yeast Gravy (from my book "World Vegan Feast", but recipe below) |
BRYANNA’S RICH BROWN YEAST GRAVY (GLUTEN-FREE, BEAN-BASED)
Makes 2 1/2 cups
This fat-free and delicious brown gravy will become a
low-fat staple. It lends itself to many variations!
1/3 cup nutritional yeast flakes
2 tablespoons oat flour (can be GF) (grind rolled or quick oats in a dry
blender or electric coffee/spice mill)
4 tablespoons chickpea flour (besan)
(OR use 1/3 cup white bean flour in place of the oat and chickpea flour)
(OR use 1/3 cup white bean flour in place of the oat and chickpea flour)
2 tablespoons soy sauce
2 1/2 cups water
1/2 teaspoon salt
Optional: several shakes of gravy browner, such as Kitchen Bouquet
In a 1 1/2 to 2 quart microwave-safe batter bowl or measuring
pitcher, mix the flours and yeast. Toast this in the microwave on full power
for 2 to 3 minutes, uncovered. Whisk in the water, soy sauce, salt, and gravy
browner, if using. Cover and cook on full power for 3 minutes. Whisk well. Cook
again for 3 minutes on full power. Whisk one last time.
Alternatively, in a heavy saucepan over high heat, whisk the
yeast and flours together until they smell toasty. Remove from the heat briefly
to whisk in the water, soy sauce, salt, and gravy browner, if using. Stir
constantly over high heat until it thickens and comes to a boil. Reduce the
heat and simmer for 2 to 5 minutes.
This gravy can be made ahead and reheated.
Nutrition (per 1/2-cup
serving): 26.6 calories; 13% calories from fat; 0.4g total fat; 0.0mg
cholesterol; 218.0mg sodium; 113.5mg potassium; 3.5g carbohydrates; 1.4g fiber;
0.3g sugar; 2.1g net carbs; 3.0g protein; 0.3 points.
 |
| Freshly-milled chickpea flour from my new Wonder Mill with an adapter for milling bean flours. If you don't have a mill, you can buy chickpea or garbanzo bean flour (or besan) in health food stores and Indian grocery stores, as well as online. |
My latest gravy recipe is a new bean-based version of my Southern-style biscuit gravy. You can bulk it up with Soy Curls (read about Soy Curls here) or other chicken subs, or vegan sausage, if you like. DH went crazy over it! (And, if you are counting calories, nix the biscuits and serve it on a steamed or baked potato, or whole grain toast or fat-free waffles.)
 |
| Creamy-smooth Vegan Southern-Style Bean-Based Biscuit Gravy (with Soy Curls) on a potato |

Printable Recipe
BRYANNA'S
VEGAN SOUTHERN-STYLE BEAN-BASED BISCUIT GRAVY
Servings:
6
Yield:
3 cups (without additions)
1/3 cup
white bean flour
1/4 cup
nutritional yeast flakes
1/2 tsp
salt
1 1/2 cups water
1 cup plain nondairy
milk
1/2 Tbs soy sauce
1/2 Tbs
"chicken-style" vegetarian broth powder or paste (you can use
a GF and/or SF version, if necessary), such as Better Than Bouillon No-Chicken Vegan Soup Base
2 tsp
dark sesame oil (Optional, but gives a smokey flavor)
freshly-ground black pepper
OPTIONAL: (any or all)
2 cups
reconstituted Soy Curls or other vegan chicken sub strips OR crumbled
vegan breakfast sausage (about 2 large links or 4 small), browned a bit under a
broiler
1/2 tsp
dried rubbed sage (not powdered)
1/2 tsp
dried thyme leaves (not powdered)
2
green onions, thinly sliced
 |
| Freshly-milled white bean flour |
Blend together all of the gravy
ingredients (EXCEPT optionals) until smooth.
Place in a heavy medium saucepan. Whisk over high heat until it starts to boil,
then reduce the heat to medium and whisk constantly for several minutes. Bean
flour takes a little longer than grain flour to cook through. Use taste and smell to discern whether or not
the gravy is finished. There should be no
“beany” taste or smell if it’s done.
 |
| Making the gravy |
If you are adding any of the optionals, do
so at this point, heat through and taste for seasoning. Serve hot over hot
split biscuits, toast, plain waffles, or potatoes.
 |
| The Gravy (with Soy Curls) on a potato; broiled leeks mixed with broth-sauteed broccoli with sundried tomatoes |
LAST, BUT NOT LEAST---BRING BACK THE BROILER!
I've been utilizing my oven's broiler ALOT these days, as we have been watching our calories. I spread veggies, or sliced tofu in a marinade, or reconstituted Soy Curls, etc. on a cookie sheet sprayed with a little oil from a pump sprayer, add any seasoning I might want, spray with a little oil from the pump sprayer again and place about 4-5 inches under the hot broiler. In just a few minutes they start to char a little and vegetables soften. I stir them around and cook for a few more minutes. In about 6 to 8 minutes, my food it cooked through and browned, with virtually no fat and not much effort.
Sometimes I use this method for a simple vegetable side dish an sometimes I use it as an alternate to stir-frying. I love doing leeks this way-- they get so soft and sweet and juicy. Give it a try!
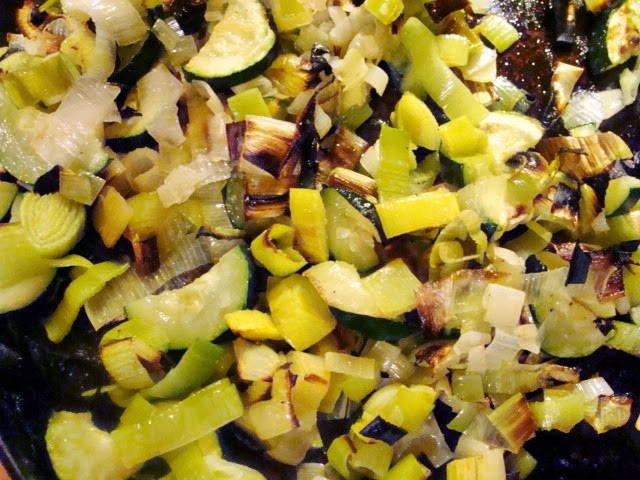 |
| Broiled leeks and zucchini |
 |
| Broiled Soy Curls, mushrooms and onions, ready to be topped with Rich Brown Gravy. |
 |
| Broiled leeks |
Enjoy!
Wednesday, November 6, 2013
CHICKPEA FLOUR HUMMUS, & RADIATORE WITH SNAP PEAS & HUMMUS PESTO SAUCE
NOTE: YOU DO NOT NEED A MILL TO MAKE THESE RECIPES! YOU CAN USE PURCHASED CHICKPEA FLOUR.


Frankly, it sounded yucky to me! But, I looked it up on the Internet and there were quite a few recipes and some good reviews (not all, but I'll get to that later), so I figured it was worth a try. But first I wanted to grind some chickpea flour and see what it was like. I was told in the video that John provides online to use the "coarse" setting, which seems odd at first because you want the flour to be fine. (NOTE: this video was made before he developed the Bean Adapter I have-- he is using a prototype made with a small plastic cup, but the idea and the method is the same.) But, I followed the directions and was rewarded with this lovely powdery-fine flour:

In the recipes for chickpea flour hummus I read online, several bloggers complained about whisking the flour into the hot water-- it got lumpy and hard to stir. It also seemed to take quite a long time to cook- about 15 minutes. Not great for a recipe that is supposed to save time. I had some ideas for remedying both problems, but you'll see what I did in the recipe. Other bloggers seemed to have problems with it being too thick, even solid. I like my hummus very creamy-smooth, NOT thick and pasty, so I knew I'd have to work on that.
And then there was the taste. I wasn't sure what to expect, but I knew what I wanted. Using my No Oil Hummus recipe (it does contain tahini) as a guide (but not sure of amounts), I achieved what I had in mind in two tries-- not bad! I ended up needing to use a little more tahini, lemon juice and seasonings than in my recipe using whole cooked chickpeas.
I think this stream-lined recipe is excellent (and one I will be repeating often), but you might be asking, "Why use chickpea flour-- why not just use chickpeas, as usual?" I think the concept came from food storage circles-- a way to use dried beans with less cooking time and water, perhaps. And, of course, even if you aren't into emergency preparedness food storage, you might like to save water and energy (the fuel kind, I mean!) But, for the average person, I think it's just another handy option if you want hummus, but you don't have any canned chickpeas/garbanzo beans in the house and you don't have time to cook them, you don't have a pressure cooker, etc.. (And, believe me, no store-bought hummus is as good as homemade!)
Of course, you don't have to grind your own chickpea flour (though a mill is worth saving up for if you use different types of flours and eat lots of whole grains and legumes, and it will save you money in the long run). You can keep a bag of chickpea/garbanzo bean flour (also called besan), double-bagged, in your freezer (to prevent rancidity) for just this sort of recipe.

The second recipe below was a spur-of-the-moment lunch that I made with some of the first batch of Chickpea Flour Hummus I made. I felt like making a quick pasta dish with some snap peas and other vegetables I had around. I was about to make a creamy pasta sauce with some homemade pesto and silken tofu when it occurred to me that the garlicky, lemony creamy pesto sauce I had in mind could be made with some of the smooth and creamy hummus that I had just made with chickpea flour. After all, I had made creamy sauces from cooked beans before, hadn't I? So, that's what I did and it was delicious! In fact, it gave me some ideas for making more sauces with bean flour, so stay tuned.
So, here's my new Hummus recipe..

Printable Recipe
BRYANNA'S SMOOTH AND CREAMY CHICKPEA FLOUR HUMMUS
Makes about 2 1/2 cups
The seasonings in this recipe are my preference-- you can play around with them to suit your own taste.
2 3/4 cups cold water
3/4 cup chickpea/garbanzo flour (besan), freshly-ground or commercial
NOTE: Store chickpea/garbanzo bean flour (also called besan), double-bagged, in your freezer to keep it fresh.
5 Tbsp fresh lemon juice (or bottled organic)
1/4 cup tahini
2-3 large cloves garlic, peeled1 1/2 tsp fine salt
3/4 tsp ground cumin
large pinch cayenne
Possible Garnishes:extra-virgin olive oil to drizzle over the top
paprika or smoked paprika (hot or sweet)
chopped fresh parsley or parsley sprigs
chopped green onions
toasted pine nuts or almonds
grated organic lemon zest
See this post for Hummus flavor variations, using slightly larger amounts than those given

Place the water and chickpea flour into your blender container and blend at medium-high speed until well- blended. Pour into a microwave-proof 2 qt. batter bowl or something similar. Microwave at 100% power for 3 minutes. Using a large whisk, whisk vigorously to make a smooth mixture. Microwave for another 3 minutes at 100% power and repeat whisking. Microwave for 2 minutes at 50% power and whisk again. NOTE: If you don't have a microwave, you will have to cook the blended mixture in a heavy saucepan over medium heat until it has thickened, whisking all the time so that it doesn't stick or clump. This may take up to 15 minutes. (Afraid of microwave ovens? Please read this document I have compiled.)
The mixture will foam up while it cooks in the microwave and then "deflate". You can see in the picture below how the mixture rose up the sides and then down again.

Scoop the mixture into a shallow bowl or baking dish. If you aren't in a hurry, place it in the refrigerator until it has cooled and is a rather solid mass. To speed up this process, place your dish in the freezer. This took about 45 minutes cooling time for me. Make sure the mixture is a cool solid mass and not runny and warm.
Now, break up the chickpea flour mixture and place it in a blender or food processor, along with lemon juice, tahini, garlic, cumin and cayenne. Blend or process until the mixture is very smooth and creamy. Place in a bowl and cool down to room temperature before serving, or refrigerate for future use.
IMPORTANT: The mixture will firm up a bit, so, before spreading it in a shallow serving bowl (like a soup plate) for serving, whisk it vigorously to make it creamy again.
Nutrition Facts:
Nutrition (per 1/4 cup serving): 52.8 calories; 45% calories from fat; 2.8g total fat; 0.0mg cholesterol; 243.8mg sodium; 79.6mg potassium; 5.2g carbohydrates; 1.1g fiber; 0.8g sugar; 4.1g net carbs; 2.2g protein; 1.1 points.
*******************************************************
And here's that pasta recipe featuring the Hummus Pesto Sauce...

BRYANNA'S SUPER-QUICK RADIATORE WITH SNAP PEAS, SPINACH, GRAPE TOMATO AND CREAMY HUMMUS PESTO SAUCE
Serves 5
The lemony flavor of the hummus added an extra accent to the simple garlicky pesto sauce.
3/4 lb (12 oz.) dry radiatore pasta (or you could use penne, gemelli, fusilli, etc., instead)
8 oz. snap peas, cut into about 3/4-inch pieces (I used kitchen scissors for this)
4 oz. frozen spinach, thawed, squeezed and fluffed
about 12 grape tomatoes, cut in half lengthwise
Sauce:
1 1/2 cups hummus
1 cup of the hot pasta cooking water
1/4 cup pesto (use homemade or commercial vegan pesto)
Serve with:
freshly-ground black pepper
vegan parmesan, soy based, nut based or homemade
Bring a large pot of salted water to a boil and add the pasta. Cook for about 9 minutes, then add the peas and cook for another 3 or 4 minutes. Drain in a colander placed in a large bowl to catch the cooking water, which you should save. Return the drained pasta and peas to the cooking pot, add the spinach and tomatoes, toss together and cover.
Whisk together the sauce ingredients. It should not be too thick. Pour the sauce into the pot with the pasta and vegetables, toss well and serve immediately.
| Nutrition Facts |
| Nutrition (per serving): 361.1 calories; 11% calories from fat; 4.9g total fat; 0.0mg cholesterol; 388.1mg sodium; 502.5mg potassium; 64.3g carbohydrates; 5.5g fiber; 3.0g sugar; 58.8g net carbs; 14.8g protein; 6.8 points. |
Enjoy!
Thursday, May 10, 2007
LIGHT, TENDER 100% WHOLEWHEAT BREAD IN YOUR BREAD MACHINE
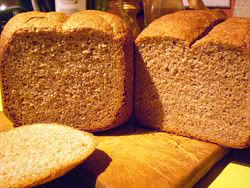
The two recipes below; sourdough loaf on the left, yeast sponge loaf on the right.

If you're in the Portland area this weekend, come to Veg Fest and introduce yourself! I'll be doing a demo with author Julie Hasson at 10:30 AM on Saturday.
 Julie Hasson
Now, onto bread!
When I did my post on grinding my own wholewheat flour with the Wondermill and making a light loaf of 100% wholewheat bread with it, a reader asked me if that recipe would work in a bread machine.
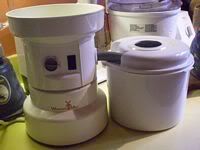
The Wondermill
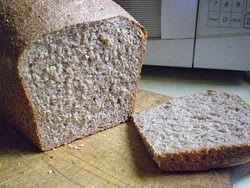 My oven-baked 100% wholewheat bread
Well, I finally tried it and it was a disaster-- well, it actually tasted pretty good and I used it for toast, but it fell in the middle and it was kind of coarse and very dark in color. Obviously, that recipe is best made the old-fashioned way!
I decided to stick with a tried-and-true wholewheat loaf with more potato in it than in my oven recipe. Potato is a great lightener-upper of wholegrain breads! I also used the sponge method-- which is basically leaving the liquid, yeast and half the flour (a batter) to rise for several hours before adding the remaining ingredients and turning on the machine cycle. One recipe uses a yeast sponge and the other a sourdough sponge. Otherwise they are pretty much the same.
Why bother with this extra step?
It's all about umami, the "fifth flavor", the "essence of deliciousness". It turns out that bland old wheat gluten contains umami compounds.
Mushrooms and fungi are a great source of synergizing umami. Yeasts (both active, and non-active nutritional yeast and yeast extract, such as Marmite), which is also a fungi (and this includes sourdough, a natural yeast) , have umami compounds. They also act as synergizers. For instance, in a live yeast or sourdough starter, the enzymic action develops the umami in wheat flour to "ripen" the dough and develop its flavor.
Now this brings me to a favorite hobbyhorse-- I've been writing for years that fast-risen breads seem tasteless, and most bread machine breads have a "homogenized" flavor no matter what you put into them. I knew that this was due to the lack of rising time, which develops enzymes and "ripens" the dough and improves the crust. I've been telling people for a long time to try making their bread machine breads with an overnight sponge, or the addition of sourdough starter. But I had no idea that it was umami at work!
So, I give you here two versions of a bread that I have been making for years and which I re-vamped for the bread machine. They both come out nicely-shaped, light and tender, AND with excellent crumb, crust and flavor!
NOTE ABOUT FLOUR: Canadian flour is higher in gluten (protein) than US flour, so Canadians can use ordinary wholewheat flour. Americans might want to use wholewheat bread flour.
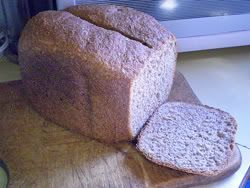
Printable Recipe
BRYANNA'S VERY LIGHT, MOIST BASIC 100% WHOLEWHEAT ABM BREAD (SPONGE METHOD)
This is an adaptation of a recipe I have made in the oven for years. This recipe makes a tender, light wholewheat bread. You can use this as a base for all sorts of variations. NUTRITIONAL ANALYSIS done using water, 2 T. sugar, no soymilk or soy protein.
I make the sponge just before I go to bed at night, and add the other ingredients first thing in the morning and start the machine.
Sponge:
1 cup warm water
1 cup wholewheat flour (can be white wholewheat flour)
1/2 tsp dry active baking yeast (or 1/3 tsp instant yeast)
Finishing Bread:
3/4 cup mashed russet potato (plain, no milk or salt)
Time-saver: use 3/4 c. instant mashed potato flakes mixed with 1/2 c. boiling water instead of cooked potato.
1-2 Tbs sugar
2 Tbs oil
OPTIONAL: 1 T. soy flour or soymilk powder
1/2 Tbs salt
2 cup whole wheat flour (can be white wholewheat flour)
1/2 tsp dry active baking yeast (or 1/3 tsp instant yeast)
Sponge: (Mix this 4-8 hours before you start the bread machine cycle-- you can do it before you go to bed at night.)
Mix in the bread machine container (this is the one I have) the water 1 cup flour, and 1/2 tsp. yeast on the dough cycle for 5-10 minutes, then unplug. Cover the container with plastic wrap and let it rise.
After the sponge has risen (4-8 hours), add the mashed potato, sugar, oil, salt, flour and the remaining yeast, in that order.
Set on the Basic Cycle. Check the dough during the first knead to make sure that it is neither too dry, not too wet. If it's too dry, add water by the tablespoonful, letting it knead in, until it looks right. (I often have to add 1 T. or so-it kind of depends on how dry the potatoes are.) If it's too wet, do the same with flour. This is a wet dough but still rises well. It's fine as long as it kneads well, even if it looks a little sticky.
If you want a more attractive top crust to the bread, 5 minutes before the bread is due to bake (I set my kitchen timer to remind me of this), you can make a decorative slash in the top of the bread with a razor blade, and you can also glaze the bread with some soymilk, using a pastry brush, or sprinkle the top with some flour.
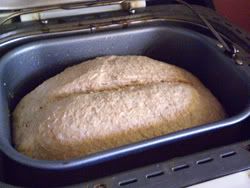
Cover the "window" in the top of your machine with foil, so that the top of the bread will brown properly. Remove the bread immediately from the machine when done, placing on a rack to cool thoroughly. This will insure a crisp crust.
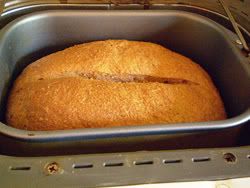
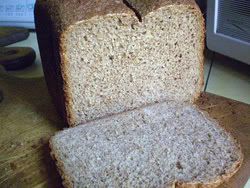
Yield: 1 3/4 lb. loaf (10 large slices)
Nutrition Facts
Nutrition (per 1/2 slice): 103.9 calories; 14% calories from fat; 1.7g total fat; 0.0mg cholesterol; 175.5mg sodium; 129.7mg potassium; 20.2g carbohydrates; 2.8g fiber; 1.0g sugar; 17.4g net carbs; 3.2g protein; 1.7 points.
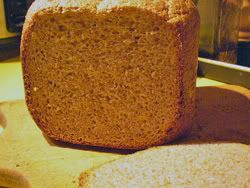
Printable Recipe
BRYANNA'S VERY LIGHT, MOIST BASIC 100% WHOLEWHEAT ABM BREAD (with sourdough starter and yeast)
This is almost the same as the wholewheat sponge bread above, but with a wholewheat sourdough starter used as well as the yeast. I think it is a bit superior, but they are both good! NUTRITIONAL ANALYSIS done using water, 2 T. sugar, no soymilk or soy protein.
1/2 cup plus 1 T. water, potato water or nondairy milk (make it hot if the sourdough starter is cold out of the fridge)
1 cup bubbly, fresh wholewheat sourdough starter (see Notes below)
3/4 cup mashed russet potato (plain, no milk or salt)
Time-saver:use 3/4 c. instant mashed potato flakes (you can buy organic ones) mixed with 1/2 c. boiling water instead of cooked potato.
1-2 Tbs sugar or other sweetener
2 Tbs oil
OPTIONAL: 1 T. soy flour or soymilk powder
1/2 Tbs salt
2 2/3 cups wholewheat flour (can be white wholewheat flour)
1 tsp dry active baking yeast (or 3/4 tsp instant yeast)
Set your machine (this is the one I have) on the Basic Cycle. Check the dough during the first knead to make sure that it is neither too dry, not too wet. If it's too dry, add water by the tablespoonful, letting it knead in, until it looks right. If it's too wet, do the same with flour. This is a wet dough but still rises well. It's fine as long as it kneads well, even if it looks a little sticky.
If you want a more attractive top crust to the bread, 5 minutes before the bread is due to bake (I set my kitchen timer to remind me of this), you can make a decorative slash in the top of the bread with a razor blade, and you can also glaze the bread with some soymilk, using a pastry brush, or sprinkle the top with some flour.
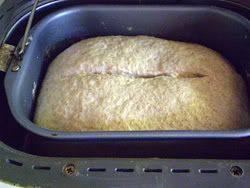
Cover the "window" in the top of your machine with foil, so that the top of the bread will brown properly. Remove the bread immediately from the machine when done, placing on a rack to cool thoroughly. This will insure a crisp crust.
Yield: 1 and 3/4 lb. loaf; 10 large slices
Nutrition Facts
Nutrition (per 1/2 slice): 107.1 calories; 14% calories from fat; 1.7g total fat; 0.0mg cholesterol; 175.3mg sodium; 123.9mg potassium; 20.9g carbohydrates; 2.6g fiber; 1.6g sugar; 18.4g net carbs; 3.1g protein; 1.8 points.
SOURDOUGH STARTER: If you already have a white sourdough starter, use 1/4 cup of it to make a wholewheat starter. You can get a very good free starter online here: Oregon Trail Sourdough Starter. I have been using this one for several years. You can also email me for my vegan yogurt-based sourdough starter instructions. Refresh the starter before using it in this bread-- it has to be fresh and bubbly!
Enjoy!

Subscribe to:
Posts (Atom)