Showing posts with label whole wheat bread. Show all posts
Showing posts with label whole wheat bread. Show all posts
Tuesday, January 20, 2015
MY RECIPE FOR SPROUTED WHEAT BREAD (WITH MINIMAL FLOUR)


UPDATE Nov. 2017: Are you gluten-intolerant or do you have IBS? There is research showing that you may be able to tolerate grains with gluten if they are sprouted or risen with natural fermentation, such as sourdough. (PS: Using sourdough starter in this bread recipe would require some experimentation because so little liquid is used in this dough.)
Sprouted wheat flour can be used in place of ordinary wheat flour in this recipe and the bread would still be inexpensive, since so little is used. You could even make your own sprouted wheat flour, if you are so inclined, directions here: http://www.theprairiehomestead.com/2011/01/making-sprouted-flour.html
RECIPE UPDATED ON JAN. 23, 2015-- I added some photos and a few extra notes and corrected the size of the bread pans I use and the amount of water used in the recipe. Sorry about that-- should not write recipes when I'm sick!
I'm sorry it's taken so long to get this post (or any post!) up-- I've been sick with the flu. But, at last I'm finishing this post on how to make a delicious sprouted wheat bread (with minimal flour) that is not heavy, flat and/or overly moist, that has the texture and appearance of a good whole wheat loaf.
I started this journey because I was interested in making a bread with a lower glycemic index rating. I discovered that: "Since particle size influences the glycemic index (the smaller the size the higher the glycemic index), bread made from grain kernels have been shown to be lower GI. Not yet tested but probable, bread made from sprouted grains can be expected to have a similar effect." From http://tinyurl.com/ywve7 (And evidently, sourdough breads are lower on the glycemic index, too.) Eating lower on the glycemic index may have a positive influence on my husband's triglyceride levels, so we (both being bread bakers) thought it was worth some experimentation.
Many bakers are experimenting with sprouted wheat flour, but I prefer not to buy it-- it's very expensive, and it's time-consuming to make (you must sprout the grain, then dry it thoroughly, and then grind it-- which is why it is expensive to buy). We grind our whole wheat flour, so we have lots of wheat kernels in the house at all times. So, the most practical solution seemed to be to experiment with the sprouted wheat itself. But I was aiming for a lighter loaf than most the sprouted wheat breads I'd seen, one with minimal flour, and one which did not need the addition of vital wheat gluten powder in order to rise (not that I object to it-- I use it to make seitan-- but I think it makes breads too chewy.)
My first experiment, using an adapted version of a recipe from "The Laurel's Kitchen Bread Book: A Guide to Whole Grain Breadmaking" was a success-- the dough was easy to handle and rose beautifully, baked up nice and crusty. I used my husband's signature baking method-- 5 minutes at 485°F. and 25 more at 375°F-- and the bread tasted great, smelled heavenly (kind of nutty), and the crumb is lovely. It made delicious toast!
But what was NOT so positive with my first batch was that when I removed the initial ground sprout mixture from the food processor and the kneaded dough from the mixer bowl, I was left with a thin coating of sticky dough that stuck like glue, particularly to the blade (inside and out) of the processor. After soaking everything in warm water for a while, it took me about 20 minutes of scrubbing to clean everything, and the sponge had to go into the garbage can. But I let the dough rise in an oiled bowl and that bowl was easy to clean (thank goodness!). When I cut and rolled the dough and shaped the loaves, I oiled my hands and had no problem with sticking. So, the next time, as I outlined in the final recipe, I oiled everything the dough was going to touch, and it went smoothly (not to make a pun). Don't worry-- after kneading, the dough not so sticky and should feel like an ordinary bread dough.
So, here's the final recipe. I hope it works as well for you as it has for us. It's truly delicious and I have some more wheat kernels soaking right now for the next batch.

So, here's the final recipe. I hope it works as well for you as it has for us. It's truly delicious and I have some more wheat kernels soaking right now for the next batch.
BRYANNA'S
SPROUTED WHEAT BREAD (WITH MINIMAL FLOUR)
Yield:
3 loaves
You will need a large food processor to grind the soaked
wheat kernels, a large colander, a large bowl for rising the dough, and, if you
prefer not to hand-knead, a sturdy stand mixer than can knead 3-4 loaves-worth
of whole grain dough. You will also need three 8 x 4.5-inch loaf pans. (We use these pans-- they are excellent and long-lasting and only need greasing once in a while.)
6 cups hard red wheat kernels
1/4 cup warm water
2 teaspoons instant baking yeast
1/3 cup (packed) brown sugar, Sucanat or
coconut sugar
3 1/2 teaspoons salt
3 cups whole wheat flour OR sprouted whole wheat flour
(NOTE: You can even make your own sprouted wheat flour, if you are so inclined:
http://www.theprairiehomestead.com/2011/01/making-sprouted-flour.html )
(NOTE: You can even make your own sprouted wheat flour, if you are so inclined:
http://www.theprairiehomestead.com/2011/01/making-sprouted-flour.html )
Optional:
3 tablespoons oil (this addition does help keep the bread moist for a longer time)
1 In a large bowl,
cover the wheat kernels (by several inches) with warm water. Cover the bowl and
let stand in a warm place (such as in the oven—turned off-- with the light on).
Depending on the warmth in house, you may
have to let the wheat soak for up to 3 whole days (which is what it takes me, usually), rinsing and changing the water twice a day.
IMPORTANT: You don't want the wheat to sprout more than a tiny fraction-- just so you see the white sprout emerging. In my experience, some of the wheat may not sprout at all, but it still works just fine for this recipe. NOTE: If the water smells a bit fermented and gets a little frothy on top, the temperature where you are sprouting the wheat is too warm! Thoroughly rinse the wheat in cold water, add new water and continue in a cooler place. If you can't use the sprouts right away, rinse them, then store in a covered container in the refrigerator (for only a day or two) until you can make the bread. Rinse them with warm water and drain for 30 minutes before using.
IMPORTANT: You don't want the wheat to sprout more than a tiny fraction-- just so you see the white sprout emerging. In my experience, some of the wheat may not sprout at all, but it still works just fine for this recipe. NOTE: If the water smells a bit fermented and gets a little frothy on top, the temperature where you are sprouting the wheat is too warm! Thoroughly rinse the wheat in cold water, add new water and continue in a cooler place. If you can't use the sprouts right away, rinse them, then store in a covered container in the refrigerator (for only a day or two) until you can make the bread. Rinse them with warm water and drain for 30 minutes before using.
ALSO IMPORTANT: If the wheat sprouts more than a tiny bit, the diastatic enzymes develop and make the bread dough very gooey and hard to bake.
3 When you are ready to make the dough, drain the wheat in a large colander and let drain for about 1/2 an hour.
4 Meanwhile, thoroughly oil ALL of the equipment that the dough will touch-- all of the inside of the food processor bowl and the inside of the lid, the blade, the inside of the blade, and the spindle for the blade; and then the inside of your mixer bowl, the inside of the mixer lid, and the dough hook. Also oil the inside of the bowl you will use for rising the dough. This is VERY important. If you neglect the oiling procedure, the un-kneaded dough will stick like glue to everything it touches!
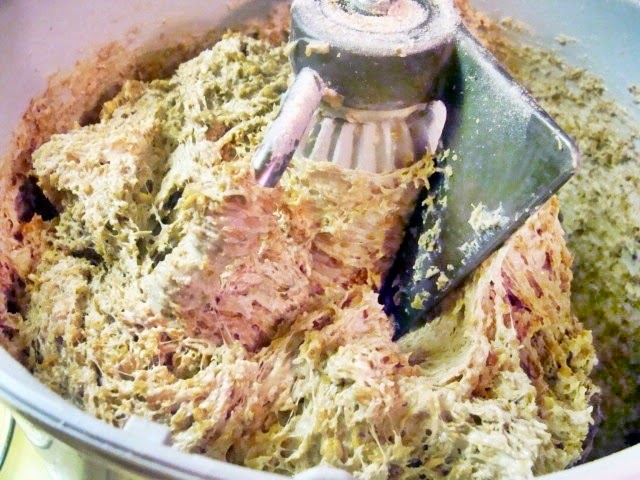
5 Grind the drained wheat kernels in the oiled food processor in 2 or 3 batches, depending on the size of your machine. Grind the kernels until they form a dough on the top of the blade. You will see the bran in the dough, by the way. Deposit each batch of dough into a large oiled bowl or the oiled bowl of the stand mixer you are using.

6 Soften the yeast in
the warm water for a few minutes and scoop it into the dough (along with the
optional oil, if you are using it). In a small dry mixing bowl, stir together 1
cup of the whole wheat flour, the sugar and salt. Add this mixture to the dough
and begin kneading, by machine or with your hands on an oiled counter, or right
in a large oiled bowl. Add the remaining flour as the kneading proceeds. You
should use the entire 3 cups in order for the bread to rise nicely. This has
worked for me with no adjustments after draining the wheat for about 30 minutes, but if you drain the wheat for a longer time, you may have to add a bit of water until the dough feels right. You do not want the dough to be very dry or
stiff. Knead the dough for about 10 minutes. It should feel like a
normal, springy whole grain yeast dough. If you knead by hand, oil your hands
and the kneading surface, rather than flouring them, so that the dough remains moist
and springy.


8 The dough should double in size and be springy. To test for whether or not it has sufficiently risen, poke your finger into the dough and, if the hole does not start filling in, it’s ready. If you would like to rise it once again before forming the loaves, punch it down and let it rise again for about 1 hour.

9 On an oiled surface, with oiled hands, divide the dough into three equal pieces. You want each loaf to weigh approximately 1 lb. 12 oz., no more. You may have some extra dough left over, which you could shape into small buns, a little baby loaf, to or make into tortilla-like flatbreads, if you like.
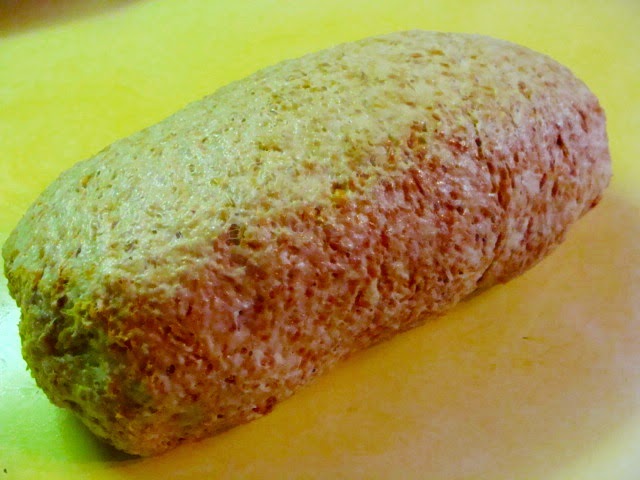
Pat each piece of dough into a rough rectangle and roll it up from one of the short sides. Pinch dough on the “seam”.


Place
each loaf into greased or nonstick 8 x 4.5-inch loaf pan, press it down so
that the top is even.


Cover the loaves with clean, warm, wet tea towels (non-textured), or canvas; OR place them inside of a new plastic bag that is big enough to puff up over and around the loaves, without touching the dough. Secure it in place with a twist-tie. Rise the loaves in a warm place for about another hour or so, checking after half an hour and every 10 minutes or so after that.
10 After 30 minutes rising, turn on your oven on to 485°F.

11 When the loaves have risen over the tops of the pans (see picture above), slash the top as pictured with a sharp serrated knife or a blade, squirt the tops with water from a spray bottle. Place the loaves on a rack in the middle of the preheated oven and bake for 5 minutes. Turn the oven down to 385°F and back for 25 minutes, or until the loaves are golden brown and crusty.
12 Remove from the pans and cool thoroughly on racks.


Nutrition Facts
Nutrition
(per slice [16 per loaf]): 110.1 calories; 4%
calories from fat; 0.6g total fat; 0.0mg cholesterol; 138.5mg sodium; 117.2mg
potassium; 23.2g carbohydrates; 3.8g fiber; 1.6g sugar; 19.4g net carbs; 4.7g
protein.
Nutrition
Facts with Optional Oil:
Nutrition
(per slice [16 per loaf]): 117.5 calories; 10%
calories from fat; 1.4g total fat; 0.0mg cholesterol; 138.6mg sodium; 117.2mg
potassium; 23.2g carbohydrates; 3.8g fiber; 1.6g sugar; 19.4g net carbs; 4.7g
protein.Happy Baking!


Friday, January 21, 2011
NEW NO-KNEAD VERSION OF MY MOIST 100% WHOLE WHEAT SANDWICH BREAD (FLAX SEED OPTIONAL)

I haven't been cooking much beyond soup, veggie sausages, and pasta these days, due to our situation, but earlier this week I decided to experiment with converting my 100% whole wheat sandwich bread to the no-knead technique, to make it easier and more flexible for busy home bakers. Not everyone wants the crusty bread that the no-knead technique is so great for-- sometimes you want a softer bread, or sometimes you don't want to bother with baking on hot baking stones or in hot pots!

I tried it one time with too much water in it and it was tasty, but too heavy. So, the other day, I cut back on the water and it was just great! If you prefer 100% whole wheat, but you want a less crusty, softer version, I think you'll enjoy this simple bread for toast and sandwiches. We mill our own flour with the wonderful WonderMill, BTW!

Printable Recipe
BRYANNA'S NO-KNEAD BASIC TENDER 100% WHOLEWHEAT BREAD
Yield: 2 loaves
Yield: 2 loaves
(You can double this recipe to make 4 loaves, but DO NOT double the yeast! If you halve the recipe to make only one loaf, use only 1 teaspoon of dry active baking yeast or 3/4 teaspoon instant yeast)
IMPORTANT NOTE! Before making this recipe, get an inexpensive oven thermometer and test the heat of your oven. Many ovens are as much as 100° off, even new ones! If it is seriously off, have it calibrated by someone from a company that sells and fixes stoves and ovens. Otherwise, you may have to adjust the temperature up or down when you bake.
3 1/2 cups very warm potato cooking water
OR use warm water water plus 1/4 cup instant potato flakes
1 Tbs sweetener of choice (I use organic sugar )
)
1 1/2 tsp. (1/2 Tbs.) dry active baking yeast (please DO NOT increase this amount!) OR 1 tsp. instant yeast
1/4 cup ground flax (optional) (use golden flax , if you like)
1 Tbs sea salt (please DO NOT reduce this amount or leave out-- salt is important to regulate rising, as well as for taste)
2 Tbs oil (I use olive)
7 cups whole wheat flour (Canadian all-purpose whole wheat flour has a higher gluten content than US; use bread flour in the US; use hard white whole wheat flour
 if you like) (If you grind your own, 4 1/2 cups hard wheat kernels [red
 or white
 varieties] will mill into just about this amount of flour)
OPTIONAL: raw sesame seeds to sprinkle on the bottom of the pan
NOTE: Why use potato water? Well, for one thing, it's a good use of water from cooking potatoes. But, seriously, the potato seems to help make 100% whole wheat bread nice and light-- I'm not sure why.
TO MAKE THE BREAD:
Dissolve the yeast in the potato water or water with potato flakes, along with the sweetener in a large bowl. When bubbly, mix with the remaining ingredients and then stir in the flour, using a Danish dough whisk or a heavy wooden spoon. The dough will be soft and rough looking-- don't worry!
IMPORTANT NOTE! Before making this recipe, get an inexpensive oven thermometer and test the heat of your oven. Many ovens are as much as 100° off, even new ones! If it is seriously off, have it calibrated by someone from a company that sells and fixes stoves and ovens. Otherwise, you may have to adjust the temperature up or down when you bake.
3 1/2 cups very warm potato cooking water
OR use warm water water plus 1/4 cup instant potato flakes
1 Tbs sweetener of choice (I use organic sugar
)1 1/2 tsp. (1/2 Tbs.) dry active baking yeast
(please DO NOT increase this amount!) OR 1 tsp. instant yeast1/4 cup ground flax (optional) (use golden flax
, if you like)1 Tbs sea salt (please DO NOT reduce this amount or leave out-- salt is important to regulate rising, as well as for taste)
2 Tbs oil (I use olive)
7 cups whole wheat flour (Canadian all-purpose whole wheat flour has a higher gluten content than US; use bread flour
in the US; use hard white whole wheat flour if you like) (If you grind your own, 4 1/2 cups hard wheat kernels [red or white varieties] will mill into just about this amount of flour)OPTIONAL: raw sesame seeds to sprinkle on the bottom of the pan
NOTE: Why use potato water? Well, for one thing, it's a good use of water from cooking potatoes. But, seriously, the potato seems to help make 100% whole wheat bread nice and light-- I'm not sure why.
TO MAKE THE BREAD:
Dissolve the yeast in the potato water or water with potato flakes, along with the sweetener in a large bowl. When bubbly, mix with the remaining ingredients and then stir in the flour, using a Danish dough whisk
or a heavy wooden spoon. The dough will be soft and rough looking-- don't worry!
Cover the bowl with a disposable clear plastic shower cap (TIP: I get a pack of 8 of these for $1 at my local dollar store—very useful for covering bowls in the fridge, etc.), a snap-lid or plastic wrap (or place the whole bowl inside of a new small white bin-liner-bag and twist-tie it, leaving room for rising), and let rise AT LEAST until it rises and collapse (2-3 hours), but preferably for about 12 hours on the counter at normal room temperature. (I think the longer rise makes for better flavor and texture.)
You can place the dough in the pans right away, if you like, but it’s easier to handle when it’s cold, so you can place the covered bowl (let the gas out if you use a snap-lid) in the refrigerator for up to a week or so. (When I made this batch, it was only refrigerated for about 1 1/2 days.)
Either way, when you're ready to bake, shape the dough into 2 loaves (they will look a bit loose and sloppy, but not to worry!) and place in greased 8-8 1/2" x 4 1/2" loaf pans . (If you like, sprinkle the bottoms of the pan first with a few raw sesame seeds. My husband always does this and it lends a little extra something to the flavor!) Pat down on the top of the loaves with a wet hand to make the surface even.
Cover the loaves loosely (you can place the pans inside of a new small white bin-liner-bag and twist-tie it, leaving room for rising, or use the plastic shower caps) and let the COLD loaves rise about 2 hours, or the un-refrigerated dough rise for about 40 minutes, or to the top of the pans or slightly rounded over the tops of the pans.
Either way, when you're ready to bake, shape the dough into 2 loaves (they will look a bit loose and sloppy, but not to worry!) and place in greased 8-8 1/2" x 4 1/2" loaf pans
. (If you like, sprinkle the bottoms of the pan first with a few raw sesame seeds. My husband always does this and it lends a little extra something to the flavor!) Pat down on the top of the loaves with a wet hand to make the surface even.Cover the loaves loosely (you can place the pans inside of a new small white bin-liner-bag and twist-tie it, leaving room for rising, or use the plastic shower caps) and let the COLD loaves rise about 2 hours, or the un-refrigerated dough rise for about 40 minutes, or to the top of the pans or slightly rounded over the tops of the pans.
If you want to try using my husband's unique baking technique, which makes a moist bread with a nice crust, preheat oven to 480 degrees F with convection, 500 degrees F without convection. If you can’t be bothered changing the temperature during baking, just heat it to 375ºF!
Using my husband’s technique: just before baking, spray the loaves with water from a pump-sprayer (this helps you get a nice "oven-spring"). Place the loaves in the middle of the oven, and bake for 5 minutes. IMMEDIATELY LOWER HEAT TO 400 degrees F with convection, 410 degrees without (if you are baking 4 loaves at once, make the temperature 410 degrees F with convection, 425 degrees without), and bake for about 20-25 minutes, or until golden brown.
If you are using the usual baking technique: Bake at 375ºF for 30-40 minutes, or until golden-brown.
TIP: Either way, if your oven heat is uneven, switch the loaves around to different positions after the first 10 minutes at the lower temperature. Remove the loaves from pans immediately and cool on racks before slicing.
TIP If you like a shinier crust, rub the top of the loaves with a little vegan vegan butter.
TIP: Either way, if your oven heat is uneven, switch the loaves around to different positions after the first 10 minutes at the lower temperature. Remove the loaves from pans immediately and cool on racks before slicing.
TIP If you like a shinier crust, rub the top of the loaves with a little vegan vegan butter.
Turn the loaves out onto racks to cool thoroughly (loosen the sides with a table knife, if necessary).
Enjoy!

Enjoy!

Thursday, January 14, 2010
FINALLY! NO-KNEAD, CRUSTY ALMOST-ALL WHOLE WHEAT ARTISAN BREAD BAKED IN A POT!
UPDATE: THIS DOUGH ALSO MAKES GREAT PIZZA!See the pizza photo at the end of this post.
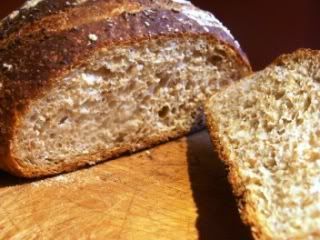
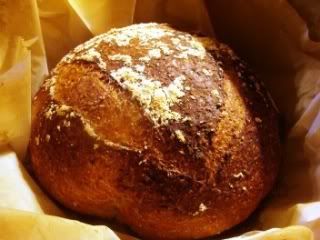
Over the last few months, in between other projects, I have been trying to make a whole wheat, crusty, no-knead artisan loaf that I can be really proud of (like my "whiter version", which is only about 1/3rd whole wheat.) I'm not saying that this is the final version, but I think it's pretty darn close! (Read more about the no-knead bread process and why it's so good here and here.)
As with my other recipe, I borrowed ideas and advice from a number of experts (see the text at the beginning of the recipe below), combined with my own tastes and experience. I don't know if it is possible to make a really tempting whole wheat version of this type of bread solely with whole wheat flour. My early attempts were "grassy"-tasting and heavy. So, I used the proportions in Jeff Hertzberg's and Zoë François' recipe for "five-minute" no-knead, refrigerated for whole grain bread, with a few additions and changes.
The proportions are slightly more than 3/4 whole wheat flour to slightly less than 1/4 unbleached white flour-- not bad! The authors explained that "In order to mix up dough that’s really high in whole grains, but can still be successfully stored, you need to boost the dough’s gluten level. Otherwise, the bread won’t rise nicely and will be too dense..." This made sense, even though I've always disliked the breads I'd tried with added gluten (they seemed to have a "tough" quality). But it worked with this very wet dough! I used a little less gluten this time, because it still seemed a bit tough the first time I tried it. However, this may be explained by the higher gluten content in Canadian flour, so you can try it both ways if you live in the USA.
I took master baker Peter Reinhart's advice and added a little organic sugar (to counteract the "bitter tones of the whole wheat flour") and olive oil ("to soften the bran"). The resulting bread does not taste sweet or "enriched"-- it tastes "clean" to me, and very tasty. (In my "whiter version", I used less whole wheat, so I didn't add the sugar, but I did add some oil, which I thought improved the texture.)
I hope you will give this a try and perhaps you can improve upon it further, and make your own variations. It's such an easy and satisfying way to make good bread!
Printable Recipe
BRYANNA'S 3/4 WHOLE WHEAT SIMPLE NO-KNEAD CRUSTY BREAD (BAKED IN A POT)
Makes 3 good-sized loaves (Jan. 13, 2010)
For this recipe, I have used as much wholewheat flour as possible and still kept the qualities of an artisan crusty bread-- a crackly crust, holes in the crumb, etc.. I started with Jeff Hertzberg's and Zoë François' recipe for "five- minute" no-knead, refrigerated dough for whole grain bread, combined with some of the qualities of Jim Lahey's no-knead bread method (via Marc Bittman in the NY Times), along with his novel pot-baking method; and took also advice from Peter Reinhart's books (reluctantly adding a little sugar to the whole grain dough, as he recommended, and finding that it improves the flavor of a mostly whole grain loaf), and Cook's Illustrated magazine experiments with no-knead, pot-baked bread. (See this blog post and this one for more about no-knead, crusty bread, and this one for my "whiter" version.) It's very good!
4 cups lukewarm water
1 tablespoon regular dry-active baking yeast (OR 3/4 tablespoon instant yeast
 )
)
2 tablespoons olive oil
2 tablespoons organic sugar
1 tablespoon table salt (or small crystal kosher salt )
)
Flour mixture (combine together in a dry container):
5 1/2 cups whole wheat flour (ground from hard wheat, if you grind your own, or, especially in the USA, use whole wheat bread flour)
2 cups unbleached white flour (Canadian all-purpose flour is fine, but you might want to use bread flour in the US) + more for dusting dough
3 tablespoons pure gluten powder (vital wheat gluten )
)
(In the USA, if you are using unbleached all-purpose flour, you might want to use 1/4 cup of gluten powder. When I used 1/4 cup [with Canadian flour], it seemed too tough, so I reduced the amount.)
Cornmeal and flour for dusting
In a large bowl or plastic container, mix the yeast into the lukewarm water (about 100 degrees). Let sit until yeast dissolves. (If using the instant yeast, you don't have to dissolve it, though master baker Peter Reinhart has revised his thinking on this and recommends dissolving instant yeast to "allow it to ferment more effectively during the cooldown phase in the refrigerator".) Add oil, sugar, and salt. Stir in the flour mixture, mixing until there are no dry patches. Dough will be quite loose.
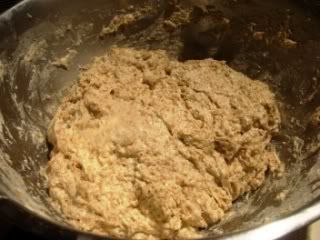
Place the container inside of a clean plastic bag (a small new white garbage bag does fine), and twist-tie it closed, leaving room for the dough to rise. Let dough rise at room temperature 2 hours (or up to 10 hours).
Prepare to bake all or some of the dough at this point OR refrigerate in a tightly-covered oiled container (OR 2 containers) with room to double in size, for as long as two weeks. (The dough is much easier to work with if you refrigerate it for at least 3 hours before shaping.)
When ready to bake, sprinkle a little flour on dough (DON'T PUNCH DOWN!) and cut off 1/3rd of the dough with serrated knife, or a bench knife, for each loaf.
Lightly flour a work surface and place dough on it; sprinkle it with a little more flour and fold it over on itself once or twice. (It's quite sticky-- keep your hands and the surface floured; maybe used a bench scraper.)
Using just enough flour to keep dough from sticking to work surface or to your fingers, gently and quickly shape dough into a ball OR oval shape, depending on the shape of the pot you are going to bake it in.
Line a bowl, pan or oval casserole (depending, again, upon the shape of the vessel you will be baking the bread in-- doesn't matter what it's made from as you aren't going to bake it in this, just let it rise in the appropriate shape) with baking parchment -- 1 for each loaf you are baking at the time. Sprinkle the parchment with flour, cornmeal, semolina, or bran. Place the dough seam-side-down on the parchment in the bowl or pot, and dust lightly with more flour, semolina, bran, or cornmeal. Place the vessel(s) inside of a clean plastic bag(s) (a small new white garbage bag does fine), and twist-tie closed, leaving plenty of room for the dough to rise. Let dough rise in a warm spot for about 2 hours (if dough has been refrigerated-- if it has not, rise at room temperature for about 1 hour).
Heat the oven to 475°F, with the pot(s) you are baking the bread in heating in the oven at the same time, for at least 30 minutes. Use a deep cast iron skillet or Dutch oven with a lid (can be enamel-coated or not), or a heavy ceramic covered casserole (NOT unglazed clay).
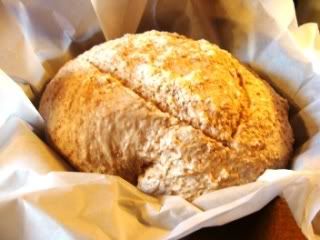
When the oven and the pan are heated, and the dough has risen for the appropriate time, just lift up the loaf (or loaves) right in the parchment (using the parchment as a "lifter") and set it into your hot pot, pan or casserole with the parchment. (Don't worry-- it won't stick or burn!) Cover with the lid and bake 30 minutes, then remove the lid and bake another 15 minutes, or until the loaf is beautifully browned. Remove the bread from the pan immediately and cool on a rack.
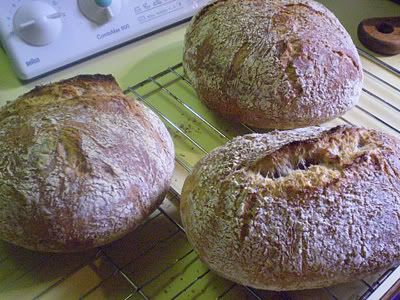
PS: If this method of transferring the loaves to the pots in parchment makes too much of a "neat and tidy-looking" loaf for your taste, follow my original directions at this blog post (using the recipe in the blog post, not the printable recipe). This results in a more rustic-looking loaf as the photo below shows. It's up to you!
Nutrition Facts
Nutrition (per slice [12 slices per loaf]): 100.1 calories; 10% calories from fat; 1.2g total fat; 0.0mg cholesterol; 189.9mg sodium; 89.0mg potassium; 19.5g carbohydrates; 2.5g fiber; 0.8g sugar; 17.0g net carbs; 3.8g protein; 1.6 points.
UPDATE (Jan. 16, 2010): This afternoon I used the remaining dough (2/3rds of the recipe) to make 3 pizzas. This was the best almost-all-whole-wheat pizza I've ever made! Even my 3 picky granddaughters loved it! I used it cold straight from the refrigerator, with no rising, baked it at 500 degrees F. I just patted and stretched the dough out by hand on a sheet of baking parchment-- it's a sticky dough and you can't spin this one! I baked it right on the parchment because I was afraid the sticky dough would stick to the peel. It worked just fine! I made the pizza pretty thin, but you can see that the edges puffed up quite a bit in the oven.

Pizza made with the same dough, after refrigerating it for 3 days.
Happy Baking!
Printable Recipe
BRYANNA'S 3/4 WHOLE WHEAT SIMPLE NO-KNEAD CRUSTY BREAD (BAKED IN A POT)
Makes 3 good-sized loaves (Jan. 13, 2010)
For this recipe, I have used as much wholewheat flour as possible and still kept the qualities of an artisan crusty bread-- a crackly crust, holes in the crumb, etc.. I started with Jeff Hertzberg's and Zoë François' recipe for "five- minute" no-knead, refrigerated dough for whole grain bread, combined with some of the qualities of Jim Lahey's no-knead bread method (via Marc Bittman in the NY Times), along with his novel pot-baking method; and took also advice from Peter Reinhart's
books (reluctantly adding a little sugar to the whole grain dough, as he recommended, and finding that it improves the flavor of a mostly whole grain loaf), and Cook's Illustrated magazine experiments with no-knead, pot-baked bread. (See this blog post and this one for more about no-knead, crusty bread, and this one for my "whiter" version.) It's very good!4 cups lukewarm water
1 tablespoon regular dry-active baking yeast
(OR 3/4 tablespoon instant yeast)2 tablespoons olive oil
2 tablespoons organic sugar
1 tablespoon table salt (or small crystal kosher salt
)Flour mixture (combine together in a dry container):
5 1/2 cups whole wheat flour
(ground from hard wheat, if you grind your own, or, especially in the USA, use whole wheat bread flour)2 cups unbleached white flour
(Canadian all-purpose flour is fine, but you might want to use bread flour in the US) + more for dusting dough3 tablespoons pure gluten powder (vital wheat gluten
)(In the USA, if you are using unbleached all-purpose flour, you might want to use 1/4 cup of gluten powder. When I used 1/4 cup [with Canadian flour], it seemed too tough, so I reduced the amount.)
Cornmeal and flour for dusting
In a large bowl or plastic container, mix the yeast into the lukewarm water (about 100 degrees). Let sit until yeast dissolves. (If using the instant yeast, you don't have to dissolve it, though master baker Peter Reinhart has revised his thinking on this and recommends dissolving instant yeast to "allow it to ferment more effectively during the cooldown phase in the refrigerator".) Add oil, sugar, and salt. Stir in the flour mixture, mixing until there are no dry patches. Dough will be quite loose.
Place the container inside of a clean plastic bag (a small new white garbage bag does fine), and twist-tie it closed, leaving room for the dough to rise. Let dough rise at room temperature 2 hours (or up to 10 hours).
Prepare to bake all or some of the dough at this point OR refrigerate in a tightly-covered oiled container
(OR 2 containers) with room to double in size, for as long as two weeks. (The dough is much easier to work with if you refrigerate it for at least 3 hours before shaping.)When ready to bake, sprinkle a little flour on dough (DON'T PUNCH DOWN!) and cut off 1/3rd of the dough with serrated knife, or a bench knife, for each loaf.
Lightly flour a work surface and place dough on it; sprinkle it with a little more flour and fold it over on itself once or twice. (It's quite sticky-- keep your hands and the surface floured; maybe used a bench scraper.)
Using just enough flour to keep dough from sticking to work surface or to your fingers, gently and quickly shape dough into a ball OR oval shape, depending on the shape of the pot you are going to bake it in.
Line a bowl, pan or oval casserole (depending, again, upon the shape of the vessel you will be baking the bread in-- doesn't matter what it's made from as you aren't going to bake it in this, just let it rise in the appropriate shape) with baking parchment
-- 1 for each loaf you are baking at the time. Sprinkle the parchment with flour, cornmeal, semolina, or bran. Place the dough seam-side-down on the parchment in the bowl or pot, and dust lightly with more flour, semolina, bran, or cornmeal. Place the vessel(s) inside of a clean plastic bag(s) (a small new white garbage bag does fine), and twist-tie closed, leaving plenty of room for the dough to rise. Let dough rise in a warm spot for about 2 hours (if dough has been refrigerated-- if it has not, rise at room temperature for about 1 hour).Heat the oven to 475°F, with the pot(s) you are baking the bread in heating in the oven at the same time, for at least 30 minutes. Use a deep cast iron skillet or Dutch oven with a lid (can be enamel-coated or not), or a heavy ceramic covered casserole (NOT unglazed clay).
When the oven and the pan are heated, and the dough has risen for the appropriate time, just lift up the loaf (or loaves) right in the parchment (using the parchment as a "lifter") and set it into your hot pot, pan or casserole with the parchment. (Don't worry-- it won't stick or burn!) Cover with the lid and bake 30 minutes, then remove the lid and bake another 15 minutes, or until the loaf is beautifully browned. Remove the bread from the pan immediately and cool on a rack.
PS: If this method of transferring the loaves to the pots in parchment makes too much of a "neat and tidy-looking" loaf for your taste, follow my original directions at this blog post (using the recipe in the blog post, not the printable recipe). This results in a more rustic-looking loaf as the photo below shows. It's up to you!
Nutrition Facts
Nutrition (per slice [12 slices per loaf]): 100.1 calories; 10% calories from fat; 1.2g total fat; 0.0mg cholesterol; 189.9mg sodium; 89.0mg potassium; 19.5g carbohydrates; 2.5g fiber; 0.8g sugar; 17.0g net carbs; 3.8g protein; 1.6 points.
UPDATE (Jan. 16, 2010): This afternoon I used the remaining dough (2/3rds of the recipe) to make 3 pizzas. This was the best almost-all-whole-wheat pizza I've ever made! Even my 3 picky granddaughters loved it! I used it cold straight from the refrigerator, with no rising, baked it at 500 degrees F. I just patted and stretched the dough out by hand on a sheet of baking parchment-- it's a sticky dough and you can't spin this one! I baked it right on the parchment because I was afraid the sticky dough would stick to the peel. It worked just fine! I made the pizza pretty thin, but you can see that the edges puffed up quite a bit in the oven.
Pizza made with the same dough, after refrigerating it for 3 days.
Happy Baking!
Friday, December 11, 2009
A VEGAN 'THANKSMAS" FEAST; CHRISTMAS CRAFT FAIRE, BREAD WORKSHOP, AND OTHER NICE THINGS

Some of our vegan "Thanksmas" feast
I'm getting ready to head off to Vancouver for the weekend, and then down on the train to Seattle for a few days. So, I won't be blogging for a week, and I'll leave you with a mish-mosh of events, pictures, and food!
VEGAN "THANKSMAS" DINNER:
First of all, our vegan "Dinner Club", I guess you could call it (which consists of 5 vegan couples of a certain age, who get together randomly a few times a year to share good vegan food and conversation, and music, etc.) got together at the end of November for what our hostess, Ellen, called our vegan "Thanksmas" feast. Here are some images from that lovely dinner! Ellen is Scandinavian, so their home was warmly decorated and very Christmasy, and she went all out with vegan versions of family Christmas treats!

Christmas candles

Fireweed's delicious seitan rolls (in the 40's and 50's, these would have been called Seitan "Birds"!)

Rudy's mashed potatoes and a bowl of lovely Denman Island squash

Pelka and Robs's delicious Brussels Sprout Salad with walnuts, beside the squash bowl

Another delicious winter salad from Pelka and Rob, this one made with red cabbage and pecans
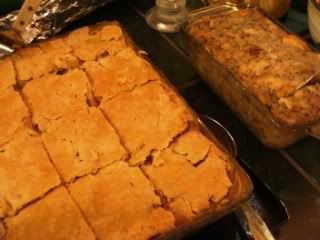
My contributions-- Tofu Pot Pie ( from my book Soyfoods Cooking for a Positive Menopause) and Sage and Onion Bread Stuffing (I also brought homemade Cranberry sauce-- both recipes from my book The Almost No-Fat Holiday Cookbook).

An overloaded dinner plate!

Ellen's berry dessert topped with soy "ice cream" and a vegan truffle!

Vegan Scandinavian treats and truffles made by our lovely hostess!
Boy, were we full! (Or "full-top" as DH claims they say in Quebec!)
****************************************************************************
A DINNER WITH FRIENDS, FEATURING DAIYA VEGAN CHEESE
We had some friends over last week and I served my Italian-American-style lasagna, but, instead of using my usual vegan bechamel sauce, I used my newly-purchased shredded white vegan Daiya cheese, which I bought from the Karmavore Vegan Shop in New Westminister, BC (by mail).
Everyone raved over it and I liked it, too, but I think I used too much! It was so rich that I think I will use half bechamel and half Daiya next time. Our omni guests couldn't get over it!
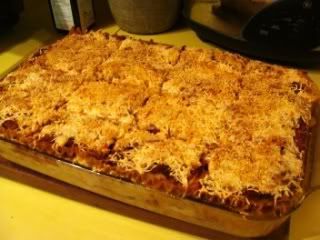
With the meal, we had wine, a lovely salad brought by 2 of our guests (avid gardeners), some braised butternut squash with basil, garlic and olive oil, baguettes, and then an Italian-style Apple Tart from my book Nonna's Italian Kitchen
 :
:
An Sweet Topping Innovation:
I made some almond milk to accompany our tea and coffee-- actually it was more like almond cream. I also needed a topping for the tart, so I left the almond pulp in half of the creme and strained the other half. I squeezed the pulp I had left from straining to get all the almond creme out, and then I added the pulp back to the other half of the recipe. (I had sweetened the creme slightly with maple syrup before straining.) The result was a thick, cloud-like, very almondy-tasting topping that everyone loved, and some nice smooth, pourable creme for our hot beverages.

******************************************************************************
THE DENMAN ISLAND CHRISTMAS CRAFT FAIRE
This took place last weekend. We didn't stay too long-- too crowded! That means it was well-attended, of course, and why not? It's always full of friends, food and wonderful arts and crafts. Our friend Leticia won the prize for the "Best Display" and we happened to be there when she was presented with it. She and her friend Tosha make wonderful handmade olive oil soaps-- chocolate, lemongrass and lavender, chai tea...they smell so good!
 Leticia and her handmade olive oil soaps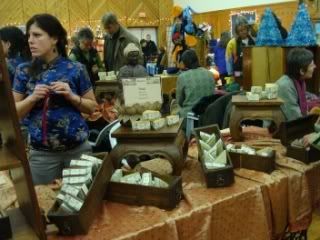
*******************************************************************************
TRYING THE NEW GARDEIN "CHIK'N FILETS"
Vegan chef Tal Ronnen uses these "Chik'n Filets" in his new book, so I thought I'd give them a try. I made a sort of scaloppine with white wine and mushrooms-- very quick and easy.

They were good, meaty texture, etc., but I think I like my own seitan cutlets better!
********************************************************************************
BREAD WORKSHOP AT THE DENMAN ISLAND COMMUNITY SCHOOL
Well, I did bring my camera, but forgot to ask my friend Holly, who was being my kitchen slave for the evening, to use it! But I had lots of dough to bake off at home the next day, so below are pictures of what I made in the class. (Everything I made in the class got eaten or taken home by the students, along with the recipes, of course!
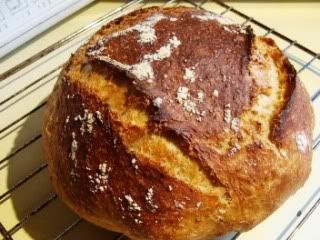
Crusty No-Knead Artisinal Bread (recipe in my book World Vegan Feast)
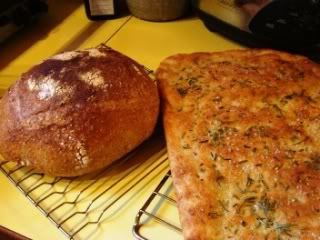
Another loaf of Crusty No-Knead Bread with the Apulian Focaccia (both recipes in my book World Vegan Feast)
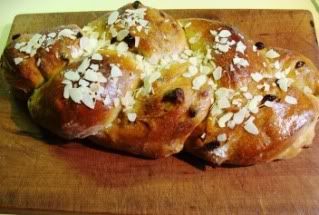

A loaf of vegan Julekage (Scandinavian Christmas bread with cardamom and fruit) made with my Vegan Low-fat Sweet Dough (recipe in my book World Vegan Feast)
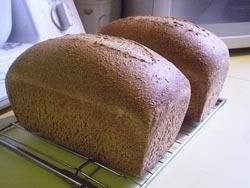
Last, but not least, my 100% Wholewheat Bread
Enjoy! See you next week!
Subscribe to:
Posts (Atom)