Showing posts with label wholewheat bread. Show all posts
Showing posts with label wholewheat bread. Show all posts
Saturday, November 28, 2009
MY VERSION OF 100% WHITE WHOLE WHEAT SANDWICH BREAD


I haven't been making much bread lately (DH makes most of our bread, and it's delicious!), but I wanted to try out a recipe for a 100% WHITE Whole wheat Sandwich Bread recipe from the Breadcetera blog. So, I put on the poolish starter/pre-ferment Wednesday night and planned to make the bread on Thursday morning. It turned out beautifully, even with my changes (which I'll expand upon below), and with being distracted by a visitor while I was putting the dough together, so I wanted to tell you about it.

WHITE whole wheat flour
 is becoming popular because it has all of the nutrition and fiber of ordinary whole wheat flour, but with a sweeter taste and a light, beige color. It has the potential to persuade more of our white-bread-loving population to try whole grains, so it's worth experimenting with.
There are two types of white whole wheat flour-- soft white whole wheat flour (or white whole wheat pastry flour), which is made with SOFT white whole wheat, and hard white whole wheat flour (which can be used for bread), made with HARD white whole wheat. I grind my own flour in my WonderMill
 (here's a blog post about the mill, with a bread recipe you can also try with white whole wheat flour), and I've been using my home-milled white whole wheat pastry flour for quite a while. It makes exceptional muffins, quick breads and cakes. The soft white wheat
 has been easier to find than the hard white wheat, but the hard white wheat is getting easier to obtain lately. (Also check with your health food store or food co-op, or an online organic farm-gate store.)
 In Canada (a leading producer of white wheat, BTW), check your health food store, or the internet for organic farm-gate vendors. In BC, you can get organic hard whole wheat flour (they call it "White Whole Wheat, Fresh Fine Grind") from Anita's Organic Mill in Chilliwack, BC. Anita's also sells soft white wheat kernels, to grind your own whole wheat pastry flour, and whole wheat pastry flour, but not the hard white wheat kernel. Here's their "where to buy" page. Their products are excellent!
Before I give you the recipe, I have to tell you what I changed in the original recipe. Steve used King Arthur flour
 and I used home-ground hard white wheat flour. I didn't have instant yeast
 , so I used slightly more dry active baking yeast
 . He used powdered milk and butter-- I used soy flour
 and vegan butter instead, but I cut the amount of butter in half. (UPDATE 2012: I now use my homemade palm-oil-free vegan "Buttah" instead Earth Balance.) That was just too much fat for me! It was fine with half the original amount. He called for honey-- I used maple syrup
 instead. (You could use agave nectar
 , if you prefer.)
I weighed all of the ingredients because he gives most of his measurements in grams, but then I measured the weighed-out ingredients in cups and spoons, for those of you (the majority of North American bakers, I suspect) who don't use a scale.
I changed some of the technique, too. A friend popped in when I was putting the dough together, so I was a bit distracted and I just dumped everything (including the poolish starter, or pre-ferment, that I had made the night before) into my Bosch mixer and let it go for 12 minutes on the first setting (the Bosch has a powerful motor, so I rarely put it on the higher settings). My house was warm, so I rose it 50 minutes in the pans instead of 60 (didn't want to risk the bread falling in the oven if I over-rose it). He called for 50 minutes baking at 350 degrees F, but my bread was ready after 30 minutes, so it probably depends on your ingredients and your oven.
It turned out very light in texture and color, almost white (and DH thought a bit too light in texture!), but very tasty and moist.

Anyway, enough said! Here's the recipe!
Printable Recipe
BRYANNA’S VERSION OF 100% WHITE WHOLEWHEAT SANDWICH BREAD
Servings: 26
Yield: 2/ 8x4" loaves
This recipe, an excellent light whole grain loaf, was adapted (veganized, made lower in fat, and simplified) from this recipe.
Poolish (starter or pre-ferment): (make the night before)
1 5/8 cups white whole wheat flour
(185 g)3/4 cup warm water (185 g)
1 1/4 teaspoon dry active baking yeast
(NOTE: I think I'll only use 1/2 teaspoon dry active baking yeast next time, or 3/8 teaspoon instant yeast.)
Dough:
1 cup + 1 tablespoon warm water (260 g)
1 1/2 teaspoons dry active baking yeast
(or 1 teaspoon instant yeast)(NOTE: I think I'll only use 1 teaspoon dry active baking yeast next time, or 3/4 teaspoon instant yeast)
3 1/3 cups white wholewheat flour
(460 g)all of the Poolish (above) that you made the night before
2 tablespoons soy flour
 (15g)
(15g)2 1/4 teaspoons salt (15 g)
2 tablespoons maple syrup
(40 g) (or agave nectar)1/4 cup vegan butter (45 g) (such as my homemade palm-oil-free vegan "Buttah")
OPRTIONAL: raw shelled sesame seeds

The night before (I did this just before I went to bed), dissolve the yeast in the warm water for 5 minutes in a medium bowl or container, then stir in the 1 5/8 cup of flour well. (IF YOU USE INSTANT YEAST, just mix everything together—you don’t have to dissolve the yeast.) Cover and let sit in a warm place (about 70ºF) for about 12 hours.
In the morning, dissolve the yeast for the dough in the water for about 5 minutes. (IF YOU USE INSTANT YEAST, just mix it together with the flour in the next step—you don’t have to dissolve the yeast.)
Combine the 31/3 cups flour in a large bowl or the bowl of your stand mixer with the soy flour and salt (and yeast, if you use instant yeast). Whisk the ingredients together well (using the whisk attachment if you are using a stand mixer). Pour the maple syrup into the water/yeast mixture (or just the water if you used instant yeast). Pour this into the flour mixture in the bowl and add the vegan butter, broken into pieces.
If you are using a stand mixer, switch to the kneading attachment, put on the cover and start kneading. I used the #1 setting on my Bosch mixer
 for the whole process for 12 minutes.
With a less powerful mixer, like the inexpensive Kitchen Aid
 model, start on Low speed for 4 minutes, increase to Medium for 4 minutes, then on High for 4 minutes.
If you are kneading by hand, mix with a wooden spoon until you can’t stir anymore, then knead in the rest of the flour mixiture and knead the dough for 10 minutes on a clean counter covered with baking parchment (to prevent sticking). Try not to add any extra flour to the dough. (Oil your hands lightly, if necessary.)
Place the dough in a lightly-oiled bowl or container, with room to double, cover with plastic wrap and let rise at about 70ºF for ½ an hour.

After ½ an hour, gently fold the dough over itself, cover and let rise for another ½ hour.

Have ready two 8 x4” pans. (We use the Norpro “dimpled” 4.5"W x 3"D x 8"L loaf pans
 . They don’t need to be greased each time you use them, but grease your pans, if necessary). I like to sprinkle the bottoms of the pans with some raw sesame seeds, like DH does.
Cut the dough into 2 equal pieces (1 ¼ lb. each) and form them into neat loaves. Place them in the pans and press down with your hand to evenly distribute the dough and so that the dough isn’t “humped” in the middle.

Cover and let rise at about 70ºF for 50 minutes or so. Do not over-rise.

After they have risen for about 30 minutes, heat your oven to 350 ºF. Place a shallow baking pan with some hot water in the bottom of the oven while it heats up.
When the oven is hot and the bread has risen, you can make a slash in the top with a very sharp razor blade if you wish, like I did, but you don’t have to.
Spray the tops with water from a spray bottle
 . Place the pans, not touching, in the center of your oven.
Bake for 10 minutes. Remove the pan of water (carefully!) from the bottom of the oven. Bake for 20 more minutes. Mine were done perfectly after 30 minutes.

Remove from pans to racks to cool. Let cool before slicing.
Nutrition Facts
Nutrition (per serving/slice): 105.7 calories; 17% calories from fat; 2.1g total fat; 0.0mg cholesterol; 182.3mg sodium; 66.2mg potassium; 19.0g carbohydrates; 1.4g fiber; 1.0g sugar; 17.5g net carbs; 2.9g protein; 2.0 points.
Enjoy!


Thursday, May 10, 2007
LIGHT, TENDER 100% WHOLEWHEAT BREAD IN YOUR BREAD MACHINE
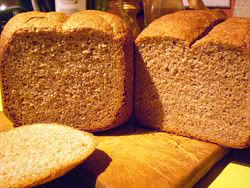
The two recipes below; sourdough loaf on the left, yeast sponge loaf on the right.

If you're in the Portland area this weekend, come to Veg Fest and introduce yourself! I'll be doing a demo with author Julie Hasson at 10:30 AM on Saturday.
 Julie Hasson
Now, onto bread!
When I did my post on grinding my own wholewheat flour with the Wondermill and making a light loaf of 100% wholewheat bread with it, a reader asked me if that recipe would work in a bread machine.
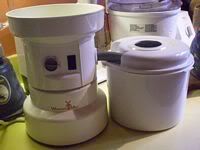
The Wondermill
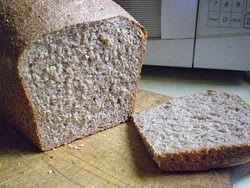 My oven-baked 100% wholewheat bread
Well, I finally tried it and it was a disaster-- well, it actually tasted pretty good and I used it for toast, but it fell in the middle and it was kind of coarse and very dark in color. Obviously, that recipe is best made the old-fashioned way!
I decided to stick with a tried-and-true wholewheat loaf with more potato in it than in my oven recipe. Potato is a great lightener-upper of wholegrain breads! I also used the sponge method-- which is basically leaving the liquid, yeast and half the flour (a batter) to rise for several hours before adding the remaining ingredients and turning on the machine cycle. One recipe uses a yeast sponge and the other a sourdough sponge. Otherwise they are pretty much the same.
Why bother with this extra step?
It's all about umami, the "fifth flavor", the "essence of deliciousness". It turns out that bland old wheat gluten contains umami compounds.
Mushrooms and fungi are a great source of synergizing umami. Yeasts (both active, and non-active nutritional yeast and yeast extract, such as Marmite), which is also a fungi (and this includes sourdough, a natural yeast) , have umami compounds. They also act as synergizers. For instance, in a live yeast or sourdough starter, the enzymic action develops the umami in wheat flour to "ripen" the dough and develop its flavor.
Now this brings me to a favorite hobbyhorse-- I've been writing for years that fast-risen breads seem tasteless, and most bread machine breads have a "homogenized" flavor no matter what you put into them. I knew that this was due to the lack of rising time, which develops enzymes and "ripens" the dough and improves the crust. I've been telling people for a long time to try making their bread machine breads with an overnight sponge, or the addition of sourdough starter. But I had no idea that it was umami at work!
So, I give you here two versions of a bread that I have been making for years and which I re-vamped for the bread machine. They both come out nicely-shaped, light and tender, AND with excellent crumb, crust and flavor!
NOTE ABOUT FLOUR: Canadian flour is higher in gluten (protein) than US flour, so Canadians can use ordinary wholewheat flour. Americans might want to use wholewheat bread flour.
Printable Recipe
BRYANNA'S VERY LIGHT, MOIST BASIC 100% WHOLEWHEAT ABM BREAD (SPONGE METHOD)
This is an adaptation of a recipe I have made in the oven for years. This recipe makes a tender, light wholewheat bread. You can use this as a base for all sorts of variations. NUTRITIONAL ANALYSIS done using water, 2 T. sugar, no soymilk or soy protein.
I make the sponge just before I go to bed at night, and add the other ingredients first thing in the morning and start the machine.
Sponge:
1 cup warm water
1 cup wholewheat flour (can be white wholewheat flour)
1/2 tsp dry active baking yeast (or 1/3 tsp instant yeast)
Finishing Bread:
3/4 cup mashed russet potato (plain, no milk or salt)
Time-saver: use 3/4 c. instant mashed potato flakes mixed with 1/2 c. boiling water instead of cooked potato.
1-2 Tbs sugar
2 Tbs oil
OPTIONAL: 1 T. soy flour or soymilk powder
1/2 Tbs salt
2 cup whole wheat flour (can be white wholewheat flour)
1/2 tsp dry active baking yeast (or 1/3 tsp instant yeast)
Sponge: (Mix this 4-8 hours before you start the bread machine cycle-- you can do it before you go to bed at night.)
Mix in the bread machine container (this is the one I have) the water 1 cup flour, and 1/2 tsp. yeast on the dough cycle for 5-10 minutes, then unplug. Cover the container with plastic wrap and let it rise.
After the sponge has risen (4-8 hours), add the mashed potato, sugar, oil, salt, flour and the remaining yeast, in that order.
Set on the Basic Cycle. Check the dough during the first knead to make sure that it is neither too dry, not too wet. If it's too dry, add water by the tablespoonful, letting it knead in, until it looks right. (I often have to add 1 T. or so-it kind of depends on how dry the potatoes are.) If it's too wet, do the same with flour. This is a wet dough but still rises well. It's fine as long as it kneads well, even if it looks a little sticky.
If you want a more attractive top crust to the bread, 5 minutes before the bread is due to bake (I set my kitchen timer to remind me of this), you can make a decorative slash in the top of the bread with a razor blade, and you can also glaze the bread with some soymilk, using a pastry brush, or sprinkle the top with some flour.
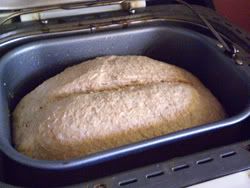
Cover the "window" in the top of your machine with foil, so that the top of the bread will brown properly. Remove the bread immediately from the machine when done, placing on a rack to cool thoroughly. This will insure a crisp crust.
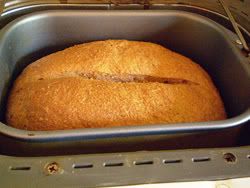
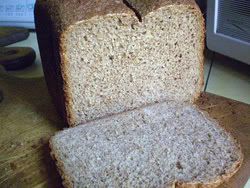
Yield: 1 3/4 lb. loaf (10 large slices)
Nutrition Facts
Nutrition (per 1/2 slice): 103.9 calories; 14% calories from fat; 1.7g total fat; 0.0mg cholesterol; 175.5mg sodium; 129.7mg potassium; 20.2g carbohydrates; 2.8g fiber; 1.0g sugar; 17.4g net carbs; 3.2g protein; 1.7 points.
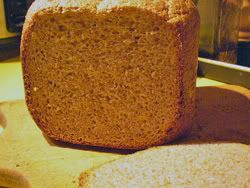
Printable Recipe
BRYANNA'S VERY LIGHT, MOIST BASIC 100% WHOLEWHEAT ABM BREAD (with sourdough starter and yeast)
This is almost the same as the wholewheat sponge bread above, but with a wholewheat sourdough starter used as well as the yeast. I think it is a bit superior, but they are both good! NUTRITIONAL ANALYSIS done using water, 2 T. sugar, no soymilk or soy protein.
1/2 cup plus 1 T. water, potato water or nondairy milk (make it hot if the sourdough starter is cold out of the fridge)
1 cup bubbly, fresh wholewheat sourdough starter (see Notes below)
3/4 cup mashed russet potato (plain, no milk or salt)
Time-saver:use 3/4 c. instant mashed potato flakes (you can buy organic ones) mixed with 1/2 c. boiling water instead of cooked potato.
1-2 Tbs sugar or other sweetener
2 Tbs oil
OPTIONAL: 1 T. soy flour or soymilk powder
1/2 Tbs salt
2 2/3 cups wholewheat flour (can be white wholewheat flour)
1 tsp dry active baking yeast (or 3/4 tsp instant yeast)
Set your machine (this is the one I have) on the Basic Cycle. Check the dough during the first knead to make sure that it is neither too dry, not too wet. If it's too dry, add water by the tablespoonful, letting it knead in, until it looks right. If it's too wet, do the same with flour. This is a wet dough but still rises well. It's fine as long as it kneads well, even if it looks a little sticky.
If you want a more attractive top crust to the bread, 5 minutes before the bread is due to bake (I set my kitchen timer to remind me of this), you can make a decorative slash in the top of the bread with a razor blade, and you can also glaze the bread with some soymilk, using a pastry brush, or sprinkle the top with some flour.
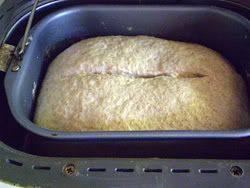
Cover the "window" in the top of your machine with foil, so that the top of the bread will brown properly. Remove the bread immediately from the machine when done, placing on a rack to cool thoroughly. This will insure a crisp crust.
Yield: 1 and 3/4 lb. loaf; 10 large slices
Nutrition Facts
Nutrition (per 1/2 slice): 107.1 calories; 14% calories from fat; 1.7g total fat; 0.0mg cholesterol; 175.3mg sodium; 123.9mg potassium; 20.9g carbohydrates; 2.6g fiber; 1.6g sugar; 18.4g net carbs; 3.1g protein; 1.8 points.
SOURDOUGH STARTER: If you already have a white sourdough starter, use 1/4 cup of it to make a wholewheat starter. You can get a very good free starter online here: Oregon Trail Sourdough Starter. I have been using this one for several years. You can also email me for my vegan yogurt-based sourdough starter instructions. Refresh the starter before using it in this bread-- it has to be fresh and bubbly!
Enjoy!

Thursday, March 22, 2007
100% WHOLE WHEAT BREAD AND MY NEW GRAIN MILL
100% wholewheat bread made with freshly-milled hard red wheat
I just got a new grain mill. I've had a Magic Mill Plus III for many years, but it needs a bit of work and it is not being made anymore. We used it alot because both my DH and I make bread--DH makes it for private customers several times a week, in fact. So we have a new mill now, the Wondermill.
My new Wondermill (UPDATE: See this post for info about the new 2014 Wondermill.)
It is a totally different design than the Magic Mill Plus III, but the grinding mechanism is the same principle-- the "impact" or micronizer, which uses steel "teeth" or blades to mill grains or legumes into flour. (The Wondermill can grind legumes into flour, which was not recommended with the Magic Mill, so that's a plus!) The Wondermill makes a lovely fine flour. (BTW, you can't make cracked grain or very coarse flour with micronizer-type mills.) You can see the bran, which you can just mix in evenly. If you want to have a healthier type of pastry flour, but a little finer than all wholewheat, grind soft wheat kernels (soft wheat contains less gluten-- good for pie crusts, pastries, cakes and quick breads, and also for low-fat baking) and then sift out the coarse bran. Some of the finer bran and the wheat germ will stay behind with the flour. The bran can be used in cereals, muffins, etc.
The Wondermill is also quieter than the Magic Mill when it is actually milling grain (be advised, though, that no electric mill is quiet!), and it is ALOT easier to clean! I also found that there was no need to drape everything on my kitchen counter in towels (like I used to have to do!) to prevent a film of flour on everything (to be fair, my old Magic Mill needs a new gasket!).
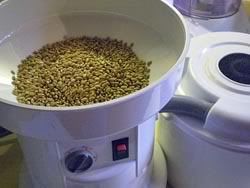
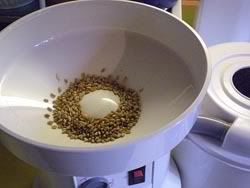
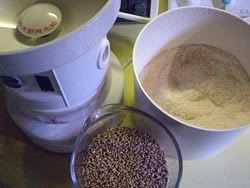
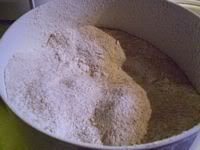
The Wondermill in action and with freshly-milled flour
Notice the container connected to the mill by a grey tube. The flour goes straight into the container and can be stored in it (some people get two containers, to have one for fresh-milling, and one for storage).
For more info about the Wondermill, dealers, reviews, go to this page .
One of the best reasons for having a grain mill (besides cost-- it's cheaper to grind organic grain than to purchase good organic flours, especially flours other than wheat-- particularly of benefit to those with food allergies and celiac disease), is freshness. As soon as grains are ground, they start to lose nutrients (just like vegetables after they are picked). So, the fresher your flour is, the better the nutrient content.
Yesterday, to try out the mill, I wanted to make a batch of bread with flour made seconds before I mixed it with the liquid ingredients, so I mixed my warm water and yeast in the Bosch mixer before I ground the grain. When the yeast was frothy, I dumped in the fresh flour warm from the grinder! Below is the recipe I prefer, and some photos of the process and the result, which was two light, moist, naturally-sweet-tasting 100% wholewheat loaves!
PS: I'LL POST A BREAD-MACHINE VERSION SOON!
TWO-LOAF BATCH OF WHOLEWHEAT BREAD (see the recipe below):
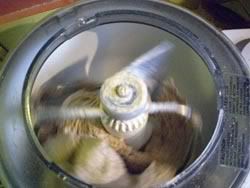
Kneading in the Bosch
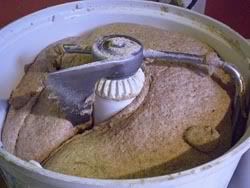
Risen dough-- who says you can't have light wholewheat bread?
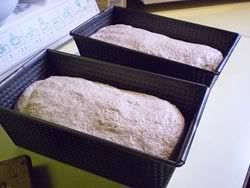
Dough in the pans before the second rising. We use the 8x4.4x3" Norpro
dimpled non-stick steel bread pans, available in many kitchen shops. They only need to be greased once in a while and they make a nicely-shaped bread for toast and sandwiches.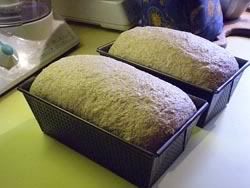
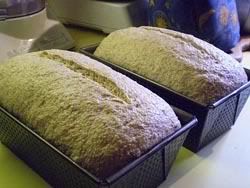
Loaves risen the second time, before and after slashing with a razor blade and ready for the oven.
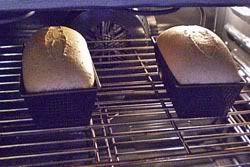
After five minutes in a very hot oven, just before turning the heat down
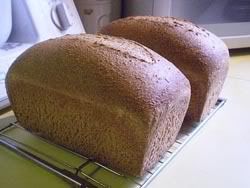 Fresh out of the oven!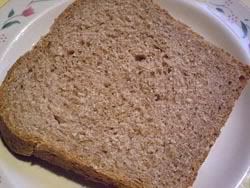
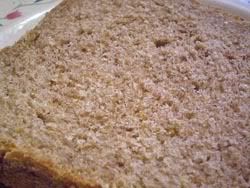
Close-ups of the cooled bread sliced, showing the nice moist crumb. It's not dry at all, and slices beautifully!
MY BREAKFAST THIS MORNING:
My husband says I eat weird things for breakfast sometimes! Maybe so, but this was delicious!
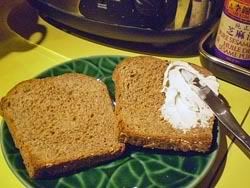
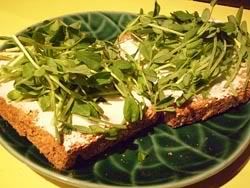
Wholewheat toast with Creamy Sheese Original and pea shoots (pea sprouts)!
UPDATE: My recipes for 100% wholewheat bread machine bread and no-knead 100% moist and tender wholewheat sandwich bread.
THE RECIPE:
Printable Recipe
BRYANNA'S BASIC TENDER 100% WHOLEWHEAT BREAD
Servings: 36/ 3/8"-thick slices
Yield: 2 loaves
You can double this recipe to make 4 loaves, but DO NOT double the yeast!
IMPORTANT NOTE! Before making this recipe, get an inexpensive oven thermometer and test the heat of your oven. Many ovens are as much as 100° off, even new ones! If it is seriously off, have it calibrated by someone from a company that sells and fixes stoves and ovens. Otherwise, you may have to adjust the temperature up or down when you bake.
I have been making this recipe for many, many years, but it has been perfected using my husband's unique baking technique, which makes a moist bread with a nice crust. This bread has at least one nice, long rise, which is the secret to making bread that has good flavor without using lots of sweeteners and fats. DO NOT cut corners on the time and try to use more yeast instead! Your bread will suffer.
2 3/4 cups very warm potato cooking water
OR warm water water plus 1/4 c. instant potato flakes (you can get the organic variety)
1 Tbs sweetener of choice (I use organic sugar )
)
1 1/2 tsp. (1/2 Tbs.) dry active baking yeast (please DO NOT increase this amount!) OR 1 tsp. instant yeast
1/4 cup ground golden flax (optional)
1 Tbs sea salt (please DO NOT reduce this amount or leave out-- salt is important to regulate rising, as well as for taste)
2 Tbs oil
6-7 cups fresh wholewheat flour (4 1/2 c. hard wheat kernels [red
[red or white
 varieties] will mill into just about this amount of flour)
OPTIONAL: raw sesame seeds to sprinkle on the bottom of the pan
NOTE: Why use potato water? Well, for one thing, it's a good use of water from cooking potatoes. But, seriously, the potato seems to help make 100% wholewheat bread nice and light-- I'm not sure why.
TO MAKE THE BREAD:
Dissolve the yeast in the potato water, along with the sweetener (I do this right in the bowl of my Bosch mixer). When bubbly, mix with the remaining ingredients, using a large bowl (or bowl of a heavy-duty mixer), including about 4 c. of the flour.
When that is well mixed, mix or knead in 2 more cups of the remaining flour. If the dough is too sticky, add the remaining 1 cup, a little at a time, but aim for a moist dough. I usually use the whole 7 cups, but the amount sometimes depends on the weather or the flour itself.
Knead in a heavy-duty mixer with a dough-hook (such as a Bosch) or by hand 10 minutes. (If kneading by hand, use as little flour as possible. Use a little oil on your hands and the kneading surface, if necessary. This prevents the addition of too much flour during kneading, which will make a dry dough.)
A two-loaf batch such as this one can be risen right in the Bosch bowl, with the cover on. However, you can transfer it to a large oiled bowl, oil the top, cover with plastic wrap (or place the whole bowl inside of a new small white bin-liner-bag and twist-tie it, leaving room for rising), and let rise for about 1 and 1/2 to 2 hours on the counter at normal room temperature (I prefer 2 hours to activate the enzymes which make bread taste good, and improve texture).
Shape into 2 even loaves and place in (greased, if necessary) 8-8 1/2" x 4 1/2" loaf pans. (If you like, sprinkle the bottoms of the pan first with a few raw sesame seeds. My husband always does this and it lends a little extra something to the flavor!)
Cover the loaves loosely (I place the pans inside of a new small white bin-liner-bag and twist-tie it, leaving room for rising) and let rise about 30-45 minutes, or until well-rounded over the tops of the pans.
After about 15 minutes of rising, preheat oven to 480 degrees F with convection, 500 degrees F without.
Just before baking, slash the loaves with a razor blade (see photo above), and spray the loaves with water from a pump-sprayer (this helps you get a nice "oven-spring"). Place the loaves in the middle of the oven, and bake for 5 minutes. IMMEDIATELY LOWER HEAT TO 400 degrees F with convection, 410 degrees without (if you are baking 4 loaves at once, make the temperature 410 degrees F with convection, 425 degrees without), and bake for about 20-25 minutes (I baked them 20 minutes), or until golden brown and hollow-sounding when tapped on the bottom.
If your oven heat is uneven, switch the loaves around to different positions after the first 10 minutes at the lower temperature. Remove the loaves from pans immediately and cool on racks before slicing.
Nutrition Facts
Nutrition (per slice): 93.7 calories; 14% calories from fat; 1.5g total fat; 0.0mg cholesterol; 190.3mg sodium; 108.3mg potassium; 18.0gcarbohydrates; 3.2g fiber; 0.5g sugar; 14.8g net carbs; 3.5g protein; 1.4 points.
Happy baking!

BRYANNA'S BASIC TENDER 100% WHOLEWHEAT BREAD
Servings: 36/ 3/8"-thick slices
Yield: 2 loaves
You can double this recipe to make 4 loaves, but DO NOT double the yeast!
IMPORTANT NOTE! Before making this recipe, get an inexpensive oven thermometer and test the heat of your oven. Many ovens are as much as 100° off, even new ones! If it is seriously off, have it calibrated by someone from a company that sells and fixes stoves and ovens. Otherwise, you may have to adjust the temperature up or down when you bake.
I have been making this recipe for many, many years, but it has been perfected using my husband's unique baking technique, which makes a moist bread with a nice crust. This bread has at least one nice, long rise, which is the secret to making bread that has good flavor without using lots of sweeteners and fats. DO NOT cut corners on the time and try to use more yeast instead! Your bread will suffer.
2 3/4 cups very warm potato cooking water
OR warm water water plus 1/4 c. instant potato flakes
(you can get the organic variety) 1 Tbs sweetener of choice (I use organic sugar
) 1 1/2 tsp. (1/2 Tbs.) dry active baking yeast
(please DO NOT increase this amount!) OR 1 tsp. instant yeast 1/4 cup ground golden flax
(optional) 1 Tbs sea salt
(please DO NOT reduce this amount or leave out-- salt is important to regulate rising, as well as for taste) 2 Tbs oil
6-7 cups fresh wholewheat flour (4 1/2 c. hard wheat kernels
[red or white varieties] will mill into just about this amount of flour) OPTIONAL: raw sesame seeds to sprinkle on the bottom of the pan
NOTE: Why use potato water? Well, for one thing, it's a good use of water from cooking potatoes. But, seriously, the potato seems to help make 100% wholewheat bread nice and light-- I'm not sure why.
TO MAKE THE BREAD:
Dissolve the yeast in the potato water, along with the sweetener (I do this right in the bowl of my Bosch mixer). When bubbly, mix with the remaining ingredients, using a large bowl (or bowl of a heavy-duty mixer), including about 4 c. of the flour.
When that is well mixed, mix or knead in 2 more cups of the remaining flour. If the dough is too sticky, add the remaining 1 cup, a little at a time, but aim for a moist dough. I usually use the whole 7 cups, but the amount sometimes depends on the weather or the flour itself.
Knead in a heavy-duty mixer with a dough-hook (such as a Bosch) or by hand 10 minutes. (If kneading by hand, use as little flour as possible. Use a little oil on your hands and the kneading surface, if necessary. This prevents the addition of too much flour during kneading, which will make a dry dough.)
A two-loaf batch such as this one can be risen right in the Bosch bowl, with the cover on. However, you can transfer it to a large oiled bowl, oil the top, cover with plastic wrap (or place the whole bowl inside of a new small white bin-liner-bag and twist-tie it, leaving room for rising), and let rise for about 1 and 1/2 to 2 hours on the counter at normal room temperature (I prefer 2 hours to activate the enzymes which make bread taste good, and improve texture).
Shape into 2 even loaves and place in (greased, if necessary) 8-8 1/2" x 4 1/2" loaf pans. (If you like, sprinkle the bottoms of the pan first with a few raw sesame seeds. My husband always does this and it lends a little extra something to the flavor!)
Cover the loaves loosely (I place the pans inside of a new small white bin-liner-bag and twist-tie it, leaving room for rising) and let rise about 30-45 minutes, or until well-rounded over the tops of the pans.
After about 15 minutes of rising, preheat oven to 480 degrees F with convection, 500 degrees F without.
Just before baking, slash the loaves with a razor blade (see photo above), and spray the loaves with water from a pump-sprayer (this helps you get a nice "oven-spring"). Place the loaves in the middle of the oven, and bake for 5 minutes. IMMEDIATELY LOWER HEAT TO 400 degrees F with convection, 410 degrees without (if you are baking 4 loaves at once, make the temperature 410 degrees F with convection, 425 degrees without), and bake for about 20-25 minutes (I baked them 20 minutes), or until golden brown and hollow-sounding when tapped on the bottom.
If your oven heat is uneven, switch the loaves around to different positions after the first 10 minutes at the lower temperature. Remove the loaves from pans immediately and cool on racks before slicing.
Nutrition Facts
Nutrition (per slice): 93.7 calories; 14% calories from fat; 1.5g total fat; 0.0mg cholesterol; 190.3mg sodium; 108.3mg potassium; 18.0gcarbohydrates; 3.2g fiber; 0.5g sugar; 14.8g net carbs; 3.5g protein; 1.4 points.
Happy baking!
Subscribe to:
Posts (Atom)