Saturday, June 6, 2009
VEGAN LEMON MERINGUE PIE!


UPDATE:
Alice from Angel Food just told me that they discontinued the meringue mix! Darn!
Well, stay tuned-- I'll have to invent something myself.
Why another dessert so soon, when we are on the WW Core Food Plan (I have lost 14 lbs and DH has lost 17!)? It was DH's birthday on Thursday (yes, we are both Geminis!), and I promised to make him a vegan lemon meringue pie. We had invited two other couples, so I figured one pie would serve the 6 of us with no leftovers-- perfect for a little splurge! I planned to use my low-fat olive oil pastry, and try out the meringue topping made with the Angel Food Vegan Meringue Cookie Mix.

The pie was a great hit with our omni guests! They couldn't figure out how I did it without egg whites!
Printable Recipe
BRYANNA’S VEGAN LEMON MERINGUE PIE
Makes 1/ 9” pie
6 servings
Make this delicious treat the morning of the day you plan to serve it. This recipe has 3 components—crust, filling, and topping. It sounds complicated, but it really is not. Just follow the sequence as I describe it.
For the topping, you need a packet of Angel Food Vegan Meringue Cookie Mix. The mix (which comes from NZ) is available online from Angel Food. Theyhave a list of international vendors who sell it, but I don't know how up-to-date-it is because the US and Canadian vendors listed don't seem to carry it anymore. So, contact Alice here if you want updated info.
You also need some Instant Clear-Jel (read about it at the end of this blog post). It isn't available on store shelves-- here in Canada I had to get 11 lbs. of it from a bakery supply company (Snowcap), but maybe a bakery would sell you a smaller amount.
You can now order it in Canada from the Gourmet Warehouse (Vancouver).
In the US, you can mail-order it from (and I believe that they all ship to Canada): amazon.com
Barry Farm and
King Arthur Flour
In Australia/NZ you can order it from the Angel Food online catalog.
Make and assemble the pie as follows:
1.) THE CRUST:

BRYANNA'S LOW-FAT, CRISPY OLIVE OIL PASTRY
Servings: 6 Yield: 1 crust
This crispy pastry is very easy to handle and quite low in fat (about 1 tsp. of olive oil per serving).
1 cup unbleached flour (NOT pastry flour)
3/4 tsp salt
2 Tbs extra-virgin olive oil
1/3 cup ice-cold water
Mix the flour and salt in a bowl. Cut in the cold olive oil briefly. Add the water and mix with a fork until it hold together. Handle as little as possible. Lightly form it into a ball and refrigerate, covered, for 30 minutes.
Preheat the oven to 400°F.
On a lightly-floured piece of baking parchment, roll out the dough to fit a 9" pie pan. Bring the pastry up to the inside top of the pan and flute it, to make a shallow shell-- not over the edge. Trim the top edge neatly. Prick the bottom and sides with a fork. Place a square of foil or baking parchment over the dough and weight down with a layer of dried beans. Bake 6 minutes. Remove beans and foil and bake 8-10 minutes more, or until it begins to turn golden. Remove from the oven and cool the pastry on a rack.
Reduce oven heat to 212°F. Make the Filling while the pastry cools.
2.) BRYANNA’S VEGAN LEMON MERINGUE PIE FILLING:
This filling is tangy and decidedly lemony!

Whisk together in a medium saucepan with a heavy bottom:
1 c. light unbleached organic granulated sugar

2/3 c. nondairy milk
7 T. orange juice (for color)
6 T. cornstarch
1/4 tsp. salt
Stir constantly until the mixture is thickened and translucent.
Immediately whisk in:
1/2 c. fresh or organic bottled lemon juice

2 T. grated lemon zest OR 2 tsp. lemon extract

1 T. vegan “buttery" spread (try my homemade palm oil-free vegan "Buttah")
Cool this for 5 minutes. Pour it into the cooled pie shell and smooth the top evenly. Set aside.
Immediately make the Meringue Topping as follows:
3.) ANGEL FOOD’S VEGAN MERINGUE TOPPING:
Have ready a packet of Angel Food Vegan Meringue Cookie Mix (see info about this mix and where to purchase it in text at the beginning of the recipe).
1. In a stand mixer
 with a whip, beat together for several minutes, until starting to fluff up (you may have to stop the machine and scrape the bottom of the mixer bowl if there is any dry powder not being incorporated into the mix):
2 T. sachet A
1/4 cup water
2. Add:
1/4 cup water
2. Add:
3/4 cup superfine (caster) sugar (I just briefly grind granulated organic unbleached sugar in a clean, dry electric coffee/spice mill—BCG)
Whip for several minutes. Again, scrape the bottom and sides of the bowl to make sure you have incorporated all of the powder and sugar.

3. Add:
(I just briefly grind granulated organic unbleached sugar in a clean, dry electric coffee/spice mill—BCG)Whip for several minutes. Again, scrape the bottom and sides of the bowl to make sure you have incorporated all of the powder and sugar.

3. Add:
2 1/2 tsp. sachet B
4 tsp. Instant Clear-Jel (See info in the text at the top of the main recipe for other places to purchase)
Whip again for several minutes, until it is really fluffy, and you can’t see any granules in it (scrape the bottom and sides as necessary to make sure all of the Clear-Jel gets mixed in).
You can see in the following photo that there are still granules of Clear-Jel showing:

Place spoonfuls of the meringue onto the surface of your pie. The mixture is very thick and sticky. It will spread out a little when baked and the tops of meringue “blobs” will smooth out somewhat, so allow for that. I used 10 spoonfuls around the edge and one larger one in the center.

Bake at 100°C (212°-215°F) for about 20 minutes.
Cool the pie on a rack and then refrigerate until serving. Serve the same day it is made.
Nutrition Facts
Nutrition (per serving): 410.5 calories; 14% calories from fat; 6.8g total fat; 0.0mg cholesterol; 348.8mg sodium; 121.8mg potassium; 86.4g carbohydrates; 1.1g fiber; 61.1g sugar; 85.3g net carbs; 3.1g protein; 8.6 points.
Enjoy!

4 tsp. Instant Clear-Jel
(See info in the text at the top of the main recipe for other places to purchase)Whip again for several minutes, until it is really fluffy, and you can’t see any granules in it (scrape the bottom and sides as necessary to make sure all of the Clear-Jel gets mixed in).
You can see in the following photo that there are still granules of Clear-Jel showing:

Place spoonfuls of the meringue onto the surface of your pie. The mixture is very thick and sticky. It will spread out a little when baked and the tops of meringue “blobs” will smooth out somewhat, so allow for that. I used 10 spoonfuls around the edge and one larger one in the center.

Bake at 100°C (212°-215°F) for about 20 minutes.
Cool the pie on a rack and then refrigerate until serving. Serve the same day it is made.
Nutrition Facts
Nutrition (per serving): 410.5 calories; 14% calories from fat; 6.8g total fat; 0.0mg cholesterol; 348.8mg sodium; 121.8mg potassium; 86.4g carbohydrates; 1.1g fiber; 61.1g sugar; 85.3g net carbs; 3.1g protein; 8.6 points.
Enjoy!


Saturday, May 30, 2009
BULGUR WHEAT, AN ANCIENT, HEALTHFUL FAST FOOD!
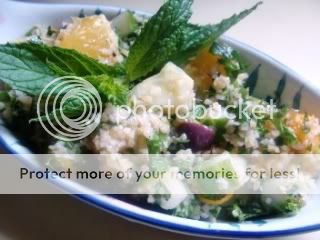
"Fruity Tabouli" from my book "World Vegan Feast".
This post was updated on May 31, 2018.
BULGUR WHEAT IS A LOW-GLYCEMIC WHOLE GRAIN:
Articles on the nutrition of bulgur wheat:
https://www.livestrong.com/article/256333-what-are-the-benefits-of-bulgur-wheat/
https://www.livestrong.com/article/500635-can-you-eat-bulgur-wheat-with-diabetes/
https://www.quora.com/Is-bulgur-wheat-a-good-carbohydrate
http://www.nutridesk.com.au/bulgur.phtml
WHEAT-FREE BULGUR; GLUTEN-FREE BULGUR AND COUSCOUS SUBSTITITES (see end of this post)
BULGUR RECIPES ON THIS BLOG:
Mushroom-Tempeh Burgers
Potato Kibbeh
Pumpkin Kibbeh
Red Lentil and Bulgur Salad Balls with Dried Fruit in Butter Lettuce Cups
Sanaa Abourezk's Bulgur and Black Eyed Peas
Apple-Cinnamon-Bulgur Cereal
Summer Bulgur and Green Bean Salad
Bulgur Pilaf with Mixed Greens and Garlic
Orange Bulgur Salad
Cooking directions for different types of bulgur wheat.
This time of the year almost always keep a grain salad on hand for snacking. Grain salads are hearty, filling, nutritious, and, the way I make them, low in fat. Tabouli (also spelled tabbouleh or tabbouli), the lemony Levantine bulgur wheat and parsley salad, is well-known to vegans and omnis alike. Sometimes it's the only thing we vegans can eat at a potluck! But I never get tired of it.
The other day I was craving some tabouli, but I didn't have any tomatoes. I've made other versions before-- I guess you can't really call them tabouli, but I do, anyway!-- but I decided to use chopped fresh orange and mango instead of tomatoes and green peppers, and add a few kalamata olives for a savory touch. The result was delicious and I was sorry when there was no more left!
"Also known as bulgar, bulgour, or burghul, this very versatile food, is believed to have been first eaten in the Euphrates Valley as far back as 5000 BC. Since then, it has been on the daily menu of the people of the Middle East," writes Canadian cookbook writer and historian Habeeb Salloum in his article "Bulgur, the noblest food achieved by wheat" in the Vegetarian Journal, Jan/Feb 2004. In this article he describes how his Syrian immigrant family made their own bulgur on the Saskatchewan prairie. He and his young siblings did not appreciate the hard work involved in making bulgur, but he now appreciates the value of bulgur to Middle Eastern cuisine, and even modern, Western cuisine. He writes, "Simple to prepare, this ancient food is an inexpensive, succulent, and versatile cereal. It is cooked in the same fashion as rice, which it commonly replaces, and takes about 20 minutes to prepare. It can be used in all types of dishes, and it can be employed in every course and every meal of the day."
Bulgur pilaf was one of the first dishes I learned to make as a child. I learned it from Rosie, a good friend of our family who was an Armenian refugee in California. Now I always have 3 types of bulgur in my kitchen-- coarse (#3), medium (#2), and fine (#1)-- ready to make a nourishing, quick meal at any time. (There is also an "extra-coarse" grade [#4], but I've never used that.)
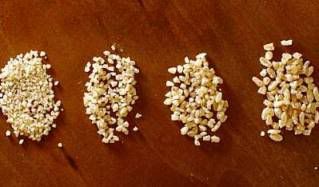
L to R: fine, medium, coarse, and extra-coarse bulgur (photo by Craig Lee, SF Chronicle)
What about the nutrition in bulgur? Bulgur is made by pre-cooking whole wheat kernels, drying them, and then cracking them. That's why it cooks so quickly. According to this interesting article on bulgur, "Bulgur Wheat is a natural whole grain food in that no chemicals or additives are used in processing the product. Many of the wheat's naturally occurring vitamins and minerals permeate the kernel during cooking thus maintaining more nutritive content than other forms of processed wheat products."
This is similar to what happens with “parboiled” or “converted” rice.
This article also reports: "The Center for Science in the Public Interest (CSPI) published two posters in 1992 describing the nutritional characteristics of bulgur wheat. The first, titled 'Nutrition Scoreboard', listed bulgur wheat as the number one grain in terms of nutrition scoring. Bulgur (69 points) outpaced wheat germ (61 points), pearled barley (60 points), brown rice (45 points) and pasta (45 points). It beat oatmeal and the highly touted Wheaties cereal (both 38 points) by 31 points!
The second poster from CSPI, titled "Rough It Up", listed bulgur wheat as the third highest grain item in the Grains and Pasta category in terms of fiber content. In this category bulgur wheat beat out whole-wheat spaghetti, buckwheat pancakes, and had more than double the fiber of cous cous. The Food Research & Innovation Enterprises says "cereal foods like bulgur should be the cornerstone of our daily diet."
Cooking Light magazine published (June 2004) an excellent visual comparison between bulgur and brown rice, showing that a cup of bulgur has fewer calories, less fat, and more than twice the fiber of rice!" Here it is:
Here's an interesting food article on bulgur wheat.
And some follow-ups articles: http://healthyeating.sfgate.com/benefits-bulgur-wheat-6245.html and http://healthyeating.sfgate.com/bulgur-wheat-nutritional-information-1681.html
(PS: read more about Habeeb Salloum's prairie childhood and his mother's recipes in his fine book "Arab Cooking on a Saskatchewan Homestead: Recipes and Recollections". It was the Silver Winner of the 2006 Canadian Culinary Awards, Canadian Food Culture Category. It's not a vegetarian book, but there are many fine vegetarian recipes, and the cooking lore and history is fun to read. It's one of my favorite cookbooks.
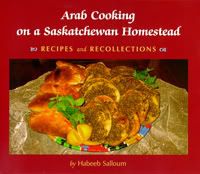
Habeeb is also the author of "Classic Vegetarian Cooking From The Middle East And North Africa", a book that should be in every vegetarian kitchen, and is co-author of From the Land of Figs and Olives, another excellent cookbook. He's also written many articles for The Vegetarian Journal, and a variety of articles on Canadian, Arab and Latin- American history, travel and the culinary arts in various journals.)
Cheers!

This post was updated on May 31, 2018.
BULGUR WHEAT IS A LOW-GLYCEMIC WHOLE GRAIN:
Articles on the nutrition of bulgur wheat:
https://www.livestrong.com/article/256333-what-are-the-benefits-of-bulgur-wheat/
https://www.livestrong.com/article/500635-can-you-eat-bulgur-wheat-with-diabetes/
https://www.quora.com/Is-bulgur-wheat-a-good-carbohydrate
http://www.nutridesk.com.au/bulgur.phtml
WHEAT-FREE BULGUR; GLUTEN-FREE BULGUR AND COUSCOUS SUBSTITITES (see end of this post)
BULGUR RECIPES ON THIS BLOG:
Mushroom-Tempeh Burgers
Potato Kibbeh
Pumpkin Kibbeh
Red Lentil and Bulgur Salad Balls with Dried Fruit in Butter Lettuce Cups
Sanaa Abourezk's Bulgur and Black Eyed Peas
Apple-Cinnamon-Bulgur Cereal
Summer Bulgur and Green Bean Salad
Bulgur Pilaf with Mixed Greens and Garlic
Orange Bulgur Salad
Cooking directions for different types of bulgur wheat.
The other day I was craving some tabouli, but I didn't have any tomatoes. I've made other versions before-- I guess you can't really call them tabouli, but I do, anyway!-- but I decided to use chopped fresh orange and mango instead of tomatoes and green peppers, and add a few kalamata olives for a savory touch. The result was delicious and I was sorry when there was no more left!
"Also known as bulgar, bulgour, or burghul, this very versatile food, is believed to have been first eaten in the Euphrates Valley as far back as 5000 BC. Since then, it has been on the daily menu of the people of the Middle East," writes Canadian cookbook writer and historian Habeeb Salloum in his article "Bulgur, the noblest food achieved by wheat" in the Vegetarian Journal, Jan/Feb 2004. In this article he describes how his Syrian immigrant family made their own bulgur on the Saskatchewan prairie. He and his young siblings did not appreciate the hard work involved in making bulgur, but he now appreciates the value of bulgur to Middle Eastern cuisine, and even modern, Western cuisine. He writes, "Simple to prepare, this ancient food is an inexpensive, succulent, and versatile cereal. It is cooked in the same fashion as rice, which it commonly replaces, and takes about 20 minutes to prepare. It can be used in all types of dishes, and it can be employed in every course and every meal of the day."
Bulgur pilaf was one of the first dishes I learned to make as a child. I learned it from Rosie, a good friend of our family who was an Armenian refugee in California. Now I always have 3 types of bulgur in my kitchen-- coarse (#3), medium (#2), and fine (#1)-- ready to make a nourishing, quick meal at any time. (There is also an "extra-coarse" grade [#4], but I've never used that.)
L to R: fine, medium, coarse, and extra-coarse bulgur (photo by Craig Lee, SF Chronicle)
What about the nutrition in bulgur? Bulgur is made by pre-cooking whole wheat kernels, drying them, and then cracking them. That's why it cooks so quickly. According to this interesting article on bulgur, "Bulgur Wheat is a natural whole grain food in that no chemicals or additives are used in processing the product. Many of the wheat's naturally occurring vitamins and minerals permeate the kernel during cooking thus maintaining more nutritive content than other forms of processed wheat products."
This is similar to what happens with “parboiled” or “converted” rice.
This article also reports: "The Center for Science in the Public Interest (CSPI) published two posters in 1992 describing the nutritional characteristics of bulgur wheat. The first, titled 'Nutrition Scoreboard', listed bulgur wheat as the number one grain in terms of nutrition scoring. Bulgur (69 points) outpaced wheat germ (61 points), pearled barley (60 points), brown rice (45 points) and pasta (45 points). It beat oatmeal and the highly touted Wheaties cereal (both 38 points) by 31 points!
The second poster from CSPI, titled "Rough It Up", listed bulgur wheat as the third highest grain item in the Grains and Pasta category in terms of fiber content. In this category bulgur wheat beat out whole-wheat spaghetti, buckwheat pancakes, and had more than double the fiber of cous cous. The Food Research & Innovation Enterprises says "cereal foods like bulgur should be the cornerstone of our daily diet."
Cooking Light magazine published (June 2004) an excellent visual comparison between bulgur and brown rice, showing that a cup of bulgur has fewer calories, less fat, and more than twice the fiber of rice!" Here it is:
 |
| Click on photo for larger view |
And some follow-ups articles: http://healthyeating.sfgate.com/benefits-bulgur-wheat-6245.html and http://healthyeating.sfgate.com/bulgur-wheat-nutritional-information-1681.html
(PS: read more about Habeeb Salloum's prairie childhood and his mother's recipes in his fine book "Arab Cooking on a Saskatchewan Homestead: Recipes and Recollections". It was the Silver Winner of the 2006 Canadian Culinary Awards, Canadian Food Culture Category. It's not a vegetarian book, but there are many fine vegetarian recipes, and the cooking lore and history is fun to read. It's one of my favorite cookbooks.
Habeeb is also the author of "Classic Vegetarian Cooking From The Middle East And North Africa", a book that should be in every vegetarian kitchen, and is co-author of From the Land of Figs and Olives, another excellent cookbook. He's also written many articles for The Vegetarian Journal, and a variety of articles on Canadian, Arab and Latin- American history, travel and the culinary arts in various journals.)
For those of you with a wheat sensitivity (not a gluten allergy or sensitivity, however), there is now a Kamut® bulgur on the market! Check it out here. Kamut® bulgur could be used in place of couscous, as well. From what I've read, it can be used just like wheat bulgur.
If you must eat gluten-free, you can substitute millet or quinoa for bulgur and couscous. This recipe from Whole Foods explains how to cook millet, especially for a salad. Here's how to cook quinoa.
There used to be a product called "Rice-Cous" (not sure if that was the spelling) on the market, but it's no longer available. However, you can make a kind of "bulgur rice" or "rice couscous" by pulsing uncooked white basmati rice, 1/2 cup at a time, in a good blender (make sure the interior of the blender is dry!) until the rice is broken into small pieces, like bulgur or couscous. Toast the rice, spread thinly on an ungreased baking sheet, at 350ºF for 20-30 minutes, stirring on and off, until it is lightly toasted. Let it cool thoroughly and store in a covered container, or zipper-lock bags. It's worth making several cups at a time.
There used to be a product called "Rice-Cous" (not sure if that was the spelling) on the market, but it's no longer available. However, you can make a kind of "bulgur rice" or "rice couscous" by pulsing uncooked white basmati rice, 1/2 cup at a time, in a good blender (make sure the interior of the blender is dry!) until the rice is broken into small pieces, like bulgur or couscous. Toast the rice, spread thinly on an ungreased baking sheet, at 350ºF for 20-30 minutes, stirring on and off, until it is lightly toasted. Let it cool thoroughly and store in a covered container, or zipper-lock bags. It's worth making several cups at a time.
You can't simply soak this “bulgur rice” in boiling water for salads, like you do with wheat bulgur-- you have to cook it as you would cook ordinary rice, but using 1 cup liquid (water or broth) for each 1/2 cup toasted rice, bringing to a boil, then turning to low heat, covering the pot, and cooking for about 1/2 an hour. Fluff it with a fork. Then serve as you would couscous or bulgur, or use in a salad recipe.
Kamut® Bulgur
Wednesday, May 27, 2009
LUSCIOUS VEGAN PECAN MOCHA LATTE CAKE!

Yes, it was my birthday yesterday! Here I am blowing out my candle with two grandaughters looking on.
I took some time of work for an extended weekend and DH and I went over to Hornby Island on Sunday morning to walk the trail through the Mt. Geoffrey Escarpment Provincial park, which goes from the ferry landing to picturesque Ford's Cove. It was a vigorous 45-minute walk, with alot of uphill and downhill, and very beautiful.
 An interesting tree root
When we arrived in Ford's Cove, we walked out on the dock and sat down on a very comfy bench to enjoy the scenery, the sun and the quiet while eating the lunch we had packed.
The view of Denman Island, where we live, from Ford's Cove:

Some of the boats docked at Ford's Cove:

My daughter, Bethany, met us on the dock and we also met briefly with my oldest granddaughter, Savannah, who was just coming off a dive boat she helps out on. We had tea and coffee with Beth at the "Circle" near the Hornby Co-op Store, in the outdoor "Vorizo Cafe", then she drove us to the ferry and we went home. A lovely spring outing!
I insisted on making my own birthday cake, over some mild protests from family members, because I have really had the urge to bake in the last little while. But DH and I have been on the Weight Watchers' Core plan (still are-- almost 15 lbs. gone--each!), so, as you might have noticed, I haven't been making desserts! So, I controlled myself and waited for my birthday! I decided to make a version of my Vegan Almond Mocha Latte Cake, which I had devised for my son's birthday a few years ago, and which was featured in one of my newsletters. I had no almonds this time, so I used pecans (my favorite nut, anyway).
(UPDATE: The recipe for this cake is in my newest book, World Vegan Feast.)
We took it over to my son's house to share with his family (leaving some behind, so we wouldn't indulge further!). The quarter of the cake that is left is going with us to some friends' house tonight to finish off. I will not have anymore, since it is 10.5 points per slice (1/12th of the cake-- a good size, actually), but I really, really enjoyed my birthday slice, I can tell you!


Mmmmmmmm!
Monday, May 18, 2009
RUSTIC APPLE-RAISIN TART WITH CRISPY, LOW-FAT OLIVE OIL PASTRY

This is a traditional pastry for savory pies in some parts of Italy, and I have used it for several years. I was always impressed with the crisp texture and ease of handling of this dough, considering how little oil there is in it (2 tablespoons)! Since olive oil is my primary oil for cooking (being a tasty, monosaturated oil), I have been wanting to try it in a fruit pie. But, since being on the WW Core Plan for the last 7 weeks, I haven't been making very many desserts.
Yesterday, however, we were invited by some friends to come over for coffee, I had some apples that needed using, and we had some extra WW points leftover, so I offered to bring an apple tart. I was impressed with the almost buttery taste of it and our hosts gobbled it up with groans of pleasure. This will now be my choice for pastry for any free-form pie! (I have yet to try it as a regular 2-crust covered pie.) I may try it with half whole wheat pastry flour next time-- I'll let you know how it works!
The apple filling is moderately sweetened with agave nectar and raisins plumped in sherry, but you can alter that as you like. Enjoy!

Printable Recipe for Pie and Pastry
Printable Recipe for Olive Oil Pastry only
BRYANNA'S RUSTIC APPLE-RAISIN TART WITH CRISPY, LOW-FAT OLIVE OIL PASTRY
Servings: 6
Yield: 1 freeform tart
This is a lovely, not-too-sweet treat. PS: If you would like a large tart, double the recipe, including the pastry and form the tart on a 14" pizza pan. Bake the large pie for 1 hour.
1 recipe Bryanna's Low-Fat, Crispy Olive Oil Pastry
(See recipe in Cooking Tips below)
Filling:
1/4 cup raisins (organic Thompson
 is what I used)
 soaked in:
2-4 tablespoons medium sherry (enough to cover the raisins)
3 large apples, cored and thinly sliced (I don't peel them- it's up to you!)
(whichever variety you like-- I used what I had: 1 Cox's Orange Pippin, and 2 Galas)
1 tablespoon lemon juice
1/4 cup agave nectar

Spices:
1/2 teaspoon cinnamon
1/4 teaspoon ground ginger
a few gratings of nutmeg
1 pinch salt
3/4 tablespoon cornstarch

Optional:
You can add some grated lemon or orange zest, if you like
Finish:
soy milk
 or nut milk
 for brushing and a sprinkle of organic granulated sugar
Make the pastry as instructed in the recipe below. Place in a bowl covered with plastic wrap and refrigerate while you prepare the Fillling.
You need to soak the raisins and there are 2 ways to do this. 1.) place the raisins in a small microwave-proof bowl and cover with sherry. Cook in the microwave for 30 seconds, or as long as it takes to just come to a boil. Or, 2.) place the raisins and sherry in a small saucepan and bring just to a boil over high heat. Immediately remove from the heat. Either way, cover the bowl or pan and let sit while you go on to the next step.
Mix the sliced apples in a large bowl with the lemon juice, agave nectar, spices and salt. Add the plumped raisins and sherry, optional citrus zest (if using), and sprinkle with the cornstarch.
Combine well. Set aside. Preheat the oven to 400°F.
On a lightly-floured piece of baking parchment
 , roll the pastry dough out into a 13-14" circle (it doesn't have to be perfect, but avoid having any holes or very thin spots). Carefully transfer the dough circle to a 9-10" pie pan or small pizza pan, lightly sprayed with oil from a pump sprayer
 . Pile the apple filling in the middle of the pastry and bring the edges up around the filling, to make a freeform pie. Pleat the edges of the dough over the filling, leaving a 5" open circle in the center.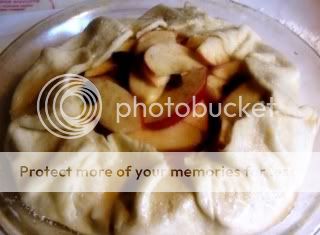
Brush the pastry with soy or nut milk and sprinkle with a little organic granulated sugar.
Cover the fruit in the open circle (not the pastry) with a circle of foil cut to fit.
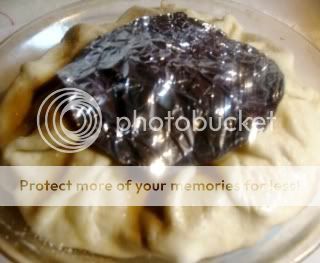
Place the pie in the oven and immediately reduce the heat to 350°F.
Bake the pie for about 45 minutes. Remove the foil and poke the apples with a fork to see if they are tender. If they are, remove the foil. If the pastry not golden yet, bake another 5-10 minutes, or until golden.
Cool on a rack until just warm. Serve warm, if possible. Cut into 6 wedges to serve.
Nutrition Facts
Nutrition (per 1/6th): 235.6 calories; 18% calories from fat; 4.9g total fat; 0.0mg cholesterol; 285.0mg sodium; 204.6mg potassium; 47.9g carbohydrates; 3.6g fiber; 26.2g sugar; 44.3g net carbs; 2.7g protein; 4.4 points.
Cooking Tips
BRYANNA'S LOW-FAT, CRISPY OLIVE OIL PASTRY
This crispy pastry is very easy to handle and quite low in fat (about 1 tsp. of olive oil per serving). Perfect for rustic "freeform" tarts. If you want to make a larger tart, double the recipe and make it on a 14" pizza pan.
1 cup unbleached flour
 (NOT pastry flour)
 1/2 tsp salt
2 Tbs extra-virgin olive oil
1/3 cup ice-cold water
Mix the flour and salt in a bowl. Cut in the cold olive oil briefly. Add the water and mix with a fork until it hold together. Handle as little as possible. Lightly form it into a ball and refrigerate, covered, for 30 minutes.
Preheat the oven to 400°F.
On a lightly-floured piece of baking parchment, roll the pastry dough out into a 13-14" circle (it doesn't have to be perfect, but avoid having any holes or very thin spots). Carefully transfer the dough circle to a 9-10" pie pan
 or small pizza pan
 , lightly sprayed with oil from a pump sprayer
 . Pile the filling in the middle of the pastry and bring the edges up around the filling, to make a freeform pie. Pleat the edges of the dough over the filling, leaving a 5" open circle in the center.
 For a sweet pie, brush the pastry with soy or nut milk and sprinkle with a little organic granulated sugar. For a savory pie, brush or spray lightly with olive oil.
Cover the filling in the open circle (not the pastry) with a circle of foil cut to fit. Place the pie in the oven and immediately reduce the heat to 350°F.
Bake the pie for about 45 minutes. Remove the foil and poke the apples with a fork to see if they are tender. If they are, remove the foil. If the pastry not golden yet, bake another 5-10 minutes, or until golden.
Servings: 6
Yield: 1 crust
Nutrition Facts
Nutrition (per 1/6th): 115.6 calories; 36% calories from fat; 4.7g total fat; 0.0mg cholesterol; 235.8mg sodium; 22.3mg potassium; 15.9g carbohydrates; 0.6g fiber; 0.1g sugar; 15.3g net carbs; 2.2g protein; 2.6 points.
Enjoy!
Wednesday, May 13, 2009
MOONG DAL INDIAN "CREPES"-- MADE ONLY WITH BEANS; NO FLOUR OR GRAIN
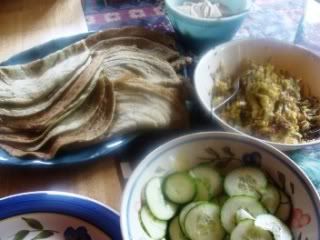
I'm really excited about these Indian "crepes" (called adai or pesarattu, made only from dal [dried legume] and un-fermented)-- they are made from beans!
I have made dosa (another type of Indian "crepe") for years, but usually with some grain or flour in them, and usually with some oil in the pan. My experiment was to make them solely with soaked beans and with no more than a light spritz of oil in the pan. It was a success, and DH and my friend Holly gobbled them up. (For a filling, I used a simple cabbage stir-fry recipe from Madhur Jaffrey's World of Vegetarian Cooking, with some Tofu "Yogurt". You can use any vegan yogurt.)
We all remarked that this simple, delicious, nourishing, and filling meal was so inexpensive to make.
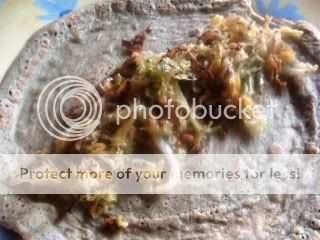
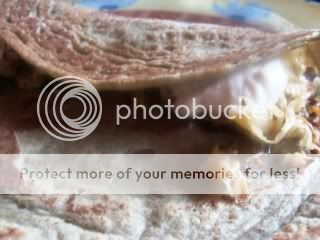
This experience has inspired me to try different kinds of Indian breads and dumplings that can be cooked in a nonstick pan, or steamed, using soaked beans, sprouted beans, bean flours, and even fresh corn. I'll let you know if I have any other successes.
Last night I soaked some moong dal in water:
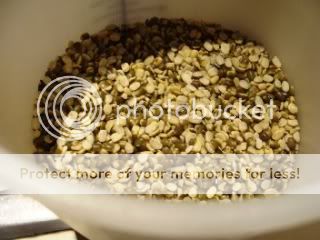
I used split moong dal, with the skins.Much later, I found my split washed moong dal
 (which has the skins removed), which would have made a nice white batter. Mine was kind of green! Oh, well-- next time.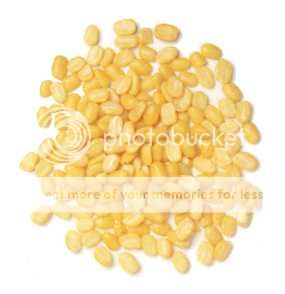
Washed moong dal
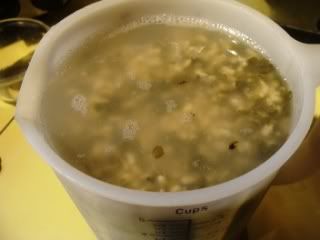
In the morning it looked like this and I had about 5 1/2 cups of soaked dal.
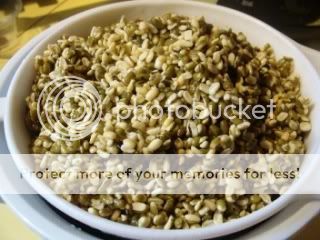
Here's the recipe:
Printable Recipe
BRYANNA'S MOONG DAL ADAI OR PESARATTU (INDIAN "CREPES" )
Servings: 12
These crepes are a type of Indian "crepe" that is made only from soaked, but not fermented, dal. These are actually a bit sturdier than the crepes we're used to, but they fold and roll nicely. You can eat them simply with chutney or an Indian-style vegetable stir-fry, or with a more elaborate vegetable curry, if you like. They can be eaten for breakfast, as a snack, or for a lunch or supper dish. (They would be great for a gluten-free diet, too.)
1 1/2 cups split moong dal
 (The washed kind have no skins, so make a nicer-looking batter, but you can use the kind with the skins. I'm told that you can use whole moong dal as well.)
 water to generously cover-- they really soak it up!
2 tablespoons (or more, according to taste) of fresh chopped green chilies (seeds removed-- or, cheat, as I did, and use pickled or canned jalapeño peppers)
1 piece (1-inch) fresh ginger, peeled
1 teaspoon salt
1/2 teaspoon cumin seed
water to thin the batter, as necessary (1/2 cup, at least)
The night before you are to make the adai, rinse and drain the dal and then place in a bowl or container with room to almost triple, and cover generously with water. The dal will soak up alot of water, so don't be stingy!
The day you are making the pancakes, make or assemble your filling(s) before starting to cook the adai.
Drain the water off the soaked dal and place it in a large high-speed blender container, along with the chilies, salt and ginger. In a Vita-Mix, you can grind the soaked beans, using the tamper, without extra water, but I don't think you could do this in cheaper blenders. In any case, I ended up adding water to the batter, so you are safe to add 1/2 cup of water to the batter when blending.
Blend the mixture until smooth, stopping and scraping down as necessary. Scoop the mixture into a bowl. Add the cumin seeds.
Now, adjust the thickness of the batter. If it's too thick, it won't spread easily. I kept stirring in water until it spread easily. I didn't measure, unfortunately, but the batter ended up like a regular Western crepe batter, more or less-- kind of like cream.
Spray a good-quality 8 to 10" nonstick skillet
 with oil from a spray pump and heat over high heat. (OR use a well-seasoned cast iron, carbon steel or stainless steel skillet instead of a non-stick pan-- see below recipe for how to season these skillets so that they are virtually nonstick, and how to keep them that way.)
With a good nonstick or well-seasoned skillet you may be able to cook these without using a spray pump with oil, but it depends on your pan. When cold water sprinkled on the pan sizzles, scoop about 1/4 cup of batter into the center of the pan with a small ladle and then use the bottom of the ladle to go in circles and spread the batter out from the center. It's easier than you might think! See the "action" pictures below (they are blurry, but give you the idea):
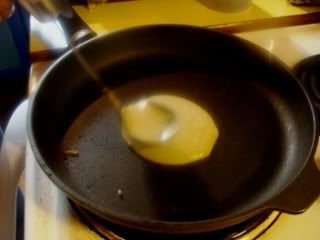

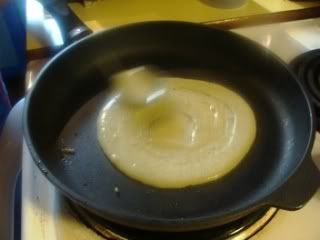
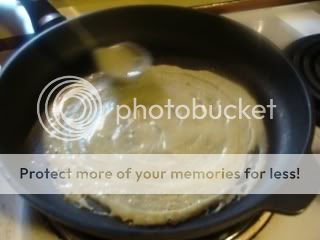
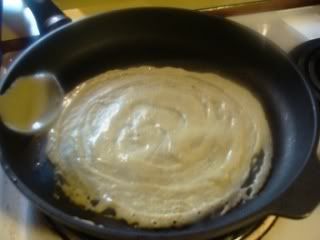
PS: if your batter doesn't spread easily, it may be too thick.
I turned the heat down just a notch or two from the "high" setting. Almost as soon as you have the batter spread, it will start looking a bit dry on top.
Carefully turn the adai and cook for a few seconds, then fold in half and lay on a platter with a clean tea towel over the adai.
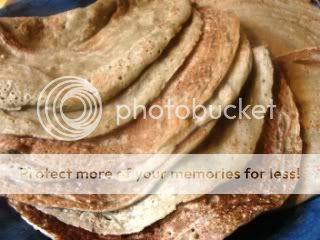
Repeat until the batter is all used up. These can be refrigerated and reheated.
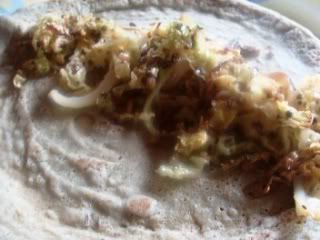
Nutrition Facts
Nutrition (per crepe): 90.8 calories; 3% calories from fat; 0.3g total fat; 0.0mg cholesterol; 166.5mg sodium; 327.7mg potassium; 16.4g carbohydrates; 4.3g fiber; 1.7g sugar; 12.1g net carbs; 6.2g protein; 1.0 points.
INSTRUCTIONS FOR SEASONING SKILLETS AND KEEPING THEM SEASONED , SO THAT THEY ARE VIRTUALLY NONSTICK:
Instructions for seasoning a carbon steel skillet here, here and here.
Instructions for seasoning a stainless steel skillet here and here.
Instructions for seasoning a cast iron skillet here.
If your cast iron skillet is really a mess, here is one way to restore it. If it is a rusty mess, it needs to be stripped and re-seasoned. I had an old pan like this and I did not want to use lye or oven cleaner to scrub it. I used the self-cleaning oven method described at the beginning of this article. This treatment stripped it right down to the grey iron. Then I did thorough oven-seasoning-- rub oil on all parts of the pan, including the handle; make sure there is no dripping oil; bake at about 350 degrees F for 1 hour; cool completely; repeat 3 more times. This may seem excessive, but you can do it when you are baking something at the same time, and the pan was like new!
To keep your cast iron pans well-seasoned, after cooking, add some HOT water to the pan (do not use cold) and let them soak for a few minutes. Then clean with a scrub brush (no stainless steel scrubbers, please!). Anything is stuck, use the edge of a plastic (not metal) dough scraper or the special polycarbonate pan scraper that Lodge sells for this purpose:

PS: You do not need to use an expensive oil like flax oil, or even coconut oil. Your favorite neutral smelling/tasting oil will do just fine.
Enjoy!
Subscribe to:
Posts (Atom)