Showing posts with label Indian cuisine. Show all posts
Showing posts with label Indian cuisine. Show all posts
Monday, May 13, 2013
FUSION NAAN PIZZAS AND MESSING AROUND WITH FLATBREADS

 |
| Naan Pizza |
 |
| Leek and vegan cheese flatbreads for dinner last night-- so good! |
All this ruminating on bread reminded me of a recipe I developed for my old newsletter, The Vegan Feast, a few years ago-- a sort of pizza with a base of vegan naan and an Indian-style pea/tomato sauce, topped with vegan cheese and rich-tasting browned onions. So, I offer it to you here while I make a few more flatbread discoveries for the next post. Bon appetit!

Printable Recipe
BRYANNA'S FUSION NAAN PIZZAS WITH INDIAN TOMATO SAUCE WITH PEAS, ARUGULA, VEGAN MOZZA, AND CRISPY BROWNED ONIONS
Serves 12 Yield: 6 pizzas
I
wanted to have a casual Indian fusion meal for friends one evening a few years ago, and this is
the main dish I was thinking about for days before. It turned out to be a big hit, and a good choice for a casual company meal, because all of the components can be made either
early in the day, or even a day or two ahead of time.
NOTE: Naan for pizzas can be baked several
hours ahead of time. Bake them for only
3 minutes or so, or until they are risen and set, and starting to become
golden. You need to underbake them because they will bake again with the
toppings. Remove them with a peel or long-handled spatula. Place them inside of
an open paper bag until time to make the pizzas.
6 Vegan Naan Bread, slightly under-baked
(see my book "World Vegan Feast" for my vegan recipe)-- mine are
about 9 x 7-inches
OR use
commercial naan (if you can find some without dairy) OR vegan pita (uncut)--
you may need to use 1 or 2 more of these
UPDATE: or use one of these flatbread doughs: My 1st flatbread dough; my 2nd flatbread dough-- both no-knead.
UPDATE: or use one of these flatbread doughs: My 1st flatbread dough; my 2nd flatbread dough-- both no-knead.
Crispy Browned Onions: **You can make these ahead of time, even the day before.**
4 large onions, thinly-sliced
2 tablespoons olive oil
1 teaspoon salt
Indian Tomato Sauce with Peas:
2 tablespoons grated fresh ginger
1 tablespoon chopped garlic
1 medium onion, minced
1 teaspoon salt
1 teaspoon turmeric
1 tablespoon garam masala or curry powder
1 teaspoon ground coriander
1 pinch cayenne
1/4 cup water or vegetarian broth
1/ 14 oz can tomatoes with juice, mashed
with your fingers
1 1/2 cups frozen petit pois (young green
peas)
1 teaspoon sugar
Additional:
2 cups raw arugula (approximately)
Crispy Browned
Onions: Heat the olive oil in a large well-seasoned skillet over high heat. Add the thinly-sliced onions and salt. Saute for several minutes, then reduce the
heat to medium. Cook the onions,
stirring often, for about 15 minutes.
You want them to be deep brown and a little crispy. When the are done, set the pan aside, off the
heat.
Indian Tomato Sauce with Peas: Add the ginger
and garlic to a large well-seasoned skillet over high heat, and stir-fry with a little bit of water
for a minute. Add the onion and stir-fry until it is soft, about 5 minutes,
adding a squirt of water as needed to keep from sticking. Add the seasonings
and 1/4 cup of water or broth, stirring around well, then add the tomatoes,
peas, and sugar, and simmer for 10-15 minutes.
Set aside.
Assembling and Baking the Pizzas: About 1/2 an
hour before you want to serve the pizzas, set an oven rack in the
upper-middle rung. Place a large baking stone (or 2 or more smaller ones) or baking tiles (leaving a 1-inch gap around the border), or a large cast iron skillet (or 2 smaller ones), or griddle or pizza pan , on the oven rack. Heat the oven to 450°F.

My homemade Naan
Place the naan (or pita) on your work surface
and cover all them evenly with the Indian Tomato Sauce. Distribute the shredded mozza evenly between
the pizzas.


Place the raw arugula
over the mozza. Top with the Crispy
Browned Onions.

Place the pizza on a baking peel, a large dough scraper/bench knife, cake or cookie lifter, or a small rimless baking sheet-- whatever
you are using to transfer the pizzas to the baking stone or alternate. Transfer
to the baking stone and bake as directed below.
To use a peel, or alternate, dust it lightly
but thoroughly with flour, cornmeal or semolina, gently pull the pizza onto it, letting one edge hang off the rim a bit, if necessary. As you place the front tip of the peel AT THE BACK
END of the hot stone or skillet, etc., pull the peel out sharply, and the pizza will slip onto the hot surface. Close the oven door quickly. If your
stone is big enough, add a second pizza.
Bake each pizza (or pair of pizzas)
for 3-5 minutes each, remove immediately and repeat until the others are
cooked. Cut them in half and serve
immediately!
Nutrition (per serving): 338.0 calories;
36% calories from fat; 13.8g total fat; 0.0mg cholesterol; 900.6mg sodium;
281.2mg potassium; 45.0g carbohydrates; 3.8g fiber; 5.5g sugar; 9.3g protein;
7.1 points.
Enjoy!


Monday, March 14, 2011
A DELICIOUS INDIAN MEAL WITH FRIENDS; CREAMY VEGAN GUJARTI-STYLE PUDDING RECIPE
 |
| A plateful of flavor! |
It was a great evening and we ate almost everything! I made Goan Black-Eyed Peas with Coconut from "The Indian Slow Cooker
 ", which was super-easy to make and delicious (and made a very generous amount!). My only criticism was that it was a bit on the salty side (and I'm not a no-salt person!)-- maybe there was a typo.
 |
| My 2 latest cookbook purchases |
The vegetable dish was perfect-- quick and easy, flavorful, and utilizing staple veggies such as cabbage, carrots and frozen peas. This was the Cabbage Mixed Vegetables from my new copy of "The Indian Vegan Kitchen
 ".
". |
| Sunji--Spicy mixed vegetables |
 ". It contained spinach, carrots, green onions, radishes and other goodies-- very good! Since I can't obtain a good tangy plain vegan yogurt, I used my Tofu Sour Cream instead of yogurt.
 |
| Vegan vegetable raita |
 |
| The original of the raita recipe is from this book. |
I served the meal with some chutney I had in the refrigerator, poppadoms crisped in the microwave, and brown basmati rice.
 |
| Little poppadams crisped in the microwave with no fat |
 . The traditional dish is a thick, sweet mixture made from drained yogurt. My original recipe was not quite thick enough, I decided, so I revised it to squeeze much of the liquid out of the creamy silken tofu before blending it with the other ingredients. I also added rose water and a little tahini (or you can use almond butter instead) for more flavor and richness. We were more than happy with the results! I hope you like it, too.
Printable Recipe
BRYANNA'S TOFU SHRIKAND (GUJARATI "YOGURT" PUDDING)
Servings: 4
This delicious pudding is traditionally made with a rich drained yogurt. This vegan version utilizes drained silken tofu and lemon juice for a smooth, rich-tasting and tangy dessert that has amazed some friends who are devotees of good Indian cuisine. You have some lee-way with the sugar content in this recipe.
2 (12.3 oz.) boxes extra-firm silken tofu , crumbled, drained and squeezed as directed below
, crumbled, drained and squeezed as directed below
1/2 to 2/3 cup light organic unbleached sugar OR organic powdered sugar
1/4 cup lemon juice
OR organic powdered sugar 1/4 cup lemon juice
2 tablespoons tahini or almond butter
or almond butter
1/2 tsp salt
1/4 tsp pure almond extract
1/4 tsp grated fresh nutmeg
1/4 tsp ground cardamom
1/4 tsp Spanish saffron soaked in
soaked in
1 tablespoon hot nondairy milk
OPTIONAL:
4 tsp rose water
GARNISH:
grated lemon zest (preferably organic) and/or chopped toasted pistachio nuts or almonds
grated nutmeg
Line a colander with clean cotton sheeting or fine cheesecloth
 , with some over-hang. Place the colander in the sink. Crumble the silken tofu into the cloth-lined colander. Gather up the ends of the cloth and twist the cloth and squeeze to extract the water from the tofu. Twist and squeeze until you get as much liquid as possible out of the tofu. Place the squeezed tofu into a food processor
 .
.
with clean cotton sheeting or fine cheesecloth, with some over-hang. Place the colander in the sink. Crumble the silken tofu into the cloth-lined colander. Gather up the ends of the cloth and twist the cloth and squeeze to extract the water from the tofu. Twist and squeeze until you get as much liquid as possible out of the tofu. Place the squeezed tofu into a food processor.
Transfer all of the remaining ingredients to the food processor and blend until VERY smooth. Scoop it evenly into 4 decorative pudding dishes or goblets. Cover and chill for at least 2 hours. Garnish before serving.
Nutrition Facts
Nutrition (per serving): 240.3 calories; 25% calories from fat; 6.9g total fat; 0.0mg cholesterol; 352.4mg sodium; 323.6mg potassium; 31.9g carbohydrates; 0.9g fiber; 27.2g sugar; 30.9g net carbs; 14.4g protein; 5.2 points.

Enjoy!

Wednesday, July 7, 2010
WHAT TO DO WITH SOY CURL CRUMBS (OR SEITAN YOU DON'T LIKE MUCH!): VEGAN MURGHI KA KEEMA
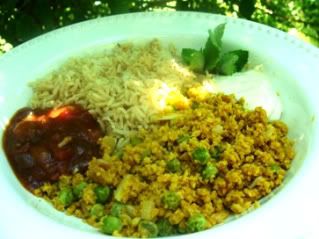
A tasty way to use those crumbs at the bottom of a box or package of Soy Curls™ (see below for the other option)! (Sorry about the lousy photo!)
I've used Butler Foods Soy Curls™ in several recipes on this blog. Here's a post with info on purchasing, storing and using them. As I wrote in that post: "They are somewhat like dried textured soy protein, but superior in texture and also less processed. They are made from the WHOLE soybean, so they contain all the fiber, and have no additives or preservatives....When reconstituted in hot broth (which takes only 5 minutes or so), the strips are like tender chicken (though you could flavor them differently). (I usually reconstituted more than I am using at that particular time and freeze the remaining for really quick meals.) They are very versatile and wonderful for stirfries, casseroles, etc..."
I buy them in bulk-- 12 lbs in a large box. 12 lbs. may not sound like much, but it's ALOT of Soy Curls™! I usually split a box with a friend. I end up with a couple of bags of Soy Curl "crumbs" which make their way to the bottom of the box. They can be used in recipes that call for TVP granules, but hey are more tender and "chicken-like". Sometimes I add them to soups and they are great for Chinese dumpling fillings! These reconstituted "crumbs" could also be used in taco and enchilada fillings, cabbage rolls, white chili, lasagne, biscuit gravy, "chicken" salad or sandwich spread, spaghetti sauce, pasta casseroles, shepherd's pie, spring rolls, fried rice, sloppy joes...
I reconstituted my last a batch of "crumbs" in boiling water and ended up with about 7 cups reconstituted. I squeezed them pretty dry and mixed with 1/4 cup low-salt "chicken-y" veggie broth powder, 1/4 cup nutritional yeast flakes and 2 tablespoons of soy sauce, then packed them in small quantities in zip-lock bags to freeze. I made an Indian-style dish with a portion of them and it was delicious! I'll share it with you below.
THE OTHER OPTION: Today I was checking my freezer for things that needed using up and found a bag of "ground chicken seitan". Oh, I remember now-- I had made a recipe for seitan which I didn't really like, but hated to waste, so I ground it up in the food processor, froze it and forgot it. It was perfect for this dish, too, so, take your pick!
Printable Recipe
BRYANNA'S VEGAN MURGHI KA KEEMA (Indian, Pakistani, Sri Lankan)
Serves 4
This is not a pretty dish, but it's yummy and very quick and easy to make (under 10 minutes!). We served it with brown basmati rice, tofu sour creme (commercial or homemade), and chutney.
1 Tbs. olive oil
1/ 1" stick cinnamon
1/4 teaspoon ground cardamom
2 bay leaves
1 small onion (4oz.), chopped
3 cloves garlic , minced
2 tsp. finely grated fresh ginger
3 cups reconstituted and flavored Soy Curls™ "crumbs" OR ground "chicken seitan" (see text above for both)
1 cup chicken-style vegetarian broth
1 1/2 cups fresh or frozen peas -- lightly cooked or just thawed out with hot water and drained
1 tsp. garam masala (or curry powder-- more if you want it hotter)
1/4 tsp. ground turmeric
1/4 tsp. cayenne (more if you want it hotter)
1/2 -3/4 tsp. salt
2 Tbs. fresh lemon juice
freshly ground pepper to taste
Pour the oil into a wide cast iron or hard anodized aluminum skillet
 or carbon steel wok
 or stir-fry pan over medium-high heat. When the oil is hot, add the cinnamon, cardamom, and bay leaves. Stir-fry for a few seconds. Add the onion.
Stir-fry until the onion pieces turn brown at the edges. Add the garlic and stir for a few seconds. Add the ginger and stir for another few seconds.
Now Add the reconstituted Soy Curls™ "crumbs" (or ground seitan), and the broth. Stir-fry until any lumps are broken up. Now add all the remaining ingredients.
Stir to mix and cook at high heat for another 2-3 minutes, stirring. The broth should be almost absorbed, but it should be moist.
Note: remove the whole spices - bay leaves, cinnamon stick - before eating.
Enjoy!

Wednesday, May 13, 2009
MOONG DAL INDIAN "CREPES"-- MADE ONLY WITH BEANS; NO FLOUR OR GRAIN
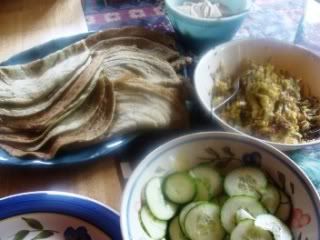
I'm really excited about these Indian "crepes" (called adai or pesarattu, made only from dal [dried legume] and un-fermented)-- they are made from beans!
I have made dosa (another type of Indian "crepe") for years, but usually with some grain or flour in them, and usually with some oil in the pan. My experiment was to make them solely with soaked beans and with no more than a light spritz of oil in the pan. It was a success, and DH and my friend Holly gobbled them up. (For a filling, I used a simple cabbage stir-fry recipe from Madhur Jaffrey's World of Vegetarian Cooking, with some Tofu "Yogurt". You can use any vegan yogurt.)
We all remarked that this simple, delicious, nourishing, and filling meal was so inexpensive to make.
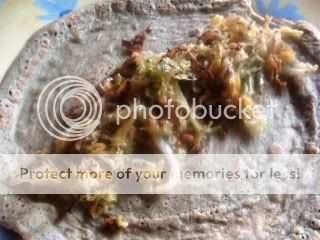

This experience has inspired me to try different kinds of Indian breads and dumplings that can be cooked in a nonstick pan, or steamed, using soaked beans, sprouted beans, bean flours, and even fresh corn. I'll let you know if I have any other successes.
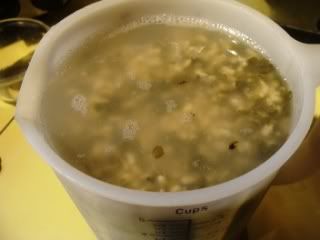
Last night I soaked some moong dal in water:
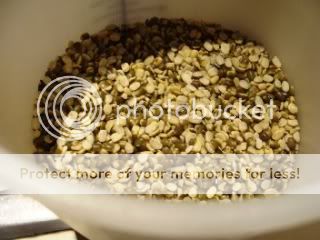
I used split moong dal, with the skins.Much later, I found my split washed moong dal
 (which has the skins removed), which would have made a nice white batter. Mine was kind of green! Oh, well-- next time.
Washed moong dal
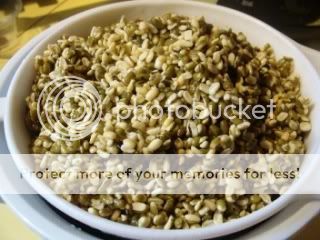
In the morning it looked like this and I had about 5 1/2 cups of soaked dal.
Here's the recipe:
Printable Recipe
BRYANNA'S MOONG DAL ADAI OR PESARATTU (INDIAN "CREPES" )
Servings: 12
These crepes are a type of Indian "crepe" that is made only from soaked, but not fermented, dal. These are actually a bit sturdier than the crepes we're used to, but they fold and roll nicely. You can eat them simply with chutney or an Indian-style vegetable stir-fry, or with a more elaborate vegetable curry, if you like. They can be eaten for breakfast, as a snack, or for a lunch or supper dish. (They would be great for a gluten-free diet, too.)
1 1/2 cups split moong dal
 (The washed kind have no skins, so make a nicer-looking batter, but you can use the kind with the skins. I'm told that you can use whole moong dal as well.)
 water to generously cover-- they really soak it up!
2 tablespoons (or more, according to taste) of fresh chopped green chilies (seeds removed-- or, cheat, as I did, and use pickled or canned jalapeño peppers)
1 piece (1-inch) fresh ginger, peeled
1 teaspoon salt
1/2 teaspoon cumin seed
water to thin the batter, as necessary (1/2 cup, at least)
The night before you are to make the adai, rinse and drain the dal and then place in a bowl or container with room to almost triple, and cover generously with water. The dal will soak up alot of water, so don't be stingy!
The day you are making the pancakes, make or assemble your filling(s) before starting to cook the adai.
Drain the water off the soaked dal and place it in a large high-speed blender container, along with the chilies, salt and ginger. In a Vita-Mix, you can grind the soaked beans, using the tamper, without extra water, but I don't think you could do this in cheaper blenders. In any case, I ended up adding water to the batter, so you are safe to add 1/2 cup of water to the batter when blending.
Blend the mixture until smooth, stopping and scraping down as necessary. Scoop the mixture into a bowl. Add the cumin seeds.
Now, adjust the thickness of the batter. If it's too thick, it won't spread easily. I kept stirring in water until it spread easily. I didn't measure, unfortunately, but the batter ended up like a regular Western crepe batter, more or less-- kind of like cream.
Spray a good-quality 8 to 10" nonstick skillet
 with oil from a spray pump and heat over high heat. (OR use a well-seasoned cast iron, carbon steel or stainless steel skillet instead of a non-stick pan-- see below recipe for how to season these skillets so that they are virtually nonstick, and how to keep them that way.)
With a good nonstick or well-seasoned skillet you may be able to cook these without using a spray pump with oil, but it depends on your pan. When cold water sprinkled on the pan sizzles, scoop about 1/4 cup of batter into the center of the pan with a small ladle and then use the bottom of the ladle to go in circles and spread the batter out from the center. It's easier than you might think! See the "action" pictures below (they are blurry, but give you the idea):
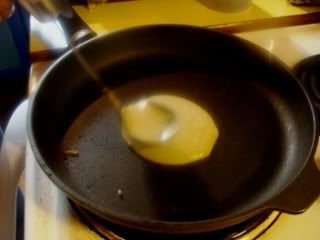

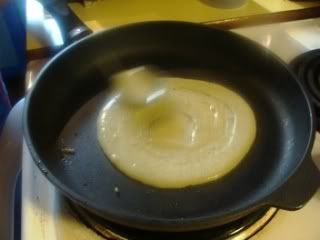

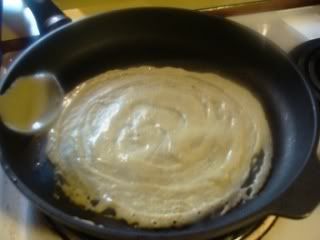
PS: if your batter doesn't spread easily, it may be too thick.
I turned the heat down just a notch or two from the "high" setting. Almost as soon as you have the batter spread, it will start looking a bit dry on top.
Carefully turn the adai and cook for a few seconds, then fold in half and lay on a platter with a clean tea towel over the adai.

Repeat until the batter is all used up. These can be refrigerated and reheated.
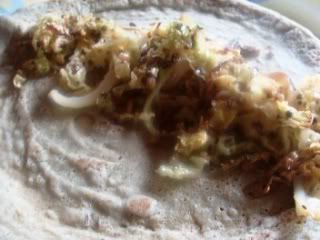
Nutrition Facts
Nutrition (per crepe): 90.8 calories; 3% calories from fat; 0.3g total fat; 0.0mg cholesterol; 166.5mg sodium; 327.7mg potassium; 16.4g carbohydrates; 4.3g fiber; 1.7g sugar; 12.1g net carbs; 6.2g protein; 1.0 points.
INSTRUCTIONS FOR SEASONING SKILLETS AND KEEPING THEM SEASONED , SO THAT THEY ARE VIRTUALLY NONSTICK:
Instructions for seasoning a carbon steel skillet here, here and here.
Instructions for seasoning a stainless steel skillet here and here.
Instructions for seasoning a cast iron skillet here.
If your cast iron skillet is really a mess, here is one way to restore it. If it is a rusty mess, it needs to be stripped and re-seasoned. I had an old pan like this and I did not want to use lye or oven cleaner to scrub it. I used the self-cleaning oven method described at the beginning of this article. This treatment stripped it right down to the grey iron. Then I did thorough oven-seasoning-- rub oil on all parts of the pan, including the handle; make sure there is no dripping oil; bake at about 350 degrees F for 1 hour; cool completely; repeat 3 more times. This may seem excessive, but you can do it when you are baking something at the same time, and the pan was like new!
To keep your cast iron pans well-seasoned, after cooking, add some HOT water to the pan (do not use cold) and let them soak for a few minutes. Then clean with a scrub brush (no stainless steel scrubbers, please!). Anything is stuck, use the edge of a plastic (not metal) dough scraper or the special polycarbonate pan scraper that Lodge sells for this purpose:

PS: You do not need to use an expensive oil like flax oil, or even coconut oil. Your favorite neutral smelling/tasting oil will do just fine.
Enjoy!
Subscribe to:
Posts (Atom)