Showing posts with label homemade soymilk. Show all posts
Showing posts with label homemade soymilk. Show all posts
Monday, May 9, 2011
OKARA MADNESS!

 Vegan burgers made with okara
I haven't had much time for experimental or fun cooking lately-- too busy editing my book-- or for much blogging either, for that matter. The last couple of days I've had fun doing some experimenting.
I've been trying to use the okara (soy pulp) from making homemade soymilk more frequently (I make 2 batches in my soy milk maker
 every 4-5 days). After all, it contains high-quality fiber (both soluble and non-soluble), as well as protein, calcium and other nutrients (nutrition facts for okara).
I do make my own parmesan substitute, and I recently devised a yummy, crispy vegan okara waffle recipe. I also developed a delicious vegan okara brownie recipe, but I can't eat those too often! I make my Okara Miso Pate sometimes, to eat as a snack with rye crisp crackers. But, I've been wanting to use it more often in recipes than just composting
 it, so I've been experimenting a little.
 Okara "Parmesan"
 Okara Waffles
 Okara Brownies
 Okara-Miso Pate
This last weekend I used okara in a couple of useful and a delicious recipes and I have a few more I want to try, but I'll just post the two that I'm happy with-- a vegan burger and a vegan "ricotta". I hope that all you home soymilk and tofu-making folks will try them out.
I altered my TVP
 /TSP vegan burger recipe, which had tofu in it as well, to use okara instead of the tofu. It worked perfectly-- and that saves a bit of money, too. This recipe makes 8 medium-large burgers. Steaming cooks the gluten and keeps the burgers moist, but also firms them up nicely when cooled, so they can be browned, grilled or added to recipes later. You can multiply this recipe and freeze it. Crumble the cooked mixture into casseroles, etc.. (It's better to use commercial vegetarian "hamburger crumbles" in sauces.) Or use the patties/burgers instead of cutlets, Salisbury steaks, minute steaks, etc..
 I won't post the actual recipe here, but here is the printable burger recipe and some photos
(PS: check out homemade burger bun recipes here):
 Before steaming
 Before steaming
 Ready to steam in a Chinese bamboo steamer
 Steaming in a Chinese bamboo steamer

 Steamed burgers
 Browning a burger
Finished burger:


And here's the second recipe, the Okara-Cashew "Ricotta"--

Printable Recipe
See http://veganfeastkitchen.blogspot.ca/2018/01/how-to-replace-expensive-sometimes.html
for alternatives to nuts.
BRYANNA’S OKARA-CASHEW RICOTTA
Makes about 2 2/3 cups
This is an excellent vegan ricotta for all purposes!
2 cups unsqueezed okara
3/4 cup raw cashews
2 tablespoons plus 2 teaspoons lemon juice
1 teaspoon sugar
1/2 teaspoon salt
Cover the cashews with boiling water and let sit for about 15 minutes. Drain them well. Process them in a dry food processor until almost a paste. Loosen with a spatula
 . Add remaining ingredients and process at high speed until as smooth as possible (will never get completely smooth)—this may take 5 minutes or more. Stop and scrape the sides every few minutes. Pack into a container, cover and refrigerate.
until almost a paste. Loosen with a spatula. Add remaining ingredients and process at high speed until as smooth as possible (will never get completely smooth)—this may take 5 minutes or more. Stop and scrape the sides every few minutes. Pack into a container, cover and refrigerate.
Alternatively, process everything together in a high-powered blender such as a Vita-Mix or Blend-Tec
 until almost smooth.
or Blend-Tec until almost smooth.
Nutrition Facts
Nutrition (per serving—1/3 cup): 98.4 calories; 55% calories from fat; 6.5g total fat; 0.0mg cholesterol; 121.8mg sodium; 154.8mg potassium; 8.2g carbohydrates; 0.4g fiber; 1.4g sugar; 7.8g net carbs; 3.3g protein; 2.4 points.

Enjoy!


Monday, August 3, 2009
EASY VEGAN POPSICLES-- GROWN-UP ONES, TOO; & CONSERVING WATER WHEN MAKING HOMEMADE SOYMILK OR TOFU

A Vegan Pineapple Sherbet Pop about to be eaten, in front of a new batch of Vegan Orange Creamsicles
Last week all temperature records were broken in BC-- it was HOT! Popsicles and salads were the order of the day, and I'll get back to those popsicles very soon. A prime concern for many people, even in our rain forest, is water-- or the lack thereof. We had a dry winter and spring, and now a dry summer. Forest fires are raging in parts of the province; wells are drying up. You see trucks with huge water tanks waiting in the ferry lineups to bring water to fill island wells. (We are lucky-- we have a back-up deep well to fill up our well in the summer.)
A reader pointed out the problem of how much water is used in soymilk making some time ago. I recently began to use a more efficient way of utilizing water during the soymilk-making process, and I'd like to share it with you.
If you make your own soymilk and/or tofu and you are having water problems, here are some ideas to conserve water during the very water-intensive process:
You can use the same 2 quarts or so of water to:
a.) float the skins off the soybeans;
b.) scald your equipment;
c.) wash your equipment after making the soymilk;
and d.) water your plants or garden!
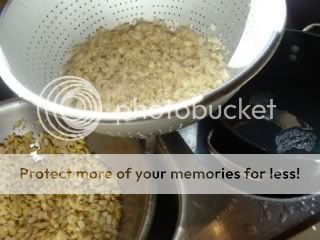
While rubbing the skins off of the beans before making the soymilk (removing the skins results in a product with a less "beany" taste), strain the water in which you are floating off the skins through a sieve into a pot or bowl each time. Re-use the same water for each round of rubbing off and floating off the skins and save the water after the last round. (NOTE: I have found that the age of the soybeans makes a difference in terms of removing the skins. For older, more shrunken soybeans, it takes me about 7 minutes to remove the skins; for nice plump newer soybeans it takes only about 3 minutes. I soak them in the refrigerator first for a few days. Freezing the soaked beans also helps the skins come off more easily.)
Now you can boil that same strained rinsing water and use it to scald your equipment in a basin. After making your soymilk, you can re-use the same water (in a washing basin and reheated) to wash out your straining cloth and clean and rinse your soymilk-making equipment. If you use dish soap, use a biodegradable one. You can then use this washing and rinsing water to water your plants or garden, or even flush your toilet, if water is very scarce.
If you make your own soymilk and/or tofu and you are having water problems, here are some ideas to conserve water during the very water-intensive process:
You can use the same 2 quarts or so of water to:
a.) float the skins off the soybeans;
b.) scald your equipment;
c.) wash your equipment after making the soymilk;
and d.) water your plants or garden!
While rubbing the skins off of the beans before making the soymilk (removing the skins results in a product with a less "beany" taste), strain the water in which you are floating off the skins through a sieve into a pot or bowl each time. Re-use the same water for each round of rubbing off and floating off the skins and save the water after the last round. (NOTE: I have found that the age of the soybeans makes a difference in terms of removing the skins. For older, more shrunken soybeans, it takes me about 7 minutes to remove the skins; for nice plump newer soybeans it takes only about 3 minutes. I soak them in the refrigerator first for a few days. Freezing the soaked beans also helps the skins come off more easily.)
Now you can boil that same strained rinsing water and use it to scald your equipment in a basin. After making your soymilk, you can re-use the same water (in a washing basin and reheated) to wash out your straining cloth and clean and rinse your soymilk-making equipment. If you use dish soap, use a biodegradable one. You can then use this washing and rinsing water to water your plants or garden, or even flush your toilet, if water is very scarce.
*******************************************
Now, ABOUT those popsicles:
Sure, I keep them around for treats for my grandchildren, but DH and I like them for a cold treat, too. And the ones I make are low in calories, fat, and even sugar. I don't have any of those fancy, flat Popsicle molds. I like the small ones you can buy in a large supermarket just because they ARE small. These small molds make a popsicle that's only around 50 cool calories and about 1 WW point.
If you are looking for BPA-free molds, here are three: Tovola molds [doesn't say they are BPA free, but I according to this site, they are]; Norpro molds
 ; and Soft Landing molds. Stainless-steel popsicle molds
 are also available. You can also use wooden popsicle sticks [buy them at craft stores if you can't find them elsewhere] with tiny glass jars or drinking glasses. Because it is a cold mixture that goes into them, and they can be removed from the mold as soon as they freeze, and the plastic is never heated, I personally don't worry too much about this.)
For special occasions, you can make "adult popsicles" by adding a little liquor or liqueur to the mix.
Here are two of our favorite popsicle recipes, and I'll share some more of our favorites in the weeks to come.
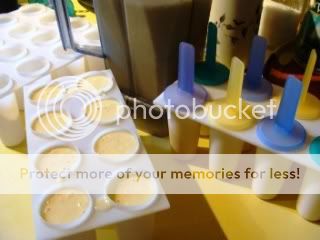
Printable Recipe
BRYANNA'S VEGAN ORANGE CREAMSICLES (WITH GROWN-UP OPTION)
Servings: 16
Yield: 16 small popsicles
1 cup non-dairy milk
(NOTE: you can even use soymilk that has turned to "buttermilk")
1/ 12.3 oz. box firm or extra-firm SILKEN tofu
 (use soft or medium tofu if silken is not available)
6 oz frozen orange juice concentrate
1/3 cup unbleached organic granulated sugar (or agave nectar
 )
)
1 teaspoon vanilla
1 pinch salt
GROWN-UP OPTION: 3 tablespoons citrus vodka or orange liqueur
Blend until smooth in a blender or Vita-Mix
 , fill your popsicle molds, put the sticks in place, and freeze solid. To remove, turn the mold upside down and run under hot tap water for a a few seconds, until the popsicles loosen in the molds enough to slide them out.
Nutrition Facts
Nutrition (per serving): 54.2 calories; 9% calories from fat; 0.6g total fat; 0.0mg cholesterol; 39.3mg sodium; 142.5mg potassium; 10.2g carbohydrates; 0.2g fiber; 9.7g sugar; 10.0g net carbs; 2.3g protein; 1.1 points.
Nutrition facts with the vodka or liqueur added: Nutrition (per serving): 60.3 calories; 8% calories from fat; 0.6g total fat; 0.0mg cholesterol; 39.3mg sodium; 142.6mg potassium; 10.2g carbohydrates; 0.2g fiber; 9.7g sugar; 10.0g net carbs; 2.3g protein; 1.2 points.
**********************************************
Printable Recipe
BRYANNA'S VEGAN PINEAPPLE SHERBET POPS (WITH GROWN-UP OPTION)
Servings: 18
Yield: 18 small popsicles
1/ 12.3 oz box firm or extra-firm SILKEN tofu (use soft or medium tofu if silken is not available)
1/3 cup unbleached organic granulated sugar (or agave nectar
 )
)
4 teaspoons lemon or lime juice
3/4 teaspoon vanilla extract
19 oz canned unsweetened crushed pineapple packed in juice (with the juice)
GROWN-UP OPTION: 3 tablespoons vodka, rum, pineapple liqueur or coconut liqueur
Blend until smooth in a blender or Vita-Mix
 , fill your popsicle molds, put the sticks in place, and freeze solid. To remove, turn the mold upside down and run under hot tap water for a few seconds, until the popsicles loosen in the molds enough to slide them out.
Nutrition Facts
Nutrition (per serving): 43.6 calories; 8% calories from fat; 0.4g total fat; 0.0mg cholesterol; 12.5mg sodium; 68.1mg potassium; 8.9g carbohydrates; 0.3g fiber; 8.2g sugar; 8.6g net carbs; 1.6g protein; 0.9 points.
Nutrition facts with the liquor added: Nutrition (per serving): 52.4 calories; 6% calories from fat; 0.4g total fat; 0.0mg cholesterol; 12.5mg sodium; 68.1mg potassium; 9.7g carbohydrates; 0.3g fiber; 8.2g sugar; 9.4g net carbs; 1.6g protein; 1.0 points.
Keep cool!

[doesn't say they are BPA free, but I according to this site, they are]; Norpro molds ; and Soft Landing molds. Stainless-steel popsicle molds are also available. You can also use wooden popsicle sticks [buy them at craft stores if you can't find them elsewhere] with tiny glass jars or drinking glasses. Because it is a cold mixture that goes into them, and they can be removed from the mold as soon as they freeze, and the plastic is never heated, I personally don't worry too much about this.)For special occasions, you can make "adult popsicles" by adding a little liquor or liqueur to the mix.
Here are two of our favorite popsicle recipes, and I'll share some more of our favorites in the weeks to come.
Printable Recipe
BRYANNA'S VEGAN ORANGE CREAMSICLES (WITH GROWN-UP OPTION)
Servings: 16
Yield: 16 small popsicles
1 cup non-dairy milk
(NOTE: you can even use soymilk that has turned to "buttermilk")
1/ 12.3 oz. box firm
or extra-firm SILKEN tofu (use soft or medium tofu if silken is not available)6 oz frozen orange juice concentrate
1/3 cup unbleached organic granulated sugar
(or agave nectar)1 teaspoon vanilla
1 pinch salt
GROWN-UP OPTION: 3 tablespoons citrus vodka or orange liqueur
Blend until smooth in a blender
or Vita-Mix, fill your popsicle molds, put the sticks in place, and freeze solid. To remove, turn the mold upside down and run under hot tap water for a a few seconds, until the popsicles loosen in the molds enough to slide them out.Nutrition Facts
Nutrition (per serving): 54.2 calories; 9% calories from fat; 0.6g total fat; 0.0mg cholesterol; 39.3mg sodium; 142.5mg potassium; 10.2g carbohydrates; 0.2g fiber; 9.7g sugar; 10.0g net carbs; 2.3g protein; 1.1 points.
Nutrition facts with the vodka or liqueur added: Nutrition (per serving): 60.3 calories; 8% calories from fat; 0.6g total fat; 0.0mg cholesterol; 39.3mg sodium; 142.6mg potassium; 10.2g carbohydrates; 0.2g fiber; 9.7g sugar; 10.0g net carbs; 2.3g protein; 1.2 points.
**********************************************
Printable Recipe
BRYANNA'S VEGAN PINEAPPLE SHERBET POPS (WITH GROWN-UP OPTION)
Servings: 18
Yield: 18 small popsicles
1/ 12.3 oz box firm
or extra-firm SILKEN tofu (use soft or medium tofu if silken is not available)1/3 cup unbleached organic granulated sugar
(or agave nectar)4 teaspoons lemon
or lime juice3/4 teaspoon vanilla extract
19 oz canned unsweetened crushed pineapple packed in juice (with the juice)
GROWN-UP OPTION: 3 tablespoons vodka, rum, pineapple liqueur or coconut liqueur
Blend until smooth in a blender
or Vita-Mix, fill your popsicle molds, put the sticks in place, and freeze solid. To remove, turn the mold upside down and run under hot tap water for a few seconds, until the popsicles loosen in the molds enough to slide them out.Nutrition Facts
Nutrition (per serving): 43.6 calories; 8% calories from fat; 0.4g total fat; 0.0mg cholesterol; 12.5mg sodium; 68.1mg potassium; 8.9g carbohydrates; 0.3g fiber; 8.2g sugar; 8.6g net carbs; 1.6g protein; 0.9 points.
Nutrition facts with the liquor added: Nutrition (per serving): 52.4 calories; 6% calories from fat; 0.4g total fat; 0.0mg cholesterol; 12.5mg sodium; 68.1mg potassium; 9.7g carbohydrates; 0.3g fiber; 8.2g sugar; 9.4g net carbs; 1.6g protein; 1.0 points.
Keep cool!
Tuesday, May 27, 2008
UPDATED: NEW, CREAMIER SOYMILK RECIPE

UPDATES, January 2020: See this post about straining the milk; and this one.
Also, if you are looking for a soymilk maker, look for a filterless machine-- see 2020 reviews of filterless machines here and here. Filterless machines are so much easier to clean and some can make a thicker soymilk, with more beans, and NO burning!
The machines I use (the SoyQuick pictured below) is, unfortunately, not produced any longer. (You may be able to find a good deal on an un-used or gently-used SoyQuick machine on ebay or other similar sites.)

I have revised my recipe for soymilk using the filterless machine. Because you can use a larger amount of beans without burning the milk, you can make ultra-creamy soymilk with this new Soyquick machine. Even with the extra beans (organic), it's still costs UNDER $1 a quart!
I developed a new soymilk recipe that makes non-beany soymilk (using ordinary soybeans) that is creamy and silky-smooth and tastes great! DH, who previously did not really like homemade soymilk as a beverage, is now converted!
For each batch, use a total of 6 oz., or about 165 g, of dried soybeans, which have been soaked thoroughly (I soak them overnight-- or even for up to 3 days-- in large screw-top jars with water up to the bottom of the neck of the jar), and, if you like, the skins removed (see information below-- this is an easy but important step to improve the flavor of the finished product), PLUS 3 tablespoons of rolled oats, which add a creamy texture.
NOTE: You don't have to follow the intructions in the following section if you use Laura soybeans, which apparently have a less "beany" flavor. This is what I have been told-- I haven't tried them myself because they are not available in Canada, as far as I am aware. Link to order Laura Soybeans (USA) (non-GMO)-- they are a pretty good price.
BEFORE MAKING THE SOYMILK, I prefer to rub off most of the skins of the soybeans-- this neutrilizes the "beany" taste. ( The skins contain some of the bitter flavours and also some inhibiting enzymes, so removing the skins can positively affect the taste, while some "gas forming" or "digestion inhibiting" compounds may be reduced or eliminated.)
This procedure isn't as arduous as it sounds. Place the drained, soaked soybeans in a deep bowl in the sink. Cover with boiling water and let sit until it cools off to just warm. This helps loosen the skins. Remove the skins (or husks) by rubbing the soaked soybeans (still in the soaking water) between your hands with a back and forth motion. Stir the beans in a circular motion. The skins will float to the top and you can float them away while you drain off the water, leaving the beans behind. You need to do this a few times (adding more water each time) until most of the skins have come off (leaving a few behind is okay). (PS: To conserve water, you can drain the soaking water into another bowl and reuse it each time you float away more skins. See instructions and ideas at end of this post.)
The skins are great for your compost, BTW, and the okara (the soy pulp left over from squeezing out the milk) can be used in recipes. Check this blog's Recipe Link page for okara recipes, or use the search box on the main page using the word "okara". In addition, you can do a search in whatever search engine you use for "okara recipes"-- there are actually quite a few out there, such as Susan Voisin's vegan Okara "Crab" cakes or my Okara Waffles. There are some great okara recipes here, too!
Okara is full of fiber-- both soluble and non-soluble-- for one thing. It also contains some protein, calcium, iron and B vitamins. If you want to save it to use later, you can freeze it or dehydrate it
***NOTE: Do read the comments below-- lots of interesting and helpful information!
Now, follow the directions for your machine to make the soymilk.
Straining your soymilk:I like my milk smooth, so I want it strained well. Gold coffee filters, which is often recommended, are very slow and tedious. The mesh strainer that comes with many machines is just not fine enough for me and doesn't hold much at a time, so I gave up on that. Consequently, I use a metal "Chinois", or a conical strainer, to strain my soymilk with ease. (These are sometimes called "China caps", or a "8-inch Extra Fine Mesh Bouillon Strainer".) It has large capacity, is made of stainless steel and has extra fine mesh. If you do buy a conical strainer, opt for extra-fine mesh, NOT perforated steel. In Canada, you can buy this from amazon here. In the USA, you can order it from here.

**For extra-smooth milk, I also line the strainer with a fine mesh "jelly bag" or nut milk bag, which fits inside the strainer and can be secured by folding the top edge over the edge of the strainer. The string at the top of the bag can be secured by attaching it to the hook at the top of the metal strainer, across from the handle. Then your pulp can be pressed with the bottom of a jar or some sort of pestle (it will be too hot to squeeze by hand). These bags are easily available in cookware shops, online, and even in large supermarkets.

To flavor each batch after straining, use 1/2 teaspoon salt and 1-2 tablespoons organic sugar or sweetener of choice.
Note: Soymilk is naturally very low in sodium and sugars, which is why they are added to commercial soymilk. Dairy milk is naturally high in both—a taste most of us are used to, so most people prefer a little flavoring. Some people like to add vanilla, but I don't like the flavor of vanilla in my tea and cereal, etc..


EXTRA: If you make your own soymilk and/or tofu and you are having water problems, here are some ideas to conserve water during the very water-intensive process:
You can use the same 2 quarts or so of water to:
a.) float the skins off the soybeans;
b.) scald your equipment;
c.) wash your equipment after making the soymilk;and d.) water your plants or garden!
While rubbing the skins off of the beans before making the soymilk (removing the skins results in a product with a less "beany" taste), strain the water in which you are floating off the skins through a sieve into a pot or bowl each time. Re-use the same water for each round of rubbing off and floating off the skins and save the water after the last round. (NOTE: I have found that the age of the soybeans makes a difference in terms of removing the skins. For older, more shrunken soybeans, it takes me about 7 minutes to remove the skins; for nice plump newer soybeans it takes only about 3 minutes. I soak them in the refrigerator first for a few days. Freezing the soaked beans also helps the skins come off more easily.)
Now you can boil that same strained rinsing water and use it to scald your equipment in a basin. After making your soymilk, you can re-use the same water (in a washing basin and reheated) to wash out your straining cloth and clean and rinse your soymilk-making equipment. If you use dish soap, use a biodegradable one. You can then use this washing and rinsing water to water your plants or garden, or even flush your toilet, if water is very scarce.

Cheers!

Subscribe to:
Posts (Atom)