Showing posts sorted by relevance for query soymilk maker. Sort by date Show all posts
Showing posts sorted by relevance for query soymilk maker. Sort by date Show all posts
Monday, March 2, 2009
EASY HOMEMADE HEMP MILK AND MORE

 |
| Shelled hemp seeds |
The first recipe is for a very rich, creamy milk that could also be used like cream. It's fairly high in calories. The second recipe is a variation of that recipe, with half the calories and fat, but a nice light beverage. I hope you'll give it a try (maybe in one of the extra recipes that follow)-- it's easy and delicious.
Printable Recipe
BRYANNA'S RICH HOMEMADE HEMP MILK OR CREME
Yield: 3 cups
This recipe produces a creamy, pleasant-tasting, rich white milk (or a light creme) with very little effort. When you strain it, there is very little residue-- just the green covering on the seeds that was left behind. I add some sweetener and salt so that it tastes more like dairy milk, which naturally contains sugar (milk sugars) and sodium.
This is a raw milk, so it must be used within a few days, and it needs to be shaken before use. You can double the recipe if you can use it up in that time. For a longer-lasting milk, you can make it in a soymilk maker that can be used with grains and seeds, such as the SoyQuick Premier Milk Maker 930P.
(Update March 2020: I understand that this company is no longer in operation. Here are some recent reviews of other soymilk makers.)
Ingredients:
3 cups cold boiled or purified water
1/2 cup shelled hemp seeds (sometimes called "hemp nuts")
1 tablespoon light agave nectar
1/4 teaspoon salt
Equipment: (scald everything with boiling water to sanitize before using)
1 blender
1 sieve or strainer
1/ 1 qt. pot or bowl that the strainer will fit into
1 square of very fine (90 weight) cheesecloth to line the strainer, with some overhang
OR you can use a "nut milk bag"
1 whisk
1/ 3-4 cup mason jar with a tight lid
Place the strainer or sieve inside of a pot or bowl, so that it rests on the edge and there is enough room underneath it to hold 3 cups liquid with some room to spare.
Place the water and shelled hemp seeds in the blender and blender on high speed for about 2 minutes.
Pour the blended mixture into your strainer set-up. Let it drip for a few minutes, then bring the cloth up and twist it, squeezing and twisting and "milking" the cloth gently until all of the liquid is released.
You should be left with a thin coating of greenish pulp on the inside of the cloth, which you can rinse off.
To the rich hemp milk in the bowl or pot, add the agave nectar and salt and whisk until dissolved.
Pour the rich hemp milk into the jar, cover and refrigerate. The milk will separate in the refrigerator-- just shake the jar well before using.
Nutrition Facts
Nutrition (per cup): 221.3 calories; 53% calories from fat; 13.1g total fat; 0.0mg cholesterol; 174.7mg sodium; 0.0mg potassium; 11.8g carbohydrates; 1.3g fiber; 3.8g sugar; 10.5g net carbs; 14.7g protein; 5.2 points.
 |
| Lighter Hemp Milk on the Left, and Rich Hemp milk on the Right |
BRYANNA'S HOMEMADE LIGHTER HEMP MILK
Yield: 6 cups
This is a pleasant-tasting, light, white milk for drinking and cooking.
For a longer-lasting milk, make the recipe in a soymilk maker that can be used with grains and seeds, such as the SoyQuick Premier Milk Maker 930P. (Update March 2015: I understand that this company is no longer in operation. Here are some recent reviews of other soymilk makers.)
3 cups cold boiled or purified water
1/2 cup shelled hemp seeds (sometimes called "hemp nuts")
3 more cups cold boiled or purified water
2 tablespoons agave nectar (NOTE: Use organic sugar instead of agave if you are using a soy/seed/grain milk maker because the heat will cause acidity in the agave to curdle the hemp milk.)
1/2 teaspoon salt
Equipment: (scald everything with boiling water to sanitize before using)
1 blender
1 sieve or strainer
1/ 1 qt. pot or bowl that the strainer will fit into
1 square of very fine (90 weight) cheesecloth to line the strainer, with some overhang
OR you can use a "nut milk bag"
1 whisk
2/ 3-4 cup mason jars with a tight lid, or a 6-cup glass jug with a lid
Place the strainer or sieve inside of a pot or bowl, so that it rests on the edge and there is enough room underneath it to hold 6 cups liquid with some room to spare.
Place the first 3 cups water and shelled hemp seeds in the blender and blend on high speed for about 2 minutes.
Pour the blended mixture into your strainer set-up. Let it drip for a few minutes, then bring the cloth up and twist it, squeezing and twisting and "milking" the cloth gently until all of the liquid is released. You should be left with a thin coating of greenish pulp on the inside of the cloth, which you can rinse off.
To the hemp milk in the bowl or pot, add the second 3 cups of water, the agave nectar and salt,and whisk well. Pour the hemp milk into the jar, cover and refrigerate. The milk will separate in the refrigerator-- just shake the jar well before using.
Nutrition Facts
Nutrition (per cup): 114.7 calories; 51% calories from fat; 6.5g total fat; 0.0mg cholesterol; 168.1mg sodium; 0.0mg potassium; 7.2g carbohydrates; 0.7g fiber; 3.2g sugar; 6.5g net carbs; 7.3g protein; 2.7 points.
HERE ARE SOME IDEAS FOR USING YOUR HOMEMADE HEMP MILK:
 |
| Top Left: Hemp seeds and homemade hemp milk; Top Right: Hemp Mayonnaise; Bottom Left: Hemp Fruit Shake or Smoothie; Bottom Right: Hemp Milk Latte |
Printable Recipe
BRYANNA'S HEMP MILK LATTE OR MOCHA LATTE
Servings: 1
1/2 cup freshly-brewed, hot espresso (can be decaffeinated)
(see this blog post)
1/2 cup Original or Vanilla commercial hemp milk, or homemade hemp milk (rich or light) , heated gently until almost boiling
sweetener to taste, if desired
Mocha variation:
Use chocolate hemp milk
Mix your sweetener in a coffee cup with the hot espresso. Pour in the hot hemp milk, stir and enjoy!
Nutrition Facts
Nutrition (per serving): 59.5 calories; 58% calories from fat; 3.9g total fat; 0.0mg cholesterol; 79.3mg sodium; 260.8mg potassium; 3.5g carbohydrates; 0.5g fiber; 3.0g sugar; 3.0g net carbs; 2.8g protein; 1.4 points.
Printable Recipe
BRYANNA'S FRUIT SALAD HEMP SHAKE
Servings: 2
1 1/2 cups Original or Vanilla commercial hemp milk or homemade hemp milk
1 cup frozen sliced mixed fruits and berries (some stores have bags of frozen 5-fruit mixes)
1 medium frozen banana, cut into chunks
2 teaspoons organic sugar or agave nectar (optional)
1 tablespoon lemon juice
1 teaspoon pure vanilla extract
Blend everything in a blender until smooth. Serve immediately.
Nutrition Facts
Nutrition (per serving): 222.1 calories; 24% calories from fat; 5.7g total fat; 0.0mg cholesterol; 90.9mg sodium; 385.3mg potassium; 38.0g carbohydrates; 3.6g fiber; 29.5g sugar; 34.4g net carbs; 5.2g protein; 4.2 points.

Printable Recipe
BRYANNA'S HEMP MILK MAYONNAISE (EGG-FREE)
Yield: 2 cups
This vegan mayonnaise is smooth, rich-tasting, and creamy, and a little tangy, but not too much. It is nice and white in color, too-- no green tinge from the hemp oil, surprisingly!
Mixture A:
1/2 cup plus 2 tablespoon cold water
1/2 teaspoon agar powder
3 1/2 tablespoons cornstarch (or wheat starch--do not substitute other starches! You can buy organic cornstarch or wheat starch in health food stores and online.)
Mixture B: (place in a blender, food processor, or, if you are using a hand/immersion blender, a 1 qt. deep bowl, milkshake cup, beaker or measuring cup or pitcher):
1 cup homemade hemp milk (rich or light variety) or commercial Original hemp milk
2 tablespoons vinegar (a light variety-- I use cider vinegar), or lemon juice
1/4 cup hemp seed oil (or use 2 tablespoons olive oil and 2 tablespoons hemp seed oil)
1 1/2 teaspoons salt
1/2 teaspoon dry mustard powder
Additional: 1/8 to 1/4 tsp. guar or xanthan gum (you can leave this out, but it makes the mayo more stable)
NOTE: Don’t add the guar or xanthan gum to Mixture B until JUST before you add Mixture A, NOT with it.
In a small saucepan (if you are going to cook it on the stovetop) or in 2 cup microwave-safe bowl (if you are using the Microwave Method, below), mix together the water, and agar powder. Let the mixture soak for a few minutes.
Whisk the cornstarch into the soaked agar mixture. Whisk the mixture together well.
The Stovetop Method for Mixture A: Stir it constantly over high heat with a whisk at first, and then a wooden spoon, until it is very thick and translucent.
The Microwave Option for Mixture A:
Add the cornstarch to the water and agar powder in the microwavable bowl, whisk together well, and microwave on full power for 30 seconds. Whisk. Repeat 2 times, or until very thick and translucent. (The microwave works well with cornstarch mixtures.)
NOTE: If you don't cook Mixture A thoroughly (and "translucent" is the key word), the mayo won't thicken properly.
Finishing the Mayonnaise:
Add the guar or xanthan gum to Mixture B in the blender, food processor or container you are using with your hand/immersion blender, and then the Mixture A on top of that. NOTE: Make sure to scrape the bottom of the pot or bowl with the whisk, so that no cornstarch gets left at the bottom.
Blend until the mixture is very smooth and you can't see any oil globules, which will take about 2 minutes.(NOTE: This mayo doesn't get thick as you blend it, like regular mayonnaise or soy mayonnaise made with lots of oil, so don't blend it and blend it, thinking it will thicken as it blends- it won't!! It will thicken after a few hours in the refrigerator.)
Scrape the mixture into a clean pint jar, cover and refrigerate until it is set. Keeps about 2 weeks.
Nutrition Facts
Nutrition (per tablespoon): 26.6 calories; 73% calories from fat; 2.2g total fat; 0.0mg cholesterol; 94.1mg sodium; 2.3mg potassium; 1.3g carbohydrates; 0.1g fiber; 0.1g sugar; 1.2g net carbs; 0.5g protein; 0.7 points.
Nutrition (per tablespoon): 26.6 calories; 73% calories from fat; 2.2g total fat; 0.0mg cholesterol; 94.1mg sodium; 2.3mg potassium; 1.3g carbohydrates; 0.1g fiber; 0.1g sugar; 1.2g net carbs; 0.5g protein; 0.7 points.
Cooking Tips
VARIATION: Do you prefer Miracle Whip to mayonnaise? Try this:
Use 1 teaspoon mustard powder, and add 1 tablespoon lemon juice and 1 tablespoon organic sugar or agave nectar to the recipe (sugar levels in this type of recipe vary, so start with this and then let your taste dictate).
 |
| Dark Green Hemp Oil |


Saturday, July 7, 2007
UPDATE ON MUSHROOM-LEEK GOURMET TOFU-- AND ANOTHER VERSION, TOO!

Slices of Sundried Tomato/Garlic/Basil/Artichoke Gourmet Tofu drizzled with a peppery extra-virgin olive oil and balsamic vinegar
I hope I won't bore you with my tofu adventures! Since I tried making the fresh sage, leek, and dried wild mushroom tofu two blog posts ago, I have talked to various other cooks about it, and wanted to try it with dried porcini mushrooms not soaked beforehand, so that the mushroom taste was more concentrated than in my first version (I soaked them the first time, then chopped them and added them to the soymilk). The originators of this recipe, on the wishwewerebaking blog, did not soak them first, but they used dried champignon mushrooms, which are not as strong as porcinis. Another friend used them without soaking, but did not specify the type she used-- she thought the results "screamed" mushroom on the first bite!
So, I had to try it myself. I also wanted to try adding the chopped leeks and sage raw, without sauteing, as I had done before. I figured that this would save time and effort, and that the leeks would cook in the hot soymilk, anyway.
NOTE: There are explicit directions for making tofu, written by my friend Brenda Wiley, at this link. Just follow those directions, with my additions below. If you don't want to make your own soymilk, and you have access to fresh unflavored soymilk , you can use that instead. But make sure it is fresh and unflavored!
To the two soymilk maker batches (3 qts.total) hot, fresh unflavored soymilk this time I added:
about 7/8 cup dried porcini mushrooms, crumbled, so that the pieces wouldn't be too large
3 cups chopped leeks
18 fresh sage leaves
(I chopped the leeks and sage more finely in the food processor)
I added these to the hot fresh soymilk in a large pot BEFORE adding the coagulant, let it come up to over 180 degrees F, and added the coagulant (2 tsp. nigari powder dissolved in 1 cup boiling water) slowly, covered the pot and let it sit 10 minutes. Then I stirred gently again and began ladling out the curds as instructed.
(See that last blog post for pictures of the process, and some of the ways I used the results.)
BTW: I made this batch with 1 Tbs. (3 packets) nigari powder for coagulant, but I think I will use only 2 tsp. (2 packets) again next time. The extra nigari made the curds smaller, and I don't think that makes as nice a tofu.

Version #2 of the Mushroom/Leek/Sage Tofu
I thought the tofu was good, the mushroom flavor stronger in a subtle way, but I think I would saute the leeks and sage again next time. I think the leek and sage flavor came through better with the sauteed version, and the leeks did not "crunch".
We just had some for a snack with real tamari (the liquid that drains off miso) from our local miso maker-- a treat!
ANOTHER VERSION:
I made this early last week, just 1 block using 1 batch (1 1/2 qts.) soymilk. I added (for 1 1/2 qts.) :
1/2 cup sundried tomatoes in oil (I rinsed the oil off with hot water and chopped them small after measuring)
1/2 cup marinated sliced artichoke hearts (also rinsed and then chopped pretty finely after measuring)
3 large cloves garlic, minced
2 tsp. dried basil (didn't have any fresh-- if you do, use 2 Tbs. chopped)
One thing I noticed was that the acid from the tomatoes (and any residual marinade on the artichokes, I guess) started curdling the soymilk before I even added the coagulator. But I added it anyway. I also noticed that the curds were smaller as a result. The tofu was a bit fragile from all the stuf I loaded into it, but tasted great! I might cut the tomatoes and artichokes down to 1/3 cup each next time.

We ate this cold drizzled with a very peppery extra-virgin olive oil and just a dash of balsamic vinegar. Yum...
As I mentioned before, I did not store the tofu in water, as I don't want to destroy the flavor, and we ate it all up within a day or two. I just placed it in the fridge on a plate, covered with plastic wrap.
Enjoy!

Tuesday, May 27, 2008
UPDATED: NEW, CREAMIER SOYMILK RECIPE

UPDATES, January 2020: See this post about straining the milk; and this one.
Also, if you are looking for a soymilk maker, look for a filterless machine-- see 2020 reviews of filterless machines here and here. Filterless machines are so much easier to clean and some can make a thicker soymilk, with more beans, and NO burning!
The machines I use (the SoyQuick pictured below) is, unfortunately, not produced any longer. (You may be able to find a good deal on an un-used or gently-used SoyQuick machine on ebay or other similar sites.)

I have revised my recipe for soymilk using the filterless machine. Because you can use a larger amount of beans without burning the milk, you can make ultra-creamy soymilk with this new Soyquick machine. Even with the extra beans (organic), it's still costs UNDER $1 a quart!
I developed a new soymilk recipe that makes non-beany soymilk (using ordinary soybeans) that is creamy and silky-smooth and tastes great! DH, who previously did not really like homemade soymilk as a beverage, is now converted!
For each batch, use a total of 6 oz., or about 165 g, of dried soybeans, which have been soaked thoroughly (I soak them overnight-- or even for up to 3 days-- in large screw-top jars with water up to the bottom of the neck of the jar), and, if you like, the skins removed (see information below-- this is an easy but important step to improve the flavor of the finished product), PLUS 3 tablespoons of rolled oats, which add a creamy texture.
NOTE: You don't have to follow the intructions in the following section if you use Laura soybeans, which apparently have a less "beany" flavor. This is what I have been told-- I haven't tried them myself because they are not available in Canada, as far as I am aware. Link to order Laura Soybeans (USA) (non-GMO)-- they are a pretty good price.
BEFORE MAKING THE SOYMILK, I prefer to rub off most of the skins of the soybeans-- this neutrilizes the "beany" taste. ( The skins contain some of the bitter flavours and also some inhibiting enzymes, so removing the skins can positively affect the taste, while some "gas forming" or "digestion inhibiting" compounds may be reduced or eliminated.)
This procedure isn't as arduous as it sounds. Place the drained, soaked soybeans in a deep bowl in the sink. Cover with boiling water and let sit until it cools off to just warm. This helps loosen the skins. Remove the skins (or husks) by rubbing the soaked soybeans (still in the soaking water) between your hands with a back and forth motion. Stir the beans in a circular motion. The skins will float to the top and you can float them away while you drain off the water, leaving the beans behind. You need to do this a few times (adding more water each time) until most of the skins have come off (leaving a few behind is okay). (PS: To conserve water, you can drain the soaking water into another bowl and reuse it each time you float away more skins. See instructions and ideas at end of this post.)
The skins are great for your compost, BTW, and the okara (the soy pulp left over from squeezing out the milk) can be used in recipes. Check this blog's Recipe Link page for okara recipes, or use the search box on the main page using the word "okara". In addition, you can do a search in whatever search engine you use for "okara recipes"-- there are actually quite a few out there, such as Susan Voisin's vegan Okara "Crab" cakes or my Okara Waffles. There are some great okara recipes here, too!
Okara is full of fiber-- both soluble and non-soluble-- for one thing. It also contains some protein, calcium, iron and B vitamins. If you want to save it to use later, you can freeze it or dehydrate it
***NOTE: Do read the comments below-- lots of interesting and helpful information!
Now, follow the directions for your machine to make the soymilk.
Straining your soymilk:I like my milk smooth, so I want it strained well. Gold coffee filters, which is often recommended, are very slow and tedious. The mesh strainer that comes with many machines is just not fine enough for me and doesn't hold much at a time, so I gave up on that. Consequently, I use a metal "Chinois", or a conical strainer, to strain my soymilk with ease. (These are sometimes called "China caps", or a "8-inch Extra Fine Mesh Bouillon Strainer".) It has large capacity, is made of stainless steel and has extra fine mesh. If you do buy a conical strainer, opt for extra-fine mesh, NOT perforated steel. In Canada, you can buy this from amazon here. In the USA, you can order it from here.

**For extra-smooth milk, I also line the strainer with a fine mesh "jelly bag" or nut milk bag, which fits inside the strainer and can be secured by folding the top edge over the edge of the strainer. The string at the top of the bag can be secured by attaching it to the hook at the top of the metal strainer, across from the handle. Then your pulp can be pressed with the bottom of a jar or some sort of pestle (it will be too hot to squeeze by hand). These bags are easily available in cookware shops, online, and even in large supermarkets.

To flavor each batch after straining, use 1/2 teaspoon salt and 1-2 tablespoons organic sugar or sweetener of choice.
Note: Soymilk is naturally very low in sodium and sugars, which is why they are added to commercial soymilk. Dairy milk is naturally high in both—a taste most of us are used to, so most people prefer a little flavoring. Some people like to add vanilla, but I don't like the flavor of vanilla in my tea and cereal, etc..


EXTRA: If you make your own soymilk and/or tofu and you are having water problems, here are some ideas to conserve water during the very water-intensive process:
You can use the same 2 quarts or so of water to:
a.) float the skins off the soybeans;
b.) scald your equipment;
c.) wash your equipment after making the soymilk;and d.) water your plants or garden!
While rubbing the skins off of the beans before making the soymilk (removing the skins results in a product with a less "beany" taste), strain the water in which you are floating off the skins through a sieve into a pot or bowl each time. Re-use the same water for each round of rubbing off and floating off the skins and save the water after the last round. (NOTE: I have found that the age of the soybeans makes a difference in terms of removing the skins. For older, more shrunken soybeans, it takes me about 7 minutes to remove the skins; for nice plump newer soybeans it takes only about 3 minutes. I soak them in the refrigerator first for a few days. Freezing the soaked beans also helps the skins come off more easily.)
Now you can boil that same strained rinsing water and use it to scald your equipment in a basin. After making your soymilk, you can re-use the same water (in a washing basin and reheated) to wash out your straining cloth and clean and rinse your soymilk-making equipment. If you use dish soap, use a biodegradable one. You can then use this washing and rinsing water to water your plants or garden, or even flush your toilet, if water is very scarce.

Cheers!

Thursday, June 28, 2007
GOURMET TOFU FROM YOUR OWN KITCHEN!
 |
| Fresh sage, leek, and dried wild mushroom tofu, just made, drizzled with a bit of soy sauce |
Last week I came across this very cool blog post (UPDATE June 2015: The blog doesn't exist anymore, unfortunately) about making homemade tofu with vegetables and herbs added. The authors called it "tofeta", but, since that name conjures up a salty, fermented taste for me, I just call it "gourmet tofu". Whatever you call it, it's a brilliant idea.
That article inspired me (as the authors intended) to think of other flavors, and quite a few combinations came to mind. However, I decided to try it more or less according to their directions for a start. They did not specify the amount of soymilk they started with, so I used 2 batches from my soymilk maker, which is 3 quarts, un-flavored. (PS, June 2015: the soymilk makers I have are Soyquick, but that brand is no longer in business-- too bad, they are great and have lasted a long time. You can check the reviews on amazon.com of other brands [or amazon.ca or the one for your country]).
NOTE: There are explicit directions for making tofu, written by my friend Brenda Wiley, at this link. Just follow those directions, with my additions below. If you can't or don't want to make your own soymilk, and you have access to fresh unflavored soymilk from an Asian soy product store (most big cities have such a store), you can use that (but make sure tha the milk is fresh and un-flavored). OR you can use unsweetened, un-flavored commercial soymilk from an un-opened carton, or (preferably) from a shelf-stable UHT carton, you can use that instead.
They added dried mushrooms, dried leeks, and dried sage to the soymilk before coagulating. Since I had some fresh leeks and beautiful sage growing in the garden, I decided to use those, plus some dried mixed wild mushrooms, which I soaked in some hot water. I also decided to chop the sage and leeks (green and white part) in the food processor and then sauté them briefly in a little olive oil, to bring out the flavors and chopped the drained, soaked mushrooms (the directions from the blog mentioned were a bit vague).
I used:
1 cup dried mixed wild mushrooms
 , soaked them for 15 minutes in boiling water
3 cups roughly chopped leeks
18 fresh sage leaves
(I chopped the leeks and sage in the food processor)
1 Tbs. olive oil for sautéing
I used 1/2 cup of the hot mushroom soaking water instead of plain water to dissolve the coagulator (I used nigari
 ). I added the prepared veggies and herbs to the hot soymilk when it got to just over 180 degrees F, then drizzled in the dissolved nigari, stirred gently and briefly, covered the pan and let set for 10 minutes.
 |
| The tofu curds and flavorful sauteed vegetables |
 you often get with soymilk machines, but which you can purchase separately. If you have a nice wooden tofu mold
  (or in Canada here) you can do the whole batch in that.
 |
| Curds in the tofu molds before pressing |
I used 5/ 28 oz. cans of tomatoes and stacked the last 3 on a wooden cutting board placed over the first two cans to make the pressure even. That's about 9 lbs. and I pressed it for about 15 minutes. It's pretty firm tofu. It made about 1 lb. 2 oz. after pressing.
There are various types of more efficient tofu presses available, such as this one, the TofuXpress:

This press, and others shown on the same page (some of which hold more product) are available on amazon and various other sites.

This tofu is fantastic! We ate some fresh and warm, just drizzled with a little soy sauce, as the Japanese do.
Last night, as a starter, we had small pieces coated lightly with nutritional yeast flakes, pan-fried in just a little olive oil with a few drops dark sesame oil,
 and served with soy sauce. Divine!
This morning, I scrambled it with a good sprinkle each of nutritional yeast flakes and soy sauce to eat with toast. Lovely! (I apologize for not being very inventive-- it tastes so good in these simple preparations. I do want to try marinating, deep-frying, etc. at a later date.)

I did not store the remaining gourmet tofu (which is the way you would normally store fresh tofu), because I didn't want to destroy the flavor, and we plan to eat it up soon, anyway. I just refrigerated it on a plate, covered with plastic wrap.
Enjoy!

Friday, May 30, 2008
A PRACTICAL WAY TO USE OKARA
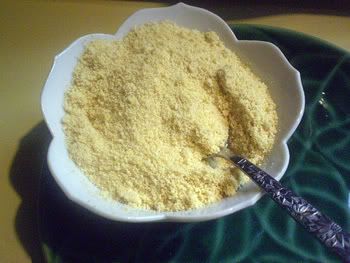
Okara "Parmesan"
What is okara? It's the pulp, or residue, leftover from making soymilk (see this blog post and this page on my website). If you make soymilk frequently you will have lots of it! Many people make interesting recipes with it, but, I must confess, I usually simply compost it!
Does it have any nutrition left? Yes, it does! It's full of fiber-- both soluble and non-soluble-- for one thing. It also contains some protein, calcium, iron and B vitamins. If you want to save it to use later, you can freeze it or dehydrate it (see the Tips in the recipe below).
The justhungry blog has some great ideas for using okara that I hadn't thought of (though not all vegetarian)! For instance, she mentions that you can rehydrate dried okara by simmering it in water or soymilk until soft, and then draining it. One great idea is to use fresh okara in polenta.
I never liked using fresh okara in breads, as it seems to sometimes "weigh them down". But justhungry suggest using dried okara in quick breads, etc., for a lighter texture-- sounds promising!
I just remembered that Dori from the Bakehouse blog (who has lots of okara recipes!)!) recommended using okara in my nut-based parmesan substitute recipe, but I never tried it. The other day I did, and it's good! Thanks, Dori! We can't get the Galaxy Foods Vegan Soy Parmesan up here anymore, so this is something I will definitely use often!
I'll post a few more okara recipes soon!
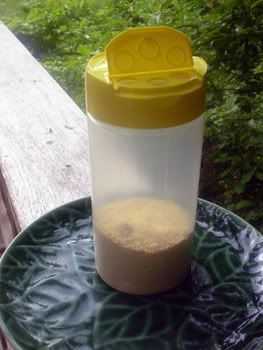
PS: for a new and improved version see this blog post!
BRYANNA'S OKARA PARMESAN SUBSTITUTE (Hat Tip to Dori from the Bakehouse blog!)
This is derived from my recipe for “Almonzano” (from my book "Nonna's Italian Kitchen"), but Dori from the bakehouse blog suggested using okara in it instead of almonds. The measurement for the okara is mine. This really looks like grated cheese and tastes "cheesey" (the miso adds a bit of fermented flavor). It shakes out easily, too. You can easily double, triple or quadruple the recipe and keep it refrigerated or frozen. IT'S ONLY 12 CALORIES A TABLESPOON!!
PS: By "squeezed", I mean okara that comes after squeezing and twisting the soymilk out of a cloth or cloth bag, or pressing through a fine filter. The okara left in the filter of a soymilk maker is much wetter and you would need to squeeze that further.
1 1/3 cups dried okara (2 cups fresh, squeezed) (see Cooking Tips below for how to dry and store)
4 tablespoons nutritional yeast flakes
1/2 teaspoon salt
2 teaspoons light miso
Process the okara, yeast and salt in a DRY blender until as fine as possible. Add the miso in tiny bits. Process again so that there are no lumps. Place in a covered container or shaker and keep refrigerated. (Make sure that the container is tightly closed so that no moisture gets in while in the refrigerator.)
Yield: 1 1/2 cups
Nutrition Facts
Nutrition (per tablespoon): 12.7 calories; 18% calories from fat; 0.3g total fat; 0.0mg cholesterol; 58.3mg sodium; 49.3mg potassium; 1.8g carbohydrates; 0.4g fiber; 0.0g sugar; 1.5g net carbs; 1.0g protein; 0.2 points.
Cooking Tips
DRYING OKARA:
If you have a large amount of okara, you can use a food dehydrator, or spread it on cookie sheets and set it in the oven at its lowest temperature, with the oven door cracked open a little to let out moisture, until dry, stirring now and then.
To dry a small amount in a microwave oven:
Get a microwave-safe plate, or use the carousel in your microwave. Line it with two sheets of paper toweling (this will absorb the moisture), and top that with a piece of cooking parchment cut to fit (this will keep the okara from sticking as it dries). Spread the okara evenly on that, breaking up clumps as much as possible. Leave a space in the center empty (it burns easily in the center of the plate).
Here's my set-up for microwave-drying small amounts:
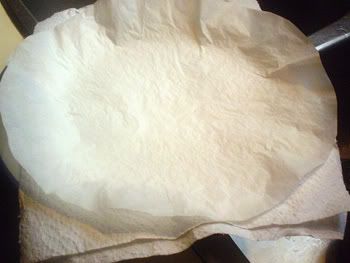
Microwave at half power (#5) in 5 minute increments, stirring after each one, until dried. I took away the paper toweling after the first 5 minutes because it was quite wet, and replaced it with new paper toweling.
Let it cool thoroughly before using or storing (in zip-lock bags).
Cheers!

Sunday, November 30, 2008
NEW AND IMPROVED OKARA PARMESAN!
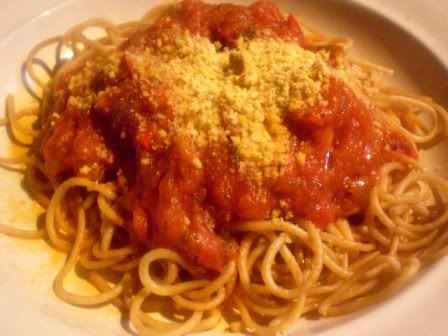
Back in May, I developed a recipe for a vegan "parmesan" utilizing dried okara-- the residue or pulp leftover from making soymilk or tofu. It was not bad, but I have been wanting to improve on it. I love Galaxy vegan soy parmesan, but it is only available in Canada online at one venue that I know of and is kind of pricey, considering how much I like to use it! That's my motivation for coming up with something I really like.
So I started playing with the recipe the other day, adding ingredients I thought would improve both flavor and texture. I like to add miso to my vegan cheeses for a fermented flavor, but you can't add much to a vegan parmesan made out of a light powdery substance, such as dehydrated okara, because it will make it soggy. So, I decided to dehydrate some miso for this recipe, in order to add more flavor. Miso powder does exist, but I have never been able to find it in my area. It was easy to make in an inexpensive home food dehydrator, and the directions are in the recipe.
So, here is the improved version, and I hope you'll like it! It contains more calories, due to the almonds and sesame seeds, but I think the calories are worth it! The recipe also uses up the okara from 2 batches of soymilk-maker okara, squeezed as dry as possible in a cloth (this is important!). The recipe makes 4 cups, which makes your effort worthwhile, too!
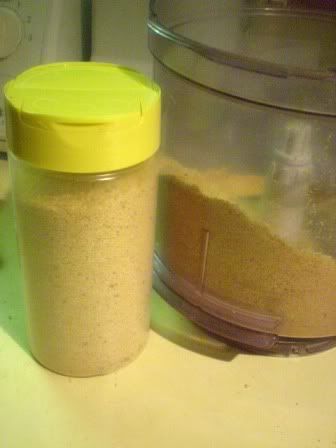
Printable Recipe
BRYANNA'S NEW AND IMPROVED OKARA PARMESAN SUBSTITUTE
Yield: 4 cups
Updated Sept. 10, 2010
This is a great way to use up okara, the residue from making soymilk. This really looks like grated cheese and tastes "cheesey" (the dried miso powder adds a fermented flavor). It shakes out easily, too. This makes quite alot , but keeps well in the refrigerator.
2 2/3 cups dried okara (about 4 cups fresh, squeezed dry in a cloth--this is the amount from 2 batches of soy milk using my new, richer soy milk recipe)
(see Cooking Tips below for how to dry okara)
1 1/3 cups blanched, slivered almonds OR 1 1/2 cups raw cashews (raw or lightly toasted)
1 cup nutritional yeast flakes
2/3 cup raw sesame seeds
3 tablespoons miso powder (see Cooking Tips below)
1 tablespoon garlic granules or powder
1/2 tablespoon salt
Process all of the ingredients in a dry food processor until it looks about the consistency of parmesan. You don't want a powder-- you want a little texture. You can use a DRY blender, but you'll have to watch the texture closely.
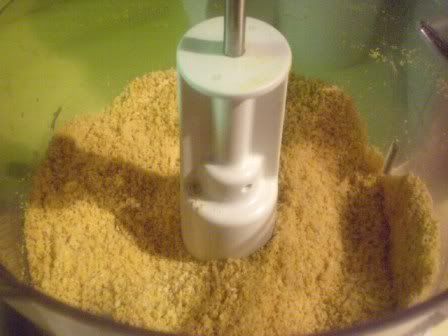
Place some in a covered container or shaker, and the rest in a ziplock bag, and keep refrigerated. (Make sure that the container is tightly closed so that no moisture gets in while in the refrigerator.)
Nutrition Facts
Nutrition (per 2 tablespoons): 79.0 calories; 48% calories from fat; 4.6g total fat; 0.0mg cholesterol; 182.5mg sodium; 182.3mg potassium; 6.6g carbohydrates; 2.1g fiber; 0.4g sugar; 4.5g net carbs; 4.6g protein; 1.5 points.
COOKING TIPS
DRYING OKARA:
If you have a large amount of okara, you can use a food dehydrator (use fruit-leather liners, or make a liner with cooking parchment), or spread it on cookie sheets and set it in the oven at its lowest temperature, with the oven door cracked open a little to let out moisture, until dry, stirring now and then.

To dry a small amount in a microwave oven:
Get a microwave-safe plate, or use the carousel in your microwave. Line it with two sheets of paper toweling (this will absorb the moisture), and top that with a piece of cooking parchment cut to fit (this will keep the okara from sticking as it dries). Spread the okara evenly on that, breaking up clumps as much as possible. Leave a space in the center empty (it burns easily in the center of the plate).
Microwave at half power (#5) in 5 minutes increments, stirring after each one, until dried. I took away the paper toweling after the first 5 minutes because it was quite wet, and replaced it with new paper toweling.
Let it cool thoroughly before using or storing (in zip-lock bags).
DRIED MISO POWDER:
This company makes freeze-dried miso powder. You may be able to find miso powder in a Japanese or Asian grocery store-- I'll have a look next time I have a chance. I wasn't going off-island when I made this recipe, so I made some myself.
HOMEMADE MISO POWDER:
(400g or 14 oz. of miso make about 2 cups of powdered miso.)
You might as well make a whole bunch of miso powder at one go-- it keeps well if very dry and airtight.
I used a cheap little home food dehydrator with 2 trays. You could probably use the oven or microwave methods, as well. Check the dried okara notes above for directions. You'll have to dry the miso in small "dabs".
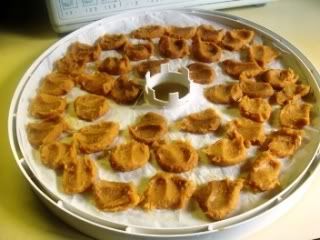
This is the whole 400 g carton of miso on one tray.
When the miso is shrunken and partially dried, break it up a bit more. I broke it up in the Vita-Mix until it was almost powdery-- more granulated, really-- and ten spread it back on the drying tray. Continue drying until you feel no moisture.
When it is dried and cooled off, grind it in a DRY Vita-Mix or other heavy-duty blender, or in small amounts in a DRY electric coffee/spice mill until powdery. If there are any hard resistant bits which refused to be pulverized, you can sift them off. Store in a tight jar or zip-lock bag.
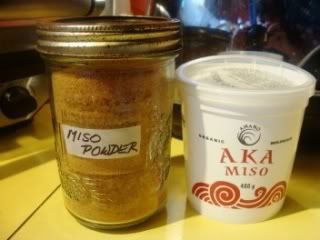
Cheers!
Sunday, March 15, 2009
HEMP-OAT MILK IN THE SOYQUICK PREMIER 930P (AND A TASTY ACCIDENT!)
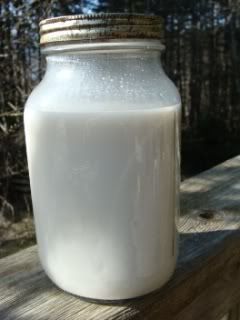
In my post about making raw hemp milk, I mentioned using the soymilk maker to make a hemp milk that wouldn't separate so easily. I tried several batches before I got it to my satisfaction-- the results are below-- and it, indeed, does not separate as easily as the raw version. But it does eventually separate after standing in the refrigerator for a day or so. However, you can shake it up and it's just fine.
I had a little accident with one batch that I made, but, never one to waste food, I salvaged something good out of it! You can see that tale below the milk recipe!
Printable Recipe
BRYANNA'S SOYQUICK HEMP AND OAT MILK
Yield: 5 1/2 cups
This is a nice mild nondairy milk. You need the filterless SoyQuick Premier
 Milk Maker 930P to make this milk.
 5 1/2 cups water (up to the "minimum" mark in the SoyQuick container)
3/4 cup shelled hemp seeds
 (also called "hemp nuts
 ")
") 3 tablespoons rolled oats
 (oatmeal)
 1 1/2 to 2 tablespoons organic sugar
 or agave nectar
IMPORTANT: IF YOU USE AGAVE NECTAR, DO NOT ADD UNTIL THE MILK COOLS OR IT WILL CURDLE! (see what happens below!)
1/2 teaspoon salt
Add water , hemp seeds, and oats to the Soy Quick container. Attach the rest of the machine, plug in and press the "Multigrain" setting.
When it beeps, remove the grinding mechanism, etc:
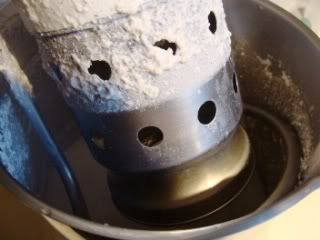
You'll see a residue or hemp seed and oats on the blade protector, etc.
and pour the milk through a cloth inside of a colander placed over a pot (sterilize all equipment with boiling water).
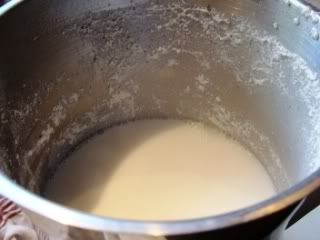
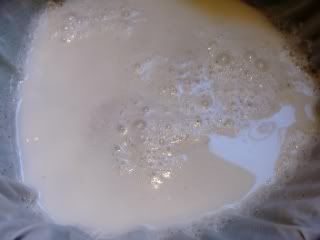
Let it drain and then pull up the sides of the cloth, twist and squeeze until all the milk is in the pot and you are left with a small residue on the inside of the cloth (discard that).
Stir in the sugar and salt, pour the milk into a scalded glass jug or canning jars, cap tightly, and refrigerate.
IF YOU USE AGAVE NECTAR FOR THE SWEETENER, DO NOT ADD IT TO THE HOT MILK, OR THE ACID IN THE AGAVE WILL CURDLE THE MILK! WAIT UNTIL THE MILK COOLS OFF. (See what happens below!)
The hemp milk will probably separate after a day or so-- just shake it up before serving.
Nutrition Facts
Nutrition (per 1/2 cup): 70.1 calories; 46% calories from fat; 3.7g total fat; 0.0mg cholesterol; 91.5mg sodium; 4.9mg potassium; 5.2g carbohydrates; 0.5g fiber; 2.1g sugar; 4.7g net carbs; 4.2g protein; 1.6 points.
OKAY, SO WHAT ABOUT THAT "ACCIDENT"?
With one of my test batches, I unthinkingly added agave nectar to the fresh, hot hemp milk and poured it into jars. This is what happened:
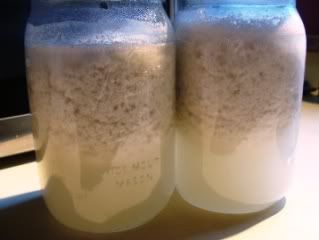
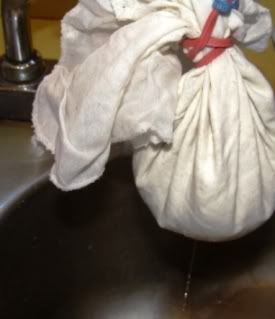
I instantly knew that that "citrusy" flavor I detect in agave nectar is acidity! Not one to waste food, I gently poured the contents of both jars (a little at a time) into the cloth lined tofu press that comes with the SoyQuick. However, the curds were very fragile, so I didn't want to press them. I gathered up the cloth after it had drained for a time in the sink, tied it with a rubber band and drained it on the end of the sink tap:
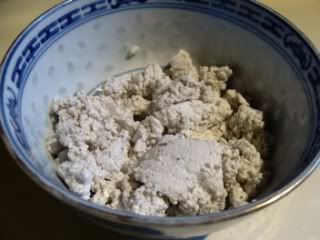
After it drained for several hours, I scraped it out of the cloth into a small bowl and was left with about 1/2 a cup of "hemp curd cheese":
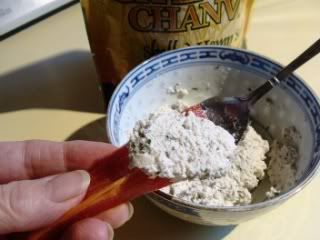
I seasoned the curds with a little salt, garlic, and herbs and used it as a tasty spread:
This would probably not be worth doing on purpose very often, as the yield is meager and it would be fairly expensive. But it was certainly good!
Enjoy!
Subscribe to:
Posts (Atom)