Showing posts sorted by date for query soymilk maker. Sort by relevance Show all posts
Showing posts sorted by date for query soymilk maker. Sort by relevance Show all posts
Friday, October 14, 2016
NEW VEGAN "SOUR CREAM" ICE CREAM WITH QUICK & EASY BROWN SUGAR "CARAMEL" SYRUP


This recipe came about in my kitchen two days ago when I was trying to think of something yummy to do with 2 cups of homemade vegan "sweet crema" that I had made for Thanksgiving dessert but never used, and some leftover vegan sour cream (both items made with silken tofu). I thought about ice cream right away because both of these low-fat items are so nice, creamy and rich-tasting. But I wasn't sure if there was such a thing as Sour Cream Ice Cream. However, it sounded possible, so I looked it up. And, yes, there is such a thing as Sour Cream Ice Cream. The two recipes I found were egg-free, which is a good start for a vegan interpretation. One contained sour cream, whole milk yogurt and whole milk. The other contained sourcream, 1/2 and 1/2, and heavy cream.
So, with some skepticism, I used my "sweet crema" (I'll post the recipe another time) and the leftover Tofu Sour Cream (recipe here) with some soymilk. But it turned out to be absolutely delicious! Topped with dribbles of the easy Brown Sugar Sauce (recipe below)...mmm, mmm!
NOTE: There's no need to make two additional recipes in order to make the ice cream recipe. To create a "from scratch" recipe (see below), I combined the ingredients for my "sweet crema" and 1/3 of my Tofu Sour Cream recipe, along with all of the additional ingredients.
Printable Recipe
BRYANNA'S VEGAN "SOUR CREAM" ICE CREAM
Servings: 8
16 oz extra-firm silken tofu (1+1/3 MoriNu 12 oz. shelf-stable cartons)
1 cup creamy original soymilk (I use Silk Organic Original), or other creamy non-dairy milk (NOT full-fat coconut milk)
(NOTE: If you prefer, you can use your favorite commercial vegan creamer, such as So Delicious Original Coconut Creamer)
3/4 cup light-colored unbleached organic granulated sugar
4 1/2 Tbsp lemon juice
2 tsp Instant Clear Jel or UltraGel (OR 1/2 tsp guar gum or xanthan gum)
(NOTE: the above ingredients help keep the ice cream from getting icy)
1 tsp lemon oil or 2 tsp. finely-grated lemon zest
1/2 tsp pure vanilla extract
3/8 tsp salt
Crumble the tofu into a blender and add all other ingredients. Blend until VERY smooth. Chill mixture until it is very cold.
Freeze according to the directions for your ice cream maker. I use a Cuisinart ICE-30BC 2-Quart Automatic Ice Cream Maker and this recipe took about 20 minutes freezing time.
Spread the mixture into a 2 quart rectangular glass or ceramic baking pan or a rectangular 2 qt. freezer container. Cover and freeze for several hours before serving-- preferably overnight.
Nutrition Facts
Nutrition (per serving): 119 calories, 11 calories from fat, 1.6g total fat, 0mg cholesterol, 136.5mg sodium, 140.8mg potassium, 21.7g carbohydrates, less than 1g fiber, 20.3g sugar, 5.1g protein, 3.3 points.
BRYANNA'S QUICK & EASY BROWN SUGAR "CARAMEL" SYRUP
Yield: 1 1/2 cups
This isn't a real caramel sauce. In that type of recipe, you must actually caramelize white sugar. But, believe me, this short-cut version is delish!
1 cup brown sugar (light brown or regular-- your pick)
1/4 cup vegan butter
1/2 cup creamy non-daiiry milk (I use Silk Organic Original) OR vegan creamer such as So Delicious Original Coconut Creamer
1 Tbsp pure vanilla extract
Whisk together all of the ingredients in a heavy medium saucepan over medium-low heat. Keep whisking gently for about 5 minutes, or until it thicken. Remove from heat. Serve warm or refrigerate. The warm sauce will harden a bit when dribbled over ice cream.
To reheat, microwave briefly at low power.
Nutrition (per 1 Tbsp serving): 55 calories, 17 calories from fat, 1.9g total fat, 0mg cholesterol, 25.7mg sodium, 39.4mg potassium, 9.2g carbohydrates, less than 1g fiber, 9g sugar, less than 1g protein, 1.6 points.
Enjoy!


Thursday, February 9, 2012
LET'S HEAR IT FOR GREAT HOMEMADE ESPRESSO-CAFE-STYLE COFFEE MADE WITH MANUAL EQUIPMENT; & HOW NOT TO CURDLE YOUR SOYMILK

Cappuccino with homemade soy milk
I was just reading about the recall of some 900,000 Tassimo coffee makers in Canada, and about 850,000 in the USA. This article goes on: "The U.S. Consumer Product Safety Commission says there have been 140 reports of problems with the Tassimo single-cup brewers dousing people, including 37 cases involving second-degree burns.
In one incident, a 10-year-old girl from Minnesota was hospitalized with second-degree burns to her face and neck. The commission also says the coffee maker's "T-disc" — the plastic disc that holds the coffee or tea — can burst while brewing and spray hot liquid. It says a 2-year-old girl in Canada suffered second-degree burns to her face.
Some four million packages of Tassimo espresso T-discs are also being recalled, and about half of those were sold in Canada. They were manufactured by Kraft Foods Global Inc., in Illinois, and were recalled after 21 reports of problems."
Now, far be it from me to say that electric coffee devices are no good. However, my husband has been making wonderful espresso-style coffee for years with no electric equipment, with stove-top espresso makers that last for many, many years if you treat them right. I'd just like to make the case for not bothering with another electric device which only has one use, takes up counter space, and has a tendency to break down after a very few years (never mind the possible dangers).
Another reason to consider switching to a stove-top version (perhaps when your electric one kicks the bucket) is the fact that these are sturdily-made from stainless steel, no plastic to throw away. And the Tassimo-- and other similar machines-- requires a plastic "T-disc" to hold little separately-packaged one-serving amounts of coffee-- more plastic to throw away. It's easy to grind your own coffee beans (organic, fair trade, preferably)-- it takes only a minute, even in a hand grinder-- and the coffee is fresh.
Another reason to consider switching to a stove-top version (perhaps when your electric one kicks the bucket) is the fact that these are sturdily-made from stainless steel, no plastic to throw away. And the Tassimo-- and other similar machines-- requires a plastic "T-disc" to hold little separately-packaged one-serving amounts of coffee-- more plastic to throw away. It's easy to grind your own coffee beans (organic, fair trade, preferably)-- it takes only a minute, even in a hand grinder-- and the coffee is fresh.

We use the big one when we have company, and the small ones when it's just one of two of us.
You fill the bottom part of the pot with water just to the little valve, add freshly-ground coffee (don't pack it down too much-- that firm packing is for the commercial steam machines), screw on the top part and set it on high on the burner. When it starts to make noise it means that the water is turning to steam and being forced up through the coffee. If your stove is electric, just leave it on the burner, but turn it off. The residual heat is enough to finish the process. If you have gas, turn it down a bit and keep an eye on it. Open the lid to see if the coffee has all come up, and enjoy!

 |
| DH even grinds his own coffee manually every time (takes only seconds) on this old Spong grinder that he's had for years. (The sound of grinding coffee is my morning wake-up call.) Missing from this photo: a little metal dish that fits into the gap below the grinding apparatus. Here's some history of the Spong, plus tips on using and a blog post about Spong grinders. |
 |
| The full battery of DH's stovetop espresso makers-- all in use at family gatherings. |

I don't drink much of coffee, but, when I do, only the best will do (my husband's), and I usually make a soy latte or cappuccino. To foam the milk for a cappuccino, I use a manual milk frother:

You add heated milk (or heat it right in the container in the microwave)-- just 1/3 to 1/2 cup...

This turns into...

...this!
Any store with cookware will have something similar-- this one was only $12.

Blue-striped cup,
rear left: homemade soymilk; white cup, rear right: Almond Breeze; front in
blue cup: Soy Dream (They all foam, but homemade soymilk or Soy Dream or Vitasoy are best; hemp milk foams, but is rather weak.)

Vitasoy Foam

Almond Breeze foam

Hemp milk foam
Some folks have told me that their coffee curdles with soy milk. Ours never does. We use dark roast, but not so dark that it tastes burnt (Starbucks tastes burnt to me). Brown (lighter roast) beans are actually more acidic than dark roast beans (and acid is what makes it curdle usually-- even some teas are a bit acidic. Warming the milk before adding to coffee also tends to prevent curdling. I found this on, of all things, the National Dairy
Council site (!): "...The acid in coffee, along with coffee's heat, favor
curdling of cream." From Oregon State U. site; "The phenolics and
acids in coffee may curdle the cream. This is especially true if the coffee is
hot ..."
Now, about the coffee: "The acid content in a
brew is also greatly dependent upon the roast degree, type of roaster, and
brewing method." (from http://www.coffeeresearch.org/) They show the types
of acids in coffee and point out that there is a maximum concentration of
acetic, malic, and citric acids in light roasted coffee. And: "In regards
to the concentration of citric, malic, lactic, pyruvic and acetic acid, Blank
found that a typical medium roast coffee consisted of 0.30%, 0.22%, 0.13%,
0.07%, and 0.27% of each acid, respectively (Clarke, 25). At very light roasts,
Blank found that the total concentration of these acids was around 1.58%, while
at dark roasts these acids could drop down to 0.71%."
They also showed that a quick-brewing method (such as the steam method of espresso, or the European plunger [French press] method) results in less acid in the brew. Also, oddly, less caffeine, even with the darker bean.
Here is the approximate caffeine content of a variety of coffee products. Keep in mind that the numbers provided are not exact:
Brewed (8 oz./250mL) = 85mg of caffeine
Instant (8 oz./250mL) = 75mg of caffeine
Decaffeinated, brewed (8 oz./250mL) = 3mg of caffeine
Decaffeinated, instant (8 oz./250mL) = 3mg of caffeine
Espresso (1 oz./30mL) = 40mg of caffeine
Cappuccino and Latte (1 oz./30mL) = 40mg of caffeine
http://www.truestarhealth.com/Notes/1718008.html
More advice from http://www.coffeereview.com/reference.cfm?ID=120: "Buy a moderately-dark- to dark-roasted coffee. Dark roasting reduces the acid sensation in coffee.
Buy a lower-altitude, naturally low-acid coffee brought to a moderately dark roast (full-city, Viennese, light espresso). To me, this is by far the best solution for acid-shy coffee drinkers. Naturally low-acid coffees include Brazils, most India and Pacific (Sumatra, Timor, Hawaii) coffees, and most Caribbean coffees.
It also helps to buy very good coffee, because the best coffee has been processed from ripe coffee fruit, and coffee from ripe fruit is naturally sweet and lacks the sharp, astringent sensation of cheaper coffee processed from less-than-ripe fruit."
http://www.coffeeresearch.org/ adds: "Acidity is typically a highly valued quality especially in Central American and some East African coffees." So you might want to avoid those.
And "Acidity has been correlated with coffees grown at very high altitudes and in mineral rich volcanic soils. The perceived acidity of washed coffees is also significantly higher than the acidity found in naturally (dry) processed coffees. This is likely due to an increase in the body of naturally processed coffees relative to wet processed coffees since body masks a coffee's acidity."

Enjoy!

Sunday, July 31, 2011
EASY, CREAMY, QUICK BERRY FROZEN “SOYGURT”
 |
| This was made with a frozen three-berry mixture. |
 ) works just fine with this, so you don’t need an electric
 one, though that works fine, too. You could also freeze the mixture in ice pop molds
 .
.
BRYANNA’S EASY BERRY FROZEN “SOYGURT”
Makes about 5 cups
This recipe is definitely a "keeper"!
This recipe is definitely a "keeper"!
1 lb. medium-firm tofu, drained and crumbled (or use 1 1/3 [12.3 oz.] boxes extra-firm silken tofu )
)
)
1/2 cup nondairy milk
3/4 cup light unbleached organic sugar (or sugar-free sweetener of your choice)
(or sugar-free sweetener of your choice)
3 tablespoons fresh lemon juice
2 teaspoons pure vanilla extract
a pinch salt
*2-3 tablespoons vodka, rum, brandy or orange, lemon or berry liqueur
*AND/OR 1 tablespoon Instant ClearJel (see info about this below) OR 3/8 teaspoon Xanthan gum or Guar gum
(see info about this below) OR 3/8 teaspoon Xanthan gum or Guar gum
(*These 2 ingredients are optional but recommended [one or both] because they help prevent the mixture from freezing rock-hard, and the liquor also adds flavour.)
3 cups frozen berries (I used a 3-berry mix of raspberries, blueberries and Marion berries from Costco)
NOTE: If you don’t have a heavy-duty blender (such as a VitaMix ) that will puree the berry seeds so that you can’t discern them, you’ll have to first puree the frozen fruit in a blender or food processor and then press the mixture through a sieve to leave the seeds behind. (Using a manual mouli or food mill
 with the finest holes might work too.) Set it aside in the refrigerator.
) that will puree the berry seeds so that you can’t discern them, you’ll have to first puree the frozen fruit in a blender or food processor and then press the mixture through a sieve to leave the seeds behind. (Using a manual mouli or food mill with the finest holes might work too.) Set it aside in the refrigerator.
Place all of the ingredients EXCEPT the fruit in a blender and blend until VERY smooth. Add the frozen berries (either whole, or pureed--see Note above—depending on the strength of your blender) and blend well again until the mixture is smooth.
Quickly scrape the cold mixture into your ice cream machine and follow the directions for your machine. (We ate some of it straight out of the machine—if you close up the machine and just let the mixture sit for 1/2 an hour or so, it will further firm up.)
Scoop the frozen “soygurt” or what you have left!) into a 1-quart (or two 1-pint) freezer container, cover, and freeze for a couple of hours before serving.
Nutrition Facts (Analysed according to a yield of 5 cups/10 servings; made with medium-firm tofu, soymilk; and Instant ClearJel, but no liquor)
, but no liquor)
Nutrition (per 1/2 cup serving): 123.3 calories; 17% calories from fat; 2.6g total fat; 0.0mg cholesterol; 38.0mg sodium; 102.2mg potassium; 22.4g carbohydrates; 1.5g fiber; 19.4g sugar; 21.0g net carbs; 4.2g protein; 2.4 points.
Cooking Tips
A while ago, I started playing with my gelato recipe from my book "Nonna's Italian Kitchen ". I wanted to make it richer-tasting, easier to make, and with more servings. One of the things I did was to use Instant Clearjel® instead of the cooked tapioca flour mixture that I generally use (tapioca thickens the mixture instead of eggs, and it has better mouth feel than cornstarch). This eliminates cooking the starch mixture, which means the whole thing takes less time and it doesn't take so long to chill the gelato mixture before freezing. Another option is xanthan gum or guar gum, and I have given the amounts in the recipe.
". I wanted to make it richer-tasting, easier to make, and with more servings. One of the things I did was to use Instant Clearjel® instead of the cooked tapioca flour mixture that I generally use (tapioca thickens the mixture instead of eggs, and it has better mouth feel than cornstarch). This eliminates cooking the starch mixture, which means the whole thing takes less time and it doesn't take so long to chill the gelato mixture before freezing. Another option is xanthan gum or guar gum, and I have given the amounts in the recipe.
INSTANT CLEARJEL® NOTES AND SUPPLIERS (Updated July 2019)
In this recipe, DO NOT use the regular Clearjel® meant for making jam and pies and needs to be cooked. Instant Clearjel® does NOT need to be cooked. It is carried on amazon.com, hoosierhillfarm.com, barryfarm.com, nuts.com and King Arthur Flour for US customers (Nichols Nursery labels theirs non-gmo.]. It has been available in Canada primarily from baking supply wholesalers, but, good news for Canadians--amazon.ca finally carries Instant Clearjel®! (Make sure you add a note to your order specifying that you want INSTANT Clearjel®.) Gourmet Warehouse in Vancouver, BC carries it, too, and they do mail order.
For information about this thickener, see:https://recipes.fandom.com/wiki/Instant_Clearjel%C2%AE
Read about another instant thickener that I haven't tried yet below, called Ultra-Gel:
https://www.pickyourown.org/ClearJel.htm Of their product, they say:
"Ultra Gel is a gluten-free, non-GMO cornstarch that can be added directed to any liquid, hot or cold, for instant thickening."
In this recipe, DO NOT use the regular Clearjel® meant for making jam and pies and needs to be cooked. Instant Clearjel® does NOT need to be cooked. It is carried on amazon.com, hoosierhillfarm.com, barryfarm.com, nuts.com and King Arthur Flour for US customers (Nichols Nursery labels theirs non-gmo.]. It has been available in Canada primarily from baking supply wholesalers, but, good news for Canadians--amazon.ca finally carries Instant Clearjel®! (Make sure you add a note to your order specifying that you want INSTANT Clearjel®.) Gourmet Warehouse in Vancouver, BC carries it, too, and they do mail order.
For information about this thickener, see:https://recipes.fandom.com/wiki/Instant_Clearjel%C2%AE
Read about another instant thickener that I haven't tried yet below, called Ultra-Gel:
https://www.pickyourown.org/ClearJel.htm Of their product, they say:
"Ultra Gel is a gluten-free, non-GMO cornstarch that can be added directed to any liquid, hot or cold, for instant thickening."

Monday, May 9, 2011
OKARA MADNESS!
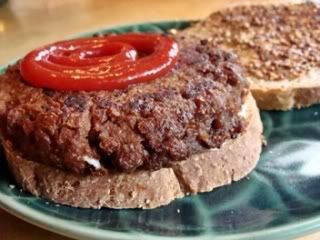
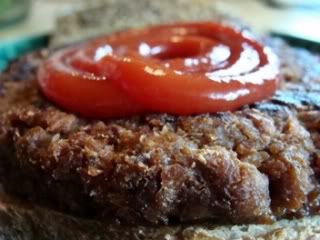 Vegan burgers made with okara
I haven't had much time for experimental or fun cooking lately-- too busy editing my book-- or for much blogging either, for that matter. The last couple of days I've had fun doing some experimenting.
I've been trying to use the okara (soy pulp) from making homemade soymilk more frequently (I make 2 batches in my soy milk maker
 every 4-5 days). After all, it contains high-quality fiber (both soluble and non-soluble), as well as protein, calcium and other nutrients (nutrition facts for okara).
I do make my own parmesan substitute, and I recently devised a yummy, crispy vegan okara waffle recipe. I also developed a delicious vegan okara brownie recipe, but I can't eat those too often! I make my Okara Miso Pate sometimes, to eat as a snack with rye crisp crackers. But, I've been wanting to use it more often in recipes than just composting
 it, so I've been experimenting a little.
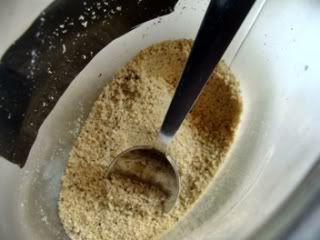 Okara "Parmesan"
 Okara Waffles
 Okara Brownies
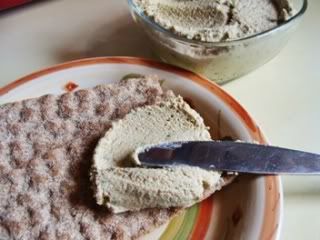 Okara-Miso Pate
This last weekend I used okara in a couple of useful and a delicious recipes and I have a few more I want to try, but I'll just post the two that I'm happy with-- a vegan burger and a vegan "ricotta". I hope that all you home soymilk and tofu-making folks will try them out.
I altered my TVP
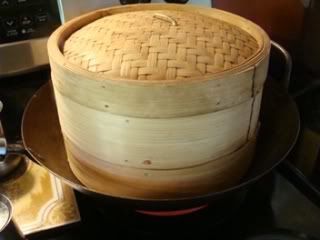
 /TSP vegan burger recipe, which had tofu in it as well, to use okara instead of the tofu. It worked perfectly-- and that saves a bit of money, too. This recipe makes 8 medium-large burgers. Steaming cooks the gluten and keeps the burgers moist, but also firms them up nicely when cooled, so they can be browned, grilled or added to recipes later. You can multiply this recipe and freeze it. Crumble the cooked mixture into casseroles, etc.. (It's better to use commercial vegetarian "hamburger crumbles" in sauces.) Or use the patties/burgers instead of cutlets, Salisbury steaks, minute steaks, etc..
 I won't post the actual recipe here, but here is the printable burger recipe and some photos
(PS: check out homemade burger bun recipes here):
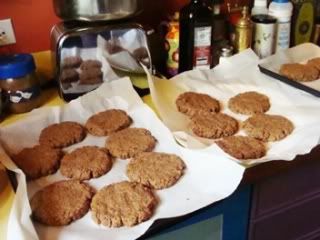 Before steaming
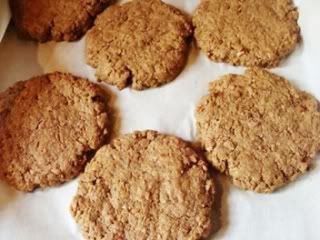 Before steaming
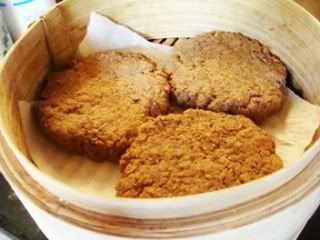 Ready to steam in a Chinese bamboo steamer
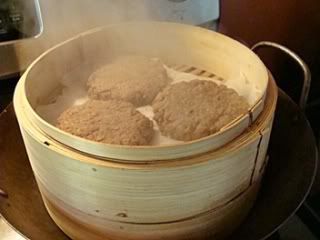 Steaming in a Chinese bamboo steamer
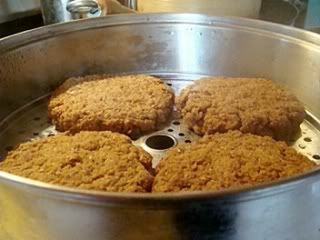 Steamed burgers
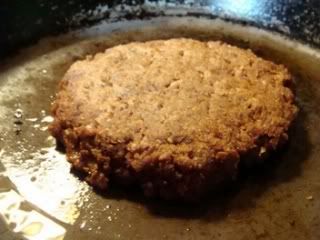 Browning a burger
Finished burger:

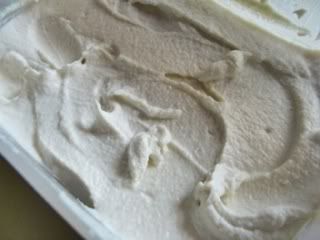
And here's the second recipe, the Okara-Cashew "Ricotta"--

Printable Recipe
See http://veganfeastkitchen.blogspot.ca/2018/01/how-to-replace-expensive-sometimes.html
for alternatives to nuts.
BRYANNA’S OKARA-CASHEW RICOTTA
Makes about 2 2/3 cups
This is an excellent vegan ricotta for all purposes!
2 cups unsqueezed okara
3/4 cup raw cashews
2 tablespoons plus 2 teaspoons lemon juice
1 teaspoon sugar
1/2 teaspoon salt
Cover the cashews with boiling water and let sit for about 15 minutes. Drain them well. Process them in a dry food processor until almost a paste. Loosen with a spatula
 . Add remaining ingredients and process at high speed until as smooth as possible (will never get completely smooth)—this may take 5 minutes or more. Stop and scrape the sides every few minutes. Pack into a container, cover and refrigerate.
until almost a paste. Loosen with a spatula. Add remaining ingredients and process at high speed until as smooth as possible (will never get completely smooth)—this may take 5 minutes or more. Stop and scrape the sides every few minutes. Pack into a container, cover and refrigerate.
Alternatively, process everything together in a high-powered blender such as a Vita-Mix or Blend-Tec
 until almost smooth.
or Blend-Tec until almost smooth.
Nutrition Facts
Nutrition (per serving—1/3 cup): 98.4 calories; 55% calories from fat; 6.5g total fat; 0.0mg cholesterol; 121.8mg sodium; 154.8mg potassium; 8.2g carbohydrates; 0.4g fiber; 1.4g sugar; 7.8g net carbs; 3.3g protein; 2.4 points.
Enjoy!

Subscribe to:
Posts (Atom)