Showing posts with label corn. Show all posts
Showing posts with label corn. Show all posts
Wednesday, October 10, 2018
CRUNCHY VEGAN CORNSTICKS!


My recipe is an easy one and the corn sticks came out nice and crispy, as they should be. They are great for eating with a good chili!

Printable Recipe
BRYANNA'S VEGAN CORN STICKS
Yield: 14 corn sticks (Can be gluten-free if you use certified GF oat flour-- which you can make out of oat flakes in a dry blender.)
You will need two cornstick pans (preferably cast iron), each with 7 indentations for the batter. (Mine are Lodge, which is an excellent brand.)
1 cup yellow cornmeal
1/2 cup oat flour
1 tsp salt
1/2 tsp baking soda
WET MIX:
1 1/4 cups soy milk
1 Tbsp lemon juice
3 Tbsp oil OR 1/4 cup melted vegan butter
1 Tbsp Orgran or Ener-G egg replacer powder
ADDITIONAL:
1 Tbsp oil for brushing on pans
OPTIONALS:
I haven't tried any of these yet, just to let you know.
1.)Some people add corn kernels to the batter (about 1 cup), but toss them in the flour mix first.
2.) Another common addition is cayenne pepper-- about 1/4 tsp. -- or some chopped jalapeño peppers, or a cup of grated vegan "cheddar" or other vegan cheese.
3.) You could also try using 2 Tbsp. of ground golden flax instead of the egg replacer powder.
Directions:
Heat the oven to 450 degrees F. When the oven is heated, heat the pans in the oven for about 5 minutes. Brush the indentations in the hot pans with the 1 Tbsp. of oil.
Mix the Dry Mix ingredients together in a medium bowl, and whisk the Wet Mix ingredients together with a whisk or immersion blender in a 1 qt. pitcher. Set aside separately.
To make the batter:
Pour the Wet Mix into the Dry Mix and stir in an over-and-under fashion just to moisten all of the Dry Mix.. Spoon the batter into the oiled indentations of the warm corn stick pans, to just barely fill to the top of each one. Immediately place in the hot oven and bake for 18 minutes. Cook the pans on racks for a few minutes before carefully loosening the sticks from the pans and removing the cornsticks to a plate. They should be nice and crispy on the bottoms. Eat as soon as possible!
Nutrition Facts
Nutrition (per serving): 84 calories, 34 calories from fat, 3.9g total fat, 0mg cholesterol, 195mg sodium, 65.5mg potassium, 10.6g carbohydrates, 1.1g fiber, less than 1g sugar, 2.2g protein, 2.4 points.
Enjoy!


Saturday, July 28, 2018
MOIST & DELICIOUS LOW-GLYCEMIC/NO-ADDED-SUGAR CORN MUFFINS

As you might have noticed, I've been on vacation from blogging for almost a month. However, I haven't been idle. You might remember me mentioning back in April that I was diagnosed as pre-diabetic, so I have been adjusting my vegan diet to a low-glycemic vegan diet, which means also adjusting some recipes, totally revamping others, or even starting from scratch, and tossing some out, as well. (You can read a bit about this in this blog post and this one. And, PS: I've dropped 13 lbs without even trying, and my blood tests are definitely improving. )
We mostly eat fresh fruit (often with homemade soy yogurt) when we want a dessert, but occasionally I make Chocolate "Nice Cream", made with 3 sliced frozen ripe bananas, 1/3 cup dark unsweetened cocoa powder, 1/4 cup soy milk, a pinch of salt, a little vanilla extract, and sometimes a dollop of nut butter, blended until creamy-smooth in the food processor, then frozen-- no sugar or sweetener of any kind needed! So delicious!
We mostly eat fresh fruit (often with homemade soy yogurt) when we want a dessert, but occasionally I make Chocolate "Nice Cream", made with 3 sliced frozen ripe bananas, 1/3 cup dark unsweetened cocoa powder, 1/4 cup soy milk, a pinch of salt, a little vanilla extract, and sometimes a dollop of nut butter, blended until creamy-smooth in the food processor, then frozen-- no sugar or sweetener of any kind needed! So delicious!
I've been eating only sprouted grain or whole rye breads, and also investigating other low-glycemic grains and flours. Quinoa, teff, and amaranth are all very well, but they are expensive (as is commercial sprouted grain flour), difficult for some people to find, and often too strong in taste to use in many recipes. My favorite quartet of LG flours is comprised of oat flour, barley flour, millet flour (all can be ground from grain to flour in a dry high-speed blender if you do not have a grain mill) and chickpea flour. (White bean flour can be used in place of chickpea flour.) Buckwheat and rye are also excellent, and I always have some in my freezer, but their strong flavors make them less useful.
Lately, I've been working on a low-glycemic, low-fat vegan brownie-- can you tell that we love chocolate? I'm not there yet, but will report back. Another recipe that I've been working on is a low-fat, but moist, low-glycemic vegan cornbread or corn muffin. Cornbread is a particular favorite of mine. I've tried many recipes from online sources and cookbooks, but, in the end I successfully revised one of my own corn muffin recipes and it's easy, quick, and inexpensive, as well as delicious.
Lately, I've been working on a low-glycemic, low-fat vegan brownie-- can you tell that we love chocolate? I'm not there yet, but will report back. Another recipe that I've been working on is a low-fat, but moist, low-glycemic vegan cornbread or corn muffin. Cornbread is a particular favorite of mine. I've tried many recipes from online sources and cookbooks, but, in the end I successfully revised one of my own corn muffin recipes and it's easy, quick, and inexpensive, as well as delicious.
The following recipe is based on a recipe from my book "The Fiber for Life Cookbook" (Book Publishing Co., Summertown, TN; © 2002). It has been a favorite of ours for many years, because we love anything corn-y, and these are double-corn-y! The canned cream-style corn in the recipe (which contains no cream or dairy whatsoever) adds more fiber, and makes the muffins moist and sweet. If you don't have a can in your pantry, or prefer not to use it, you will need some thawed and drained frozen sweet corn-- see note at the end of the Ingredient List in the recipe.
In this close-up, you can see the nice moist crumb of the muffin.

Printable Recipe
BRYANNA'S
MOIST & DELICIOUS LOW-GLYCEMIC/NO-ADDED-SUGAR CORN MUFFINS
Makes 12
(This recipe also happens to be gluten-free, can be soy-free, and contains no sugar or syrup of any kind, and no artificial sweeteners.)
Makes 12
(This recipe also happens to be gluten-free, can be soy-free, and contains no sugar or syrup of any kind, and no artificial sweeteners.)
DRY
MIX:
1
cup yellow cornmeal
1/2
cup oat flour
1/4
cup barley flour
1/4
cup millet flour
1/2
T. baking powder
1/2
tsp. salt
1/4
tsp. baking soda
WET
MIX:
3/4
cup non-dairy milk
2
T. oil
2
tsp. powdered egg replacer (such as Ener-G or Orgran)
ADDITIONAL:
14
oz. can cream-style corn (This product
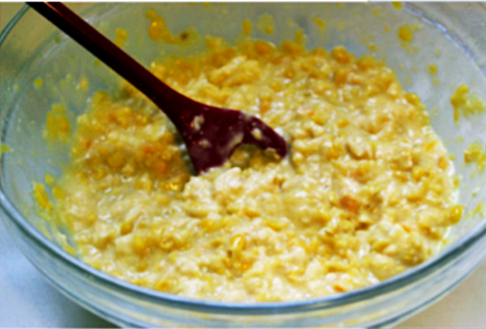
does NOT contain dairy products.) OR, in place of canned cream-style corn, you can mix 14 oz. of thawed frozen sweet corn (do not drain) with the Wet Mix ingredients in a blender or food processor for about 5 seconds-- some lumps of corn should remain. See photos below to judge texture.


Instructions:

Instructions:
Preheat
the oven to 375 degrees F. Oil 12 muffin cups. Mix
the Dry Mix ingredients together well in a medium bowl. Mix the
Wet Mix ingredients in another (2 to 4-cup) bowl or pitcher with a
whisk or with a hand/immersion blender. Pour the contents of
the can of "cream-style" corn into the Wet Mix and stir
well.
Pour
this mixture into the Dry Mix and mix briefly. Spoon evenly
into the muffin tin. Bake 15-20 minutes. (Test one of the muffins with a toothpick
after 15 minutes, to see if the toothpick comes out clean-- if it dies not, bake for a few minutes more.).
Loosen
them carefully with a table knife and turn them on edge. Place
the muffin tin on a rack, cover the muffins with a clean tea towel
and cool for a few minutes before serving. Cool thoroughly
before storing. These freeze well.
Nutrition
Facts
Nutrition
(per serving): 126 calories, 30 calories from fat, 3.4g total
fat, 0mg cholesterol, 211.5mg sodium, 185.4mg potassium, 22.5g
carbohydrates, 2.1g fiber, 1.6g sugar, 3g protein, 3.7 points.
Enjoy!

Thursday, March 22, 2018
CHEESE-Y CHARRED CORN & GREEN BEAN SALAD WITH GRAPE TOMATOES

It's not so nice out now, but last week we had some sunny, warmish days-- enough to make me think of making a hearty salad for lunch instead of a soup. It was almost shopping day, so I studied the contents of my refrigerator and freezer for what needed using and/or what was available, colorful and tasty. I already had some of my staple low-fat balsamic vinaigrette made (see recipe below), so I kept that in mind as well.
So, here's what I came up with on short notice. It was easy to throw together and a hit with my husband (and also fed us for two lunches). I hope you will enjoy it as much as we did!

BRYANNA'S CHEESE-Y CHARRED CORN & GREEN BEAN SALAD WITH GRAPE TOMATOES
Serves 4
1 lb. slender fresh young green beans
1 tablespoon dark sesame oil
1 medium onion (whatever kind you like-- I used a white one), chopped
1 cup fresh or thawed frozen sweet corn kernels
1 cup red grape tomatoes, sliced in half lengthwise
about 1/2 cup Low-Fat Balsamic Vinaigrette (recipe below) or similar type of vinaigrette
1/4 to 1/2 cup of your favorite vegan Parmesan substitute (I used EarthIsland/FollowYour Heart)
Pick over the green beans, removing stems, and cook until tender, but not limp. Cook them however you prefer-- they can be steamed, microwaved (in a tiny bit of water in a covered casserole), or brought to a boil just covered in water on the stove, then simmered for a few minutes, u ntil done to your liking.
Drain the beans in a colander and run cold water over them until they cool off a bit. Leave in the colander to drain further.
Saute the onion in the sesame oil until they are softened and a little browned around the edges. set aside.
Spread the corn kernels on an oiled baking sheet and place about 4" under your oven's broiler. Broil until they start to char a bit, toss them a bit with a spatula and mound them up a bit in the middle of the pan and broil for a few minutes more. Set aside.
When everything is ready, toss the green beans, onion and corn together in a medium-sized serving bowl with the sliced grape tomatoes and salad dressing. Divided between serving bowls and sprinkle each serving with some of the cheese.
Nutrition Facts
Nutrition (per serving): 204 calories, 34 calories from fat, 4g total fat, 0mg cholesterol, 172mg sodium, 458.7mg potassium, 29.9g carbohydrates, 5.8g fiber, 5.4g sugar, 8.3g protein, 5.2 points.
****
BRYANNA'S BALSAMIC VINAIGRETTE
This is a good basic dressing for many types of salads.
Yield: 1 1/2 cups Servings: 12
1 serving= 2 tablespoons
1 cup Fat-Free Oil Substitute for salad Dressings OR aquafaba (unsalted chickpea broth from canned or home-cooked)
1/4 cup extra virgin olive oil
1/4 cup good-quality balsamic vinegar (I prefer Costco's Kirkland Signature brand, which is affordable, yet aged for 3 years and contains no wine vinegar or caramel color, unlike the 60-day-aged supermarket IGP brands. See http://www.costcoconnection.ca/connectioncaeng/20180506/?pg=89#pg89)
1 tablespoon red wine vinegar
1 tablespoon Dijon mustard
1 tablespoon brown sugar
1 clove garlic, crushed
1 teaspoon salt
Whisk, shake, or blend the ingredients together well, bottle and store in the refrigerator.
Nutrition Facts
Nutrition (per serving): 50 calories, 40 calories from fat, 4.6g total fat, 0mg cholesterol, 175.5mg sodium, 12.9mg potassium, 2.6g carbohydrates, less than 1g fiber, 1.1g sugar, less than 1g protein, 1.5 points.

Enjoy!

Monday, March 5, 2018
WHY I HAVEN'T BEEN BLOGGING LATELY & 2 RECIPES-- QUICK & EASY CHINESE VELVET CORN SOUP; AND VEGAN SUKIYAKI


I apologize heartily for having neglected this blog in the past few months, and for not writing a post for over a month! There's been a lot going on lately, on top of which, DH and I are just getting over a very long and uncomfortable cold (not the flu this time, but not fun!).
One thing that is taking up a lot of my time has been a diagnosis of pre-diabetes! I almost fell off my chair when my doctor told me this. It may be an inherited tendency-- we don't know. So, I've been working up my exercise regime, which I had not been keeping up as well as I should have (especially while sick), and spending much of my time poring over books, websites, and charts to do with the Glycemic Index and Glycemic Load, and tailoring my already-pretty-good vegan diet to this advice:
From https://www.health.harvard.edu/diseases-and-conditions/glycemic-index-and-glycemic-load-for-100-foods
"The glycemic index is a value assigned to foods based on how slowly or how quickly those foods cause increases in blood glucose levels. Also known as "blood sugar," blood glucose levels above normal are toxic and can cause blindness, kidney failure, or increase cardiovascular risk. Foods low on the glycemic index (GI) scale tend to release glucose slowly and steadily. Foods high on the glycemic index release glucose rapidly. Low GI foods tend to foster weight loss, while foods high on the GI scale help with energy recovery after exercise, or to offset hypo- (or insufficient) glycemia. Long-distance runners would tend to favor foods high on the glycemic index, while people with pre- or full-blown diabetes would need to concentrate on low GI foods. Why? People with type 1 diabetes and even some with type 2 can't produce sufficient quantities of insulin—which helps process blood sugar—which means they are likely to have an excess of blood glucose. The slow and steady release of glucose in low-glycemic foods is helpful in keeping blood glucose under control.
But the glycemic index of foods tells only part of the story. What it doesn't tell you is how high your blood sugar could go when you actually eat the food, which is partly determined by how much carbohydrate is in an individual serving. To understand a food's complete effect on blood sugar, you need to know both how quickly the food makes glucose enter the bloodstream, and how much glucose it will deliver. A separate value called glycemic load does that. It gives a more accurate picture of a food's real-life impact on blood sugar. The glycemic load is determined by multiplying the grams of a carbohydrate in a serving by the glycemic index, then dividing by 100. A glycemic load of 10 or below is considered low; 20 or above is considered high. Watermelon, for example, has a high glycemic index (GI) (80). But a serving of watermelon has so little carbohydrate (6 grams) that its glycemic load (GL) is only 5."
So, I'm not making desserts these days, getting used to my morning latte without a teaspoon of brown sugar, using a few dates in my oatmeal instead of sugar on top (dates have alot of fiber, which counteracts the sugar in them), learning about resistant starch and low glycemic grains, and experimenting with making low GL bread with them (adding some bean flour, or okara [soy pulp] from my soy milk making, and/or some vital wheat gluten flour helps, too).
Who knew that converted/parboiled rice carries a lower glycemic load (GL) than brown rice and has? (The process creates resistant starch while protecting most of the nutrition of the whole grain rice.) We are loving parboiled basmati rice! (Here's a fairly simple explanation of resistant starch.) And my beloved semolina pasta is low GL, especially if cooked al dente and then refrigerated. The resistant starch remains when reheated. Ditto for potatoes. Buckwheat, oats, bulgur wheat, rye and quinoa are also good choices.We already eat lots of vegetables and fruits and protein-rich legumes, soy products, and seitan, and a pretty low-fat diet, so I don't have to change much there.
Anyway-- I have alot to learn, but I've lost 6 pounds without really trying to and we're eating well. I hope to have some good new recipes for you soon. In the meantime, here are some old favorites from two of my older cookbooks.
Thanks for your patience!

Printable Recipe
BRYANNA'S QUICK AND EASY CHINESE VELVET CORN SOUP
Servings: 4
(From my book, "Authentic Chinese Cuisine for the Contemporary Kitchen: All Vegan Recipes", Book Publishing Co., 2000)
Corn is probably not the first thing that comes to mind when you thick of Chinese cooking, but, when it was imported from the Americas, the Northern Chinese took to it readily. This soup, which often contains chicken or crab in its non-vegetarian incarnation, is extremely popular, even at formal banquets, but it's inexpensive, quick and simple to make.
6 ounces smoked tofu, cut into small dice (You can sauté the cubes in a bit of oil to brown, if you like, but that's optional.)
4 cup low-salt vegetarian "chicken-y" broth (such as Better Than Bouillon No-Chicken broth paste)
14-15 ounces canned creamed corn (this product contains no dairy ingredients)
1 cup frozen petit pois (baby peas)
1 Tbs low sodium soy sauce
pepper to taste
1 Tbs cornstarch dissolved in 1 T. cold water
1 tsp roasted sesame oil
OPTIONAL:
1 Tbs soy "bacon" bits OR 2 T. chopped vegetarian "ham"
Mix the broth, creamed corn, peas and soy sauce (and the optional soy "bacon" or "ham" at this point, if you're using it) in a medium pot or saucepan. When it comes to a boil, turn the heat down to a simmer and cook gently until the peas are barely tender. Add the smoked tofu, pepper to taste, and dissolved cornstarch, stirring. Simmer until the soup thickens, then drizzle the sesame oil on top and serve.
Nutrition Facts
Nutrition (per serving): 177 calories, 41 calories from fat, 4.7g total fat, 0mg cholesterol, 1249.5mg sodium, 240.5mg potassium, 28.9g carbohydrates, 3g fiber, 6.5g sugar, 10g protein, 5.3 points.
*****************************************************************

Printable Copy
BRYANNA'S VEGAN SUKIYAKI (CAN BE SOY-FREE)
Serves 4
My Peruvian father, Alejandro Jaime Urbina, loved Japanese food, so he took us to Japanese restaurants fairly often when we were growing up in San Francisco. It was always such fun to watch the kimono-clad server quickly make the sukiyaki right in front of us. This is my vegan version.
(From my book, 20 Minutes to Dinner, Book Publishing Co., 1997)
All you need is a pot of steamed rice to go with this wonderful Japanese classic. If you have a large electric skillet, you can cook this at the table in true Japanese style.
NOTE: If you do not have shirataki noodles (clear Japanese noodles made from the konjac yam), substitute Asian rice vermicelli, or bean thread noodles (also called "cellophane" noodles, made from mung beans), which have first been soaked for 15 minutes in warm water. If none of these is available, substitute 2 c. fresh bean sprouts.
 |
| Shirataki Noodles |
Sauce:
1/4 c. Japanese soy sauce, or tamari (or soy-free alternate, see note below)
1/4 c. honey, sugar, or alternate
1/2 c. water
2 T. dry sherry or mirin (Japanese rice wine)
NOTE:
Soy-Free Soy Sauce or Tamari Replacement: Substitute this mixture tablespoon-for-tablespoon for the soy sauce called for if you have a soy allergy.
**Mix 3/4 c. water, broth or mushroom soaking liquid mixed with 1 T. EACH yeast extract paste (such as Marmite), soy-free gravy browner (like Kitchen Bouquet), and salt. This replaces 15 T. (slightly less than 1 c.) of soy sauce.
**To replace some of the complex qualities that a good fermented soy sauce or tamari supplies, use some dry sherry or Japanese mirin wine, and/or mushroom broth or concentrate as some of the 3/4 cup liquid in the recipe.
Sukiyaki Ingredients:
For a soy-free version, omit the tofu and either use 1 1/2 lbs. seitan, OR use the 8 oz. seitan called for and double the amount of mushrooms
1 lb. regular medium-firm tofu
8 oz. seitan, very thinly-sliced
8 large fresh shiitake mushrooms, cut in half (or you can use thick slices of portobello mushrooms, or whole criminis)
10 oz. cleaned spinach leaves, sliced 1" thick
1 (8 oz.) can sliced bamboo shoots, rinsed and drained
1 bunch green onions, cut into 2" lengths OR 1 large white onion, sliced
2 to 4 cups fresh, cisp bean sprouts
1/4 lb. dried shirataki noodles, soaked in warm water 15 minutes (see Note above for substitutions)

**(Put a pot of rice of your choice on to cook before starting the recipe. Short grain white rice is the Japanese choice, or you could use short grain brown rice, if you prefer.)
Mix the sauce ingredients in a small saucepan and set over low heat while you prepare the ingredients.
Heat a large heavy skillet or large electric skillet (my choice). Cut the block of tofu in half horizontally and brown the halves on both sides in the hot pan. Remove from the pan and slice the pieces about 1/2" thick.
Place the sliced tofu, seitan, mushrooms, spinach, and bamboo shoots (and the white onion, if you are using it instead of the green onions) in separate piles side-by-side in the hot pan and pour the sauce over it all.

When the sauce is bubbling and the spinach begins to wilt, turn everything over carefully, not mixing it together. Make room for the green onions and soaked noodles (and/or bean sprouts), and cook for a few more minutes, until the spinach and mushrooms are cooked and everything is hot.
Serve immediately with steamed rice, dividing the ingredients equally between bowls.
Nutrition Facts (without rice)
Nutrition (per serving): 434 calories, 63 calories from fat, 7.8g total fat, 0mg cholesterol, 1190.2mg sodium, 1330.1mg potassium, 66.9g carbohydrates, 7.7g fiber, 22.8g sugar, 31.2g protein, 12.9 points.
Enjoy!

Sunday, January 1, 2017
SMOKY VEGAN SAUSAGE AND POTATO CHOWDER

I don't know about you, but, after all the feasting and festivities, we feel like eating pretty simple food. But, given the cold Northern wind blowing here today over the water, it's got to be solid winter food-- solid, but not stodgy. Tonight, of course, we're having my vegan version of Hoppin' John, a New Year's tradition with Southern roots (I do have ancestors who hailed from Virginia). The beans (or black-eyed peas, in this case) are for luck, along with some cooked greens for money, and some corn bread or brown rice (I haven't decided yet).
But, after that, we often have winter soup meals. (I love making soups, in case you hadn't noticed!) So here is a soup that I developed some years ago, but have not ever posted on this blog. It's a creamy chowder-- so warming and satisfing-- but with a few twists. I hope you enjoy it!
BRYANNA'S SMOKY VEGAN SAUSAGE AND POTATO CHOWDER
Serves 6
Can you ever have enough good soup recipes? Not in my book! This recipe uses a bit of smoked salt for extra flavor.
4 cups vegetarian bouillon (I prefer Better-Than-Bouillon No-Chicken Vegetarian OR Better-Than-Bouillon Vegetable broth pastes-- use a little more salt with the vegetable base)
1/2 lb sweet potato, peeled and diced
1/2 lb Yukon Gold potatoes, diced
1/2 cup chopped green onions
1/2 cup diced red bell pepper
1/2 cup diced celery
1 bay leaf
1 tsp smoked salt (or sea salt with a few shakes of liquid smoke)
2 cups frozen corn kernels
2 vegan "Smoked Apple Sausages", sliced (Field Roast or Tofurky brands)
1 1/2 cups non-dairy milk of choice
1/2 cup medium-firm tofu OR firm to extra-firm SILKEN tofu
2 Tbs potato starch
freshly-ground black pepper to taste
Optional:
smoked paprika (pimenton) for garnish
Mix together the broth, sweet potatoes, potatoes, green onions, red pepper, celery, bay leaf, and smoked salt in a medium soup pot. Bring to a boil, then reduce heat to a simmer and cook, covered, until the potatoes are just tender. Add the corn kernels and the sliced sausage and heat through.
In a blender, combine the milk and tofu with the potato starch until smooth. Pour, stirring, into the hot soup. Stir until it thickens (potato starch thickens when mixed with hot liquid-- it doesn't actually have to cook). Add pepper to taste and taste for salt.
Serve hot, sprinkled with the optional smoked pimenton, if you like.
Nutrition Facts
Nutrition (per serving): 248.2 calories; 20% calories from fat; 5.8g total fat; 0.0mg cholesterol; 586.5mg sodium; 558.1mg potassium; 36.2g carbohydrates; 6.9g fiber; 8.2g sugar; 15.8g protein; 4.6 points.
I wish you all a Happy New Year!

Tuesday, April 26, 2016
THAI-STYLE CORN FRITTERS, SHALLOW-FRIED *OR* BAKED (Can be GF)


UPDATED April 26, 2018

It's been a long time since I last blogged. I've been taking a semi-break from internet activity for a little while, but that isn't the only reason. We've been eating pretty simply, for one thing, and I'm preparing for a cooking workshop coming up soon. Also, we've had company and the odd family emergency, and, to tell you the truth, I just haven't had much inspiration in the kitchen.
Well, today I got some inspiration-- I had a hankering for vegan Thai corn fritters. But, I wanted to develop a recipe that could be baked, for vegans who don't use much fat, or shallow-fried for those who don't mind a little oil but prefer not to deep-fry, and also for the gluten-free crowd-- or not. Seemed a tall order, but it wasn't really very difficult.
I have read many, many recipes for this crispy Thai delight and, believe me, there are many versions and variations! My version gives you some leeway about the type of flour you use and I decided to use aquafaba (the brine or cooking liquid from chickpeas or other beans that is making waves in the vegan community and even in the mainstream culinary world) as an egg replacer.
The batter is quick and easy to mix up and you have a choice of baking or shallow-frying-- I liked both versions. The baked version is not quite as crispy as the fried, but still delicious.

Printable Copy (includes my No-So-Sweet Homemade Thai Red Chili Sauce recipe.)
BRYANNA'S
THAI-STYLE CORN FRITTERS, SHALLOW-FRIED *OR* BAKED
Makes
about 20, or 5 servings (Can be GF) UPDATED April 26, 2018
There's
no need to deep-fry these delicious morsels. With this recipe you
have a choice between shallow-frying the fritters in a little bit of
oil, or baking them.
1
cup unbleached white flour or sprouted whole wheat flour
½ cup brown rice flour or oat flour (ALTERNATIVE: You can omit the rice or oat flour and simply use 1 ½ cups wheat flour, OR you can use your favorite GF flour mixture for the total. A good GF AND low-glycemic mix would be 1/2 cup EACH of oat flour, potato starch and chickpea flour.)
½ cup brown rice flour or oat flour (ALTERNATIVE: You can omit the rice or oat flour and simply use 1 ½ cups wheat flour, OR you can use your favorite GF flour mixture for the total. A good GF AND low-glycemic mix would be 1/2 cup EACH of oat flour, potato starch and chickpea flour.)
2
¼ tsp. baking powder
¾
tsp. salt OR 2 tsp. soy sauce (Note: If you use the soy
sauce, add it to the liquid ingredients.)
½
cup non-dairy milk
6
tablespoons aquafaba (the broth from cooking chickpeas, or
the liquid from canned chickpeas)
2
tablespoons fish-free Thai
red curry paste, such as Maesri,
or Taste of Thai brands
6
green onions, finely chopped
1
tablespoon grated fresh ginger
3 cups fresh OR frozen and thawed corn kernels, drained
3 cups fresh OR frozen and thawed corn kernels, drained
 |
| Ingredients for the fritters |
Serve
with:
Thai
Sweet Chili Sauce, purchased or homemade (See recipe for my Not-So-Sweet Homemade Thai-Style Sweet Red Chili Sauce below.)
Directions:
If
you are going to bake the fritters,
preheat the oven to 400°F.
If
you are going to shallow-fry the fritters, have ready a large frying
pan and oil suitable for frying. (Cast
iron, carbon-steel or hard-anodized are good pans-- I no longer use any
nonstick.)
Combine
the two flours (or
alternative), baking
powder and salt in a dry medium-sized mixing bowl. ( If
you use the soy sauce instead of the salt, add it to the liquid
ingredients.)
In
a smaller bowl, whisk together the non-dairy milk, aquafaba and red
curry paste (and
the soy sauce, if you are using that instead of salt),
until there are no lumps of curry paste left (use
an immersion blender, if you like).
Pour this mixture into the flour mixture, along with the green onions and ginger, and mix briefly.
Add
the corn kernels to the batter (it is thick) and mix just to
distribute the kernels well.

If
you are baking the fritters, lightly
oil a large dark baking sheet (or 2 small ones)-- a dark baking sheet browns foods better. Scoop a heaping soup
spoon-full of the batter out for each fritter and plop it onto the
baking sheet(s). Repeat until the sheet is full, but don't crowd the
fritters too much. Smooth out the tops, but don't spread too thin.
Bake for 10-15 minutes, then flip the fritters over and bake 10-15 minutes
more, or until golden brown and crispy on both sides. Serve hot
with the Sweet Red Chile Sauce.
 |
| Baked fritters on the left, shallow-fried fritters on the right |
If
you are shallow-frying the fritters, pour
about 1/4 cup of oil into your skillet and set it to heat over
medium-high heat for several minutes. When you drop a bit of batter
into the oil, it should sizzle. Scoop a heaping soup spoon-full of
the batter out for each fritter and plop it into the hot oil. Repeat
until the pan is full, but don't crowd the fritters too much. Smooth
out the tops, but don't spread too thin. Fry until the bottoms are
golden brown and crispy, then carefully turn them over and cook until
the second side is the same. Repeat until all of the batter is used,
adding a bit more oil as needed. Remove the fried fritters from the
pan to paper-lined plates or baking sheets, so that any excess oil is
absorbed by the paper. Serve hot with the Sweet Red Chile Sauce.
Nutrition Facts (for Baked version)
Nutrition (per serving: 4 fritters): 255 calories, 14 calories from fat, 1.7g total fat, 0mg cholesterol, 305.7mg sodium, 624.1mg potassium, 55.9g carbohydrates, 4.7g fiber, 4.7g sugar, 7.9g protein, 7.4 points.
(See below for my No-So-Sweet Homemade Thai Red Chili Sauce, if you prefer less sugar.)
Nutrition Facts (for Baked version)
Nutrition (per serving: 4 fritters): 255 calories, 14 calories from fat, 1.7g total fat, 0mg cholesterol, 305.7mg sodium, 624.1mg potassium, 55.9g carbohydrates, 4.7g fiber, 4.7g sugar, 7.9g protein, 7.4 points.
(See below for my No-So-Sweet Homemade Thai Red Chili Sauce, if you prefer less sugar.)
 |
One of the many brands of this sauce. |
BRYANNA’S NOT-SO-SWEET THAI-STYLE SWEET RED CHILI SAUCE
Servings: Fourteen 2-tablespoon servings
Yield: 1 3/4 cups
Ingredients:
Mix together in a small saucepan:
1/2 cup rice vinegar
1/2 cup water
1/2 cup organic agave syrup or maple syrup
3 Tbs Chinese or Vietnamese chili garlic sauce (Huy Fong Foods, Inc. and Lee Kum Kee are common brands)
1 1/2 Tbs soy sauce
Bring to a boil, then turn down and simmer for 5 minutes.
Add the Thickener:
1 Tbs potato starch, or tapioca starch mixed with 1 tablespoon cold water
If you use potato starch (which contains resistant starch, so is better for low-glycemic eating), DO NOT add it to the mixture while it is cooking. Take the pot off of the heat and stir in the potato starch/water mixture. If you use tapioca starch, add while the sauce is still simmering and whisk until it thickens, then remove from heat.
Nutrition Facts
Nutrition (per 2 T. serving): 35 calories, less than 1 calorie from fat, less than 1g total fat, 0mg cholesterol, 146mg sodium, 92.5mg potassium, 12.3g carbohydrates, less than 1g fiber, 6.9g sugar, less than 1g protein, 1.4 points.
Servings: Fourteen 2-tablespoon servings
Yield: 1 3/4 cups
Ingredients:
Mix together in a small saucepan:
1/2 cup rice vinegar
1/2 cup water
1/2 cup organic agave syrup or maple syrup
3 Tbs Chinese or Vietnamese chili garlic sauce (Huy Fong Foods, Inc. and Lee Kum Kee are common brands)
1 1/2 Tbs soy sauce
Bring to a boil, then turn down and simmer for 5 minutes.
Add the Thickener:
1 Tbs potato starch, or tapioca starch mixed with 1 tablespoon cold water
If you use potato starch (which contains resistant starch, so is better for low-glycemic eating), DO NOT add it to the mixture while it is cooking. Take the pot off of the heat and stir in the potato starch/water mixture. If you use tapioca starch, add while the sauce is still simmering and whisk until it thickens, then remove from heat.
Nutrition Facts
Nutrition (per 2 T. serving): 35 calories, less than 1 calorie from fat, less than 1g total fat, 0mg cholesterol, 146mg sodium, 92.5mg potassium, 12.3g carbohydrates, less than 1g fiber, 6.9g sugar, less than 1g protein, 1.4 points.
Enjoy!

Monday, October 12, 2015
ASIAN CORN CABBAGE SOUP FROM KATHY HESTER'S NEW BOOK "THE EASY VEGAN COOKBOOK"

Leave it to Kathy Hester to come up with a book full of easy-peasy, healthful, inspired vegan recipes for time-challenged cooks! Kathy is the author of four previous books and blogs at healthyslowcooking.com This new book contains 80 recipes that are full of healthful ingredients (lots of beans-- a plus, in my opinion!) and many inspired by cuisines of other cultures. She has a chapter of "Make-Ahead Staples", which is really handy, and everything from Soups, Stews, Pasta, Stir-fries, and other Mains, followed by more recipes for easy Sandwich Fillings and Spreads, Sides, and of course, Desserts and Drinks. The recipes are low-oil and there are many GF and soy-free recipes and options, as well.

I had a hard time selecting the recipe to try for this post on Kathy's blog tour, but I'm so glad I chose this soup recipe. We had our vegan Canadian Thanksgiving feast (12 of us) last night and over-ate, of course. This easy, light and delectable soup (and I love corn so much!) is the perfect simple-but-delectable day-after-feasting meal. The chopped mushrooms in the broth give it wonderful flavor.
Congratulations on another winner, Kathy!

KATHY HESTER'S ASIAN CORN CABBAGE SOUP (From "The Easy Vegan Cookbook", with permission from Page Street Publishing)
• gluten-free option** • oil-free option* • soy-free option**
This soup isn’t the prettiest, but the taste is bold and delicious. This recipe is my favorite way to use up the extra cabbage from my CSA.
SERVES 4
½ small onion, minced
1 tablespoon (15 ml) olive oil (*or sauté in water)
2 cloves garlic, minced
1½ cups (105 g) minced mushrooms
Pinch of salt
2 to 3 teaspoons (10-15 g) minced ginger
4 cups (356 g) chopped cabbage
2 cups (282 g) corn kernels (frozen or fresh)
4 cups (946 ml) water
1 tablespoon (5 g) nutritional yeast
2 teaspoons (10 ml) vegetable bouillon
1 teaspoon sesame oil
½ to 1 teaspoon sriracha sauce
1 teaspoon light soy sauce (**or use coconut aminos)
STOVE-TOP METHOD (This is the method I used.)
Sauté the onion in oil (*or water) until it’s translucent, then add the garlic and cook 1 more minute. Add mushrooms and a pinch of salt. Sauté until the mushrooms have cooked down and released their liquid, about 10 minutes. Add everything except sesame, sriracha and soy sauce (**or coconut aminos) to the pot and cook until the cabbage is tender, about 15 minutes. Before serving, add sesame, sriracha and soy sauce (**or coconut aminos). Adjust seasonings if needed. (NOTE from Bryanna: I used 3 teaspoons of vegan broth paste [Better Than Bouillon No-Chicken vegan Broth Paste] and 2 teaspoons of soy sauce.)
SLOW COOKER METHOD
To prep the night before, sauté the onion in oil (*or water) until it’s translucent, then add the garlic and cook one more minute. Add mushrooms and a pinch of salt. Sauté until the mushrooms have cooked down and released their liquid. Store the cooked mixture with cut cabbage and corn in the refrigerator overnight. In the morning, add everything except sesame, sriracha and soy sauce (**or coconut aminos) to your 4-quart (4-L) slow cooker. Cook 7 to 9 hours on low. Before serving, add sesame, sriracha and soy sauce (**or coconut aminos). Adjust seasonings if needed.
Per serving with oil: Calories 156.8, protein 5.5 g, total fat 5.8 g, carbohydrates 22.4 g, sodium 41.8 mg, fiber 4.9 g
TIP: Cheater Slow Cooker Shortcut: Skip the onion sauté and use ½ teaspoon of onion powder instead. Then add the raw mushrooms into the slow cooker for a throw-it-all-in-and-go meal!
Enjoy!

Subscribe to:
Posts (Atom)