Friday, October 9, 2020
DELICIOUS, TENDER LOW-GLYCEMIC WHOLE GRAIN SPELT, OAT, SORGHUM & BEAN FLOUR PANCAKES


Yikes! It's been 5 months since I last blogged! You might have thought that I'd be posting like mad during this pandemic time, when we're pretty much isolating here in the woods. It's not as though I'm not cooking! I cook quite a bit. But I've been mostly revisiting recipes from my own cookbooks and cooking notes, re-discovering (and sometimes improving on) dishes that I developed many years ago. Which has been fun, I must say. But I haven't been inventing new recipes very often, I confess. So, it feels good to post again, with a recipe that I'm quite proud of.
The following combination of flours turned out to be a winner! We were so pleasantly surprised with the wonderful flavor of the pancakes, even without syrup. I don't think I've ever had such tasty pancakes! They are very simple to make-- I hope that you will enjoy them as much as we do.
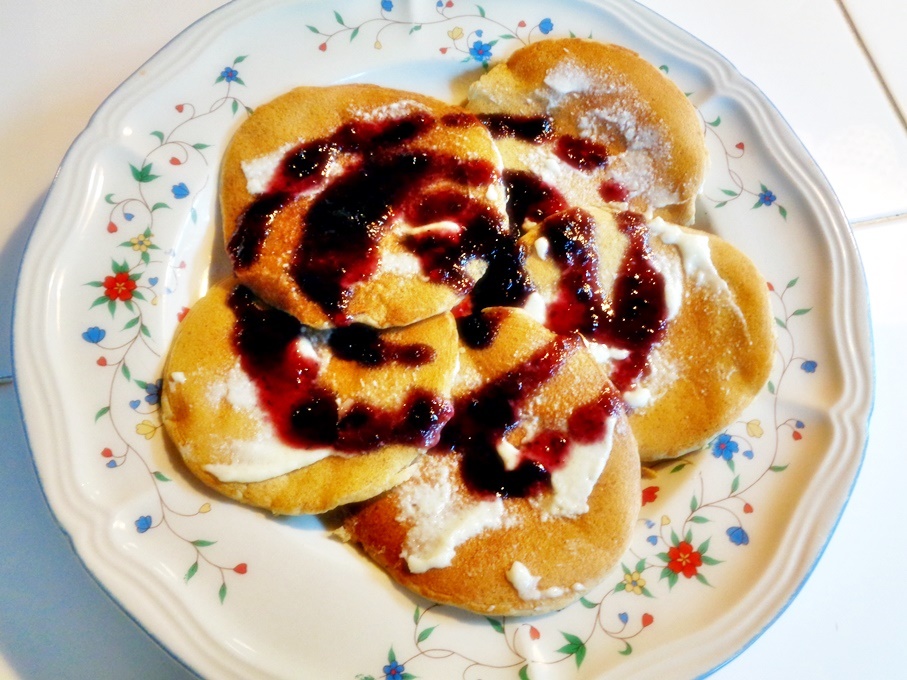
BRYANNA'S DELICIOUS, TENDER LOW-GLYCEMIC WHOLE GRAIN SPELT, OAT, SORGHUM AND BEAN FLOUR PANCAKES
Makes about 24 pancakes (3 to 4-inch size)
NOTE: Nutrition facts below recipe
DRY MIX:
Whisk together in a dry mixing bowl:
1 cup whole grain spelt flour
1 cup oat flour
***(I blend rolled oats in a dry blender to make oat flour.)
1/2 cup bean flour
***(You can use soy, yellow pea, white bean or chana dal flour.)
1/2 cup sorghum flour
***(I blend dry sorghum grains in a dry blender to make sorghum flour.)
2 tablespoons coconut sugar or equivalent of your favorite sugar sub
1 tablespoon baking powder
1 teaspoon baking soda
1/2 teaspoon salt
WET MIX:
Combine in a 4-cup pitcher:
6 tablespoons water
2 tablespoons ground flax (brown or golden)
After 10 minutes, add and whisk:
1 cup soy milk or plain hemp milk
1 1/2 cup water
2 tablespoons oil
2 tablespoons lemon juice or apple cider vinegar
2 teaspoons vanilla extract
METHOD:
Add the Wet Mix to the bowl with the Dry Mix. Combine briefly with a large spoon, medium-sized whisk or a Danish dough whisk.
Cook as for any pancakes-- I make them about 3 inches across. I like to use my old rectangular electric skillet at 400°F (205°C). It will cook 5 to 6 pancakes at a time just perfectly. But a well-seasoned cast iron skillet or griddle over medium heat (heat up for about 10 minutes before cooking) is excellent, as well. Either way, wipe the pan with a bit of oil before heating. Cook the pancakes for about 3 minutes on the first side and about 2 minutes on the second side. Serve immediately with your favorite toppings.
NOTE: For a low-glycemic syrup, I use low-sugar jam mixed with some water to make a syrup.
© 2020 Bryanna Clark Grogan. All Rights Reserved.
| Nutrition Facts | |
|---|---|
| Serving size: 1 pancake | |
| Servings: 24 | |
| Amount per serving | |
| Calories | 51 |
| % Daily Value* | |
| Total Fat 1.9g | 2% |
| Saturated Fat 0.3g | 1% |
| Cholesterol 0mg | 0% |
| Sodium 109mg | 5% |
| Total Carbohydrate 6.7g | 2% |
| Dietary Fiber 0.9g | 3% |
| Total Sugars 1.5g | |
| Protein 2.1g | |
| Vitamin D 0mcg | 0% |
| Calcium 37mg | 3% |
| Iron 1mg | 4% |
| Potassium 143mg | 3% |
| *The % Daily Value (DV) tells you how much a nutrient in a food serving contributes to a daily diet. 2,000 calorie a day is used for general nutrition advice. | |
Recipe analyzed by  | |

Enjoy!


Wednesday, May 29, 2019
NEW MOIST & VERY CHOCOLATE-Y LOW-FAT OAT BROWNIES (CAN BE GF)

I love brownies! You will find quite a few brownie recipes on this blog, but, because I was diagnosed with pre-diabetes last year, I've been working on a version that is not only very chocolate-y, moist and low in fat, but made with low-glycemic ingredients. (See this post and this one.)
I did devise a very good low-glycemic brownie last September, which included the addition of yellow split pea puree and unsweetened applesauce. (See about the low-glycemic advantages of split peas and other pulses here.)
In this new recipe I still use my favorite low-glycemic flour combination of oat flour and chickpea flour, but, in addition to split peas and unsweetened applesauce, this new recipe utilizes prune puree , which provides sweetness (thereby cutting down on the amount of sugar needed) AND a whole lot of other goodness. (It seems that prunes contain lots of fiber, which is slow to digest, leaving you satisfied for a longer time. Prunes also have a low glycemic index count, which means that they raise the glucose [sugar] levels in your blood slowly. See this article for more about the benefits of adding prunes to your diet.

Printable Recipe
BRYANNA'S NEW MOIST AND VERY CHOCOLATE-Y LOW-FAT OAT & CHICKPEA FLOUR BROWNIES
(It also happens to be gluten-free if you use GF oatmeal.)
Makes 18 brownies
This is the latest (and maybe the last!) recipe in my quest for a really delicious dark chocolate, vegan, low-fat, low-glycemic brownie. It's easy to make and, dare I say it, even healthful, despite being a delicious dessert item.
Oat flour and chickpea flour are both low-glycemic flours. Applesauce, prune puree and yellow split pea puree add plenty of fiber and nutrients, as well as moisture.
NOTE: I make oat flour by grinding oatmeal flakes in my Vitamix-- just make sure the container is absolutely dry!
DRY MIX:
3/4 cup oat flour
1/2 cup +1 Tbsp dark cocoa powder
6 Tbsp. chickpea flour (also called besan) (or other bean flour)
3/4 tsp. salt
3/4 tsp. baking soda
3/4 tsp. baking powder
WET MIX:
1 cup unsweetened smooth applesauce
1/2 cup Prune Puree (see end of blog for homemade recipe) OR babyfood pureed prunes in a jar
6 Tbsp. yellow split pea puree (see how to and store make below)
6 Tbsp. maple syrup or agave nectar
1 1/2 Tbsp. oil
2 tsp. vanilla extract
ADDITIONAL:
1/2 cup chopped walnuts or pecans
INSTRUCTIONS:
Turn the oven to 350 degrees F. Prepare a 7 x 11" baking pan by lining with baking parchment.
Or, as I do, grease the bottom and sides of the inside of the pan lightly with my Homemade Palm-Oil-free, Non-Hydrogenated “Cake Release” (Pan Coating or Professional Baker's Grease) with GF Option.
Whisk the Dry Mix ingredients together in a small bowl and set aside.
In a larger bowl, whisk together the Wet Mix ingredients until smooth. Add the Dry Mix into the bowl and stir until smooth. Add the chopped walnuts and stir just to distribute evenly.
Scoop the batter into the prepared pan (using a silicone spatula to get as much as possible) and then spread it evenly into the pan with the spatula.
Bake for 18 minutes and cool thoroughly on a rack before cutting into 18 pieces.
HOW TO MAKE PRUNE PUREE:
Note: 2 cups of large pitted prunes, pressed down a bit, with make about 2 3/4 cups of prune puree.
In an appropriately-sized bowl, cover your prunes with hot water. (Make sure that they are completely covered with water.) Let the prunes sit until they are more or less lukewarm. Then pour the prunes and water into your blender and blend until VERY smooth. You can safely keep this in your refrigerator in a tightly-closed container for 2 or 3 days, or you might prefer to store it in 1/2-cup containers in the freezer.
HOW TO MAKE YELLOW SPLIT PEA PUREE (Makes 5 cups):
Mix 2 cups of dried split yellow peas with 4 cups of water in an Instant Pot and cook at high pressure for 10 minutes. (PS: You could use any other type of pressure cooker, OR you can simmer, covered, for 30 minutes in a medium saucepan on your stovetop.) The resulting soft mush just needed a few stirs to "puree", or, if it looks a bit lumpy, you can cool it off a bit and puree it in your blender.
I refrigerate the puree in a covered container for a day or so-- it will firm up considerably. You can press then the puree into silicone cupcake liners or large silicone ice cube trays in 1/4 cup portions, or into normal ice cube trays in 2 Tbsp. portions and freeze them. Then pop out the frozen portions, bag them up and place them back in the freezer for future use.
(See more about yellow split pea puree at this link.)

Enjoy!

Thursday, May 9, 2019
FINALLY ON THE MEND, WITH WHOLE GRAIN, LOW-FAT, LOW-GLYCEMIC LEMON, WALNUT, BLUEBERRY MUFFINS

I'm happy to report that, over the last few days, my rotten cold is just about over, my nerve pain (from shingles) discomfort has eased quite a bit (after 4 months), and I have had much more energy in the last few days. I have managed to get some much-needed household and outside jobs done (in the morning, when my energy is highest)-- yay!
In my original recipe, I made a note stating: "Batter will be kind of runny-- it will be fine." I was a bit nervous about this, but decided to proceed anyway. Again, I needn't have worried-- the muffins turned out just fine-- in fact, nice and moist, but not soggy at all. I hope you'll give them a try!

Printable Recipe
BRYANNA'S NEW, MOIST LOW-FAT, LOW-GLYCEMIC LEMON, WALNUT, BLUEBERRY MUFFINS
Makes 12 muffins
WET MIX:
1 1/2 cups creamy plant-based milk (I use soy)
1/2 cup sugar of choice (for sugar-free, use 1/2 cup sucralose instead)
1/3 cup unsweetened applesauce
1 T. oil
grated zest of 1 lemon
DRY MIX:
3/4 cup oat flour
1/2 cup whole wheat flour
1/4 cup chickpea flour (or white bean flour)
1/4 cup wheat germ
1/4 cup oat bran
2 tsp. baking powder
3/4 tsp. salt
1/4 tsp. grated nutmeg
1/4 tsp. baking soda
Additional:
1 cup fresh or frozen blueberries (do not thaw them out!)
1/2 cup chopped walnuts (or nuts of your choice)
Optional for topping: brown sugar or coconut sugar
Preheat oven to 400 degrees F and grease 12 muffin cups (or use cupcake liners or my Homemade Palm-Oil-Free, Non-Hydrogenated “Cake Release” (Pan Coating or Professional Baker's Grease).
Blend the Wet Mix ingredients together in a blender or with a stick blender, or a food processor. Set aside Mix the Dry Mix ingredients in a medium bowl. Add the blueberries and walnuts and stir to coat with the Dry Mix.
Stir in the blended Wet mix and stir well, making sure that there is no Dry Mix still at the bottom of the bowl. As noted in the intro above, the batter will be runny-- see pics below.


Spoon the batter evenly into the prepared muffin cups. Sprinkle with a bit of brown sugar or coconut sugar, if you like.

Nutrition Facts (see below for Nutrition Facts for recipe without sugar):

Nutrition Facts for recipe without sugar-- for instance, using an equal amount of sucralose:


Enjoy!

Sunday, January 13, 2019
BACK ON THE BLOG (FINALLY), WITH YUMMY LOW-GLYCEMIC CHOCOLATE CHIP COOKIES

It's been about 2 1/2 months since I last blogged. There are various reasons for this-- some "blogger burn-out", I suppose you could call it, after 12 years, first of all (13 years, actually). And then, there's been a fairly big change in my diet and how I cook now, since I was diagnosed as pre-diabetic last year and now eat a low-glycemic diet. (See blog posts from March 2018 and on, particularly this one.) I'm not on a low-carb, or no-sugar, or vegan keto diet. I've just been learning to cook with low-glycemic and high-fiber grains and flours, and fewer sweets, and also learned about "resistant starch"-- see this post.
Just as I was feeling like blogging again, I developed a case of shingles! This has laid me low for over a month now. It is improving, but my energy has been pretty low. I'm hoping that I'll be back to normal in a couple of weeks, but it's hard to predict.
But, at least I've had a little more interest in cooking again. Lately, I've been working on developing some truly good low-glycemic rolled biscuits, but I haven't got there yet! (Stay tuned.) I've also been working on a good high-fiber, low-glycemic, not too fatty or sweet chocolate chip cookie recipe. My goal was also to make it easy to make, using readily-available, inexpensive ingredients, and of course, to make cookies that still tasted like a treat!
So, I'd like to offer you my latest version, which I'm quite happy with (but, you never know-- I might refine them further). I hope that you will enjoy them, too!


Saturday, July 28, 2018
MOIST & DELICIOUS LOW-GLYCEMIC/NO-ADDED-SUGAR CORN MUFFINS

We mostly eat fresh fruit (often with homemade soy yogurt) when we want a dessert, but occasionally I make Chocolate "Nice Cream", made with 3 sliced frozen ripe bananas, 1/3 cup dark unsweetened cocoa powder, 1/4 cup soy milk, a pinch of salt, a little vanilla extract, and sometimes a dollop of nut butter, blended until creamy-smooth in the food processor, then frozen-- no sugar or sweetener of any kind needed! So delicious!
Lately, I've been working on a low-glycemic, low-fat vegan brownie-- can you tell that we love chocolate? I'm not there yet, but will report back. Another recipe that I've been working on is a low-fat, but moist, low-glycemic vegan cornbread or corn muffin. Cornbread is a particular favorite of mine. I've tried many recipes from online sources and cookbooks, but, in the end I successfully revised one of my own corn muffin recipes and it's easy, quick, and inexpensive, as well as delicious.

Printable Recipe
Makes 12
(This recipe also happens to be gluten-free, can be soy-free, and contains no sugar or syrup of any kind, and no artificial sweeteners.)
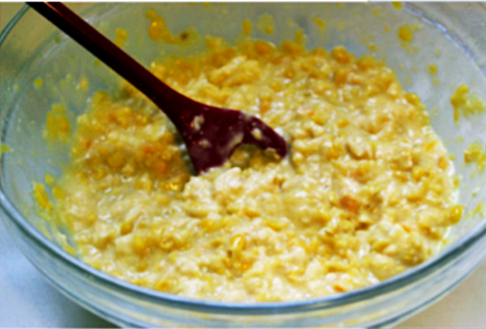

Instructions:

Saturday, May 5, 2018
SPICY LOW-SUGAR RHUBARB/APPLE CHUTNEY

My first effort was a success! I used only 1/2 cup of syrup (agave nectar or maple syrup) in a recipe that made about 2 qts.of chutney. It was quick to make, nthickener was necessary, and it is delicious! It could be water-bath canned, but I froze mine.

Printable Recipe
BRYANNA'S SPICY LOW-SUGAR RHUBARB/APPLE CHUTNEY
Makes about 2 qts. or 64/ 2 T. servings
8 cups diced rhubarb
3 cups diced apple (with the skin)
2 cups raisins (You could also use dried cranberries, which would make the chutney more red.)
1 cup finely chopped red onion
1 cup water
1/2 cup organic maple syrup or organic agave syrup
1/4 cup minced fresh ginger
2 T. + 2 tsp. balsamic vinegar (I prefer Costco's Kirkland Signature brand, which is affordable, yet aged for 3 years and contains no wine vinegar or caramel color, unlike the 60-day-aged supermarket IGP brands. See http://www.costcoconnection.ca/connectioncaeng/20180506/?pg=89#pg89)
1 tsp. EACH ground allspice, salt, red pepper flakes and mustard powder
1/2 tsp. ground coriander
Mix everything together in a large pot and bring to a boil. Turn down to a simmer and simmer (uncovered) for 15-20 minutes, stirring occasionally until it has thickened (it will thicken more when cooled). Cook for about 5 minutes more and turn off the heat. Cool and spoon into sterilized 8 oz. canning jars. Water-bath can (see directions here) or freeze.
Nutrition Facts
Nutrition (per 2 T. serving): 30 calories, less than 1 calories from fat, less than 1g total fat, 0mg cholesterol, 1.7mg sodium, 96.4mg potassium, 7.6g carbohydrates, less than 1g fiber, 5.3g sugar, less than 1g protein, 0.9 points.


Monday, April 16, 2018
EASY BEAN-ENHANCED VEGAN BURGER BUNS & A TANGY DATE-SWEETENED BBQ SAUCE


Yikes! It's been almost a month since I last blogged! I'm afraid that I've been a bit preoccupied with changing my diet, cooking and lifestyle somewhat after a diagnosis of pre-diabetes. (You can read a bit about this in this blog post.)
1.) I have stepped up my exercise, for one thing, and, 2.) learned the difference between Glycemic Index and Glycemic Load-- see http://www.mendosa.com/gilists.htm for an explanation and food lists. (For me, the Glycemic Index/Load type of diet makes more sense than the currently-popular Keto Diet, even the vegan version of it. )
From the above link: "The glycemic index (GI) is a numerical system of measuring how much of a rise in circulating blood sugar a carbohydrate triggers–the higher the number, the greater the blood sugar response. So a low GI food will cause a small rise, while a high GI food will trigger a dramatic spike. A list of carbohydrates with their glycemic values is shown below. A GI of 70 or more is high, a GI of 56 to 69 inclusive is medium, and a GI of 55 or less is low.
The glycemic load (GL) is a relatively new way to assess the impact of carbohydrate consumption that takes the glycemic index into account, but gives a fuller picture than does glycemic index alone. A GI value tells you only how rapidly a particular carbohydrate turns into sugar. It doesn't tell you how much of that carbohydrate is in a serving of a particular food. You need to know both things to understand a food's effect on blood sugar. That is where glycemic load comes in. The carbohydrate in watermelon, for example, has a high GI. But there isn't a lot of it, so watermelon's glycemic load is relatively low. A GL of 20 or more is high, a GL of 11 to 19 inclusive is medium, and a GL of 10 or less is low."
It's a slog finding scientifically accurate, up-to-date and readable material on this subject, but here are a few more helpful links, if you are interested (not necessarily oriented to vegans):
http://bonfirehealth.com/understanding-index-glycemic-load/
https://www.sharecare.com/health/diabetes/soluble-fiber-help-with-diabetes
http://www.montignac.com/en/the-factors-that-modify-glycemic-indexes/
http://www.dummies.com/food-drink/special-diets/glycemic-index-diet/fiber-and-the-glycemic-index/
http://www.dummies.com/food-drink/special-diets/glycemic-index-diet/10-real-life-strategies-to-lighten-your-daily-glycemic-load/
http://www.dummies.com/food-drink/special-diets/glycemic-index-diet/appropriate-portion-sizes-for-low-to-medium-glycemic-dishes/
3.) I've also been educating myself about "resistant starch". If you haven't heard of this, check it out-- it's a game-changer!
https://yurielkaim.com/resistant-starch/
https://www.consumerreports.org/healthy-eating/resistant-starch-may-speed-weight-loss-and-improve-health/
http://freetheanimal.com/2014/10/reheating-digestive-resistance.html
https://www.healthline.com/nutrition/resistant-starch-101
And finally...
4.) I rarely make desserts anymore, except for those special occasions, so I've also been studying how to lower the sugar content (even of "natural" sweeteners) in desserts (and that can affect the structure of baked goods, by the way), and which sweeteners might fit best with my needs, in terms of flavor, health, availability and cost, among other factors.
I'll write more about this in another blog post, but one of the sweeteners I'm using (with caution, of course!) is dates. For a simple explanation, see https://www.wellandgood.com/good-food/sugar-substitute-medjool-date-recipes-natural-delights/
"Unlike processed sugar (i.e. white sugar, brown rice syrup, cane syrup, and corn syrup), Medjool dates won’t spike your blood sugar levels. Because of their high fiber content—12 percent of your daily fiber per serving—your body breaks them down slowly, giving you a sustained release of energy without the dreaded sugar crash."
(PS: I've been using Deglet Noor dates, but have even successfully used compressed dates meant for baking to make date paste.)
But, remember-- you want to keep that fiber, so use whole dates (as in my BBQ sauce recipe below), or a homemade date paste, rather than a date syrup. To make Date Paste: puree 1 cup pitted dates with 1/2 to 1 cup hot water (depending on how thick you want it) in a high-speed blender or food processor until a paste is made. Keep refrigerated.
RECIPE #1:


Printable Recipe
BRYANNA'S EASY, INEXPENSIVE, BEAN-ENHANCED VEGAN BURGER BUNS
Makes 10 buns
High-fiber and protein rich beans, whole wheat flour, high soluble-fiber-rich oat flour, and a bit of high-protein vital wheat gluten serve to lower the glycemic load of this recipe-- but it doesn't mean you should "pig out" on it. Serving size matters!
Ingredients:
1 cup rinsed and drained canned or cooked white beans OR yellow split pea puree
(NOTE: If the split pea puree is very thick, add about 2 T. water to it.)
1/4 cup water
YEAST MIXTURE:
3/4 cup warm water
2 tsp dry active yeast
1 tsp sugar
ADDITIONAL: (NOTE: If you are on a no-fat, no-oil regime, try using either unsweetened smooth applesauce or aquafaba [liquid from cooked or canned chickpeas] instead/)
2 Tbs oil
FLOUR MIXTURE-- mix together:
1 cup whole wheat flour, preferably stone-ground or whole-milled
(NOTE: You can use sprouted whole wheat flour if you have it.)
1 cup unbleached white flour
1/2 cup oat flour (I just grind oatmeal in a dry blender.)
2 Tbs vital wheat gluten
1 tsp salt
GLAZE AND TOPPING:
soy milk or Starch Glaze (see below)
raw sesame seeds, or poppy seeds
Directions:
Puree the beans or split pea puree with the 1/4 cup water. Set aside.
In a large bowl, or your food processor bowl, or your electric mixer bowl, mix together the 3/4 cup warm water, yeast and sugar. Let sit for a few minutes. Add the pureed beans or yellow split peas and the oil.
If you are mixing by hand, stir in the Flour Mixture a bit at a time, until it is a knead-able dough. Turn out on a piece of baking parchment or silicone mat and knead until you can form a smooth ball.
If you are using a food processor, dump in the Flour Mixture and process until it forms a ball on top of the blade.
If you are using a mixer with a dough hook, add the Flour Mixture, turn on the machine and knead until smooth and elastic.
Place the dough in a medium to large oiled bowl, cover and rise in a warm spot for about an hour, or rise, well covered, in the refrigerator overnight.
Divide the dough into 10 equal pieces, shape into balls and press down into flat shapes with the palm of your hand, making the center of the bun a bit concave. Place on parchment-lined baking sheets, cover and let rise until nicely rounded on top, for about 1 hour. Do not over-rise. (If the dough is cold, you may have to rise for 1 1/2 to 2 hours.)
When the buns are about half-risen, preheat the oven to 400 degrees F.
Glaze the tops of the buns with soy milk or Starch Glaze, sprinkle with sesame or poppy seeds, and bake for about 15 minutes, or until golden brown.
Remove from the oven and switch the buns from the baking sheets to cooling racks. Cool thoroughly before using or storing. (They can be frozen.)
STARCH GLAZE:
(If you can't use corn or wheat starch, see this article or this one.)
In a small saucepan, mix 1/2 c. cold water with 1 tsp. corn or wheat starch. Stir over high heat until thickened and clear. This glaze can be used instead of an egg white glaze.


****************************************************************
RECIPE #2:

Printable Copy
BRYANNA'S LOW-GLYCEMIC DATE-SWEETENED BBQ SAUCE
Makes about 3 cups or 24/ 2 T. servings
High-fiber dates subtly sweeten this sauce, and the acidic tomato products, mustard and vinegar also lighten the glycemic load. (See info about dates as a sweetener in the text above.)
I've been using this delicious sauce instead of ketchup!
Blend until smooth:
1 3/4 cups tomato sauce
1/2 cup dry red wine (can be non-alcoholic)
6 oz. tomato paste
1/3 cup cider vinegar
1/4 cup balsamic vinegar (I prefer Costco's Kirkland Signature brand, which is affordable, yet aged for 3 years and contains no wine vinegar or caramel color, unlike the 60-day-aged supermarket IGP brands. See http://www.costcoconnection.ca/connectioncaeng/20180506/?pg=89#pg89)
1/4 cup soy sauce or tamari
8 large-ish soft dates, such as Medjool or Deglet Noor, roughly chopped
3 tablespoons Dijon mustard
1 T. (or more to taste) Chinese Chili Garlic Sauce (See Note and photos below)
1 T. vegan Worcestershire sauce
1 tsp. EACH:
onion powder
garlic granules
smoked hot paprika
salt
liquid smoke
Optional:
black pepper to taste
Scrape into a microwave-proof 2 qt. batter bowl and microwave for 10 minutes, stirring halfway through. OR, scrape into a medium saucepan, bring to a boil, then turn the heat down and simmer for about 15 minutes, stirring from time to time.
Cool and pour or scoop into a Mason jar. Twist on the cap and refrigerate. This will keep for several weeks in the refrigerator.

NOTE ABOUT CHINESE OR VIETNAMESE CHILI GARLIC SAUCE:
This product is easily available in supermarkets and Asian grocery stores or online. Here are two common brands-- Huy Fong foods, Inc. and Lee Kum Kee:


Enjoy!
