Monday, September 29, 2008
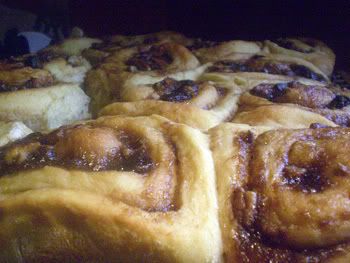
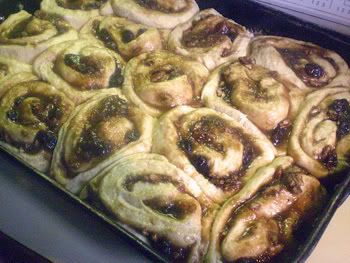
GIANT CARAMEL CINNAMON ROLLS (FROM NO-KNEAD DOUGH!)

I haven't been doing much bread-baking lately, but I have wanted to adapt my low-fat vegan sweet bread dough to the no-knead method for some time. So, last week I made a batch, adapting it somewhat (as described in the recipe at the end of this post). I stirred it up (no kneading, of course), let it rise for 2 hours and then stashed it into the fridge for a couple of days. I then adapted another cinnamon roll recipe of mine, using what had been an applesauce-caramel-sticky-bun-goo as a filling, and making giant rolls. We loved them, so I want to share them with you. I'm sure you will find many uses for it!
This method means that you can whip up some dough--literally in 5 minutes!-- and have it in the fridge ready for a batch of some delectable treats at a moment's notice. This is great for holiday breads, too-- adapt it to your family or ethnic recipes.
As I mentioned in my blog post on no-knead crusty bread:
"The science behind it-- Harold McGee author of "On Food and Cooking" (Scribner, 2004-- a book I have on my personal shelf!), says:
'It makes sense. The long, slow rise does over hours what intensive kneading does in minutes: it brings the gluten molecules into side-by-side alignment to maximize their opportunity to bind to each other and produce a strong, elastic network. The wetness of the dough is an important piece of this because the gluten molecules are more mobile in a high proportion of water, and so can move into alignment easier and faster than if the dough were stiff.'
As well, the long rise produces umami flavor compounds which give the bread outstanding flavor."
This dough is not really sweet, so it can be used for any soft bread, even savory versions.
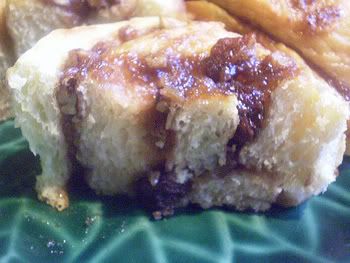
Even though they contain some vegan buttery spread, these big puffy, sticky, gooey cinnamon rolls contain about HALF the fat and calories of a Cinnabon classic cinnamon roll, or a roll from a recipe such as the Giant Sticky Pecan Rolls on the Fleischmann's Yeast website!
Printable Recipe
BRYANNA'S GIANT APPLE-CARAMEL CINNAMON ROLLS (FROM NO-KNEAD DOUGH)
Yield: 16 large rolls
The applesauce-brown sugar caramel is gooey and delicious, but not a total nutritional loss!
You can make 32 smaller rolls (or cut the large ones in half) for smaller portions. The Nutrition Facts for 1 smaller roll are: Nutrition (per serving): 181.7 calories; 26% calories from fat; 5.4g total fat; 0.0mg cholesterol; 173.5mg sodium; 145.1mg potassium; 31.7g carbohydrates; 1.3g fiber; 14.9g sugar; 30.4g net carbs; 3.1g protein; 3.8 points.
Apple-Caramel Filling:
1 1/4 cup unsweetened smooth applesauce
1 1/4 cup brown sugar
1/3 cup melted vegan buttery spread (try my homemade palm-oil-free Buttah)
1 teaspoon cinnamon
Remaining Ingredients:
1 recipe Low-Fat, Vegan, No-Knead, Refrigerator Enriched Yeast Dough (recipe below), risen in the refrigerator at least 12 hours (straight out of the fridge!)
1 cup raisins
1/2 cup chopped pecans
To make the filling:
mix together the applesauce and brown sugar in a medium bowl. When well-combined, add the melted buttery spread and cinnamon and whisk until totally combined. Set aside in the refrigerator.
To form the rolls:
Have ready an oiled baking pan (or pans). I have a large baking pan (with 2"-high sides-- NOT a cookie sheet!) measuring 16 x 11". If you don't have such a pan, you could use two 7x11" pans, or two 9" square pans.
Also have ready a WELL-FLOURED sheet of baking parchment OR a plastic or silicone pastry mat (or sheet) measuring 24 x 18" (or it can be larger). I have an old Tupperware one, but they have some new ones now. Many new versions and brands are available at kitchen stores, or online, such as amazon.com (or, for Canadians).
The parchment or mat is helpful because this dough is quite soft and sticky and the mat makes it easier to handle and roll up.
Scrape the dough, straight out of the refrigerator, onto the middle of the mat.
Sprinkle unbleached flour liberally over the dough. Pat the dough down into a rectangle shape. Now, use a rolling pin to roll the dough gently into a rectangle about 18 x 24". Have one long (24") edge facing you. (The corners might not be exactly square-- that's okay!).
IMPORTANT: While you are rolling, lift up the dough from time to time to make sure there is enough flour under it to keep it from sticking to the mat, and sift flour over the top to stop the rolling pin from sticking. Make sure the dough is rolled out to an even thickness. Work as quickly as possible, in order to keep the dough cold.
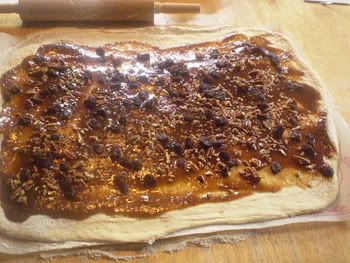
Spread the Apple-Caramel Filling evenly over the dough from short end to short end, leaving about 1" of dough empty on each long side. Sprinkle the Filling evenly with the raisins and pecans.
Using the mat or the parchment to help you, start rolling the long side closest to you away from you. Roll carefully and gently until you roll it almost to the other long side. If some of the Filling has gushed out and threatens to leak onto the clean edge of dough (which will make it hard to seal the dough), scrape it off with a spoon and set it aside in a small cup-- you can spread it on top of the buns later.
Pull the opposing long side up over the roll, pinching the dough together to seal, smoothing it as you go.
Now, using a very sharp serrated knife, and wiping it off cleanly between cuts, cut the dough into 16 rolls of an even width. Use a gentle sawing motion rather than cutting down sharply (which will squish the dough).
Carefully transfer the rolls, using a cake slice or pie server, to the prepared pans(s), placing them cut-side-up (the gooiest side facing up!). They can touch, but don't fit too tightly. If you have some left-over filling, spread it over or into some of the rolls that may not have as much filling as others.
Cover the pans loosely and let stand at room temperature for about 1 hour.
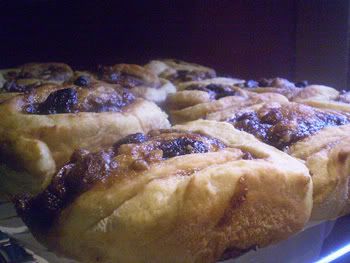
The buns risen and ready for the oven.
Bake the rolls in a preheated 350°F oven for about 30 minutes, or until golden.
Loosen the rolls all along the sides of the pan(s) and allow to cool a bit with the pan(s) on a rack, until you can handle them. if you like, you can add a powdered sugar glaze, but we prefer them plain. Eat warm! They freeze well after cooling thoroughly.
Nutrition Facts
Nutrition (per roll): 378.1 calories; 25% calories from fat; 10.7g total fat; 0.0mg cholesterol; 348.5mg sodium; 305.0mg potassium; 67.2g carbohydrates; 2.7g fiber; 33.1g sugar; 64.4g net carbs; 6.1g protein; 7.9 points.
THE DOUGH:
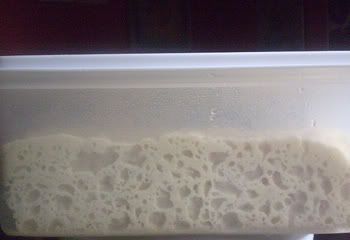
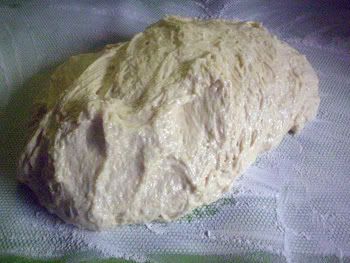
The dough after 2 days in the refrigerator
BRYANNA'S LOW-FAT, VEGAN, NO-KNEAD, REFRIGERATOR ENRICHED YEAST BREAD DOUGH
Servings: 32
Yield: Makes 2 loaves, 16 large rolls, or 32 small rolls
This is great basic dough for breads that usually call for eggs and butter-- it's light and moist (due to the mashed potatoes) and just slightly sweet. You can use it for sweet or savory breads that call for a soft, puffy dough. This is adapted from my Sweet No-Fat Yeast Dough recipe from my book "The Almost No-Fat Holiday Cookbook". I find that a little vegan butter makes the refrigerated dough a bit softer, but, if you want to make it with no fat, omit the vegan butter and use 1 cup of mashed potatoes. The long rising develops both the gluten (so that it's like a kneaded dough) and the flavor. The dough is sticky to work with, but when it's cold, it's not too hard to work.
2 cup warm nondairy milk (soymilk works really well in yeast breads)
1 pkg. (or 2 1/2 tsp.) dry active baking yeast OR 1 1/2 tsp. instant baking yeast
2/3 cup mashed potatoes (generous 5 oz. russet potatoes, cooked and mashed with no milk added) OR 2/3 c. instant organic mashed potato flakes mixed with 2/3 c. boiling water
1/3 cup melted vegan buttery spread (try my palm-oil-free Buttah)
1/2 cup wheat germ
1/4 cup maple syrup, agave syrup or brown rice syrup
1/4 cup light unbleached sugar
1 Tbs lemon juice
2 tsp salt
1/4 tsp turmeric
4 cup unbleached white flour (or you can use up to half wholewheat)
In a large mixing bowl combine the milk and yeast. When the yeast has dissolved, add the mashed potatoes (cooled down), melted vegan butter, wheat germ, syrup, sugar, lemon juice, salt, and turmeric. Mix in the flour with a wooden spoon. It will be a soft, rough dough. Cover the dough with plastic wrap, or place the bowl inside of a clean white plastic trash bag. Let rise at room temperature for at least 2 hours.
Now scrape the dough into a lightly-oiled closed container ( the rectangular box that organic baby greens come in works well but you might want to invest in a dough rising bucket). Cover tightly (but not air-tight) and refrigerate from 12 hours to 2 weeks in the refrigerator.
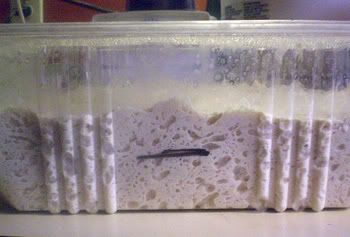
This photo shows how the dough doubled in the refrigerator.
Several hours before serving, shape the cold dough (right out of the refrigerator) into two loaves, or 16 large buns, or 32 small rolls, according to the recipe you are using. Cover and let rise at room temperature for 1 hour.
Bake at 350 degrees F for 20-45 minutes, depending upon the size and shape of the loaves or rolls. (Solid round or pan loaves may take as long as 45 minutes; long, braided, or ring loaves about 30 minutes; small rolls 20 minutes.) Cool on racks and decorate as directed in your recipe.
Nutrition Facts
Nutrition (per serving): 108.7 calories; 18% calories from fat; 2.3g total fat; 0.0mg cholesterol; 150.3mg sodium; 69.6mg potassium; 19.8g carbohydrates; 0.9g fiber; 5.2g sugar; 18.9g net carbs; 2.7g protein; 2.2 points.
Enjoy!

Monday, September 22, 2008
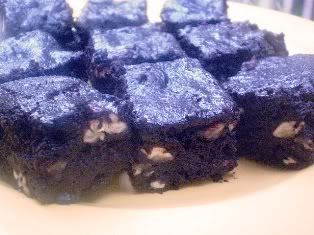
DARK, FUDGY OKARA BROWNIES
 Mmmmmm...brownies!
UPDATE: If you have no okara handy, you can make these brownies with black beans-- and, no, they do NOT taste like beans! Instead of the okara, use 1 cup UNSEASONED home-cooked black beans (or very well-rinsed canned black beans), with a little water (it should all fit in a 1 cup measure). DO NOT use the canned bean liquid, please!
NEW, STREAMLINED, ALMOST-FAT-FREE VERSION HERE!
I have to admit that I do not make use of the okara (soybean pulp) from making soymilk (and I make 2 batches at least twice a week) as often as I should. Yesterday, I had a chocolate craving (it was a bad computer day!), so I decided to try some ideas I had. I made three recipes and I will post the others if I think they came out well-- not sure yet!
But the brownies--this has got to be the most delicious way to use up some of your okara! DH declared these the best vegan brownies I've ever made! They are also pretty simple to make. They are cooked at a lower temperature for a longer time than most brownies to ensure the proper fudgy-ness without that yucky raw texture and taste.
NOTE: I squeeze and twist my okara in a large piece of cotton sheeting until I can get as much soymilk out of it as possible, so it is quite solid. To make this recipe come out properly, I recommend that you do the same. A very wet okara may result in disaster! This is what my okara looks like:

THE BROWNIES:
Printable Recipe
UPDATE: If you have no okara handy, you can make these brownies with black beans-- and, no, they do NOT taste like beans! Instead of the okara, use 1 cup UNSEASONED home-cooked black beans (or very well-rinsed canned black beans), with a little water (it should all fit in a 1 cup measure). DO NOT use the canned bean liquid, please!
NEW, STREAMLINED, ALMOST-FAT-FREE VERSION HERE!
BRYANNA'S DARK, FUDGY OKARA BROWNIES
Yield: 20 squares
FLAXSEED AND EGG REPLACER "GLOP"
1/2 cup water
2 tablespoons flaxseed, ground in a dry blender or coffee/spice mill
(do not omit the grinding step!)
2 tablespoons Ener-G or Orgran egg replacer powder
ADDITIONAL INGREDIENTS
1 cup light organic sugar
1 cup, packed brown sugar
3/4 cup, packed well-squeezed okara (soybean pulp from making soymilk)--
do not use very wet okara! See NOTE above.
4 oz (1/2 cup) melted vegan butter (try my homemade palm oil-free Buttah)
1/4 cup water
2 teaspoons vanilla extract
DRY MIX
1 1/4 cups organic unsweetened cocoa (yes.. that much!)
1/2 cup wholewheat or unbleached white flour
1/2 teaspoon salt
1/2 teaspoon baking powder
OPTIONAL: NUTS & OTHER POSSIBLE ADDITIONS.
1 cup chopped walnuts, pecans, or other favorite nuts (you could also add organic dairy-free chocolate chips, dried fruit, etc.)
Preheat the oven to 300°F. (Yes, only 300°F! That is not a typo!) Spray a 9-inch square baking pan with oil from a pump-sprayer, or with cooking spray, and line it with cooking parchment, with the parchment going up to the the top of the pan on at least two opposing sides. This enables you to lift the cooled brownie (uncut) out of the pan with no muss or fuss.
In a food processor, process the water and ground flaxseed at high speed until the mixture is smooth, somewhat like egg whites. I call this "Flaxseed Glop". Add the egg replacer and beat until thick and foamy.
Add the Additional Ingredients (the sugar to the vanilla) to the Food processor and process until well-mixed.
Whisk together the Dry Mix ingredients in a wide medium-sized bowl. Scrape the food processor mixture into the Dry mix. Fold and stir briefly, just to blend. Fold in the nuts.
Scrape the batter into the prepared pan and bake for 50 minutes. Remove to a rack to cool. Do not cut until the brownies are cool. You can lift the whole thing out of the pan, using the parchment liner, onto a cutting board . Use a very sharp serrated knife to cut into 20 squares.
Nutrition Facts (not including nuts or any other optional ingredients)
Nutrition (per serving): 194.6 calories; 41% calories from fat; 9.7g total fat; 0.0mg cholesterol; 102.3mg sodium; 185.9mg potassium; 28.5g carbohydrates; 3.0g fiber; 21.0g sugar; 25.4g net carbs; 2.3g protein; 4.1 points.
Enjoy!
Thursday, September 18, 2008
TWO EASY AND DELICIOUS FALL TREE FRUIT DESSERTS
Just wanted to share a couple of old favorite seasonal vegan dessert recipes with you!
Printable Copy of Both Recipes
BRYANNA'S APPLE "ROLY POLY" (Fat-Free)
Serves 4 (Can be GF and SF)
This is an old-fashioned dessert that deserves to be resurrected. I've been making it for years and years! It's easy, delicious and comforting, AND the pastry contains no fat! The dessert "poaches" in the syrup, so the pastry stays tender even without fat.
Syrup:
1 cup hot water
3/4 cup brown sugar
OR use:
1 cup maple syrup PLUS 1/4 cup water
Pastry:
1 cup whole wheat PASTRY flour OR Gluten-Free Flour Mix
(do not substitute ordinary whole wheat flour or the product will be tough)
1 teaspoon baking powder
1/4 teaspoon salt
1/4 cup nondairy milk
2 small apples, cored and chopped
1 teaspoon cinnamon
Preheat the oven to 350°F.
In a small saucepan, bring the hot water and brown sugar (or the maple syrup and water) to a boil. Boil gently, uncovered, for 5 minutes:
Pour the syrup into a 9 x 9" or 7 x 11" baking pan .
In a small bowl, mix together the flour, baking powder, and salt. Add the milk and mix briefly. If it's too dry to handle, add more milk, just a few drops at a time.
Roll the dough out on lightly-floured baking parchment into a 1/4"-thick rectangle, about 7 x11", covering the top with another piece of cooking parchment. Spread the chopped apples over the dough, to within 1/2" of the edge of the dough.
Roll the filled dough up like a jelly roll along one of the long edges. This dough may be a little hard to handle and look a bit messy, but it doesn't really matter after it's baked.
Brush the overlapping edge with water and seal it well to the rolled dough. Cut the roll into 12/ 1/2" slices with a sharp serrated (bread) knife. Place the slices in the syrup, cut-side-down, using a small spatula or pie server. Bake for 30 minutes. Serve warm with Soyatoo whipped topping (pictured-- or you can use Soyatoo Topping Cream or Mimicreme Healthy Top (nut-based), which come in aseptic cartons & you can whip them yourself), or Soyatoo Rice Whip, or your favorite vanilla nondairy "ice cream".
Nutrition Facts
Nutrition (per serving): 296.5 calories; 2% calories from fat; 1.0g total fat; 0.0mg cholesterol; 146.5mg sodium; 471.2mg potassium; 71.3g carbohydrates; 5.5g fiber; 45.6g sugar; 5.0g protein.

BRYANNA'S APPLE-POLENTA-PECAN CRISP
Serves 8 (Can be GF and SF)
This unusual crisp is a delicious variation on the traditional. (Confession: I said "polenta" in the title just because it sounds more exotic-- it's actually just plain ol' cornmeal along with some powdery corn flour.)
1 1/2 lbs. organic apples, cored and cut into thin slices (I don't peel them)
1/4 cup light unbleached organic sugar
1 Tbs. unbleached white flour OR rice flour or Gluten-Free Flour Mix
1 Tbs. lemon juice
1/2 tsp. pure vanilla extract
1/2 cup whole wheat flour (regular or pastry) OR Gluten-free flour mix
1/2 cup corn flour (finely milled yellow cornmeal-- see note below)
1/2 cup pecan halves
1/2 cup brown sugar
1/3 cup yellow cornmeal
1 tsp. cinnamon
1/4 cup cold vegan buttery spread (such as my homemade palm-oil-free vegan "Buttah")
your favorite vanilla non-dairy "ice cream" to top it off
Preheat the oven to 375°F.
NOTE: Corn Flour is very finely-ground yellow cornmeal-- ground almost to a powder. You can do this in small amounts in a dry, clean electric coffee/spice grinder. Or you can purchase it (sometimes organic) at a health food store or South Asian market. Bob's Red Mill is one brand you can find in HF stores.
Toss the apple slices with the 1 Tbs. flour, granulated sugar, lemon juice, and vanilla. Spread in a 9x13" baking dish. In a food processor, pulse the whole wheat flour, corn flour, cornmeal, pecans, brown sugar, and cinnamon until well-mixed and the pecans are chopped. Add the Earth Balance, cut into pieces, and pulse until crumbly. Spread the topping over the apples. Bake for about 45 minutes, or until the apples are tender and the topping is browned.
Serve hot with your favorite vegan vanilla "ice cream" on top.
Nutrition Facts
Nutrition (per serving): 288.6 calories; 32% calories from fat; 10.7g total fat; 0.0mg cholesterol; 68.9mg sodium; 237.2mg potassium; 48.3g carbohydrates; 5.1g fiber; 28.8g sugar; 2.9g protein; 7.5 points.
Cooking Tips
You could add a few fresh or dried cranberries to the filling, if you like.
Enjoy!
Friday, September 12, 2008
LOWFAT CHIPOTLE CREME TOPPING FOR CORN, AND FAT-FREE WHOLE GRAIN CREPES
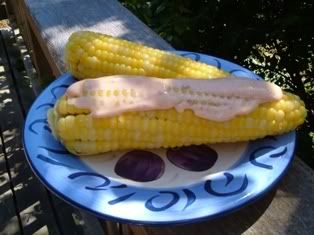
Fresh Denman Is. corn with Chipotle Creme instead of vegan butter
We are having a great corn season here on Denman Is., so sweet that I have been eating them plain. But sometimes you just HAVE to have something on your corn! In past years I've tried various lowfat toppings. Salsa is good, but I like something creamy. I devised the following a few years ago and it is quite yummy!
Printable Recipe
BRYANNA'S LOWFAT CHIPOTLE CREME
Yield: 3/4 cup
This is delicious on corn on the cob, but would make a good start for a dip, too.
1/2 cup extra-firm or firm silken tofu
1/4 cup low-fat vegan mayonnaise (my lowfat mayo recipe here; my Tofu Mayonnaise recipe here)
1 clove garlic, crushed
1/4 tsp salt
1/2 to 1 whole drained canned chile chipotle in adobo sauce
Puree the ingredients in a blender or with a stick/immersion blender. Refrigerate in a covered jar.
Nutrition Facts
Nutrition (per 2 tablespoons): 11.1 calories; 29% calories from fat; 0.4g total fat; 0.0mg cholesterol; 90.4mg sodium; 31.1mg potassium; 0.5g carbohydrates; 0.0g fiber; 0.2g sugar; 0.5g net carbs; 1.4g protein; 0.2 points.
Cooking Tip
A chipotle pepper is a smoked jalapeno; they are sold dried
************************************************************
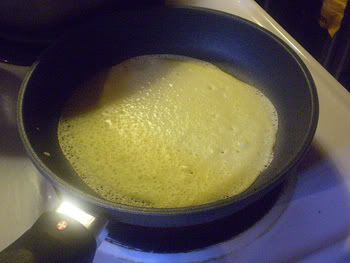
When I was at the McDougall Celebrity Weekend in Santa Rosa in June, we were not supposed to use any added fat or oil, even pan-spray on the pans. I was planning to make no-fat crepes made with wholewheat pastry flour, chickpea flour and oat flour (see recipe below). In the nonstick pans Mary provided, I made about 50 crepes for audience tasting, and then, in the workshop, I made several in front of the audience, with no mishaps. They were very impressed, and Chef Kevin Dunn told me he never would have tried that!
Here's the crepe recipe I made at the McDougall event:

Printable Recipe
BRYANNA'S FAT-FREE WHOLE GRAIN CREPES (WW Core plan Compatible)
Makes 12
2 1/4 cups nondairy milk
3/4 cup whole wheat pastry flour (do not substitute ordinary whole wheat flour)
3/4 cup oat flour (or use 2/3 cup rolled oats, ground in a dry blender or electric coffee/spice mill)
3/4 cup extra-firm silken tofu
1/3 cup chickpea flour (besan) or low-fat soy flour
1 1/2 tablespoons unbleached organic sugar
3/4 teaspoon salt
3/4 teaspoon baking powder
Process all of the ingredients ingredients in a food processor or a blender until very smooth. You do not need to "rest" the batter before cooking, as you do with egg crepes.
Heat a good nonstick 8" skillet (a shallow crepe skillet is the best, if you have one) over medium-high heat. (You can use a spray of oil from a pump-spray bottle if you like.) Use 3-4 tablespoons of batter per crepe (stirring the batter before you make each crepe), rolling and tilting the pan until it evenly covers the bottom. Cover the pan and cook for a few seconds, or until the top looks dry. Carefully loosen the crepe with a very thin silicone spatula and turn over carefully. (Or, if the crepes are to be filled and baked, you only need to cook them on one side.)
Stack the cooked crepes on a plate and cover them with a clean napkin.
Either serve the crepes right away, or let them cool and place in a rigid container (with pieces of cooking parchment in between each crepe), and refrigerate for up to 3 days, or freeze them for future use (thaw thoroughly before filling).
Nutrition Facts
Nutrition (per crepe): 85.5 calories; 14% calories from fat; 1.4g total fat; 0.0mg cholesterol; 157.7mg sodium; 171.1mg potassium; 14.4g carbohydrates; 1.8g fiber; 3.1g sugar; 12.6g net carbs; 4.7g protein; 1.5 points.
Enjoy!
Thursday, September 4, 2008
THE DENMAN IS. BLACKBERRY FAIRE

The 2008 Denman Is. green goddess, created by members of the community
Every year, on Labour Day, there is a community fair held in the field next to the Community Hall on Denman Island. It was pretty low-key this year, but a lovely day, and I had all of my children visiting, and all but 2 grandchildren.
DH waited patiently for the local arts society to set up their booth selling used CD's and videos-- he is an avid music collector and often scores some real gems there! Some of my visiting granddaughters and I perused the used books at another booth and found a few gems of our own!
My three Denman Is. granddaughters were busy selling homemade lollipops, lemonade and little blackberry-apple pies at their own table. They made a pretty good profit!
My #2 daughter did the "Blackberry Run" and finished in a a very respectable time! Actually, some ran, some jogged, some walked, some ran and walked (some with dogs!), some biked, and at least one roller-bladed! (That must be difficult uphill!)

Waiting for the Run to start...
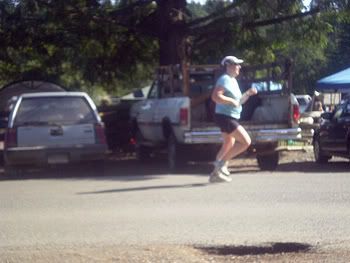
My daughter crossing the finish line
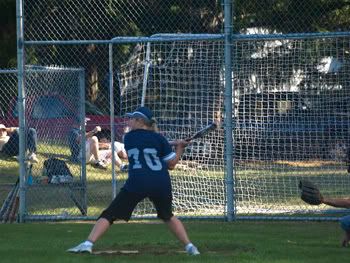
In the afternoon, we all gathered to cheer on the Denman Is. softball team, a mixed men and women's team. They were playing the Denman Is. Fire Department team, which only had one woman! There was a bit of a rivalry going on there! One couple from the island was split between the two-- the husband on the Fire Dept. team, and the wife on the Denman Is. team. Interesting conversation going on afterward! It was a close game, and ended in a tie (somewhat controversially!).
I was distracted by all the family being there, so I forgot to take very many pictures! CLICK HERE FOR SOME PHOTOS FROM LAST YEAR'S FAIRE! It will give you a better idea of what goes on.
HERE ARE SOME PHOTOS THAT I DID MANAGE TO TAKE (# 5,6 and 8 were taken by my #1 daughter):

Three cousins enjoying the new playground

My son in the field (center)

Two granddaughters watching the action

My son at bat
A. at bat
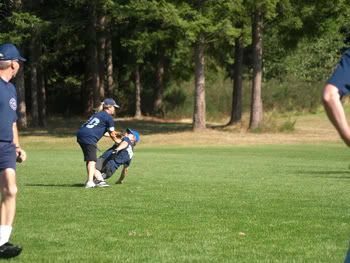
And here she is taking a man out
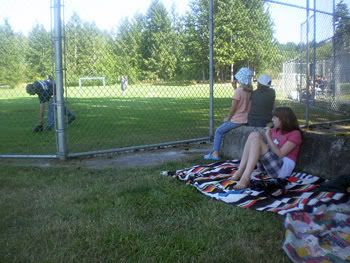
Three granddaughters relaxing in the shade as the game progresses, sampling the lollipops that their cousins made

My son shaking hands after the game
My #3 son-in-law brought some Boursin® Cheese spread to the house on this visit. He wondered if it was possible to make a vegan version that tasted as rich and delicious. Always eager to prove that "it can be done", I went to work in the kitchen and developed a vegan recipe recipe.
WHAT IS BOURSIN®?
From Wikipedia: "Boursin® cheese is a soft creamy cheese available in a variety of flavours. Its flavor and texture is somewhat similar to the American cream cheese.Boursin® cheese was first produced in 1957 by François Boursin in Normandy. Boursin® is a trademark - Boursin® cheese was at one time produced exclusively in Croisy-sur-Eure, France, by the Boursin® company, a subsidiary of Group Bel, but is now also produced in the United States for North American distribution by Unilever."
Checking online to see if anyone had already done the work for me, I found only one vegan recipe (repeated several times on various sites), which involved buying Tofutti Better than Cream Cheese (really expensive where I live, and, besides, I didn't have any, nor was I going to go off-island to get some!), and 1 whole cup of Earth Balance, which sounded rather more fatty than necessary! I decided to make my own from scratch.
DSIL loved the new spread, and he is definitely NOT a vegetarian, never mind a vegan. He actually said, and I quote his exact words: "I would eat this every day!"
It is quite delicious, but a rich spread for my taste and requirements, except on special occasions. However, comparing the two spreads: 1 tablespoon contains 43 calories, slightly less than 4 g fat (1 g saturated), and no cholesterol. It contains 100 mg LESS sodium than the "real thing" and only slightly less protein.
1 tablespoon of the "real thing" contains 120 calories, 13 g of fat (8 g saturated), and 35 mg cholesterol.
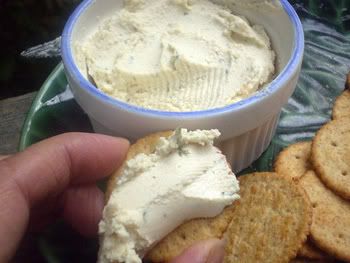
A new recipe-- Vegan Boursin®-Style Spread-- delish! The recipe will be in a new book out at the end of 2010!
Cheers!
Subscribe to:
Posts (Atom)