Thursday, February 11, 2010
KUNG HEY FAH CHOY, SWEETHEART!


Yes, the Lunar New Year (which we usually think of as “Chinese New Year”)-- this year the Year of the Metal Tiger (DH's year), and it falls on Valentine's Day. I thought it might be fun to combine the two together, so, on Saturday, I'm hosting one of our vegan dinner parties, with five vegan couples all contributing to the dinner. It also happens to be one of our group's birthday (not mine!).
I'm going to be cooking quite a bit in the next 2 days (and housecleaning!), but check back for a post about the party. This is going to be a rather short blog post today, as it's getting late. We had a power outage today (wind storm!) and I haven't been able to get online all afternoon and evening until now.

Just in case you like my idea, here's some research I did for the party: Valentine's Day harkens back to the Ides of February in ancient Rome-- the Feast of Lupercalia. Young men chose small papers, on which were written young women's names, out of a large urn. The chosen couples would be sweethearts or erotic partners (depending on your source!) for the coming year. Since the early Church could not seem to eradicate this custom, it chose to Christianize by making it the feast day of the apocryphal St. Valentine. (Some Valentine's Day customs also recall those of the old Irish and English festivals of Brigid's Day/Candlemas or Beltane/May Day.)
In all of these European cultures, great stock was put on various aphrodisiac foods, and almonds were one of those. It's convenient for our purposes on this double holiday that almonds are much used in Asian cuisines!
On Lunar New Year’s Eve there is a huge family feast for as many members of the family as possible. The children get to stay awake all night, because the Chinese believe that the longer the children stay awake, the longer their parents will live! (Better not let that get around!)
The color red is associated with both holidays, which is also very convenient for us (for decorating purposes). Red is a good luck color in Asia, so you see red everywhere. The table for the feast is set with a red cloth and red candles. And, surprise, surprise-- it is traditionally a vegetarian feast, on the first day, anyway (the celebration lasts for several days). No meat is served because harm would have to be caused to obtain meat and this would be bad luck.
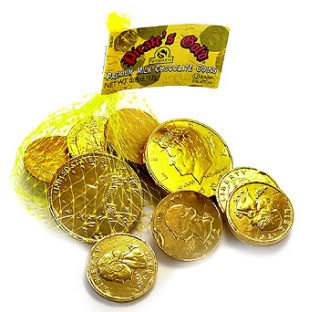
While the grown-ups enjoy a long meal, the children play games and ask riddles. They usually also receive gifts of “lucky money” (lai see) wrapped in red paper envelopes. The giving of gold-wrapped chocolate “coins” is a modern-day custom, but one that serves our mixed holiday well, as chocolate is a well-known Valentine commodity (with purported aphrodisiac qualities).
Fireworks are a big part of the celebration in China, but they're illegal here, so we'll have to make do with sparklers!
My stepson Sean is in Beijing right now, visiting an old friend of his who has a filming business there. Here he is posing with ALOT of fireworks:

The belief is that whatever happens on New Year’s day will influence the rest of the year, so everyone is very careful to say and do the right things, to think good thoughts and speak kind words. Visitors are offered gifts of sweets and fruit. The house is cleaned thoroughly and lots of food made ahead. Red and orange scrolls with Chinese characters conveying messages of good health, good, luck, long life, prosperity, and happiness, and flowers and pyramids of fruit decorate the houses. Oranges, kumquats and apples are the usual fruit, since apples are symbols of good luck and apples and oranges are both round (another lucky symbol) and are red and orange— colors of joy! (Apples are often known as “forbidden fruit” in Western mythology, which would add the requisite frisson of eroticism to the mixed festivities.) Sweet things are for the sweetness of life; dumplings and stuffed foods represent wealth; long, uncut noodles are for longevity.
Lots room for creativity there!

I had a tough time finding decorations in our small shopping area, but I managed to find some small paper lanterns, one big red and gold Chinese paper lantern, some of those little paper umbrellas, some sparklers, a paper dragon, and some gold-wrapped chocolate coins. I'm making some dark chocolate truffles with orange and ginger, and I found some red foil candy cups for them (they were all out of gold cups). These truffles will decorate an orange/ginger chocolate cake with chocolate/orange mousse filling and chocolate glaze.
So far, I know we have a yuba dish, a rice dish, an eggplant dish and a noodle dish coming. I'll make some plain rice, of course, and I have some flowering tea
 for a treat (read about it here!), but I'm still trying to decide on the other dishes (besides the cake and truffles). Gyoza (potstickers), I'm pretty sure.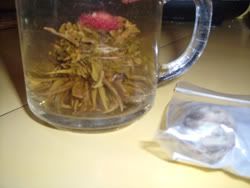
Flowering Tea
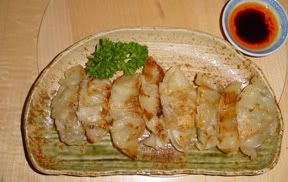
Gyoza (potstickers)
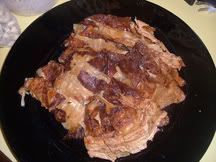
"Buddha's Chicken"
Maybe "Buddha's Chicken" or "Buddha's Roast Duck"; maybe Lion's Head (a braised dish of "meatballs" and cabbage). Other possibilities (it depends on what I have in the house!)are: Pineapple Sweet and Sour "Pork"; Chinese Mushroom/Rice "Sausage"; Stir-Fried Vegetarian "Duck" with Chili, Bell Pepper and Black Beans (all these recipes are from my Chinese cookbook
 ). I should do something with almonds!
On several sites I read that fresh tofu and other white foods (except for rice, obviously) are not served during the New Year's festivities because white is considered unlucky for New Year, as the color signifies death and misfortune.So I was thinking that you could use marinated or baked or smoked tofu, or bean curd skin (yuba) in your vegetarian feast. But Eve+line commented: "There is no such taboo about tofu or white colour food. In fact it's common to use tofu and other "white foods" (like radishes; scallops) in Chinese New Year dishes. However, we usually stir-fry or braise tofu with lots of other colourful foods so the white colour is not an issue at all.
In fact it is traditional for Singaporean Chinese to have "steamboat" during the Chinese New Year Eve, and the meal will feature lots of "white food" like tofu, enoki mushrooms and meat dumplings." Perhaps it is different according to region-- I don't know. But I'm relieved that she wrote in about that!
I'll be back in a few days with a report, pics and recipes!
Kung Hey Fah Choy!



Thursday, February 4, 2010
"POTTED TOFU"-- MISO-MARINATED TOFU THAT'S KINDA LIKE FETA

"Potted Tofu" in a green salad. (The British "pot"-- or preserve-- meat or shrimp, so why not tofu?)
I hadn't made this recipe for a long time-- it is in my first
 and second books
 , but I have added a way of storing it for longer.
I devised this as a feta substitute after I read about the Japanese method of pickling tofu in miso
 . The usual method involves a paste of miso and sake or wine (and sometimes sesame oil, ginger, etc.), in which the sliced tofu is coated. It is placed in a covered container and left for almost a day. If left for several days, this makes a quite sharp-tasting product, like a ripe cheese. (I'll post about it at another time.)
My method is a little different and the result is delicious-- I'd almost forgotten how delicious! I intend to keep some of this marinating regularly! It's very simple to make.

Printable Recipe
BRYANNA'S POTTED TOFU (MISO-MARINATED TOFU)
You can make this very smooth and soft, or more firm, depending on your taste. You can use ordinary medium-firm tofu, or firm tofu, or even extra-firm silken tofu. I use extra-firm tofu and let it marinate for about three weeks. It softens up over time.
1 lb. tofu (see text above), cut into 1/2"slices or 1/2" by 1" chunks
Marinade:
1 cup water
1/2 cup miso
(not a really dark kind)2 tablespoons lemon juice, or rice vinegar
1 teaspoon salt
Mix the marinade ingredients together and immerse the tofu in the marinade in a suitable covered container. It should be fully covered. A canning jar will do fine, but I used a small pottery casserole. Keep it refrigerated for at least 1 1/2 weeks or up to 3 weeks.

Fish the tofu carefully out of the Marinade.

You can carefully rinse off the tofu with cold water, if you like. It will keep in a covered container for a week or so. For longer storage, I pour canola oil over the tofu (to cover)-- I didn't rinse it-- and add garlic cloves (peeled), dried red hot peppers, and herbs such as bay leaves, rosemary, sage leaves, etc.. You can also add strips of orange or lemon zest and some olives.
The tofu will keep (refrigerated) in the oil for many weeks. (Both the marinade and the oil can be reused for the next batch.)

Before serving, you can rinse the oil off (gently) under warm water.
Use as you would feta cheese!

Enjoy!

Thursday, January 28, 2010
MY NO-KNEAD BAGUETTES

I have tried hard not to give in to the urge to bake bread these days, as we are trying to lose the 5 Christmas pounds we both gained over the holidays. It's not that we don't eat bread-- we eat moderate amounts of DH's good mostly-wholewheat bread. But it's hard not to eat too much of it when you are faced with a crackly artisan loaf! But, I gave in last week-- gave in to the urge to attempt to make a really good baguette. I decided to try a no-knead baguette and I used the recipe at the King Arthur Flour website as a starting point.
I did make some changes, though--
1.) I used 1 cup of wholewheat flour
 and the rest (7 cups) Canadian unbleached white flour
 .
.2.) I used dry active baking yeast
 (the same amount-- 1 tablespoon) instead of instant yeast
 , and I used slightly warmer water (3 cups) and dissolved the yeast in it first. I used the same amount of table salt (1 tablespoon).
3.) I didn't knead the dough at all in a mixer, as the recipe had instructed-- I wanted to keep it simple, like my other artisan-style bread, so I just stirred the ingredients together in a large bowl, then let the dough rise, covered, for 2 hours (you can actually let these no-knead doughs rise in a coolish kitchen for up to 18 hours before refrigerating, if you like), and stored it in the refrigerator in a container with plenty of room to rise.
4.) I changed the baking method-- more about that further down.

The dough (with 1/4 of it used already) after a few days in the refrigerator.
The dough is drier than my own no-knead bread, but I figured, what the heck-- you aren't using alot of expensive ingredients in this bread!
The recipe is a little confusing about how much it makes, but it does make 4 baguettes. I made one loaf up after about 3 days in the refrigerator, and I rested and shaped and rose the bread as per the recipe (there are pictures for shaping here). I rose and baked it in a parchment-lined dark baguette pan at 450 degrees F, as the recipe instructed. It turned out pretty good, crackly crust and moist inside, but not enough holes for me.
Forming the baguettes (sorry about the odd coloring in these photos!):


I made a batch of 2 baguettes last night and I tried something different with the baking. I shaped them as instructed and rose them inside of "troughs" made with heavy tea towels, lined with baking parchment
 (which I sprinkled with flour), instead of in the pans.
I placed the shaped baguettes into the "troughs" with the seam-side-up this time, because what I wanted to try was heating the baguette pans
 in the oven first, along with a large rectangular roasting pan to use as a cover, and I'd have to turn the baguettes into the hot pan. I figured that this might create more of a "mini brick oven" atmosphere, as we do when baking round or oval loaves in a preheated covered pot.
When the baguettes had risen in their "troughs" for 1 1/2 hours on my kitchen counter, I heated the oven, with the baguette pan and the roasting pan in the oven (to 475 degrees F this time) for half an hour, giving the loaves a full 2 hours to rise. Then I removed the hot pans from the oven, sprinkled the baguette pan with a little flour, and up-ended the risen loaves carefully into the hot baguette pan
 "troughs", seam-side-down, using the parchment they rose in as a "carrier". It worked!
I sprinkled the tops with a bit more flour, slashed the tops with a razor blade, sprayed them with warm water, and hurried them into the hot oven. Then I turned the hot roasting pan over the baguette pan to form a cover. The whole affair was not covered on the very ends because there is a handle on the baguette pan which was longer than the pan, but I figured mostly covered was possibly better than not covered at all!
I set the timer for 25 minutes and left it alone, hoping for the best! After 25 minutes, I removed the cover-- they had risen beautifully! They were nicely browned on the bottom, but needed a little more browning on top, so I turned them over and let them bake, uncovered, for another 5 minutes before placing them on racks to cool. The crust was great-- you could hear it crackling as it cooled!


When we finally cut into it (so hard to wait!) we were rewarded with a moist, holey interior and excellent flavor from the longer fermentation in the refrigerator.

I have one loaf's worth of dough left-- maybe I'll make a few hard rolls with it!
Give this a try-- so yummy, and so simple. The absolute basic bread ingredients-- water, flour, yeast and salt-- turn into this wonderful creation with hardly any work. Really!
PS: Oh, and check out Yeastspotting, "a weekly showcase of yeasted baked goods and dishes with bread as a main ingredient." I just discovered it and there's alot of beautiful bread out there...whew!
Enjoy!

Wednesday, January 20, 2010
EXPERIMENTS WITH PUMPKIN KIBBEH

I've been wanting to try a pumpkin kibbeh for a long time, but never got around to it before now. (Read about the Middle Eastern dish kibbeh at this blog post, along with a recipe for a delicious [but high-fat] potato/bulgur/onion kibbeh.) I had a can of pumpkin leftover from the holidays, so I decided to make kibbeh for lunch today.
This version is adapted from a recipe by Canadian/Syrian author and scholar Habeeb Salloum from his excellent books "Arab Cooking on a Saskatchewan Homestead: Recipes and Recollections
 ", "Classic Vegetarian Cooking From The Middle East And North Africa
 ", and “From the Land of Figs and Olives
 ”.
”.
My changes:
I used more onion and I sautéed it first to deepen the flavor.
I used smoky Aleppo Pepper
 instead of cayenne
 .
. I cut the amount of allspice in half because I find that it can be rather overwhelming.
I used chickpea flour instead of white flour, to add more fiber, protein and general nutrition.
And I found no need to add water.
As for technique:
I squeezed the soaked bulgur dry in my hands and I baked the mixture in two 8-inch square pans instead of one. (I was afraid the center would be too "squishy" if I made a thicker version in one pan, and I think I was right to do this.)
I also added a tart, savory sauce to cut the sweetness of the pumpkin.
The result is a tasty, make-ahead, low-fat, low-points meal (or appetizer, if served in smaller quantities) with lots of protein and fiber.

Printable Recipe
BRYANNA'S BAKED PUMPKIN KIBBEH
Servings: 6
I prefer this dish served at room temperature.
1 cups fine (#1 grade) bulgur wheat,
 soaked in 2 cups boiling water
 (for info about bulgur wheat)
2 teaspoons salt
1 tablespoon extra-virgin olive oil
1 large onion, chopped
2 cups canned pumpkin
(or use very well-drained, thick mashed, cooked pumpkin or dark orange winter squash [see Cooking Tip Below])
4 cloves garlic, peeled
1 teaspoon ground coriander

1 teaspoon Aleppo Pepper
(*Aleppo Pepper substitute: 4 parts sweet paprika and 1 part ancho chile or cayenne powder)
3/4 teaspoon cumin
1/2 teaspoon freshly-ground black pepper
1/2 teaspoon allspice
1 cup chickpea flour
 (besan
 )
) 4 teaspoons olive oil (for greasing)
Tofu/Tahini Mint Sauce
2/3 cup (5 oz.) firm or extra-firm silken tofu

1/4 cup lemon juice
2 tablespoons tahini

2 cloves garlic
1 teaspoon dried mint
 (or 1 tablespoon fresh, chopped)
 1/2 teaspoon salt
1 pinch sugar
freshly-ground pepper to taste
Preheat the oven to 375 °F.
Heat the 1 tablespoon olive oil in a nonstick skillet and, when hot, add the chopped onions and salt lightly. Saute briefly, then turn the heat down to medium-low and continue to cook until they are softened and just started to brown.
MICROWAVE OPTION: Place the oil in a microwave safe dish, add the onions, salt lightly and toss to coat with oil. Cover and cook on High for 4 minutes (that's at 1200 watts-- slightly longer for less wattage).
When the bulgur has absorbed most of the water, pour it into a fine strainer over a bowl and then squeeze handfuls of it as dry as you can. Place the squeezed bulgur in a medium bowl and discard the liquid. Mix the salt into the bulgur, distributing evenly.
Place the cooked onion, pumpkin, garlic, coriander, pepper, allspice, cumin, cayenne (or Aleppo Pepper), and chickpea flour in a food processor and whirl until thoroughly blended.
Scoop the processed mixture into the bulgur and mix well.
Grease two 8-inch square pans
 , each with 1 teaspoon of olive oil. Scoop half of the mixture into each pan, and smooth the surface of each until level. Drizzle a teaspoon of olive oil over the top of each and spread it around gently and evenly with your fingertips.
Bake for 25 minutes or until the surface looks dry. (The inside will be moist.)
Place the pans under the broiler for a few minutes (watching carefully!) just to brown and crisp up the surface a bit. Remove the pans to a rack to cool.
Cut the kibbeh into squares or triangles and serve at room temperature with the Tofu/Tahini Mint Sauce.

To make the Tofu/Tahini Mint Sauce,
blend all the ingredients until smooth. Scoop into a bowl, cover and refrigerate until serving time.
Nutrition Facts
Nutrition (per serving—includes sauce): 275.6 calories; 31% calories from fat; 9.8g total fat; 0.0mg cholesterol; 822.3mg sodium; 525.3mg potassium; 40.0g carbohydrates; 9.5g fiber; 6.1g sugar; 30.5g net carbs; 10.4g protein; 5.5 points.
Cooking Tips
If you use home-cooked pumpkin or squash, bake it until it is tender and then scoop it out of the shell and puree it in a food processor. Drain it for several hours hanging in a cloth (tied with string) suspended by your kitchen tap over the sink, until it’s thick like canned pumpkin.
Measure AFTER draining.

Subscribe to:
Posts (Atom)