Showing posts with label vegan pizza. Show all posts
Showing posts with label vegan pizza. Show all posts
Thursday, April 13, 2017
TIME AND ENERGY-SAVING STOVETOP PIZZA (MADE WITH NO-KNEAD DOUGH)


You can make the no-knead dough the day before or a week before and the cold dough will be easy to handle. I've never made pizza so fast and with less fuss and bother than this, and I have made alot of pizza in my time. It's perfect for 2-4 people.
And I love that I don't have to have the oven on for so long-- saves energy.
*****************************************************************
Printable Copy
This method may take a bit of adjustment, depending on your stove burners. I have an electric stove and the burners tend to be VERY hot, so I was not going to heat the pans any higher than on medium heat. (More details below.) It's also worth remembering that cast iron heats faster and retains heat longer than a pizza stone.
NOTE: If you have time to do a trial run with one piece of dough , it might be helpful, so that you can see how the dough responds to 3-4 minutes cooking on your particular burners (with the lid on the pan), and then you can adjust the heat accordingly.

So, when you are ready to make pizza....
1.) Have your toppings ready (and you want to go easy on the toppings): I saute some thinly sliced onions, peppers and mushrooms, and a bit of vegan sausage, thinly sliced, and then I use Daiya mozza shreds (but use any kind of vegan melty cheese you like) and a bit of Go Veggie! soy parmesan. For the sauce, use whatever kind you like. If I'm in a hurry, I just use some bottled tomato passata with basil and add a bit of salt and garlic to it.
2.) Measure out the dough (see info below and recipe links) and have your rolling-out set-up ready and waiting.
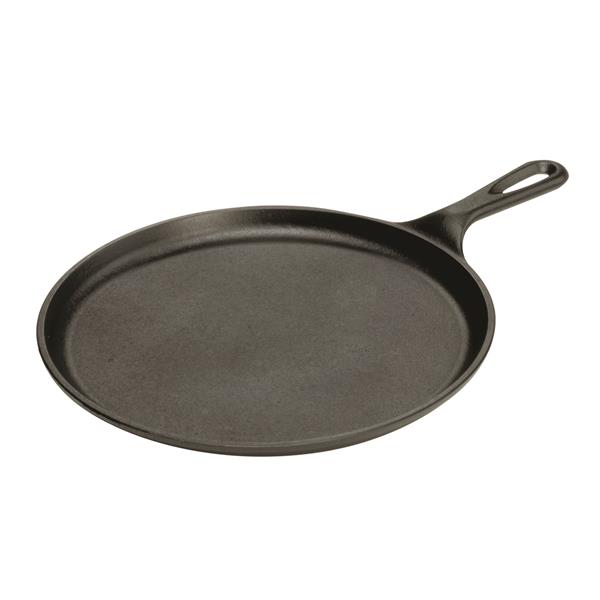
3.) Now pre-heat your skillets: I use well-seasoned cast iron skillets. I have read that you can use a heavy stainless steel skillet as well, and I would think that you could use a carbon steel skillet, too, since you can actually season both of those pans just like cast iron. See the end of the blog post for how to season all these types of skillets.
The first time I made the stovetop pizzas, I heated my pans at medium heat for 5 minutes on the two largest burners (#5 for the front one, and #4 for the back burner, which is very hot). It worked okay, but the bottoms burned a bit. The second time, I turned the front one to #4 and the back one to #3, which worked better.) PS: I didn't grease the pans at all.
You can heat the pans while you roll out the dough.
WARNING: I use silicone hot handle covers on the handles of my skillets, but you will still need really good oven mitts when moving these hot pans around.
4.) Move the top rack of your oven to about 4-5 inches below your oven broiler and turn the broiler to high. You will be quickly broiling the top of the pizzas after stovetop cooking.
5.) I used 6 oz. of cold dough for each personal pizza, rolled out to fit an 8-inch cast iron skillet. The no-knead dough should be fresh out of the refrigerator (after at least an all-night stay) and will need a good sprinkling of flour all over before rolling out on a piece of baking parchment or a silicone mat.
I used the no-knead version of my 3/4 whole wheat flatbread dough, or you could use my 100% whole wheat no-knead flatbread dough-- both doughs will keep refrigerated for a week or two. Or use your own favorite dough.


6.) Quickly place the rolled-out dough into the hot pans. Quickly spread with some of your sauce (dump about 3 tablespoons in the center of the dough and spread it outwards in a circular motion with the back of a soup spoon), top with a small handful vegan cheese shreds, a sprinkle of vegan parm and a handful of your toppings. Drizzle with a bit of olive oil from a squirt bottle, if you like. Cover with a lid and let cook for about 3 more minutes.
NOTE: If you are making 2 more pizzas, you can roll out the dough during this cooking time.
7.) Lift the lid and check the bottom of the dough-- it should be lightly browned with maybe some dark spots. If it's burning, the heat is too high-- you might want to move the pan off the heat for the last bit of cooking.
8.) Finishing off: now, you can slightly brown the top and melt the cheese thoroughly by moving the pans from the stovetop to the top rack of your oven, under the broiler. 1 or 2 minutes under the broiler should do it-- watch carefully.

Remove the skillets to the stovetop again and use a large spatula to move the pizzas to racks or plates. Repeat with more dough, etc, if you are making a couple more pizzas.
INSTRUCTIONS FOR SEASONING SKILLETS, AND KEEPING THEM SEASONED, SO THAT THEY ARE VIRTUALLY NONSTICK
Instructions for seasoning a carbon steel skillet here, here and here.
here and here.
Instructions for seasoning a cast iron skillet here.
If your cast iron skillet is really a mess, here is one way to restore it. If it is a rusty mess, it needs to be stripped and re-seasoned. I had an old pan like this and I did not want to use lye or oven cleaner to scrub it. I used the self-cleaning oven method described at the beginning of this article. This treatment stripped it right down to the grey iron. Then I did thorough oven-seasoning-- rub oil on all parts of the pan, including the handle; make sure there is no dripping oil; bake at about 350 degrees F for 1 hour; cool completely; repeat 3 more times. This may seem excessive, but you can do it when you are baking something at the same time, and the pan was like new!
To keep your cast iron pans well-seasoned, after cooking, add some HOT water to the pan (do not use cold) and let them soak for a few minutes. Then clean with a scrub brush (no stainless steel scrubbers, please!). Anything is stuck, use the edge of a plastic (not metal) dough scraper or the special polycarbonate pan scraper that Lodge sells for this purpose.

Dry the pan thoroughly. Rub a little oil all over the inside of the pan. Rub it in well and don't leave any excess oil. Place over low heat on the stove for 5-10 minutes. Let it cool and store.
PS: You do not need to use an expensive oil like flax oil, or even coconut oil. Your favorite neutral smelling/tasting oil will do just fine.
Enjoy!

Monday, February 1, 2016
NO-KNEAD PIZZA DOUGH BAQUETTES
 |
| Photo by Dianne Radmore/Fireweed |
A LITTLE EXPERIMENT THAT WENT QUITE WELL: NO-KNEAD PIZZA DOUGH BAQUETTES--
I had some leftover no-knead pizza dough in my refrigerator yesterday. We had our fill of pizza for a while, so I considered freezing the dough, but then thought, "Why not try making a couple of baguettes out of it?" Why not, indeed. It's a similar simple dough (see the recipe for the dough at the end of this post).
I have a baguette pan, but it has a hook on one end, which makes it difficult to place inside even my largest roaster.

I decided to line the baguette pan with 3 layers of foil, line the troughs with baking parchment and let the dough rise in that setup (for about 2 hours because the dough was cold).

When I heated up the oven (to 450 Degrees F), I also heated up my big rectangular granite ware roaster.

I stretched and folded the refrigerated dough a few times before shaping it into two loaves.

When the time came to bake, I slid the foil form out of the baguette pan onto the bottom of a baking sheet and then carefully slid that into the shallow bottom of the hot roaster.


The foil kind of spread outward at this point, so I quickly rolled up some more foil into two long "sausages" and used those to prop up the outside edges of my makeshift baguette pan liner (I saved all this foil for another use, BTW).
I scored the tops of the dough with a serrated knife before baking, but not deeply enough, evidently, because you couldn't see the scoring at all after it was baked (I'll use a razor blade on the soft dough next time). However, as you can see, it turned out well, had wonderful flavor (it was in the refrigerator for 2 nights), and disappeared very fast with a vegan stew I made for friends who came for dinner.
 |
| Photo by Dianne Radmore/Fireweed |
I'll be doing this again!
Printable Copy
BRYANNA'S NEAPOLITAN-STYLE NO-KNEAD PIZZA CRUST ( or about 4 baguettes)
Servings: 36
Yield: makes about six 11"-square pizzas
This is our current favorite pizza dough-- partly whole wheat and no oil added, but very tender.
6 cups unbleached white flour or unbleached bread flour (use bread flour in the USA-- Canadian all-purpose unbleached flour has the same gluten content as USA bread flour)
1 1/2 cups whole wheat pastry flour
1 Tbsp sea salt (fine)
3 cups warm water
1 Tbsp instant yeast
In a large bowl, mix together the two flours and the salt.
In a 1-quart/L container, sprinkle the yeast into the water and let sit for a few minutes. Stir and pour into the flour mix. Have ready another large bowl, oiled lightly.
Stir the mixture with a Danish dough whisk or large spoon. Use your hands to mix/knead in the last bit of flour. Using a dough scraper, scoop the dough into the oiled bowl. Cover and let rise at room temperature for 2 or more hours (this is flexible). Refrigerate in the same bowl, either covered, or placed inside of a food-safe plastic bag (it won't touch the dough if the bowl is big enough), or in a covered container such as a dough bucket or large storage container. Place in the refrigerator.
You can keep the dough in the refrigerator for about 2 weeks, although, in my experience, it gets kind of "soggy" by then. It does taste marvelous after a long stay in the refrigerator!
Make as many pizzas as you like (refrigerate any leftover dough again) as usual and bake at the highest heat your oven can reach (500-550 degrees F) for 8-10 minutes, using a baking stone or cast iron skillet heated up in the oven as it comes up to temperature.
See these blog posts for tips about rolling out and baking pizza:
http://veganfeastkitchen.blogspot.ca/2006/05/vegan-pizza-night.html
http://veganfeastkitchen.blogspot.ca/2011/10/cast-iron-skillet-pizza-perfect.html
Nutrition Facts
Nutrition (per 1/6th of one square 11-inch pizza): 93 calories, 3 calories from fat, less than1g total fat, 0mg cholesterol, 189.1mg sodium, 47mg potassium, 19.6g carbohydrates, 1.2g fiber, less than 1g sugar, 3g protein.
Enjoy!

Monday, May 13, 2013
FUSION NAAN PIZZAS AND MESSING AROUND WITH FLATBREADS
 |
| Naan Pizza |
 |
| Leek and vegan cheese flatbreads for dinner last night-- so good! |
All this ruminating on bread reminded me of a recipe I developed for my old newsletter, The Vegan Feast, a few years ago-- a sort of pizza with a base of vegan naan and an Indian-style pea/tomato sauce, topped with vegan cheese and rich-tasting browned onions. So, I offer it to you here while I make a few more flatbread discoveries for the next post. Bon appetit!

Printable Recipe
BRYANNA'S FUSION NAAN PIZZAS WITH INDIAN TOMATO SAUCE WITH PEAS, ARUGULA, VEGAN MOZZA, AND CRISPY BROWNED ONIONS
Serves 12 Yield: 6 pizzas
I
wanted to have a casual Indian fusion meal for friends one evening a few years ago, and this is
the main dish I was thinking about for days before. It turned out to be a big hit, and a good choice for a casual company meal, because all of the components can be made either
early in the day, or even a day or two ahead of time.
NOTE: Naan for pizzas can be baked several
hours ahead of time. Bake them for only
3 minutes or so, or until they are risen and set, and starting to become
golden. You need to underbake them because they will bake again with the
toppings. Remove them with a peel or long-handled spatula. Place them inside of
an open paper bag until time to make the pizzas.
6 Vegan Naan Bread, slightly under-baked
(see my book "World Vegan Feast" for my vegan recipe)-- mine are
about 9 x 7-inches
OR use
commercial naan (if you can find some without dairy) OR vegan pita (uncut)--
you may need to use 1 or 2 more of these
UPDATE: or use one of these flatbread doughs: My 1st flatbread dough; my 2nd flatbread dough-- both no-knead.
UPDATE: or use one of these flatbread doughs: My 1st flatbread dough; my 2nd flatbread dough-- both no-knead.
Crispy Browned Onions: **You can make these ahead of time, even the day before.**
4 large onions, thinly-sliced
2 tablespoons olive oil
1 teaspoon salt
Indian Tomato Sauce with Peas:
2 tablespoons grated fresh ginger
1 tablespoon chopped garlic
1 medium onion, minced
1 teaspoon salt
1 teaspoon turmeric
1 tablespoon garam masala or curry powder
1 teaspoon ground coriander
1 pinch cayenne
1/4 cup water or vegetarian broth
1/ 14 oz can tomatoes with juice, mashed
with your fingers
1 1/2 cups frozen petit pois (young green
peas)
1 teaspoon sugar
Additional:
2 cups raw arugula (approximately)
Crispy Browned
Onions: Heat the olive oil in a large well-seasoned skillet over high heat. Add the thinly-sliced onions and salt. Saute for several minutes, then reduce the
heat to medium. Cook the onions,
stirring often, for about 15 minutes.
You want them to be deep brown and a little crispy. When the are done, set the pan aside, off the
heat.
Indian Tomato Sauce with Peas: Add the ginger
and garlic to a large well-seasoned skillet over high heat, and stir-fry with a little bit of water
for a minute. Add the onion and stir-fry until it is soft, about 5 minutes,
adding a squirt of water as needed to keep from sticking. Add the seasonings
and 1/4 cup of water or broth, stirring around well, then add the tomatoes,
peas, and sugar, and simmer for 10-15 minutes.
Set aside.
Assembling and Baking the Pizzas: About 1/2 an
hour before you want to serve the pizzas, set an oven rack in the
upper-middle rung. Place a large baking stone (or 2 or more smaller ones) or baking tiles (leaving a 1-inch gap around the border), or a large cast iron skillet (or 2 smaller ones), or griddle or pizza pan , on the oven rack. Heat the oven to 450°F.

My homemade Naan
Place the naan (or pita) on your work surface
and cover all them evenly with the Indian Tomato Sauce. Distribute the shredded mozza evenly between
the pizzas.


Place the raw arugula
over the mozza. Top with the Crispy
Browned Onions.

Place the pizza on a baking peel, a large dough scraper/bench knife, cake or cookie lifter, or a small rimless baking sheet-- whatever
you are using to transfer the pizzas to the baking stone or alternate. Transfer
to the baking stone and bake as directed below.
To use a peel, or alternate, dust it lightly
but thoroughly with flour, cornmeal or semolina, gently pull the pizza onto it, letting one edge hang off the rim a bit, if necessary. As you place the front tip of the peel AT THE BACK
END of the hot stone or skillet, etc., pull the peel out sharply, and the pizza will slip onto the hot surface. Close the oven door quickly. If your
stone is big enough, add a second pizza.
Bake each pizza (or pair of pizzas)
for 3-5 minutes each, remove immediately and repeat until the others are
cooked. Cut them in half and serve
immediately!
Nutrition (per serving): 338.0 calories;
36% calories from fat; 13.8g total fat; 0.0mg cholesterol; 900.6mg sodium;
281.2mg potassium; 45.0g carbohydrates; 3.8g fiber; 5.5g sugar; 9.3g protein;
7.1 points.
Enjoy!

Monday, January 16, 2012
MY FIRST PIZZA FROM "ARTISAN PIZZA AND FLATBREAD IN FIVE MINUTES A DAY"

I have the first two "5 Minute" bread books ("Artisan Bread in Five Minutes a Day" and "Healthy Bread in Five Minutes a Day") by Jeff Hertzberg and Zoe Francois in my growing collection of no-knead bread books, but I've been looking forward to getting my hands on their newest, "Artisan Pizza and Flatbreads in Five Minutes a Day". I'm always on the lookout for a new, fabulous pizza dough recipe, and I hadn't had much success so far with my own experiments in making a no-knead pizza dough.

Note: The books are not vegan, or even vegetarian, but most of the dough recipes are or can be vegan and, well, we vegans are good at adapting!
The book arrived last week and yesterday (Sunday), three of my granddaughters were coming over for lunch. Pizza seemed like the perfect thing to serve. So, on Saturday, I stirred up up a batch of "Crisp-Yet-Tender Pizza Dough Even Closer to the Style of Naples"-- literally stirred; no kneading. It probably took 5 minutes or under. After letting it rise for a few hours, I stashed it in the refrigerator in a snap-lid bowl with room to rise overnight.

That odd-looking implement is a Danish dough whisk, perfect for stirring thick batters and soft doughs.
This particular (fat-free) dough is supposed to be made with Italian "00" flour, which is lower in protein (gluten) than North American flour. "00" flour is available in North America now, at amazon.com and King Arthur Flour. Both contain about 8% protein ( as a comparison, ordinary all-purpose flour contains about 11%). I didn't have any of this, but, fortunately, the book contains a formula for making your own Italian-style flour blend using unbleached flour and pastry flour. I couldn't resist using half whole wheat pastry flour in place of some of the white pastry flour called for, and that worked well, so next time I'll take a chance and use more. I also used a bit more salt than they called for (the book contains a great section on ingredients and how to change some things to your own taste).

The dough after about 18 hours in the refrigerator.
I should have made the dough a few days earlier, I realize, because, being familiar with no-knead dough by now, I could see that another day in the fridge would have ripened the dough more thoroughly. But it was still no trouble to roll out and stretch 6 pizzas in a short amount of time. (I roll it out on baking parchment and also bake it on the parchment-- no sticking to the peel that way!)

(BTW, If you want to learn how to throw pizza dough, see the videos and instructions here: http://www.artisanbreadinfive.com/2012/01/03/how-to-throw-pizza-dough-new-video )
I baked one pizza at a time in a 14" cast iron skillet (you could also use a cast iron pizza pan), which is my new favorite way to bake pizza (cast iron pans heat up twice as fast as a pizza stone, and the pizza cooks in about 7 minutes with a nice speckled crust). I was happy to see that the authors of this book gave this as an option.
I used my pizza sauce from my book World Vegan Feast and what I had around for toppings-- Daiya vegan mozzarella, green pepper, kalamata olives and Yves veggie pepperoni (thought the girls would like this) cut into slivers, pepper and a little olive oil.


I won't say that I will always use this dough, because I like to change it up, but this is certainly a great pizza dough, and very easy and convenient to make. The dough will keep refrigerated for about 2 weeks, so, if you don't have company and eat the whole thing in one sitting, you can pull out a piece of dough and whip up a pizza (no rising necessary) in no time at all.

(PS: No, we didn't eat the whole batch, but we had collectively eaten 5 of them by the time the girls left -- I managed to save one for my stepson, who came along later. Fast-growing12 year-old girls can eat alot of pizza!)
I'm anxious to try the focaccia, Cornmeal Olive Oil Dough, Chapati, Corn Masa Dough, Crisp Pita Bread Bowl, and several other goodies, but I'm only going to make them when we have company to eat most of it-- otherwise my good intentions to lose weight will fall by the wayside!
Even if you have never made any sort of bread before, fear not-- you can make some mighty good pizza with this book, pizza suited to your tastes and busy schedule. Kudos once again to authors Jeff Hertzberg and Zoe Francois!
Enjoy!

Thursday, October 13, 2011
CAST IRON SKILLET PIZZA-- PERFECT!

My cast iron-baked pizza with Yves veggie pepperoni, Daiya vegan mozzarella, mushrooms and peppers (I could have let it get a bit more charred, but we were starving!)
UPDATE October 2020: I wrote another post on cast iron pizza baking in April 2017 entitled
"Time and Energy-saving Stovetop Pizza (Made with No-knead Dough)", with more information and a different method, too.UPDATE October 2020: I wrote another post on cast iron pizza baking in April 2017 entitled

If you've read this blog for a few years, you'll know that I am always trying to improve on my pizza. One of the major challenges for the home cook when making pizza is that the highest temperature of a home oven (unless you have a wood-fired brick oven or a special pizza oven) is 200-300 degrees (F) lower than a commercial pizza oven. This makes it difficult to get a really excellent crust. As you can see in the photos below, I can do a very good crust in my little Cuisinart Brick Oven (that's what I bought it for, though it's proven to be a great energy-saver when doing small-batch baking or roasting).

But the interior of the Cuisinart Brick Oven is only 12-inches square, so it's only good, really, for personal-sized pizzas. When making 14" pizzas I've tried all kinds of things, including placing the pizza pan on the very bottom of the oven (until I discovered that the oven heating coils in my stove are actually in the back wall of the oven!), with mixed results.
Recently I read an article or an entry in a book (I can't remember where, darn it!) describing how to use an ordinary cast iron skillet to bake pizza (thin-crust pizza, not deep-dish), It involved heating the skillet on top of the stove until very hot, slipping in the prepared pizza and cooking it on the stove-top for about 3 minutes, then baking in a hot oven for a few more minutes and finishing it under the broiler. It looked good, but I didn't get around to trying it, and it sounded a bit involved.
Then, in the current issue of Cook's Illustrated magazine, I read a review of Lodge Pro Logic Cast-Iron 14-Inch Pizza Pan:

"After preheating the pan to 500 degrees, we used it to bake multiple batches of pizza, looking for crisp, golden crusts on par with those made with our winning pizza baking stone. The first surprise: While the stone takes an hour to reach 500 degrees, this pan was ready after a mere 30 minutes...Best of all, the pan produced perfect crust. The 14-inch circle does limit the size and shape of your pizza, providing slightly less usable space than the 14½ by 16½-inch rectangular stone (especially if you’re baking something other than pizza), but this pan offers identical results in less time."
I thought back to that item I had read before and thought about my ancient, well-seasoned 14" cast iron skillet, and thought "Why not?"

We were in a rush for dinner, but my DH was making his not-quite-white bread for a client and could spare me a loaf of the dough for our pizza, and I had a bit of my pizza sauce (recipe for the sauce and my pizza dough in my new book World Vegan Feast) in the freezer, which, mixed with some leftover spaghetti sauce which DH had made, would make a fine topping and speed up our dinner considerably. (NOTE: If you must use a canned sauce, Lucini is the only one I've ever tasted that I would recommend!) The Daiya vegan cheese in the freezer was already grated and I quickly sauteed some mushroom and bell pepper slices to compliment the Yves veggie pepperoni.
I heated the skillet at my oven's highest heat (550 degrees F) while I got everything ready. (I did not grease the pan, by the way, as the skillet is 40 years old and well-maintained.) After 30 minutes of heating, I popped the prepared pizza disc (drizzled with a bit of olive oil and still on the parchment I stretched it out on) into the hot skillet and let it bake for about 10 minutes.

It emerged puffed and brown on the edges, a bit charred on the bottom and bubbling on top! I think I now have my solution!
Later, I checked online for other versions of baking pizza in cast iron and found many hits (was I asleep before or something??) with various methods, like this one in Sunset magazine, and this one from The Atlantic, but I think the method described in Cook's Illustrated is the most straight-forward and involves less moving around from stove-top to oven to broiler, etc., and so, less chance of burning yourself! I found it very simple.
I was also thinking that, if you have a cast iron round pancake griddle, that would work, too! (I'm not sure if 14" ones are available, but a smaller one would work, too.) A word of warning: the pan stays VERY hot, so use good oven mitts and cover any handles while it rests on the stove so that you don't accidentally grab hot metal!
Enjoy!

I was also thinking that, if you have a cast iron round pancake griddle, that would work, too! (I'm not sure if 14" ones are available, but a smaller one would work, too.)
Enjoy!

Sunday, September 19, 2010
REVIEW OF SOME WONDERFUL ITALIAN PRODUCTS-- LUCINI ITALIA

Homemade vegan pizza-- mmmmmm!
It's been a busy week! Too much writing and not enough cooking, but that's the way it goes sometimes! I just wanted to tell you about a some new products I've tried
You know that I don't write alot about new products, and only if I really like them! Companies send me products to review sometimes, but I don't give bad reviews-- I just don't review them if I don't like them! Recently, I received a big box of products from Lucini Italia.

I was intrigued by the Lucini Italia "Cinque e' Cinque

"Cinque e' Cinque" is basically a farinata, or chickpea pancake. I had never heard it called by this name before, but evidently that is what they call it in Livorno, in Tuscany. In Liguria, where my paternal grandmother's family originated, they call it fai'na, which is a sort of slurring of farinata. I've always made it quite thin, but the package suggested that you could make a sort of vegan fritatta (which is a baked omelet) by making the farinata quite thick.
I decided to try the Traditiona
Here it is right out of the oven, and then cut into wedges:


I served the wedges of hot, creamy Cinque e' Cinque as a main dish, topped with an Italian-style "Salsa Cruda", or raw tomato relish with black olives and basil (with our own homegrown tomatoes and basil!):
 Italian Salsa Cruda
 Cinque e' Cinque with Italian Salsa Cruda and potatoes sautéed with mushrooms.
It was delicious, and very satisfying! I am going to experiment with adding roasted or grilled vegetables to the thick version-- it would seem more like a real fritatta, I think.
They also sent some lovely balsamic vinegar

I rarely ever buy salad dressing, but this was very tasty!

Some of our homegrown tomatoes with the Fig & Walnut Balsamic Vinaigrette
The next thing I decided to try was the Lucini artisanal Pizza Sauce

Now, I NEVER buy pizza sauce! It always tastes, well...canned...to me, no matter how expensive, organic, or whatever. But I gave it a try and made some no-knead pizza dough (the Light Whole Wheat Bread dough from "Artisan Bread in Five Minutes a Day"
Here are some more shots of the pizza:

Ready for the oven!

Ready to eat!
I can't resist showing you what I made with the rest of the dough during the week--

Italian Prune Plum Focaccia!

Red Grape Focaccia!
So, I still have quite a few of the Lucini Italia products to try and I'm looking forward to it! If the pasta sauces are as good as the pizza sauce, we'll have some yummy quick meals while I'm finishing this book!

You can buy the Lucini Italia products directly from their website, and amazon carries many of them, as you can see from my links. They have a store locator on their website, though it didn't seem to work in Canada. Choices markets in Vancouver carries them, and I'll wager that any good Italian grocery store will have some of their products (some are organic). You can read about them on their website-- they get consistently good reviews!
I'll report back about my experiments and the remaining products I have to try!
Ciao!

Subscribe to:
Posts (Atom)