Showing posts with label Neapolitan pizza dough. Show all posts
Showing posts with label Neapolitan pizza dough. Show all posts
Thursday, October 13, 2011
CAST IRON SKILLET PIZZA-- PERFECT!


My cast iron-baked pizza with Yves veggie pepperoni, Daiya vegan mozzarella, mushrooms and peppers (I could have let it get a bit more charred, but we were starving!)
UPDATE October 2020: I wrote another post on cast iron pizza baking in April 2017 entitled
"Time and Energy-saving Stovetop Pizza (Made with No-knead Dough)", with more information and a different method, too.UPDATE October 2020: I wrote another post on cast iron pizza baking in April 2017 entitled

If you've read this blog for a few years, you'll know that I am always trying to improve on my pizza. One of the major challenges for the home cook when making pizza is that the highest temperature of a home oven (unless you have a wood-fired brick oven or a special pizza oven) is 200-300 degrees (F) lower than a commercial pizza oven. This makes it difficult to get a really excellent crust. As you can see in the photos below, I can do a very good crust in my little Cuisinart Brick Oven (that's what I bought it for, though it's proven to be a great energy-saver when doing small-batch baking or roasting).

But the interior of the Cuisinart Brick Oven is only 12-inches square, so it's only good, really, for personal-sized pizzas. When making 14" pizzas I've tried all kinds of things, including placing the pizza pan on the very bottom of the oven (until I discovered that the oven heating coils in my stove are actually in the back wall of the oven!), with mixed results.
Recently I read an article or an entry in a book (I can't remember where, darn it!) describing how to use an ordinary cast iron skillet to bake pizza (thin-crust pizza, not deep-dish), It involved heating the skillet on top of the stove until very hot, slipping in the prepared pizza and cooking it on the stove-top for about 3 minutes, then baking in a hot oven for a few more minutes and finishing it under the broiler. It looked good, but I didn't get around to trying it, and it sounded a bit involved.
Then, in the current issue of Cook's Illustrated magazine, I read a review of Lodge Pro Logic Cast-Iron 14-Inch Pizza Pan:

"After preheating the pan to 500 degrees, we used it to bake multiple batches of pizza, looking for crisp, golden crusts on par with those made with our winning pizza baking stone. The first surprise: While the stone takes an hour to reach 500 degrees, this pan was ready after a mere 30 minutes...Best of all, the pan produced perfect crust. The 14-inch circle does limit the size and shape of your pizza, providing slightly less usable space than the 14½ by 16½-inch rectangular stone (especially if you’re baking something other than pizza), but this pan offers identical results in less time."
I thought back to that item I had read before and thought about my ancient, well-seasoned 14" cast iron skillet, and thought "Why not?"

We were in a rush for dinner, but my DH was making his not-quite-white bread for a client and could spare me a loaf of the dough for our pizza, and I had a bit of my pizza sauce (recipe for the sauce and my pizza dough in my new book World Vegan Feast) in the freezer, which, mixed with some leftover spaghetti sauce which DH had made, would make a fine topping and speed up our dinner considerably. (NOTE: If you must use a canned sauce, Lucini is the only one I've ever tasted that I would recommend!) The Daiya vegan cheese in the freezer was already grated and I quickly sauteed some mushroom and bell pepper slices to compliment the Yves veggie pepperoni.
I heated the skillet at my oven's highest heat (550 degrees F) while I got everything ready. (I did not grease the pan, by the way, as the skillet is 40 years old and well-maintained.) After 30 minutes of heating, I popped the prepared pizza disc (drizzled with a bit of olive oil and still on the parchment I stretched it out on) into the hot skillet and let it bake for about 10 minutes.

It emerged puffed and brown on the edges, a bit charred on the bottom and bubbling on top! I think I now have my solution!
Later, I checked online for other versions of baking pizza in cast iron and found many hits (was I asleep before or something??) with various methods, like this one in Sunset magazine, and this one from The Atlantic, but I think the method described in Cook's Illustrated is the most straight-forward and involves less moving around from stove-top to oven to broiler, etc., and so, less chance of burning yourself! I found it very simple.
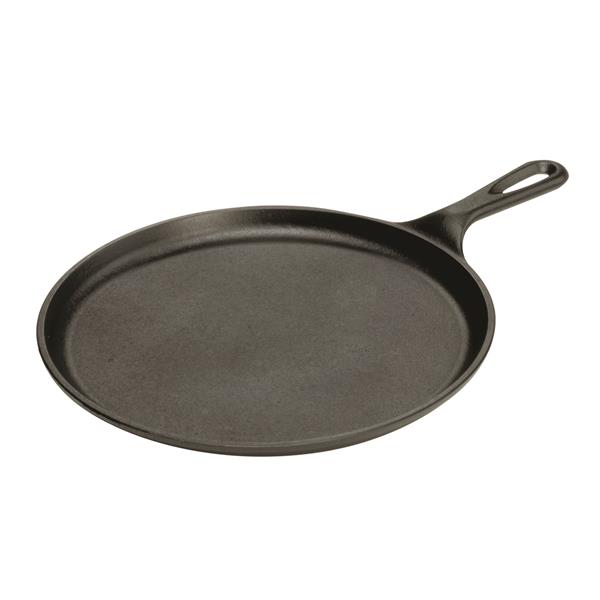
I was also thinking that, if you have a cast iron round pancake griddle, that would work, too! (I'm not sure if 14" ones are available, but a smaller one would work, too.) A word of warning: the pan stays VERY hot, so use good oven mitts and cover any handles while it rests on the stove so that you don't accidentally grab hot metal!
Enjoy!

I was also thinking that, if you have a cast iron round pancake griddle, that would work, too! (I'm not sure if 14" ones are available, but a smaller one would work, too.)
Enjoy!


Thursday, September 3, 2009
PEAR PIZZA WITH VEGAN "GOAT CHEESE", PECANS AND ARUGULA

I had a delicious pear pizza at a friend's house one time, and I've been wanting to make something similar ever since. Since I had some nice ripe pears on my counter, I decided to try my own version the other day. I used my own pizza dough (see http://veganfeastkitchen.blogspot.ca/search?q=pizza for posts with various pizza dough recipes and techniques), and added a creamy vegan "goat cheese spread", arugula and pecans. It was excellent, if I do say so myself! I hope you'll give it a try, now that pears are in season.

Printable Recipe
BRYANNA'S PEAR PIZZA WITH VEGAN "GOAT CHEESE", PECANS AND ARUGULA
Servings: 8
Yield: 4/ 9-10" pizzas
This is a deliciously savory way to enjoy pears!
1 recipe Bryanna's Neapolitan Pizza Dough (or other)
1 recipe Bryanna's Creamy Tofu/Cashew or Sunflower Seed "Goat Cheese" Spread
OR Bryanna's Creamy Tofu/Tahini "Blue Cheese" Spread Variation (see recipe below)
3 cups thinly-sliced baby arugula
3 large pears, ripe but firm
1 tablespoons extra-virgin olive oil
1/2 cup pecan halves, roughly chopped
smoked paprika or Aleppo pepper
(Aleppo Pepper substitute: 4 parts sweet paprika and 1 part cayenne or ancho chile powder
 )
)
Earlier in the day, follow the recipe for the pizza dough. Prepare and refrigerate the "Goat Cheese" Spread.
When the dough is almost ready to roll out and bake, heat your oven up to 500°F (heating your pizza stone 60 minutes OR cast iron skillet or griddle for 30 minutes in the oven, if you have one). Chop the pecans and set aside. Wash, dry and slice the arugula and refrigerate in a plastic bag.
Wash, quarter and core the pears. Slice into 1/4"-thick slices. Toss in a bowl with the olive oil.
Roll out the pizza dough into 9 or 10" rounds as directed in the pizza dough recipe. If you are baking one at a time, top each one just before it goes into the oven.
Spread each pizza crust (leaving a rim around the edge) with 1/4 of the "Goat Cheese" Spread. Sprinkle the "cheese" with 1/4 of the sliced arugula. Top with 1/4 of the pear slices. Sprinkle the pears lightly with smoked paprika or Aleppo pepper and 2 tablespoons of the chopped pecans.

Bake each pizza for about 8 minutes, or until the dough is puffy around the edges and golden and crispy on the bottom. Serve immediately.
Nutrition Facts
Nutrition (per serving): 396.9 calories; 28% calories from fat; 13.5g total fat; 0.0mg cholesterol; 683.2mg sodium; 419.3mg potassium; 59.3g carbohydrates; 6.9g fiber; 9.6g sugar; 52.4g net carbs; 13.2g protein; 8.3 points.

Printable Recipe
BRYANNA'S CREAMY TOFU/CASHEW (OR SUNFLOWER SEED) "GOAT CHEESE" SPREAD with Tofu/Tahini "Blue Cheese" Variation
Place tofu in a clean cotton cloth or fine cheesecloth , gather the ends up and twist and squeeze for a couple of minutes to extract most of the water.

(IF YOU ARE INTERESTED IN MAKING THIS PRODUCT see http://runawayrice.com/sauces-pickles/fermented-chili-tofu-chao/ )
There are several varieties of this product and may be referred to by different names. If the liquid is reddish, it's got chile in it. Some white varieties have sesame oil in them, too. (amazon carries one with both chile and sesame oil in it.) Check the label. Ideally, you want the kind with just soybeans, salt, water and wine, but I must confess that I have used both the sesame and the chile kind when I had nothing else! I rinsed them gently with running water in a mesh sieve before adding to the recipe. It actually worked fine!
Here's a very informative essay about preserved beancurd (and it's names!) from Dom's Culture-Foods of Asia in-site:

1 tablespoons extra-virgin olive oil
1/2 cup pecan halves, roughly chopped
smoked paprika
or Aleppo pepper(Aleppo Pepper substitute: 4 parts sweet paprika
and 1 part cayenne or ancho chile powder)Earlier in the day, follow the recipe for the pizza dough. Prepare and refrigerate the "Goat Cheese" Spread.
When the dough is almost ready to roll out and bake, heat your oven up to 500°F (heating your pizza stone 60 minutes OR cast iron skillet or griddle
for 30 minutes in the oven, if you have one). Chop the pecans and set aside. Wash, dry and slice the arugula and refrigerate in a plastic bag.Wash, quarter and core the pears. Slice into 1/4"-thick slices. Toss in a bowl with the olive oil.
Roll out the pizza dough into 9 or 10" rounds as directed in the pizza dough recipe. If you are baking one at a time, top each one just before it goes into the oven.
Spread each pizza crust (leaving a rim around the edge) with 1/4 of the "Goat Cheese" Spread. Sprinkle the "cheese" with 1/4 of the sliced arugula. Top with 1/4 of the pear slices. Sprinkle the pears lightly with smoked paprika or Aleppo pepper and 2 tablespoons of the chopped pecans.

Bake each pizza for about 8 minutes, or until the dough is puffy around the edges and golden and crispy on the bottom. Serve immediately.
Nutrition Facts
Nutrition (per serving): 396.9 calories; 28% calories from fat; 13.5g total fat; 0.0mg cholesterol; 683.2mg sodium; 419.3mg potassium; 59.3g carbohydrates; 6.9g fiber; 9.6g sugar; 52.4g net carbs; 13.2g protein; 8.3 points.

Printable Recipe
BRYANNA'S CREAMY TOFU/CASHEW (OR SUNFLOWER SEED) "GOAT CHEESE" SPREAD with Tofu/Tahini "Blue Cheese" Variation
Yield: 1 1/2 cups
This makes a perfect appetizer for a party. It's rich tasting and attractive-- one of those things that guests won't be able to stop eating! So, perhaps you should double or triple the recipe!
I have given you a range of how much miso and /or lemon juice to use, depending on how strong-tasting you want the spread. There is also a tangy "blue cheese" variation. Serve it with celery sticks, crackers, pita or bagel crisps, melba toast, or crostini (toasted baguette rounds).
1 box (12.3 oz.) extra-firm SILKEN tofu  (squeezed dry as directed in the recipe)
5/8 cup (1/2 cup+ 2 tablespoons) raw cashews or sunflower seeds, ground fine in a food processor, mini-chopper or coffee/spice mill
1 to 2 tablespoons light miso
1 to 2 tablespoon lemon juice
1/2 tablespoon nutritional yeast flakes
1 clove garlic, crushed
1/4 teaspoon salt
OPTIONAL:
6 black olives, such as Kalamata, pitted and chopped
(or substitute 3 large sun-dried tomatoes in oil, rinsed and chopped)
2 tablespoons minced chives or green onions
(squeezed dry as directed in the recipe)5/8 cup (1/2 cup+ 2 tablespoons) raw cashews or sunflower seeds, ground fine in a food processor, mini-chopper or coffee/spice mill
1 to 2 tablespoons light miso
1 to 2 tablespoon lemon juice
1/2 tablespoon nutritional yeast flakes
1 clove garlic, crushed
1/4 teaspoon salt
OPTIONAL:
6 black olives, such as Kalamata, pitted and chopped
(or substitute 3 large sun-dried tomatoes in oil, rinsed and chopped)
2 tablespoons minced chives or green onions
"BLUE CHEESE" SPREAD VARIATION:
Omit the cashews or sunflower seeds and use 2 tablespoons tahini instead
Omit the miso and use 3 cubes of white Chinese fermented bean curd instead (see Cooking Tips below for info and where to buy)
Use only 1 tablespoon of lemon juice
Omit the cashews or sunflower seeds and use 2 tablespoons tahini
instead Omit the miso and use 3 cubes of white Chinese fermented bean curd instead (see Cooking Tips below for info and where to buy)
Use only 1 tablespoon of lemon juice
Place tofu in a clean cotton cloth or fine cheesecloth
, gather the ends up and twist and squeeze for a couple of minutes to extract most of the water.
Place everything EXCEPT the olives and chives, and the Coating ingredients, in a food processor and process for several minutes, or until the mixture is VERY smooth. (You may have to stop the machine and loosen the mixture with a spatula once or twice.) If using, pulse in the olives and chives briefly. Scrape into a covered container and refrigerate until it is firm, at least 3 hours.
Nutrition Facts
Nutrition (per 1/4 cup): 124.1 calories; 55% calories from fat; 8.0g total fat; 0.0mg cholesterol; 277.1mg sodium; 210.5mg potassium; 6.7g carbohydrates; 0.9g fiber; 1.7g sugar; 5.8g net carbs; 7.8g protein; 3.0 points.
NUTRITION FACTS FOR "BLUE CHEESE" VARIATION: Nutrition (per 1/4 cup): 96.3 calories; 49% calories from fat; 5.6g total fat; 0.0mg cholesterol; 631.5mg sodium; 167.2mg potassium; 4.6g carbohydrates; 0.9g fiber; 0.8g sugar; 3.7g net carbs; 8.1g protein; 2.2 points.
Cooking Tips
To make a vegan "bleu cheese", you need a Chinese product-- fermented or preserved bean curd (tofu). It is called doufu-ru, fu-yu, su-fu, and various other names, confusingly.
(IF YOU ARE INTERESTED IN MAKING THIS PRODUCT see http://runawayrice.com/sauces-pickles/fermented-chili-tofu-chao/ )
This is a very inexpensive Chinese condiment that has a kind of "blue cheese" flavor. (The cubes are very strong-tasting when eaten by themselves, which they aren't meant for-it's used as a condiment.) It comes in little jars (you can see white cubes of tofu in a clear liquid) and you can get it in Asian grocery stores or the Asian section of large supermarkets. It keeps forever in the fridge, so you can get a few jars when you find it, if you like this dressing.
in it.) Check the label. Ideally, you want the kind with just soybeans, salt, water and wine, but I must confess that I have used both the sesame and the chile kind when I had nothing else! I rinsed them gently with running water in a mesh sieve before adding to the recipe. It actually worked fine!
and something about the history of this food:
Here is a page about buying Chinese foods online, if you don't have an Asian grocery store near you:
Enjoy!
Thursday, May 4, 2006
VEGAN PIZZA NIGHT

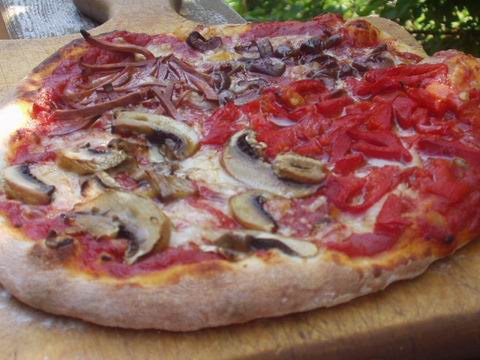
On the left are the pizzas I made for dinner last night, cooked in dark metal pizza pans on the oven racks, at 550 degrees F, with convection; on the right is a pizza made with the same dough, but baked on unglazed ceramic tiles in my oven, same temperature.
The pictures are just to illustrate the different quality of pizza that you can get in your own home oven. They were both good, by the way! But the "stone-baked" one has a crust that is crispy all over, not just on the bottom. It looks more Italian, somehow! Last night I was just too preoccupied to heat up the tiles
beforehand.
I'm not going to go into a long explanation of how I make pizza. For that you can get my book Nonna's Italian Kitchen (your library might have it) or my new book World Vegan Feast
 for a newer version.
There is so much bad pizza out there! Which is puzzling, because, once you know a few things, it's easy. And the dough is not an afterthought-- in Italy it is the primary component, and it should be here in N.A., too. In Italy they don't over load a pizza with sauce, ingredients, cheese, etc.. The dough is simple, very simple, but it tastes so good you want to eat the edges, and you don't need them to be stuffed with cheese or have some gloppy sauce to dip them into! I'm going to give you my latest favorite dough recipe, which is from my newsletter. Both of the pizzas above were made with this dough.
HINT: Pizza dough is better if you make it hours before using and let it rise in the refrigerator for 8-14 hours. Yes, it's true, and it's very convenient. The directions are in the recipe below. An alternative is to make it in the morning, let it rise once, punch it down and refrigerate as instructed until about 2 hours before dinner (so it has time to warm up). Why is it better this way? Because dough needs time to develop the enzymes which give dough flavor and good texture.
BTW, "American Pie" by master baker Peter Reinhart is a wonderful book on pizza!
A way to stretch the dough without rolling or throwing in the air! Drape the dough over an over-turned bowl (see picture) and gently stretch it all around until it is the right size, again using the weight of the dough stretch it.

Work slowly so that you don’t tear the dough. If it does tear, you can patch it and seal it again. The pizza does not have to be absolutely round!
Cheers!

Subscribe to:
Posts (Atom)