Showing posts with label ginger. Show all posts
Showing posts with label ginger. Show all posts
Thursday, March 31, 2016
NEW YUMMY SOUP FOR A COLD SUFFERER (or any old time)


I am suffering from a bad cold today. This my third day, but the worst one. I'm hoping that it will improve rapidly from here.
I wasn't very hungry at all and skipped breakfast today, but I thought that I should make some sort of light, but nourishing soup for lunch-- full of garlic and ginger in a tasty broth. I used what I had in the house, and this is what I came up with-- very delicious, and, importantly, very fast and easy to make, even when not at your best.
I hope you enjoy it-- even if you don't have a cold.

Printable copy
BRYANNA'S NEW YUMMY SOUP FOR A COLD (or any old time)
Servings: 6
9 cups very tasty vegan "chicken-y" broth (I use "Better Than Bouillion No-Chicken Vegan Soup Base")
1 cup water
1 cup broken up dry Soy Curls
(OR use 1 1/2-2 cups thin commercial vegan "chicken-y" strips, or strips of "Chicken-y" seitan, or thin strips of extra-firm tofu)
4 oz. buckwheat soba noodles, broken in half (or other thin noodles of choice)
6 oz. kale leaves (stripped off stems), thinly sliced (other greens could be used instead)
4 Tbs grated fresh ginger
3 large cloves garlic, crushed
1 tsp Sriracha hot sauce
Optional: up to 1 Tbs soy sauce/tamari
Garnishes:
dark sesame oil
Sriracha
chopped green onions
In a large pot, bring the broth and water to a boil. Add the remaining ingredients (except for the Garnishes). Bring to a boil and then turn down and simmer for 5 minutes.
Taste the soup-- if it's not too salty, add up to 1 Tbs tamari/soy sauce, if desired.
Serve each bowl with a drizzle of dark sesame oil, a sprinkle of green onions and more Sriracha on the side.
Nutrition Facts
Nutrition (per serving): 124 calories, 16 calories from fat, 1.9g total fat, 0mg cholesterol, 831.6mg sodium, 198.4mg potassium, 21.4g carbohydrates, 1.7g fiber, less than 1g sugar, 8.7g protein, 3.6 points.
Enjoy (and, if you're under-the weather like I am, get well soon)!


Saturday, August 24, 2013
CREAMY VEGAN LEMON CURD ICE CREAM WITH RHUBARB/GINGER JAM SWIRL

My friend Fireweed gave us a large bundle of her home-grown rhubarb the other day, and I was trying to think of something out of the ordinary to do with some of it.
 |
| Fireweed's beautiful bundle of home-grown rhubarb and garlic (photo by Roxanne Cave) |
At the same time, I was inspired to make a creamy lemon curd ice cream. My friend and fellow vegan cookbook author Betsy DiJulio (The Blooming Platter Cookbook) had developed a delicious recipe for a blueberry ice cream containing my own Quick Vegetable-Based Lemon Curd.

I made Betsy's recipe and it was fantastic! The lemon curd really added to the creamy texture, which was what got me thinking of a Lemon Curd ice Cream. When the rhubarb arrived and I was searching for ideas, it occurred to me that a rhubarb jam would be wonderful swirled into the lemon curd ice cream that I was dreaming up.

My lemon curd recipe is somewhat unusual, as it is not only vegan, but vegetable-based. You can read about it, and get the recipe, at this blog post. I make it in the microwave, and I did the jam in the microwave, too, so these components of the recipe are easy and quick to make in small quantities. the lemon curd is luscious, sweet and tangy, and Betsy has used it in another of her amazing recipes, Vegan Lemon Verbena Shortbread Sandwich Cookies with Vegan Lemon Curd Filling. I really have to thank her for the inspiration-- I may never have thought have using it in ice cream if it hadn't been for her!
In any case, the ice cream turned out wonderfully well. We had dinner guests last night and they (normally moderate eaters) eagerly consumed second helpings (as did DH and I). The ice cream would be very good all on its own, too, or swirled with a raspberry coulis instead of the rhubarb. I hope you'll give it a try!

Many thanks to Fireweed for the beautiful rhubarb, and to Betsy DiJulio for the culinary inspiration!
Printable Copy
BRYANNA'S VEGAN LEMON
CURD ICE CREAM WITH RHUBARB/GINGER JAM SWIRL (CAN BE SOY-FREE)
Servings: 12
Yield: 6 cups
2 cups (1 pint carton) So Delicious Coconut Milk Creamer (this is low in fat), or your favorite vegan
creamer
1 cup non-dairy milk of your choice
1/2 cup raw cashews, soaked in boiling water for 10 minutes,
rinsed in cold water, and drained
1 1/2 cups Bryanna’s Quick Vegetable-Based Lemon Curd
2/3 cup light unbleached organic granulated sugar
Optional: 2 Tbs vodka or white vermouth (helps keep the ice cream from getting rock-hard)
1 Tbs (packed) grated lemon zest (zest of 1 large organic lemon)
1 tsp pure vanilla extract
1/4 tsp salt
1/8 tsp guar gum or xanthan gum OR 2 1/4 tsp Instant Clear-Jel
For the Swirl:
1/2 cup Microwave Rhubarb/Ginger Jam (see recipe below)
1/2 cup Microwave Rhubarb/Ginger Jam (see recipe below)
Process all of the ingredients EXCEPT the jam in a
high-powered blender or Vita-Mix. Chill
until the mixture is very cold. Freeze
according to the directions for your ice cream maker. I use a Cuisinart ICE-30BC Pure Indulgence 2-Quart Automatic Frozen Yogurt, Sorbet, and Ice Cream Maker and it took about
20 minutes freezing time.
Spread the mixture into a 2 quart rectangular glass or
ceramic baking pan or a rectangular 2 qt. freezer container. For
the swirl, drop blobs of the jam in two lines down the length of the ice
cream. Take a table knife and swirl it
into the ice cream. Cover and freeze for
several hours before serving.
Nutrition Facts
Nutrition (per 1/2
cup serving): 230.1 calories; 15% calories from fat; 4.2g total fat; 0.0mg cholesterol; 60.8mg
sodium; 193.1mg potassium; 43.7g carbohydrates; 1.6g fiber; 38.3g sugar; 42.1g
net carbs; 2.0g protein; 4.6 points.
Only the ice cream: Nutrition
(per 1/2 cup serving): 194.8 calories; 18% calories from fat; 4.2g total fat; 0.0mg cholesterol; 60.3mg
sodium; 154.8mg potassium; 34.7g carbohydrates; 1.4g fiber; 29.8g sugar; 33.3g
net carbs; 1.8g protein; 4.0 points.

BRYANNA'S MICROWAVE
RHUBARB/GINGER JAM
Makes 2 cups jam
This jam is also delicious on toast or scones.
1 lb rhubarb, cut into 1/4"-thick slices
1 Tbs lemon juice
2 Tbs grated peeled fresh ginger
1 1/2 cups light organic unbleached granulated sugar
Optional for color: juice from half a medium peeled beet,
grated and squeezed through a piece of cheesecloth or cotton cloth (you will
have to discard the cloth)
Optional if you are using in ice cream: 1 tablespoon vodka or
white vermouth to keep it from icing up
In a 2 qt. microwave-safe batter bowl (glass or ceramic), mix the sliced rhubarb,
lemon juice, grated ginger and sugar.

Cook, uncovered, at 100% power for 8 minutes. Stir well and cook on 100% power 5 more minutes. Stir well and cook at 50% power for 7
minutes.

If your rhubarb looks quite green, stir in the beet optional
juice.
If you will be using this in an ice cream, stir in the
optional vodka or white vermouth.
Scoop the jam into a scalded 1 pint canning jar, seal and
cool thoroughly on the counter.
Refrigerate.
Nutrition Facts: Nutrition (per tablespoon): 52.9 calories; 0% calories from fat; 0.0g
total fat; 0.0mg cholesterol; 0.8mg sodium; 57.5mg potassium; 13.5g
carbohydrates; 0.4g fiber; 12.7g sugar; 13.1g net carbs; 0.2g protein; 1.0
points.
Enjoy!

Sunday, January 27, 2013
ADVENTURES IN MARMALADE

Lemon/Ginger Marmalade on the L; Orange-with-a-Touch-of-Lemon Marmalade on the R
I had a strange urge to make marmalade yesterday. I say "strange" because I don't do much in the way of preserve-making these days. But, I was reading about saving energy in the kitchen (Kate Hayhoe's "Cooking Green" is a good resource if you are interested) by using kitchen appliances such as microwave ovens (afraid of them? read), slow-cookers, pressure cookers, etc.. As a morning project, I re-arranged my appliances on the deep counters of my small kitchen so that all of my labor-and-energy-saving devices, both those that I use often, or those that I should use more often, are right at hand. (I, for one, will resist making a dish if it entails lugging an awkward machine out from a corner cupboard or even downstairs in my office, where the overflow goes.)
That done, I decided to make some small batches of marmalade, which my husband loves, in the microwave. I figured that, if it was a simple process, I would not have to buy it anymore and could make it from organic products while still saving money. I found a recipe, or more like a guide, really, for microwave orange marmalade in the book "Not Your Mother's Microwave Cookbook" by Beth Hensperger. Normally, the rule of thumb when making marmalade or jam is approximately twice as much sugar as fruit. But Beth's rule is 1 cup sugar to 1 cup of the fruit mix-- so, less sugar, too! And the chopping is done in a food processor, so more streamlining.
So, I made two jars (there was a bit left over to sample)-- one with a large navel orange and a lemon, and one with 3 medium-large lemons and some candied ginger. Both are delicious and each took about 15 minutes from start to finish-- I'm not kidding!
Here's what I did:
Printable Recipe (both versions)
Makes a little over 1 pint.
1 large navel orange (use organic and scrub as well)
1 medium-large lemon (ditto note above)
organic unbleached granulated sugar equal to the measure of processed fruit
(My fruit came to 1 1/2 cups, so I used 1 1/2 cups sugar )
1 tablespoon golden syrup (a sugar product) per cup of processed fruit (this replaces the 1 tablespoon corn syrup Beth Hensperger called for), to prevent crystallization.
(I used 1 1/2 tablespoons golden syrup)
If you don't mind a chunky marmalade, you can process the whole fruit in the food processor. If you want it to to be a little more refined, use a zester and zest the orange and lemon first, before cutting the lemon into 8 wedges (remove any seeds) and the orange into 12 wedges and then each wedge in half. Whichever way you do it, add the fruit to your food processor and pulse until the fruit is in tiny pieces, but not pulverized.
Pour it the fruit into a 2 qt. ceramic or Pyrex measuring beaker/batter bowl. Take note of the measure of the fruit (measure it first if your bowl does not have measurement indications) and add an equal amount of sugar and then the golden syrup as instructed above. Stir well.
Microwave (in a 1200 watt oven) on 100% power for 2-3 minutes and then on 10% power for 3-6 minutes, depending upon the amount. The fruit peel should be softened and the liquid a bit thickened. NOTE: I cooked this batch for 2 minutes at 100% power and then 6 minutes at 10% power. If your oven has less wattage than mine, you may need to add a little more time onto each section of cooking. If it is 1300 watts or more, you may have to use less time.
Pour the mixture into a sterilized pint jar or two sterilized half-pint jars and secure the lids. Let cool a room temperature and then refrigerate (or water-bath can as per canning instructions for preserves).
Nutrition (per tablespoon): 38.7 calories; 0% calories from fat; 0.0g total fat; 0.0mg cholesterol; 1.6mg sodium; 14.2mg potassium; 10.1g carbohydrates; 0.3g fiber; 9.6g sugar; 9.9g net carbs; 0.1g protein; 0.7 points.

LEMON/GINGER MARMALADE VERSION:
Makes about 1 1/4 pints
I'm thinking that this marmalade would be a great base for a savory grilling sauce.
The same as above, except use:
3 medium-large organic lemons
1/2 cup organic candied ginger
organic unbleached granulated sugar equal to the measure of processed fruit
1 tablespoon golden syrup (a sugar product) per cup of processed fruit (this replaces the 1 tablespoon corn syrup Beth Hensperger called for), to prevent crystallization.
(After I measured the fruit mixture with this version-- and, as you can see in the photo above, I zested the lemons before processing-- I had to use 2 cups sugar and 2 tablespoons golden syrup.)
Follow the instructions in the main recipe above. For this version, I cooked it at 100% power for 3 minutes and 10% power for 5 minutes.
Nutrition Facts
Nutrition (per tablespoon): 51.7 calories; 0% calories from fat; 0.0g total fat; 0.0mg cholesterol; 2.0mg sodium; 15.9mg potassium; 13.9g carbohydrates; 0.5g fiber; 10.9g sugar; 13.4g net carbs; 0.1g protein; 0.9 points.
There's a book I have on order called "One Pot of Jam from Your Microwave (Quick and Easy)" by Sonia Allison (author of "One Pot Luxury Preserves from the Microwave", which is out of print but still available 2nd hand.) I have ordered it from my library. Both should be interesting!
Happy preserving!
Saturday, December 15, 2012
VEGAN ESPRESSO & TRIPLE-GINGER CAKE FROM "WORLD VEGAN FEAST"

This ginger cake is the cosmopolitan cousin of the familiar gingerbread many of us grew up with. The cake itself is very light in texture (you would definitely not call this “bread”!) and infused with a generous amount of both fresh and ground dried ginger. Topped off with a fluffy espresso frosting and a plenty of sweet-hot organic candied ginger, this cake always gets rave reviews (and recipe requests) at potlucks and community get-togethers. Tasters are pleasantly surprised at the pairing of coffee and ginger and keep going back for more. But, really, how many times have we enjoyed a cup of coffee with a ginger cookie or a piece of gingerbread? It seemed like a match made in heaven to me and I think I was right.
BRYANNA’S
From my book “World Vegan Feast” © Bryanna Clark Grogan 2011
From my book “World Vegan Feast” © Bryanna Clark Grogan 2011
Serves 9
Wet
Mixture:
1/2 cup boiling water
1/2 cup fancy (light) molasses
1/2 cup soft brown sugar, packed
1/4 cup vegan butter (try my homemade palm oil-free Buttah) or oil
1/4 cup unsweetened smooth applesauce
1/4 cup nondairy milk
1/4 cup nondairy milk
3 tablespoons finely grated fresh ginger
Dry
Mixture:
3/4 cup unbleached white flour
3/4 cup whole wheat pastry flour (do not use ordinary whole wheat flour or the cake will be tough)
3/4 cup whole wheat pastry flour (do not use ordinary whole wheat flour or the cake will be tough)
1 teaspoon baking soda
1 teaspoon ground ginger
1 teaspoon cinnamon
1/2 teaspoon salt
1/2 teaspoon ground allspice
Espresso
Frosting:
1 1/2 teaspoons boiling water
1 tablespoon instant espresso granules (or
2 tablespoons good-quality instant coffee granules)
2 tablespoons softened vegan butter (try my homemade palm oil-free Buttah)
2 3/4 tablespoons nondairy milk
2 cups organic powdered sugar
NOTE: If you have no instant espresso powder and you can make espresso at home, you can use 8 1/4 teaspoons cold liquid espresso as the TOTAL liquid and omit the nondairy milk.
NOTE: If you have no instant espresso powder and you can make espresso at home, you can use 8 1/4 teaspoons cold liquid espresso as the TOTAL liquid and omit the nondairy milk.
Candied
Ginger Garnish:
1 cup chopped candied (crystallized) ginger
Tip: Organic candied ginger has a stronger ginger flavor and “bite” to
it than the ordinary variety, so if you really like ginger, look for it!
Oil a 9-inch square cake pan and line the
bottom with baking parchment cut to fit. Preheat the oven to 350°F.
In a large heatproof bowl, batter bowl or measuring pitcher, pour the boiling
water over the vegan butter (or oil) and whisk until smooth. Whisk in the
molasses, brown sugar, applesauce, milk and grated fresh ginger.
In another bowl, stir together the flours
with the baking soda, ground ginger, cinnamon, salt and allspice. Add this to
the molasses mixture in two additions, stirring until smooth. Transfer the
batter into the prepared pan and bake for 30 to 40 minutes or until a cake
tester comes out clean when inserted into the center. Cool thoroughly on a
rack.
To make the Espresso Frosting, pour the
boiling water into a large mixing bowl or the bowl of your stand mixer. Add the
espresso or coffee granules and stir to dissolve. Add the vegan butter and milk.
Whisk together well. With a hand-held electric mixer or the whip attachment to
your mixer, gradually beat in the powdered sugar until the frosting is creamy
and smooth. Spread it immediately over the top of cooled cake (not the sides)
so that icing drips over the sides but does not cover them completely. Sprinkle
the top evenly with the chopped candied ginger. Cut into 9 squares to serve.
Enjoy!
Friday, October 5, 2012
RUSTIC GINGER-PECAN-PEAR MUFFINS WITH CORNMEAL

I feel so badly that I can't participate in Vegan Mofo this year! But, it's just not feasible for me this year, as I am organizing a fund-raising event, which is taking up alot of time and energy. Next year!
But, we still have to eat, and I had some nice pears to use up. I decided to make some muffins with them, and, before I had thought of pear muffins, I had been been considering making some corn bread. This led me to an idea for pear muffins made with some cornmeal. And then I thought adding some of my favorite organic candied ginger (it has some real zing to it!) would be nice, and why not a handful of pecans for good measure? The results were excellent-- good enough to share with you. They would make a wonderful breakfast muffin because they are whole grain, substantial, and rather rustic, but not heavy or overly-sweet.

Makes 12
Dry Mix:
1 1/4 cup whole wheat pastry flour (do not substitute
all-purpose whole wheat flour for pastry flour)—
can be white whole wheat pastry
flour
1 cup yellow cornmeal
1/2 cup granulated unbleached organic sugar
2 teaspoons baking powder
3/4 teaspoon baking soda
1/2 teaspoon salt
1 cup yellow cornmeal
1/2 cup granulated unbleached organic sugar
2 teaspoons baking powder
3/4 teaspoon baking soda
1/2 teaspoon salt
Wet Mix:
1/2 cup water
2 tablespoons golden flax seed
2 teaspoons lemon juice with
soy milk,
hemp milk, or nut milk to make 1 cup
3 tablespoons oil
Zest of 1 medium organic lemon
Ginger Mix:
3/4 cup organic candied ginger, cut in 1/4-inch dice
1 large pear, cored and cut in 1/4-inch dice (peel
only if not organic or skin is tough or unsightly)
1/2 cup chopped pecans
Garnish:
12 pecan halves
Preheat the oven to 375ºF and spray a 12-cup muffin
pan with oil from a pump-sprayer.
Whisk together the dry ingredients in a medium bowl
and set aside.
Place the water and flax seeds in a blender and blend
until the mixture is thick and “gloppy”.
Add the curdled nondairy milk, oil and lemon zest and blend until smooth.
Add the ginger, pear and pecans to the Dry Mix in the
bowl and toss to coat them with the flour mixture. Pour in the Wet Mix and stir briefly just to
mix. Do not over-mix.
Scoop the batter evenly into the prepared muffin
cups. Sprinkle the top of each muffin
with a little brown sugar and insert a pecan half sideways into the middle of
each muffin, leaving half of the pecan showing.
Bake for 15-20 minutes, or until a cake tester or a toothpick comes out
clean.

Place the muffin pan on a cooling rack and leave for 10 minutes, then loosen the muffins gently with a table knife and remove carefully from the pan. Serve warm.


Warm muffins with some of my homemade vegan palm-oil-free Buttah
Enjoy!
Tuesday, November 8, 2011
MY FAVORITE GINGERBREAD CAKE, ALL DOLLED UP (OR NOT)

As a little prelude to holiday cooking, I made this recipe from my book, The Fiber for life Cookbook last week. Not only is it moist and dark and rich with spices and molasses, but it also happens to be whole grain, fiber-rich and low in fat. I had a bit of my vegan caramel sauce leftover from another recipe, so I decided to "doll up" my homespun gingerbread with a drizzle of that and some toasted hazelnuts. Perfect!
I called this recipe "Gingerbread" in the book because that's what we always called this type of dark, spicy, moist ginger cake baked in a square pan when I was growing up. But, it occurred to me that "gingerbread" is a cookie, too, so it's confusing. I'm hedging my bets and calling it a "Gingerbread Cake" this time!
Researching gingerbread quickly, I see that it can refer to anything from this type of moist cake to a fairly dry cookie (or biscuit, as it's called in the UK). What they have in common, besides the ginger, is the uses of molasses (or treacle), or possibly honey for at least part of the sweetener. The following type of recipe is much like the British ginger cake, but without the traditional lemon sauce.
Try this with tea on a cold day!
Printable Recipe
BRYANNA’S WHOLE WHEAT GINGERBREAD CAKE (can be SF or GF or both)
makes 1/ 9” square pan/ 9 servings
Moist, dark and spicy—also low-fat and fiber-rich.
WET MIX:
1/4 cup water
1 T. flax seeds
1 cup dark molasses
1/2 T. lemon juice + any nondairy milk to make 1/2 cup
1/2 cup light organic granulated sugar
1/3 cup smooth applesauce
(TIP: Freeze canned or homemade applesauce for baking in ice cube trays and pop the cubes into zipper-lock bags-- each one= 2 tablespoons!)
2 T. oil (olive oil works well in this)DRY MIX:
2 cup whole wheat pastry flour (a GF flour mix would probably work fine with this-- they usually work well with simple cakes)
1 T. powdered ginger
1 tsp. baking soda
1 tsp. cinnamon
1/2 tsp. salt
1/2 tsp. allspice
Preheat oven to 350 degrees F. grease and flour a 9" square pan.
In a blender, blend the water and flaxseeds until “gloppy” like egg whites. Add the remaining Wet Mix ingredients and blend well.
In a medium bowl mix the Dry Mix ingredients well. Pour in the Wet Mix and mix briefly. Spread the batter in the prepared pan and bake 25-35 minutes, testing with a cake tester. Serve warm or cool.
Nutrition Facts
Nutrition (per serving): 285.8 calories; 12% calories from fat; 4.2g total fat; 0.0mg cholesterol; 267.2mg sodium; 699.4mg potassium; 61.1g carbohydrates; 4.0g fiber; 32.4g sugar; 57.0g net carbs; 4.3g protein; 5.3 points.
"DOLLED UP" VARIATION:
Drizzle the top of the warm cake with about 1/4 cup Caramel Sauce (see recipe below) and sprinkle with 3/4 cup chopped toasted hazelnuts.
With the Variation the Nutrition Facts are as follows: Nutrition (per serving): 396.4 calories; 25% calories from fat; 11.9g total fat; 0.0mg cholesterol; 288.0mg sodium; 796.9mg potassium; 71.4g carbohydrates; 5.1g fiber; 40.3g sugar; 66.4g net carbs; 6.2g protein; 8.1 points
BRYANNA'S VEGAN CARAMEL SAUCE (makes about 1 cup):
1/3 cup brown rice syrup
1/2 cup plus 2 Tbs. brown sugar
2 Tbs vegan butter (such as my homemade vegan palm oil-free Buttah)
1/8 tsp salt
1/3 cup vegan creamer
1/2 tsp pure vanilla extract
Bring the syrup, brown sugar, Earth Balance and salt to a boil in a heavy saucepan and boil over medium heat, stirring constantly, until the consistency of heavy syrup.
Remove from heat and cool a bit. Heat the creamer just until warm. Whisk into the syrup along with vanilla.
Nutrition Facts
Nutrition (per 2 tablespoons): 173.1 calories; 18% calories from fat; 3.4g total fat; 0.0mg cholesterol; 93.7mg sodium; 59.9mg potassium; 37.9g carbohydrates; 0.0g fiber; 33.1g sugar; 37.9g net carbs; 0.7g protein; 3.7 points.
Enjoy!

Sunday, May 4, 2008
ALMOND CHAI BROWNIES WITH DOUBLE GINGER GELATO

I should be blogging a little more regularly from now on (except for being away for the week of May 12th). Due to some family obligations, I decided to stop publishing my quarterly vegan cooking newsletter, the Vegan Feast, after five years. I'm kinda sad, because it was a great experience, I met some wonderful people, learned alot, and ate really well, but something had to go!
Last night we took dinner over to a friend's house and I made a dessert I had been thinking about doing for a week. The brownies are a veganized, whole grain version of one I saw in a magazine, with a few other changes. I have made a number of other desserts with chai spices, and this sounded intriguing. I was a little worried that the brownies would be too dry (they were dryer than my other brownies, but not overly-so), so I decided to pair them with a really gingery version of my vegan gelato. It worked! All of the diners gave the dessert a thumbs-up! Give it a try!

Printable Recipe
BRYANNA'S VEGAN ALMOND-CHAI BROWNIES (WHOLE GRAIN, SF, can be GF)
These were inspired by a recipe in Cooking Light magazine. They aren't dark brownies-- if they were too chocolate-y, the chai spices would get lost in the chocolate! They are delicious served with the Ginger Gelato (recipe below).
GLUTEN-FREE NOTE: I think this recipe would work well, maybe even better, with a gluten-free flour mix.
1/4 cup plant-based milk
2 chai tea bags (I used rooibos chai teabags-- see photo below)
1/4 cup (1 1/2 oz.) organic, dairy-free semisweet chocolate chips or chopped chocolate (Fairtrade, if possible)
1/4 cup vegan butter (see my palm oil-free Buttah) or 3 tablespoons oil
1/2 cup water
2 tablespoons flaxseeds
Dry Mix:
1 tablespoon Ener-G or Orgran egg replacer powder
1 1/2 cups whole wheat pastry flour or GF flour mix
1 cup organic unbleached sugar
1/2 cup unsweetened organic cocoa (I use fair trade Camino brand)
1/3 cup packed brown sugar
1 teaspoon baking powder
1/2 teaspoon salt
Additional:
1/2 cup lightly toasted slivered almonds
Preheat oven to 350°F. Oil or spray a 9-inch square baking pan and line the bottom with baking parchment cut to fit.
Heat the milk in a very small saucepan (like a little butter melter) OR microwave in a heat-proof measuring cup at 50% power just to boiling.
Remove from heat. Add the tea bags, pressing down into the milk. Cover and let stand 15 minutes. Strain milk mixture through a tea-strainer into a measuring cup, pressing the teabags with the back of a spoon. If it doesn't measure 1/4 cup, add more milk until it does.

Pour into a medium microwave-safe bowl. Add the chocolate and Earth Balance or oil to milk/chai mixture. Microwave at high power for 20 seconds or until the chocolate is melted. Stir or whisk until smooth. Cool slightly.
In a blender, combine the water and flaxseeds at high speed until the mixture is "gloppy" like egg whites and you can only see flecks of flaxseed. Add the egg replacer powder and blend until it thickens a bit. Scoop this into the chocolate mixture with a spatula. Fold it into the chocolate mixture until it is well-mixed, but fluffy.
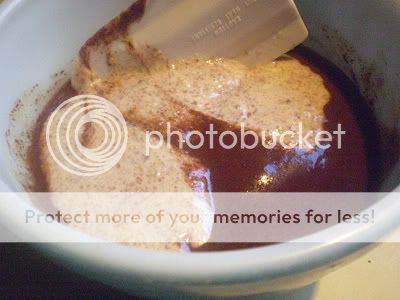
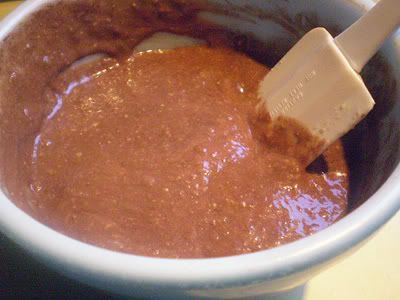
Combine the Dry Mix ingredients together with a whisk in a medium bowl. Add the Dry Mix to the chocolate/flaxseed mixture, along with the toasted almonds, stirring just until combined. It will be thick.
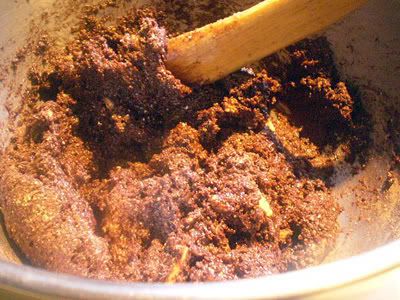
Spread evenly into the prepared pan-- I had to use wet fingers to spread it out. Bake for 30 minutes. Cool 10 minutes in the pan on a rack. Cut into 20 pieces, and loosen the edges. Cool before eating. Remove from the pan to a serving plate. Keep covered after they cool.
Servings: 20
Yield: 20 brownies
Nutrition Facts
Nutrition (per brownie): 140.1 calories; 29% calories from fat; 4.9g total fat; 0.0mg cholesterol; 76.7mg sodium; 134.0mg potassium; 24.1g carbohydrates; 2.5g fiber; 13.8g sugar; 21.5g net carbs; 2.5g protein; 2.7 points.
The gelato in my little Donvier hand-crank ice cream maker ("No salt or ice needed; freezer bowl and paddle do the work"). UPDATE: Now I also have a Cuisinart Pure Indulgence 2 qt. Automatic ice cream machine.
Printable Recipe
BRYANNA'S VEGAN DOUBLE GINGER GELATO WITH AGAVE (Can be Soy-Free)
Servings: 8
Yield: 1 quart
Adapted from a recipe in my book "Nonna's Italian Kitchen". Tapioca starch makes this gelato smooth and custardy without the mouth-feel of a "frozen pudding".
This is a very ginger-y gelato. If you want to tone it down a bit (but, why?), omit the candied ginger.
NOTE ABOUT NUT ALLERGY: if allergic to nuts, use coconut milk beverage, or soy, hemp or rice milk, and omit the cashews and add 1/4 cup more milk of choice and 1/4 cup oil.
MIXTURE #1:
Ginger-Water:
1 cup water
1/4 cup grated peeled fresh ginger
Additions:
1/2 cup light agave nectar
1 teaspoon pure vanilla extract
MIXTURE #2:
1 3/4 cups creamy original-style plant-based milk
1/2 cup raw cashew pieces
1/2 cup unbleached organic granulated sugar
1 tablespoon tapioca starch (don't substitute other starches! See Cooking Tips below)
1/4 teaspoon salt
ADDITIONAL: (you can omit this if you want a milder ginger flavor)
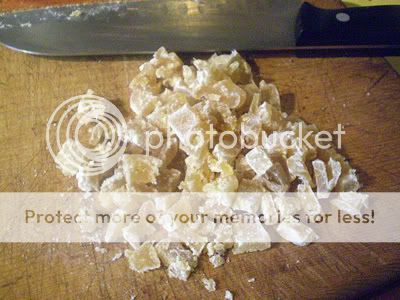
1/2 cup chopped organic candied ginger
Mixture #1:
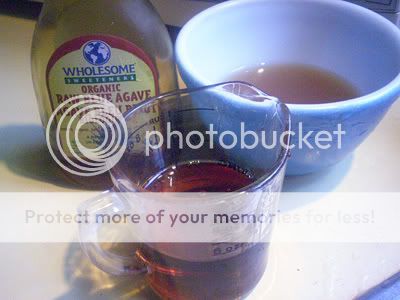
To make the Ginger-Water, simmer the water and ginger in a small saucepan, uncovered, for 5 minutes. Strain through a sieve. Measure. You should have 3/4 cup. If you have more, simmer again to reduce it to 3/4 cup. If you don't have enough, add water to make 3/4 cup. Pour it into a small mixing bowl.
Whisk in the agave nectar and vanilla. Set aside in the refrigerator.
Mixture #2:
Blend all of the Mixture #2 ingredients in the blender until VERY smooth and frothy (make sure that it doesn't feel grainy). Place this mixture in a heavy-bottomed medium saucepan and stir over medium-high heat until thickened.
OR (MICROWAVE OPTION) place the mixture in a large microwave-proof bowl and microwave on high power for 2 minutes; whisk; cook 2 minutes more; whisk; and cook 1 minute more.
Whisk Mixture #1 into cooked Mixture #2. Chill the gelato mixture thoroughly, and then freeze according to directions for your ice cream machine.
When the mixture is about 3/4 of the way frozen, add the candied ginger.
When the gelato is frozen, scoop it into a quart container, cover and freeze for several hours before serving.
Nutrition Facts
Nutrition (per 1/2 cup serving): 201.2 calories; 19% calories from fat; 4.5g total fat; 0.0mg cholesterol; 91.3mg sodium; 105.7mg potassium; 42.5g carbohydrates; 0.5g fiber; 29.5g sugar; 42.0g net carbs; 1.8g protein; 4.3 points.
Cooking Tips
TAPIOCA STARCH:
Easy to find in natural food stores, Asian grocery stores or the Asian section of large supermarkets.
Also available at http://www.bulkfoods.com/, amazon.com & .ca and many online Asian food purveyors.
Enjoy!
Monday, October 8, 2007
HAPPY THANKSGIVING, CANADA!
***I will not be blogging for about 1 1/2 weeks-- I'm going to Whitehorse, Yukon!***
Our Thanksgiving meal: (clockwise from top L) roasted butternut squash slices with orange juice and spices; Garlic and Herb Crusted Soy and Seitan "Pork Tenderloin" Roast (from the Vegan Feast newsletter); my vegan brown gravy with sauteed chanterelles; Succotash from my vegan holiday cookbook (green beans, lima beans, corn, red peppers, and green onions); Orange and Rosemary Cranberry sauce (from my upcoming issue of the Vegan Feast); Traditional vegan bread stuffing; and mashed potatoes.
 Dessert-- recipe below!
We celebrated last night with three vegan friends. We didn't have our usual big family dinner this year, due to various circumstances (but we'll get together next month for my mother's 90th birthday!). It was a spur of the moment dinner, because we were going to (perish the thought!) skip it altogether, since I'm down to the crunch getting the new issue of the Vegan Feast newsletter done and my house was less than tidy, shall we say. But I couldn't NOT have a harvest dinner, and I had one of my Soy and Seitan "Pork Tenderloin" roasts in the freezer (the one from the Everyday Dish DVD), a nice squash, some chanterelles, and some cranberries, so, I invited some close vegan friends who don't have family nearby and whose company we always enjoy.
The meal was ready from start to finish in 3 hours, and we stuffed ourselves with good food and great conversation! The main dish was made with my (thawed) frozen seitan "pork tenderloin", covered in a garlicky crust:

Leftover "pork tenderloin" is great in sandwiches with leftover cranberry sauce and vegan mayo! Crusty bread or rolls is the best, but it's good with any good bread;


We ended the meal with the following Ginger Apple Crumb Pie, topped by a creamy dessert sauce.
Hope all you fellow Canadians had a great weekend!

Printable Recipe (both recipes)
GINGER APPLE CRUMB PIE
This is my version of a recipe by Wendy Kalen from the Nov. 2004 issue of Fine Cooking magazine. I used my Lowfat Wholewheat Oil Pastry, which is in all of my books, I think. I used wholewheat pastry flour and a little less sugar in the crumb topping, and substituted vegan buttery spread for the butter called for (and half as much!). My guests ate every ginger-y crumb! We ate it with the Creamy Cashew-Pear sauce on top, but a vanilla vegan "ice cream" would be good, too. (I calculated the Nutrition Facts using my Lowfat Wholewheat Oil pastry crust.)
1/ 9" pie crust (your favorite)
Filling:
6 medium apples, peeled, cored and thinly-sliced
2 tsp grated fresh ginger
1/2 cup sugar
3 Tbs unbleached white flour
Ginger Topping:
1 cup wholewheat pastry flour
1/3 cup packed brown sugar
1 1/2 tsp ground ginger
1 pinch salt
1/4 cup vegan buttery spread (try my homemade vegan palm-oil-free Buttah)
Preheat the oven to 425°F.
Make the crust and place it in the refrigerator until ready to fill.
Mix the sliced apples with the other filling ingredients and pile into the pie crust.
Mix the Topping ingredients with a pastry cutter, in a food processor, or with your fingers, until like crumbs. Top the apples evenly with the Crumb Topping.
Place the pie plate on a cookie sheet (to catch any drips!) and bake at 425°F for 20 minutes. Then reduce the heat to 375°F and bake another 30-35 minutes, or until the apples are tender and teh top is nicely browned.
Servings: 8
Nutrition Facts
Nutrition (per serving): 342.9 calories; 30% calories from fat; 11.5g total fat; 0.0mg cholesterol; 192.9mg sodium; 255.0mg potassium; 58.4g carbohydrates; 4.3g fiber; 31.3g sugar; 54.1g net carbs; 4.6g protein; 7.0 points.
BRYANNA'S CREAMY CASHEW-PEAR DESSERT SAUCE (WITH A LITTLE HELP FROM HOLLY!)
We couldn't get any vegan vanilla "ice cream" on the island yesterday, so I decided to make a sauce to go with the apple pie. I started adding cashews to soymilk in the Vita-Mix, and my friend Holly, who is a third-generation vegetarian (!!), mentioned that her mother used to make a similar sauce, but she added pears to it. So, since I had two large ripe pears that needed using, here is my version, which she said tasted very similar to her mother's. It is luscious, and would be good on steamed pudding, chocolate cake, or anything else you can think of!
3/4 cup soymilk (or other nondairy milk)
1/4 cup organic cashew pieces
2 large ripe pears, peeled and cored and cut up (the pears should not be firm or hard, and should be sweet)
1/2 tsp pure vanilla extract
1 pinch salt
Combine all of the ingredients in a blender or Vita-Mix and blend until VERY smooth. Place in a covered bowl and refrigerate for at least 2 hours.
Servings: 8
Yield: 2 cups
Nutrition Facts
Nutrition (per serving): 61.5 calories; 30% calories from fat; 2.2g total fat; 0.0mg cholesterol; 47.6mg sodium; 118.5mg potassium; 10.0g carbohydrates; 1.9g fiber; 6.0g sugar; 8.2g net carbs; 1.5g protein; 1.0 points.
Enjoy!

Monday, November 13, 2006
POWER OUTAGES, CRISPY GINGER COOKIES, AND SEITAN GALORE!

Big, crisp ginger cookies with a glass of homemade soymilk
Okay, this is Take 3! I’ve been trying to write this blog entry for quite some time now, but the power went off AGAIN! So, I’m writing this on Word, which saves automatically every minute, and I hope to actually post it soon!
It began yesterday, with a planned outage, supposedly to check the underwater cables between Denman and Hornby Islands and the Big Island (Vancouver Island). Power went back on in the afternoon and we thought we were all set. I got up at midnight and the power was off again! No storm. We woke up early and phoned BC Hydro…got their automated message that they were investigating and it should be on again at noon. Of course, it was a Stat Holiday today (for Remembrance Day, which was actually on Saturday), so you couldn’t get a human being on the phone! Long story short-- power went on again at 9:15 am; off again at 10:20; on again at 2: 35, and since then it’s been off and on about 4 times, with dimming in between! Arrrggghhh! I’m taking a chance having the computer on at all. I’ve sneaked in a shower and some laundry.
DH worked at the bakery today, which was challenge because, though the ovens are propane, they need electricity for the proofer and slicer and mixers. They eventually got a generator in, but could only use one machine at a time, and had to knead LARGE batches by hand at times.
It has been very quiet these last two days, but I had time to organize a lot of papers and do a good, long weight routine! We are actually in pretty good shape for outages, with an emergency outhouse, a butane cooker, candles and kerosene lamps, a plug-in phone, etc… But water is tricky, as we are on a well with an electric pump. If you aren’t prepared, you have to pray for rain and collect water in buckets! (Luckily, it rained today!)
Anyway, last night, while the power was on, DH requested ginger cookies. I shouldn’t be making cookies while I’m doing WW, but… it was treat! I took an old recipe of mine and cut the fat in half by substituting corn syrup for 1/2 the Earth Balance. I also cut out the chilling step for the dough and just rolled the soft dough in sugar. They are crispy and delish!
BRYANNA'S BIG, CRISP GINGER-MOLASSES COOKIES
Makes 24 cookies
Good dunkers! Idea: replace all or some of the the corn syrup with applesauce and perhaps get a softer, chewier version.
1/4 cup vegan butter (UPDATE: try my homemade Palm-oil-free Vegan "Buttah")
1/4 cup corn syrup (you can get organic corn syrup in health food stores)
NOTE: You can try replacing the corn syrup with golden syrup, agave nectar or brown rice syrup-- not sure that it will give the cookies the same texture, though.
1/2 cup brown sugar (you can get the organic variety)
1/2 cup dark molasses
1/2 Tbs baking soda dissolved in 2 T. water
2 cup whole wheat pastry flour
1 Tbs powdered ginger
3/4 tsp each cinnamon and allspice
1/4 tsp salt
unbleached sugar for rolling
Preheat oven to 375°F.
Cream together the Earth Balance and the sugar in a medium bowl, then blend in the corn syrup and molasses. In a smaller bowl, whisk together the flour, salt and spices. Add the dissolved soda to the molasses mixture, then the flour mixture. Mix well.
Have two large greased or nonstick cookie sheets ready. Also have a flat soup bowl or plate with some unbleached sugar in it ready. Scoop balls of the dough about the size of a large walnut out with a tablespoon and drop them into the sugar Carefully turn the blob of dough until it's covered with sugar and more-or-less round. Place the dough mounds on the cookie sheets with plenty of room between them (they spread).
Now, if you want thin cookies, press them down with the bottom of a smooth glass dipped in sugar (as in picture).

If you want them thicker, leave "as is".
Bake for 8-10 minutes, or until the bottoms are slightly browned. Place the pans on racks and immediately cut the cookies apart from eachother with a table knife, and then, with a thin spatula, loosen them from the pan. (If you don't do this right away, it will be hard to get them off the pan after they cool!) Allow to cool on the pans on the racks for about 10 minutes.
Remove the cookies from the pan and place on racks. Store in a tightly-covered container after thoroughly cooled.
Nutrition Facts
Nutrition (per serving): 103.1 calories; 17% calories from fat; 2.0g total fat; 0.0mg cholesterol; 128.5mg sodium; 230.6mg potassium; 21.0g carbohydrates; 1.3g fiber; 9.3g sugar; 19.6g net carbs; 1.4g protein; 2.0 points.
Before baking:

After baking:

***********************************************
I’ve been working on seitan recipes:
UPDATE, NOVEMBER 2014: Obviously, my plan for a seitan cookbook never materialized. I still have plans for it, though. If I can't find a publisher (and the ones I've talked to seem reluctant because of the gluten-free mania), I may just do it as an e-book. Any ideas?
"Neatballs" are an invention of mine to make vegan "meatballs" that don't fall apart in a sauce. This time I also made them into "keftas" (ovals).

Uncooked vegan "neatballs" and "keftas" (or "lady's thighs"!!) (UPDATE Aug. 2019-- neatball recipe post)

The same, rolled in flour and ready to bake

Baked

Cooking the keftas in a cumin-tomato sauce-- they plump up nicely!

Ready to be devoured!
The following pictures are of my tender, sliceable vegan "pork tenderloin" roast, which I rubbed with a garlic-herb mixture and I also inserted slivers of garlic into it when I baked it before serving.


I invented a vegan "kebab meat" and made shish kebab with it on Saturday. DH LOVED them!

Cooking and flavoring the "kebab meat"

Marinating

Ready to grill

Ready to eat!
Enjoy!
Subscribe to:
Posts (Atom)