Saturday, March 25, 2006
BASIC CRUSTY BREAD

We ran out of bread the other day. Strange, because Brian bakes bread for special customers, and I bake, too. But it was all sold. So, at Brian's request, I made my crusty bread. I don't call this bread "artisinal", but it's very crusty, and tasty. This particular recipe does not need a starter, but you make a "sponge", a sort of quick starter to get things going. Since you can rise this sponge in an hour, you can make the bread without planning ahead. Or you have the option of rising the sponge overnight.
This type of bread is actually a very simple one and easy to make. Just remember not to try and speed it up by using more yeast or skipping a rising-- it needs time to develop flavor and texture. It also needs a hot oven and some moisture at the beginning of the baking, to develop "oven spring" (the last burst of rising) and to form a golden crust.
You will notice that this bread, like most European breads, contains no sweetener or oil. The yeast can feed off the natural sugars in the flour, so needs no sugar. The lack of oil gives the bread a crisp crust and chewy texture, as you expect with this type of bread, but makes it stale fast. So, if you aren't going to eat it within a day, freeze it.
The first baking, I used all unbleached flour with the bran, I rose the sponge in a warm kitchen for 1 1/2 hours, and I used my Bosch Universal Mixer
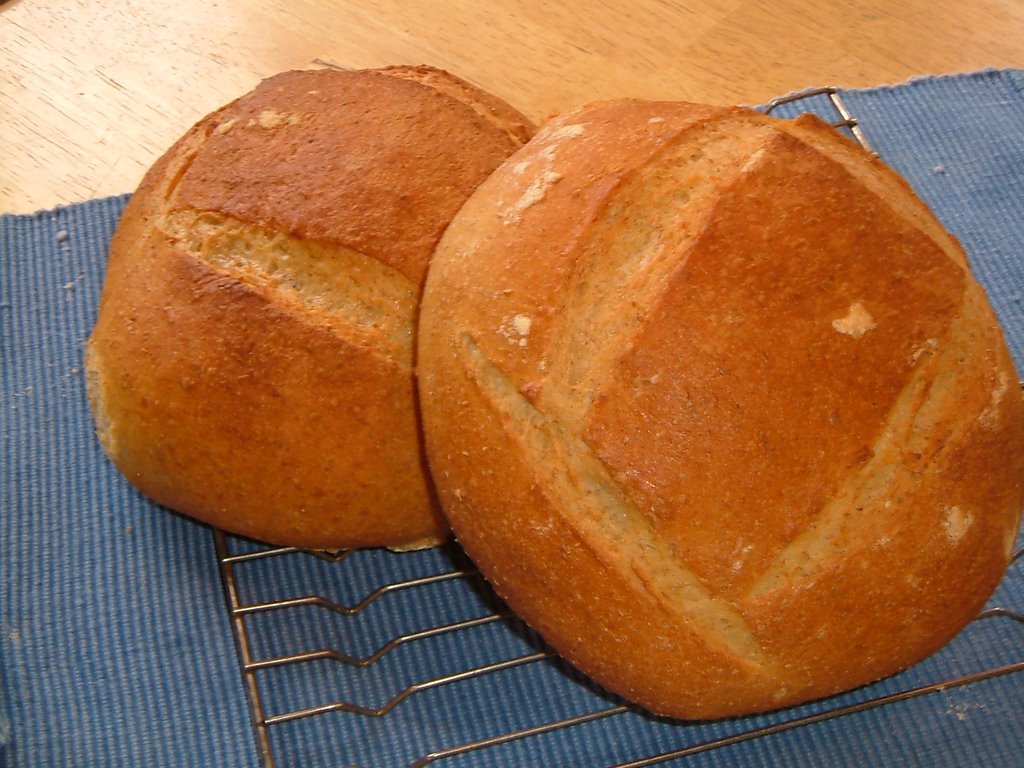
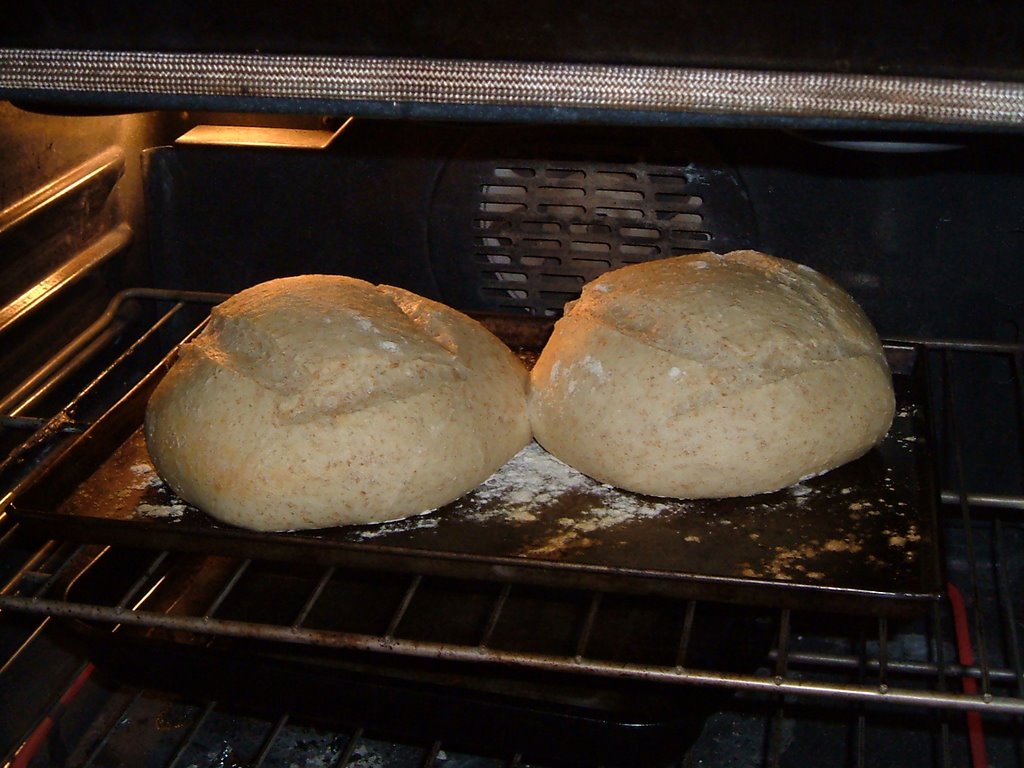
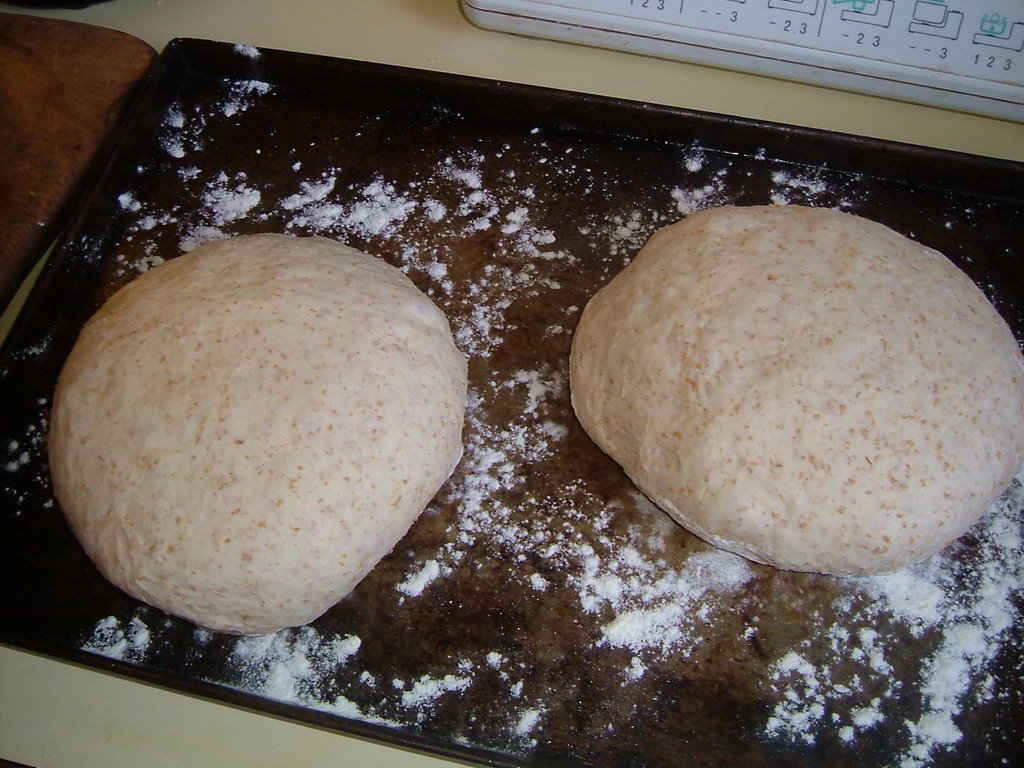
The second baking, this afternoon, I used 2 cups of wholewheat flour and 4 cups of unbleached flour, and mixed, kneaded and rose the bread in my Oster bread machine. It came out very well, too. See the photos at the bottom of this post.

BRYANNA’S BASIC CRUSTY BREAD
2 loaves or 12-16 rolls
1/2 Tbsp. dry active baking yeast
2 cups very warm water
2 1/2 cups unbleached flour
1/2 cup wheat bran
2 tsp. salt
3 cups unbleached flour
In a large bowl or bowl of a heavy-duter mixer dissolve the yeast in the water for about 5 minutes. Stir in the first 3 c. of flour and the salt. Beat well, cover with plastic wrap and let this "sponge" (batter) rise for 1 or 2 hours in a warm spot OR overnight in the refrigerator.
Stir in the last 3 c. flour a little at a time, adding only as much as necessary to make a kneadable dough. Knead the dough with the dough hook of a heavy-duty mixer or by hand on a lightly-floured surface for about 10-15 minutes. Add a little more flour as needed, but be careful not to make the dough too dry-- it should be moist but not sticky, and very pliable.
Slam the dough down hard on the surface a few times after kneading (to get rid of air bubbles). Place the dough in a large lightly-oiled bowl, cover well and let rise at room temperature until doubled. Punch down.
Punch the dough down and divide it in half. Shape the dough into 2 long loaves, or rounds or braided loaves, or into 12-16 loaf-shaped rolls. Place on a non-stick or lightly-oiled cookie sheet sprinkled with cornmeal or semolina cereal (cream of wheat). (If you are baking on stones
Meanwhile, preheat the oven to 450 degrees F (convection 425 degrees F).
(If using unglazed tiles or baking stones, preheat them in the oven as well.)
In order to generate steam in the oven, you can place a shallow pan of hot water in the bottom of the oven, AND/OR squirt the loaves and the walls of the oven two or three times in the first 10-15 minutes of baking with cold water in a plant mister.
Before baking, slash the loaves in several places with the tip of a new razor blade. (I make four slashes in a square on round loaves.) Place the cookie sheet on the middle oven rack. (If baking on tiles or stones, slide the loaves or rolls onto the hot stones or tiles.) Spray with water from a plant mister. Bake 5 minutes. Spray again. Bake 5 more minutes. Spray again. Bake 5 more minutes. (If you are using a pan of water in the oven, remove it at this point.)
Bake 15-20 minutes more, or until the bread is a rich golden brown. (Rolls will take less time and a convection oven will also probably take less time.) Remove bread from pans and cool on racks.
When the bread has cooled, you can freeze it wrapped in foil, then reheat it wrapped in the foil at 350 degrees F for 20 minutes.
TO MAKE THE DOUGH IN A BREAD MACHINE:
Making sticky bread doughs in a modern bread machine is a wonderful time-saver, and certainly very clean (no messy hands or counter). But you must bake the bread in a regular or convection oven, or you will be disappointed, even if you have a "crusty bread" or "French bread" selection on your machine.
If your bread machine makes large (2 lb.) loaves, it can probably handle kneading the whole recipe. If it's an old one with a smaller capacity, you may have to knead half a recipe at a time.
Make the sponge first. You can let it rise right in the bread machine pan. When it has risen, add the remaining flour. Select the dough cycle and let it go to work. You can remove it from the machine after it has kneaded and rise it in a bowl, or, if the your container is big enough for the dough to double, let it rise through the entire dough cycle, then remove for the final rising and proceed with the recipe as instructed above.
FOOD PROCESSOR DOUGH: You can make this dough in a large food processor, or in two batches in a medium food processor, following the directions given with your machine. Mix and rise the sponge in a bowl first. Process the final dough ("knead") for 60 seconds.
PICS OF THE SECOND BAKING:
Before rising:
Ready for the oven:

After 5 minutes in the oven:


Subscribe to:
Post Comments (Atom)
8 comments:
Bryanna,
Wow, my mouth is watering! Your crusty bread sure looks yummy! I got to try that in the near future. I love your Jiffy hamburger buns a lot and this could be my next favorite too.
SIV
Yummy. I can almost smell it...the pictures look great! I love beautiful bread. Do you find that eating is no longer the same now that you must wait to eat until you get a picture.
Bryanna ... I am making the whole wheat version of this bread as I type! A thought occurred to me after I had already started the wheat sponge - I bet this bread would be super made with my Robin Hood Multi-Grain flour. It's a mix of white and whole wheat flour, cracked wheat and rye, and flaxseeds. I am only making one loaf today, but I think I will make this bread again during the week and try out the multi-grain flour. I bet it will be really good!
Shona-- let me know how that works, if you try it. I'll look for that when we go shopping on Wednesday!
That is such a gorgeous loaf of bread - I love it!
C
Thanks for that, fiber!
Bryanna ... the multi-grain flour worked really well! It has a very mild flavor - I use it to make biscuits and bagels and stuff for my kids. If you like more of a grain flavor, however, you might want to mix up a homemade batch. I found this flour at my local Sobey's in the baking aisle. It's not bad at all and I might buy another bag when this one is gone.
Shona, I just might try my own mixture! Glad it turned out well!
Post a Comment