Monday, October 17, 2011
CORN KERNEL ZUCCHINI CORNBREAD-- IT CAN BE GLUTEN-FREE, AS WELL


I have a confession to make-- I love cornbread. My husband doesn't really understand this. He likes it all right, but not with passion, if you know what I mean. It must be an American thing. I was born in the States and he was born in Quebec. Even though I've lived in Canada since I was 18, I've never lost my passion for cornbread, and as a vegan, I've devised several cornbread recipes that I'm happy with. But, faced with a pile of zucchini and scads of ovo-lacto-laden zucchini cornbread recipes, I decided to devise my own vegan version-- with nuggets of corn added at the last minute. I almost added some Daiya vegan cheese shreds, but decided that would be overkill-- although, if you do try it, let me know!
I was out of whole wheat pastry flour, so I used my High-Fiber Gluten-Free Flour Mix instead, and you'd never know the difference!

BRYANNA'S CORN KERNEL ZUCCHINI CORNBREAD (Can be GF and SF)
Makes 1/ 10" cast-iron skillet-full
Moist and delicious, with the extra nutrition of vegetables. PS: If you don't have a skillet, use a 10" round or 9" square pan-- the skillet just makes the crust crispier.
DRY MIX:
1 cup yellow cornmeal
3/4 cup white whole wheat pastry flour OR my High Fiber Gluten-Free Flour Mix (or your favorite)
1/3 cup soy flour or chickpea flour
1/4 cup unbleached organic sugar
1 teaspoon baking powder
3/4 teaspoon salt
1/2 teaspoon baking soda
WET MIX:
1 tablespoon lemon juice with soymilk, nut milk or hemp milk to make 1 1/4 cups
1 cup packed grated zucchini with skin
2 tablespoons oil or melted Earth Balance
ADDITION:
1 cup thawed frozen (or cooked fresh) corn kernels, or canned corn kernels, well-drained
Oil a 10" cast iron skillet and place it in the oven while you heat it up to 375 degrees F. Whisk the dry Mix ingredients together in a medium bowl. Whisk or blend the wet Mix ingredients together and add to the Dry Mix. Mix briefly and pour into the hot skillet. Bake 20 minutes. Serve warm.
Nutrition Facts
Nutrition (per serving): 198.4 calories; 21% calories from fat; 4.9g total fat; 0.0mg cholesterol; 284.2mg sodium; 345.9mg potassium; 35.7g carbohydrates; 4.0g fiber; 8.2g sugar; 31.7g net carbs; 5.6g protein; 3.6 points.
Made with Bryanna's High-Fiber Gluten-Free Flour Mix:
Nutrition (per serving): 217.3 calories; 21% calories from fat; 5.3g total fat; 0.0mg cholesterol; 285.5mg sodium; 337.8mg potassium; 39.4g carbohydrates; 3.6g fiber; 8.2g sugar; 35.7g net carbs; 5.0g protein; 4.1 points.
Enjoy!

Sunday, October 16, 2011
A RAINBOW OF SEASONAL VEGAN RECIPES-- THE BLOOMING PLATTER COOKBOOK

 My copy, with some sticky-notes marking the recipes I want to try next!
When my husband said "Oh, wow!" after the first bite of Betsy DiJulio's Panko-Topped Cheesy Zucchini from her book The Blooming Platter Cookbook, I knew this book was a winner! DH is not a great zucchini fan, but I had a small pile of zucchini that needed using and this recipe was intriguing, partly because of its simplicity, and partly because of the interesting homemade cheese that was one of the primary components. It was simple to make (and quick!) and , obviously, delicious. The cheese (and I won't reveal the ingredients, but there's one especially genius addition) was a simple combination of ingredients familiar to most vegans, but its simplicity belied its complexity in the flavor department. We'll enjoy the leftovers on crisp rye crackers. (An aside: DH instructed me to tell Betsy that he hardly ever likes other people's cooking as well as mine, but he loved that dish!)
 Panko-Topped Cheesy Zucchini
  I served it with some leftover marinara sauce-- the two of us ate the whole casserole for dinner!
While this may be the first recipe I've actually cooked out of Betsy's book, I've been having some great times lately perusing it and picking out recipes to try. Betsy's writing makes one feel that a good friend is writing to one, sharing special recipes and sometimes the stories behind her inspiration. Reading statements such as: "...I have been consumed by what I like to call intense 'investigative' home-cooking and entertaining-- fueled by the advent of the food networks-- ultimately leading to part-time free-lance food writing and a bit of teaching. I remain an 'independent study' student of all things culinary." and "For as long as I can remember, food has been the blaze that marked the path of my life.", as well as her preference for soy milk, make me feel sure that Betsy is a "kindred spirit" (as Anne Shirley of "Green Gables" fame was wont to say). And a bloody good writer, too!
My overall impression after studying the book is that it is the work of a curious, inventive, creative, and discerning cook, whose sometimes rather unusual combinations of fruits, vegetables and herbs, and savory and sweet ingredients in the same recipe, are not only spot-on, but inspire quite a few "why didn't I think of that?" moments. Even without the lovely photos, one would find the recipes colorful and balanced, evidence of Betsy's artistic nature (she is a practicing artist and an art teacher).
Consider Creamy Summer Torta with Figs, with its savory, herbal vegan cheese filling and Balsamic reduction;
 or the startling Beet Muhammara (the Turkish spread usually made with red peppers, here replaced by beets, walnuts, garlic, spices and pomegranate molasses); Blackberry and Corn Salad;
 Butternut Squash Bisque with Cranberry Gremolata; Curried Red-Lentil "Cheesecake" with Tamarind Sauce, to name but a few on my list of "got to make this" recipes. All I can say is, "Bravo, Betsy!"
(Oh, and by the way, there are a fair number of "basic" recipes in the book which you will probably want to use often in your own recipes, too-- White Bean Sausages, at least four homemade vegan cheeses, and Blue Cheese Sauce.)
You're going to find many recipes in The Blooming Platter Cookbook that will surely send you into the kitchen on a colorful culinary adventure-- perhaps not the same recipes that call to me, but, believe me, there's something for everyone in this lovely, delectable, and eminently usable vegan cookbook.
Enjoy!

Thursday, October 13, 2011
CAST IRON SKILLET PIZZA-- PERFECT!

My cast iron-baked pizza with Yves veggie pepperoni, Daiya vegan mozzarella, mushrooms and peppers (I could have let it get a bit more charred, but we were starving!)
UPDATE October 2020: I wrote another post on cast iron pizza baking in April 2017 entitled
"Time and Energy-saving Stovetop Pizza (Made with No-knead Dough)", with more information and a different method, too.UPDATE October 2020: I wrote another post on cast iron pizza baking in April 2017 entitled

If you've read this blog for a few years, you'll know that I am always trying to improve on my pizza. One of the major challenges for the home cook when making pizza is that the highest temperature of a home oven (unless you have a wood-fired brick oven or a special pizza oven) is 200-300 degrees (F) lower than a commercial pizza oven. This makes it difficult to get a really excellent crust. As you can see in the photos below, I can do a very good crust in my little Cuisinart Brick Oven (that's what I bought it for, though it's proven to be a great energy-saver when doing small-batch baking or roasting).

But the interior of the Cuisinart Brick Oven is only 12-inches square, so it's only good, really, for personal-sized pizzas. When making 14" pizzas I've tried all kinds of things, including placing the pizza pan on the very bottom of the oven (until I discovered that the oven heating coils in my stove are actually in the back wall of the oven!), with mixed results.
Recently I read an article or an entry in a book (I can't remember where, darn it!) describing how to use an ordinary cast iron skillet to bake pizza (thin-crust pizza, not deep-dish), It involved heating the skillet on top of the stove until very hot, slipping in the prepared pizza and cooking it on the stove-top for about 3 minutes, then baking in a hot oven for a few more minutes and finishing it under the broiler. It looked good, but I didn't get around to trying it, and it sounded a bit involved.
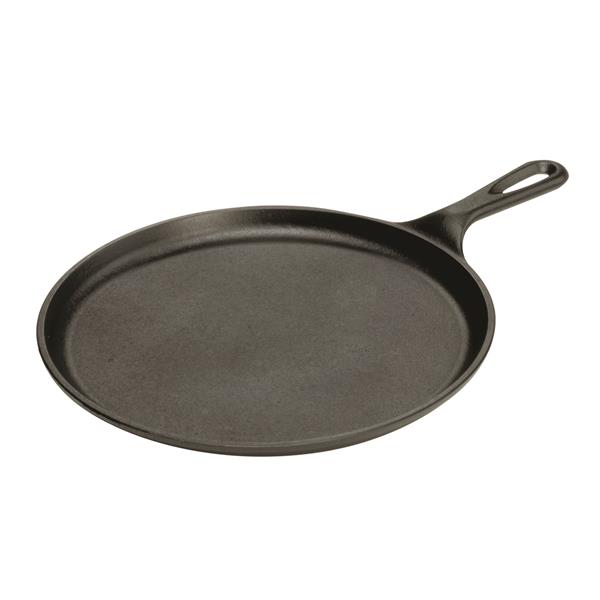
Then, in the current issue of Cook's Illustrated magazine, I read a review of Lodge Pro Logic Cast-Iron 14-Inch Pizza Pan:

"After preheating the pan to 500 degrees, we used it to bake multiple batches of pizza, looking for crisp, golden crusts on par with those made with our winning pizza baking stone. The first surprise: While the stone takes an hour to reach 500 degrees, this pan was ready after a mere 30 minutes...Best of all, the pan produced perfect crust. The 14-inch circle does limit the size and shape of your pizza, providing slightly less usable space than the 14½ by 16½-inch rectangular stone (especially if you’re baking something other than pizza), but this pan offers identical results in less time."
I thought back to that item I had read before and thought about my ancient, well-seasoned 14" cast iron skillet, and thought "Why not?"

We were in a rush for dinner, but my DH was making his not-quite-white bread for a client and could spare me a loaf of the dough for our pizza, and I had a bit of my pizza sauce (recipe for the sauce and my pizza dough in my new book World Vegan Feast) in the freezer, which, mixed with some leftover spaghetti sauce which DH had made, would make a fine topping and speed up our dinner considerably. (NOTE: If you must use a canned sauce, Lucini is the only one I've ever tasted that I would recommend!) The Daiya vegan cheese in the freezer was already grated and I quickly sauteed some mushroom and bell pepper slices to compliment the Yves veggie pepperoni.
I heated the skillet at my oven's highest heat (550 degrees F) while I got everything ready. (I did not grease the pan, by the way, as the skillet is 40 years old and well-maintained.) After 30 minutes of heating, I popped the prepared pizza disc (drizzled with a bit of olive oil and still on the parchment I stretched it out on) into the hot skillet and let it bake for about 10 minutes.

It emerged puffed and brown on the edges, a bit charred on the bottom and bubbling on top! I think I now have my solution!
Later, I checked online for other versions of baking pizza in cast iron and found many hits (was I asleep before or something??) with various methods, like this one in Sunset magazine, and this one from The Atlantic, but I think the method described in Cook's Illustrated is the most straight-forward and involves less moving around from stove-top to oven to broiler, etc., and so, less chance of burning yourself! I found it very simple.
I was also thinking that, if you have a cast iron round pancake griddle, that would work, too! (I'm not sure if 14" ones are available, but a smaller one would work, too.) A word of warning: the pan stays VERY hot, so use good oven mitts and cover any handles while it rests on the stove so that you don't accidentally grab hot metal!
Enjoy!

I was also thinking that, if you have a cast iron round pancake griddle, that would work, too! (I'm not sure if 14" ones are available, but a smaller one would work, too.)
Enjoy!

Wednesday, October 12, 2011
TWO FAMILY (CANADIAN) THANKSGIVINGS ON THE WEEKEND
I forgot my camera when we had our first Thanksgiving dinner at my son Tim's house last Saturday. We had a wonderful (mostly vegan) dinner with Tim and his wife Amber, granddaughters Zoe (and her friend Lindsay), Faith and Mariah, my stepson Laurence from Vancouver, and our friend Brenda. On the Thursday before I had made 2 seitan "turkeys" and 2 seitan "hams", and some vegan gluten-free bread for Amber to use in her stuffing recipe (which she did not stuff into anything animal!.) Saturday morning I made vegan pecan pies (with a GF crust) and 2 kinds of (GF) gravy, and the 2 remaining seitan roasts (I brought one of each). Amber had made the vegan GF stuffing with cranberries and pecans, mashed potatoes (with almond milk), a lovely salad, and a delicious and colorful vegetable casserole of sweet potatoes, Brussels sprouts and cranberries. They had turkey, but everyone tried the vegan dishes and enjoyed them.
On Monday afternoon we headed over to the main island (Vancouver Island) for another spread (mostly vegan) with my daughter Sarah, her DH Ben, and granddaughters Kate, Hannah and Cleo; Ben's parents, uncle and 2 aunts. I brought the last 2 loaves of pre-made seitan "turkey" and "ham", their respective gravies, plus tofu pot pie (a family favorite) that I had made the components for Sunday night and put together in the morning. Sarah has recently become a vegan, so she had made vegan pumpkin pie and apple-cranberry pie (with a veganized Weight Watcher's pie crust), stuffing in the slow-cooker, smashed potatoes, sweet potato casserole, and roasted veggies, and my granddaughter Savannah made a lovely salad with organic greens, pecans, pumpkin seeds, tomatoes and a raspberry dressing. So we vegans had lots to eat and to share!
Here are some pictures from the second feast:
 The vegan end of the Thanksgiving table (Lto R back: Smashed potatoes, roasted veggies, Susan Voisin's Sweet Potato Casserole with Pecan Topping; L to R front: "Ham" Gravy, my Seitan "Ham", my Tofu Pot Pie.
 Sarah's roasted veggies
 Smashed potatoes, roasted veggies and Savannah's salad
 My seitan "ham"
 My Tofu Pot Pie (recipe from my book Soyfoods Cooking for a Positive Menopause)
 Sarah's Apple-Cranberry Pie with veganized low-fat WW pie crust (see below)
BASIC PIE CRUST (SARAH'S VEGAN VERSION)
Adapted from a recipe in Weight Watchers New Complete Cookbook.
Makes 1 pie crust
1 cup all purpose unbleached flour
2 teaspoons powdered sugar
1/8 tsp salt
2 Tbsp. cold vegan butter
2 Tbsp. cold vegetable shortening
(UPDATE: Now I would use 1/4 cup of my homemade vegan palm-oil-free Buttah, very cold, in place of both)
1 tsp. cider vinegar
3 to 3 1/2 Tbl. ice water
Follow normal pastry procedures and chill for 1 hour to 24 hours for best results. (Sarah froze the chunks of margarine and shortening as Julie Hasson recommended in her book Vegan Diner, and also her recommendation to use powdered sugar.) Sarah says: "With 1 cup of frozen marg/shortening, I was able to make a large batch for 4 cups of flour and it worked perfectly. It isn't fat free but much lower fat than normal pastry."
1/8 of recipe = 3 points , 114 calories
MY NOTE: This recipe was excellent, BTW. I prefer to use my Low-fat Oil Pastry most of the because it does not use solid fat, but this recipe IS flakier, if that's important to the dish, so I'm glad to have it in my repertoire. This recipe uses 2 tablespoons of fat per 1/2 cup flour. The flaky pastry dough in Joy of Cooking (1997 version) uses 3.2 tablespoons of fat per 1/2 cup of flour, and my Low-fat oil Pastry uses 1 1/2 tablespoons fat (oil) per 1/2 cup of flour (and I use 1/2 whole wheat).
 Sarah used my recipe for vegan Pumpkin Pie filling (in my book The Almost-No-Fat Holiday Cookbook and online here), with the same crust as above.
 Grandaughter C. modelling her Halloween costume for the family, with Grampa Brian being silly.
 Big sister H., expertly playing the theme from "The Piano" for us.
I hope you enjoyed (or will enjoy) your Thanksgiving dinner(s) as much as we did!
Monday, October 10, 2011
A MEDITERRANEAN RIFF ON MASHED POTATOES
I couldn't resist posting this recipe from my new book World Vegan Feast for those of you who want a slightly different version of mashed potatoes for Canadian Thanksgiving dinner tonight!

PS: I don't usually add "butter" to mashed potatoes when I serve it, but it looked more interesting for the photo with some melted vegan butter.
BRYANNA’S MASHED POTATOES WITH SAUTÉED CHARD AND GARLIC
Mediterranean Fusion
Serves 6 GF, SFO
This is a delicious Mediterranean take on the Irish potato and cabbage dish, colcannon.
2 pounds Yukon Gold potatoes, peeled and chunked (see Tip below)
2 tablespoons olive oil
3/4 lb. green swiss chard, tough stems removed and cut into 1/4-inch thick slices
6 cloves garlic, thinly sliced
1/2 cup hot nondairy milk
1/2 teaspoon salt
freshly Ground black pepper
1.) Place a metal colander or steamer insert in a large pot or Dutch oven. Add enough water to barely reach the bottom of the colander. Bring the water to a boil over high heat. Transfer the potato chunks to the steamer/colander, cover the pot and reduce the heat to medium-high. Cook the potatoes for 20 to 25 minutes or until they are soft and the tip of a paring knife inserted into a potato chunk meets no resistance.
2.) While the potatoes cook, sauté the garlic and chard in hot olive oil in a large skillet over medium-high heat. Keep stirring, adding a tiny bit of water or broth if necessary, but the chard should exude its own liquid. When all of the liquid has evaporated and the garlic and chard are tender (but still bright green), remove from heat and set aside with a lid over the skillet to keep it warm. (The chard can be cooked ahead of time and briefly reheated before adding to the potatoes to serve.)
3.) Set a potato ricer or food mill over the empty pot. Working in batches, transfer the potatoes to the hopper of the ricer or food mill and press or grind them through the holes, removing any potatoes that stick to the bottom. Press all the potatoes through the ricer or food mill into the pot. If you do not have a ricer or a food mill, transfer the potatoes to the pot, which has been drained of water and mash with a potato masher. Stir in the salt until well-mixed.
4.) Stir in the hot milk and beat the potatoes with a wooden spoon until they are smooth and fluffy. Add the chard and garlic and lots of black pepper. Mixwell and taste for salt. Serve immediately.
Tip: Yukon Gold potatoes contribute a “buttery” look and flavor without using much fat. I steam the potatoes rather than boil them because steaming reduces the chance of having “gluey” mashed potatoes. It also saves nutrients. Using a potato ricer or a food mill makes mashed potatoes extra fluffy. See more about this at this blog post.
Nutrition Facts
Nutrition (per serving): 195 calories, 44 calories from fat, 5.1g total fat, 0mg cholesterol, 292.5mg sodium, 827.5mg potassium, 34.2g carbohydrates, 3.9g fiber, 2.5g sugar, 4.6g protein, 5.6 points.
Enjoy!

Sunday, October 9, 2011
HOLIDAY BRUNCH MENU FROM "WORLD VEGAN FEAST"
HOLIDAY BRUNCH MENU (starred recipes are in World Vegan Feast)
Creole Grits and Grillades*
Clementines, mandarin oranges or tangerines
South American-Style Hot Chocolate* (recipe below)
Lemon-Ginger Pistachio Biscotti or Cranberry-Orange-Pecan Biscotti*
This menu was is entitled "Christmas Morning Brunch" in my new book World Vegan Feast, but it can be used for any holiday brunch, really (for instance, it would be a perfect Mardis Gras brunch dish). In any case, many of us are thinking ahead to the Fall/Winter holidays and special menus that we might serve to our guests or family.
 Vegan Creole Grits and Grillades
The main course is one of my favorite recipes in the book because I love corn in any form and the creamy corn grits reminds me of soft Italian polenta. But combined with a heavenly braised vegan steak (the Grillades--pronounced gree-yahds) in a rich Creole sauce-- not to be missed! (This makes a good supper dish, too, BTW.) My version is much lighter in fat than the traditional one, but it is luxurious all the same. I assure you that this is one of the best seitan “beef” dishes you’ll ever have the pleasure of savoring.
 Two kinds of vegan biscotti
The fruit, hot chocolate and biscotti on the menu make a festive but not-too-sweet ending to the brunch. Buttery, lemon-scented biscotti studded with candied ginger and pistachios, or a biscotti perfumed with orange zest and bursting with jewel-colored cranberries and toasty pecans are both irresistible. (I make these twice-baked treats every Christmas, but you don’t have to wait for the holidays to enjoy them with coffee, tea, hot cocoa, or wine.) These biscotti are larger, a little richer, and more “buttery” than the biscotti in my book, Nonna’s Italian Kitchen. Consequently, they can be enjoyed on their own, whereas the drier biscotti are best when dunked into one of the above-mentioned beverages. But we like them with this rich South American hot chocolate recipe from the book:

SOUTH AMERICAN-STYLE HOT CHOCOLATE
Serves 2 SFO, GF
Frothy, rich, intensely chocolate and only slightly sweet...
2 cups almond milk or full-fat soy milk
2 ounces bittersweet dark eating chocolate, about 70% cocoa solids, chopped (dairy-free, organic, fair trade)
1 tablespoon organic sugar
1 teaspoon pure vanilla extract
1 tablespoon (or more) favorite liqueur or liquor(rum, brandy, Peruvian Pisco), optional
1.) Heat the milk until almost boiling, in a medium saucepan on the stove or heat the milk in a
1-quart microwave-safe measuring pitcher in the microwave at 100% power (default setting) for
1 to 1 1/2 minutes. Stir in the chopped chocolate and stir until it melts. Stir in the sugar and vanilla.
2.) Now froth the chocolate. You can use a traditional molinillo, which you roll between your hands; or use a whisk, a plunger-type cappuccino frother (or electric version), or a hand-held immersion blender. Another option is to whiz the mixture in a regular blender for a few minutes, but be sure to leave the cap off the middle hole in the blender top and cover it with a folded towel, so that the steam doesn’t explode the hot chocolate all over you! You can microwave the chocolate for about 30 seconds at 100% power (default setting), if you like– the froth rises up nicely in the microwave! Add the liqueur, if using, and serve hot.
Enjoy!
Creole Grits and Grillades*
Clementines, mandarin oranges or tangerines
South American-Style Hot Chocolate* (recipe below)
Lemon-Ginger Pistachio Biscotti or Cranberry-Orange-Pecan Biscotti*
This menu was is entitled "Christmas Morning Brunch" in my new book World Vegan Feast, but it can be used for any holiday brunch, really (for instance, it would be a perfect Mardis Gras brunch dish). In any case, many of us are thinking ahead to the Fall/Winter holidays and special menus that we might serve to our guests or family.
The main course is one of my favorite recipes in the book because I love corn in any form and the creamy corn grits reminds me of soft Italian polenta. But combined with a heavenly braised vegan steak (the Grillades--pronounced gree-yahds) in a rich Creole sauce-- not to be missed! (This makes a good supper dish, too, BTW.) My version is much lighter in fat than the traditional one, but it is luxurious all the same. I assure you that this is one of the best seitan “beef” dishes you’ll ever have the pleasure of savoring.

The fruit, hot chocolate and biscotti on the menu make a festive but not-too-sweet ending to the brunch. Buttery, lemon-scented biscotti studded with candied ginger and pistachios, or a biscotti perfumed with orange zest and bursting with jewel-colored cranberries and toasty pecans are both irresistible. (I make these twice-baked treats every Christmas, but you don’t have to wait for the holidays to enjoy them with coffee, tea, hot cocoa, or wine.) These biscotti are larger, a little richer, and more “buttery” than the biscotti in my book, Nonna’s Italian Kitchen. Consequently, they can be enjoyed on their own, whereas the drier biscotti are best when dunked into one of the above-mentioned beverages. But we like them with this rich South American hot chocolate recipe from the book:

SOUTH AMERICAN-STYLE HOT CHOCOLATE
Serves 2 SFO, GF
Frothy, rich, intensely chocolate and only slightly sweet...
2 cups almond milk or full-fat soy milk
2 ounces bittersweet dark eating chocolate, about 70% cocoa solids, chopped (dairy-free, organic, fair trade)
1 tablespoon organic sugar
1 teaspoon pure vanilla extract
1 tablespoon (or more) favorite liqueur or liquor(rum, brandy, Peruvian Pisco), optional
1.) Heat the milk until almost boiling, in a medium saucepan on the stove or heat the milk in a
1-quart microwave-safe measuring pitcher in the microwave at 100% power (default setting) for
1 to 1 1/2 minutes. Stir in the chopped chocolate and stir until it melts. Stir in the sugar and vanilla.
2.) Now froth the chocolate. You can use a traditional molinillo, which you roll between your hands; or use a whisk, a plunger-type cappuccino frother (or electric version), or a hand-held immersion blender. Another option is to whiz the mixture in a regular blender for a few minutes, but be sure to leave the cap off the middle hole in the blender top and cover it with a folded towel, so that the steam doesn’t explode the hot chocolate all over you! You can microwave the chocolate for about 30 seconds at 100% power (default setting), if you like– the froth rises up nicely in the microwave! Add the liqueur, if using, and serve hot.
Enjoy!

Saturday, October 8, 2011
SECOND TRY WITH GLUTEN-FREE PIE
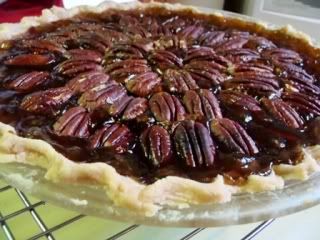
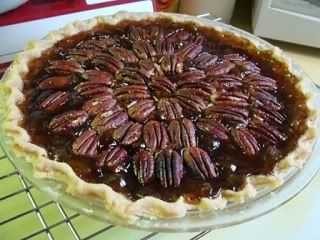
Vegan Pecan Pie-- gluten-free!
We're having our first of two Thanksgiving dinners (it's Canadian Thanksgiving weekend) tonight at my son's. (And, boy, is it windy out there-- I hope the power stays on!) They requested pecan pie, and told them I'd make the crust GF because my DIL Amber is gluten-sensitive. Smarting from my GF pie fail yesterday, I decided to try a recipe recommended by my friend Julie Hasson, the pie crust recipe in "Cooking with Isaiah" by Silvana Nardone-- recipe and tutorial here.
I think it was success, but I haven't used that much fat in a pie crust for a long time! I found out afterwards that I should wear my new reading glasses when I read recipes, because I used 1 1/2 cups non-hydrogenated shortening |(another thing I seldom use, and never in pie crust anymore) instead of 1 1/3 cups--yikes!! It seemed to work, though-- even if it is super-rich. I also must admit that it was trickier to roll out than ordinary pie dough. And, it makes enough for about 2 1/2 pies, actually.
Here's the dough before it's 15-minute rest in the freezer:
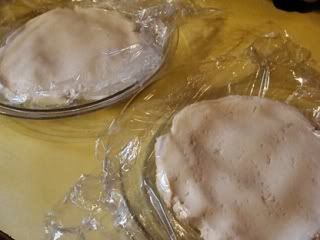
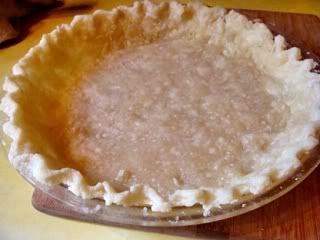
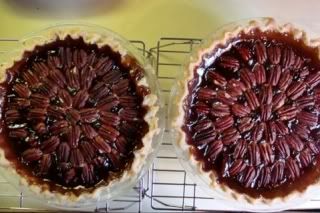
Here's the dough in the pie dishes (there was enough leftover for a small free form tart):

I had some trouble getting the first one in the pie dish, so, with the second crust, I rolled it out on a piece of baking parchment, put my left hand under the parchment, lifted it up a bit, placed the upside-down dish on the crust and gently flipped the whole thing over so that the crust was in the dish. I carefully peeled the parchment off the dough and gently fit it into place and fluted the edges, saving the scraps for my little tart. As you can see, I patched it in a few places, which was easy to do.
I pre-baked the crust for 10 minutes (after pricking all over with a fork, as usual) at 400 degrees F. With a wheat crust, you would only bake for 3 minutes, but this definitely seemed to need more.
Pre-baked crust:
Then I filled the crusts with my filling (from my new book "World Vegan Feast") and baked them at 350 degrees F for 30 minutes. They came out looking perfect!
I looked around on the net for low-fat gluten-free pie crust, but I guess it's not possible (please tell me if I'm wrong!). However, I did find one recipe that sounds pretty reasonable and uses either some millet flour or sorghum flour, which is more nutritious than white rice flour. The original recipe is here and it uses sorghum flour and tapioca flour, but this blogger used millet flour instead of sorghum flour successfully, which is what I will do next time I make a GF crust, because I have a hard time finding sorghum flour here-- and I can grind my own millet flour.
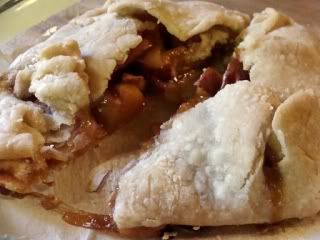
Here's the little apple tart I made with the leftover dough, using the leftover apples from my fail on Thursday:
Enjoy!
Friday, October 7, 2011
GLUTEN-FREE BAKING DAY-- ONE SUCCESS, ONE FAIL
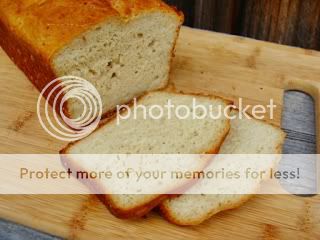 My Gluten-Free "White" Yeast Bread
I have several friends and a relative or two who are gluten-sensitive, so I've been doing some research on gluten-free vegan baking. We're having one Thanksgiving dinner at my son's tomorrow and his wife is not eating gluten but wanted to make her special stuffing recipe. So, I volunteered to make her a couple of loaves of gluten-free bread. I also decided I'd make a gluten-free pie.
THE SUCCESS:
I had already developed a vegan, high-fiber, gluten-free bread loaf for a friend a few years ago, and I decided to follow that recipe, but make it more"white" (even though it's still high-fiber-- brown rice flour is quite pale-colored). I changed my original recipe by using golden flax instead of brown flax seeds in both my flour mix and the bread recipe itself; by using maple syrup instead of molasses; and omitting the soy or rice milk powder. Otherwise it was the same.
 The dough (actually a thick batter) is beaten for only about 3 minutes.
 Then it's divided into two prepared 8 x 41/2" pans and set to rise for an hour to 90 minutes.
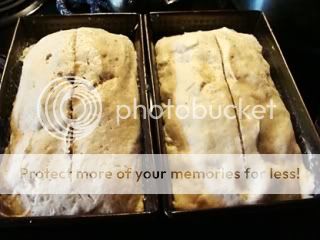 When it rises to the top of the pan it's ready to bake.
The result-- not a high loaf, but it slices well, is moist and tasty (maybe a bit sweet-- I'll have to work on that) and toasts nicely, too. My DIL was pleased with it. (See the recipe below.)

THE FAIL:
Sorry, no pictures! I didn't even think about photographing the debacle that was my first gluten-free pie crust until afterwards! So, a description will have to suffice. I should have known better and started with a conventional crust, but, instead, I decided to try my low-fat olive oil pastry for a freeform pie using the same flour mix I used for the bread. Bad idea! It was difficult to roll out and kept cracking, unlike the pliable and easily-handled wheat flour olive oil pastry. I soldiered on, however, and cobbled together a very sad-looking apple tart. When baked, the filling was lovely (I added some homemade crab-apple butter to the apples), but the crust dry and hard. Not one to waste food, I served it anyway, with almond milk poured over it in bowls, like a sort of pudding. This softened the crust and it was edible, especially with the delicious apples.
Tomorrow I'm making a pecan pie for the dinner at my son's house, with a conventional high-fat pie crust made according to the recipe in Silvana Nardone's book "Cooking with Isaiah" and my own vegan filling.

BRYANNA'S GLUTEN-FREE “WHITE” VEGAN YEAST BREAD (GF, SF)
Makes two 8 1/2 x 4 1/2" loaves
Even though the flour mixture contains high-fiber brown rice flour, chickpea flour and ground flax seed, this makes a nice “white” loaf.
NOTE: Grease the pans really well with non-hydrogenated shortening-- this bread sticks easily. (I like these pans.)
Yeast Mixture--mix and let stand 5 minutes:
1 3/4 c. warm water
1 packet regular active baking yeast (2 1/2 tsp.)
(NOTE: If you have only instant yeast, use only 1 3/4 tsp.)
1 tsp. sugar
Flax Mixture-- meanwhile, whiz in a blender:
1 c. warm water
1/4 c. golden flax seeds
The result:

When the mixture is frothy, with just bits of flaxseed hull in it, add and blend:
The result:
When the mixture is frothy, with just bits of flaxseed hull in it, add and blend:
2 T. plus 2 tsp. Ener-G egg replacer powder or Orgran No-Egg
1/4 c. olive oil or melted Earth Balance
1/2 tsp. agar powder
1 1/2 tsp. vinegar
4 tsp. maple syrup, agave nectar, or brown rice syrup
Dry Mix--in a bowl, mix well:
4 c. Bryanna's Gluten-Free “White” High-Fiber Flour Mix (see mix recipe below)
1/4 c. instant mashed potato flakes
6 T. unbleached organic sugar (I’m going to try using less sugar next time)
1 T. + 1 tsp. xanthan gum or guar gum
1 T. salt
Add the frothed-up Yeast Mixture to the Flax Mixture in the blender and blend briefly. Dump this into the bowl of a stand-up electric mixer. Using the whip attachment, gradually beat in the Dry Mix until it is all mixed in. Beat on high for about 3 1/2 minutes. Scrape the dough (it's actually a really thick batter) evenly into the prepared pans and smooth the tops flat. Cover and let rise in a warm place 1 to 1 1/2 hours, or level with the tops of the pans. (You can slash the top of the loaf with a sharp knife or razor blade, or not, as you prefer.)
Have the oven preheated to 400 degrees F. Bake the breads for 20 minutes, then reduce the heat to 350 degrees F and cover the breads with loosely foil. Bake for 30 minutes more. Loosen the edges with a table knife and carefully remove the loaves from pans to a rack to cool before slicing. This really looks, smells and tastes like bread. You can toast it and make breadcrumbs or bread crumbs out of it.
BRYANNA'S "WHITE" GLUTEN-FREE HIGH-FIBER FLOUR MIX
Makes about 13 cups
I designed this mix to work in most simple recipes as an all-purpose flour, but to be higher in nutrition and fiber than most GF mixes.
I designed this mix to work in most simple recipes as an all-purpose flour, but to be higher in nutrition and fiber than most GF mixes.
7 1/2 c. brown rice flour (as finely-ground as possible) (I used Bob's Red Mill organic)
2 1/2 c. potato starch (NOT potato flour—it’s not the same product)
1 1/4 c. tapioca flour (or tapioca starch—in this case it’s the same thing)
1 c. ground golden flax seed
1 c. chickpea flour
4 1/2 T. xanthan gum
Mix well and store in a moisture-proof container in in the freezer. Use cup-for-cup instead of regular flour in breads, muffins, simple cakes, etc.
Good luck with your gluten-free experimenting!

Good luck with your gluten-free experimenting!
Subscribe to:
Posts (Atom)