Thursday, June 6, 2013
EASY REFRIGERATED WHOLE WHEAT FLATBREAD (& PIZZA) DOUGH, WITH NO-KNEAD VERSION (AND MY VEGAN RICOTTA RECIPES)

 |
| Zatar Flatbread to accompany soup (I baked the flatbreads in a 500ºF oven (pricked the tops with a fork in a few places so that they wouldn't puff up like pita) until the bottoms were browning a bit, flipped them over, brushed with a little olive oil, and sprinkled with za'atar, then baked just until the edges started to brown a little. (See about za'atar here http://tinyurl.com/mh3pycg ) |
Finally, here is the post on the flatbread dough I've been working on for a few weeks. I haven't exhausted all the possibilities, but enough to give you some ideas. I was first inspired by the recipe in a great book called "River Cottage Veg Every Day". (It's a vegetarian vegetable cookbook-- not vegan, but, as the author writes, if you're a vegan "you know what to do".) Hugh's recipe is with white flour only, but I wanted a mostly-whole wheat one. So, I revised the recipe, using advice from Cook's Illustrated magazine for making a light, tasty whole wheat pizza dough-- which is, basically, use a little unbleached white flour along with the whole wheat, add a tiny bit of sugar (to counteract a slight bitterness in the wheat), and a little bit more oil for a more flexible dough. (I'm going to try it with all whole wheat flour next.)
I've been using this dough quite a bit. It's so easy to make and convenient and quick to make. You can keep it in the refrigerated for a couple of weeks and just use what you need a bit at a time, if you like. I've made flatbread wraps for my husband's on-the-road lunches several times and breakfast wraps, too; flatbreads topped with various things for accompanying soups and salads; pizza for a birthday dinner for six; and stuffed breads, too. Here are some photos and notes, and then the recipe. Have a ball experimenting with this-- everyone I've served my experiments to has been very impressed!
 |
| Pizza! |
 |
| Breakfast Wrap with Tofu/Cashew Ricotta and Peach Jam (see recipe for the ricotta below, plus a recipe for Almond Ricotta and a link to Okara/Cashew Ricotta) |

 |
| My first version-- sauteed leek greens with daiya mozza-- yum! (I baked the flatbreads in a 500ºF oven (pricked the tops with a fork in a few places so that they wouldn't puff up like pita) until the bottoms were browning a bit, flipped them over, sprinkled with Daiya, then Za'atar, then a little olive oil, and baked until the Daiya melted. (see about za'atar here http://tinyurl.com/mh3pycg ) |
*****************************************************************
The following pics are a version of stuffed Piadine (stuffed flatbreads from Romagna called crescione). The dough for these breads is usually unleavened or made with baking powder, but this recipe worked just as well.


 THE RECIPE:
Printable Recipe


To cook on top of the stove, heat a heavy cast iron skillet or griddle or hard-anodized skillet (9-12”) over high heat until the pan is very hot. (You can turn on your stove fan or open a few windows!)


Nutrition (per 1/2 cup): 126.6 calories; 51% calories
from fat; 7.6g total fat; 0.0mg cholesterol; 199.1mg sodium; 229.1mg potassium;
6.4g carbohydrates; 0.5g fiber; 1.7g sugar; 6.0g net carbs; 9.3g protein; 3.1
points.
Piadine stuffed with sauteed garlicky rapini and a smear of Tofu/Cashew Ricotta (see recipe for the ricotta below, plus a recipe for Almond Ricotta and a link to Okara/Cashew Ricotta)
 |
| Sauteed rapini with garlic and a little chile |
 |
| Homemade Tofu/Cashew Ricotta (see recipe for the ricotta below, plus a recipe for Almond Ricotta and a link to Okara/Cashew Ricotta) |
 |
| Stuffing the crescione: |


 |
| You cook these just like the flatbread, but at a slightly lower heat. |
 |
| Mmmmmm! |
Sweet Crescioni-- with peach jam and chocolate!


 |
| Zatar flatbread with Daiya mozza |
BRYANNA’S EASY REFRIGERATED
WHOLE WHEAT FLATBREAD (AND PIZZA) DOUGH, WITH NO-KNEAD VERSION (recipe can be
doubled, etc.)
This recipe makes
about 3 large pizzas, 8 largish wraps or flatbreads, or 12 smaller flatbreads,
wraps or pita. (You could even make simple rolls or breadsticks with this dough, but I
haven’t tried that yet.)
**I include a no-knead version in this recipe, but I have been
using the kneaded version lately because it’s easier to handle (it only needs 5
minutes kneading). The no-knead version
requires more flouring during shaping, and an experienced hand at rolling out well-hydrated
dough.
NOTE: If you prefer to make this with only
unbleached white flour (4 cups), you can omit the sugar and use only 1
tablespoon of oil. See text above for
more info.
3 cups whole wheat flour (you can use white whole wheat flour, if you have it)
1 cup unbleached white flour
1/2 tablespoon fine sea salt
1 3/4 cups lukewarm water
PS: I plan to try this
next time using 3/4 cup pureed cooked or canned white beans in place of 3/4 cup
of the water—I’ll keep you posted!)
2 teaspoons organic sugar
1 teaspoon instant or dry active yeast
2 tablespoons olive oil
FOR NO-KNEAD VERSION:
All the same; the only change is to use only 2 3/4 cups whole wheat flour.
Mix together the 2 kinds of flour and the salt. (Mix in a medium bowl or dough-rising bucket—preferably
with a lid—with a whisk, if using the No-Knead version or kneading by hand; or
in the bowl of your stand mixer if kneading by machine.)
In a smaller bowl, or a measuring pitcher, mix the water, sugar and
yeast. Let stand for a couple of
minutes.
NOTE: I know that
you don’t have to do this with instant yeast, but Master Baker Peter Reinhart
says (in his book “Peter Reinhart’s Artisan Breads Every Day”, pps 12-13): “...I’ve discovered that waking up the yeast
in lukewarm water allows it to ferment more effectively during the cooldown
phase in the refrigerator. It also makes it possible to put the dough in the
refrigerator as soon as it’s mixed rather than having to wait for it to rise.
The warmer dough and activated yeast have plenty of time to rise as the dough
cools, so the dough is ready to use right from the refrigerator, without the
wake-up time required in many of the recipes I’ve developed...Another benefit
of this method is that it’s the same whether you use instant or active dry
yeast...”
Add the oil to the yeast mixture and pour into the flour
mix. With a wooden spoon or dough whisk, stir into a rough dough. If using the No-Knead method, that’s
all you have to do. If you are kneading, either by
hand or by machine, knead about 5 minutes. If using a machine, remove
the dough from the machine bowl and place into a lightly-oiled medium-sized bowl
or dough-rising bucket. Cover with the lid or place the bowl inside of a large
food-safe plastic bag (use a twist-tie,
but make sure the bag “poofs” up over the bowl a few inches) and let it
rise on your kitchen counter until doubled in size.
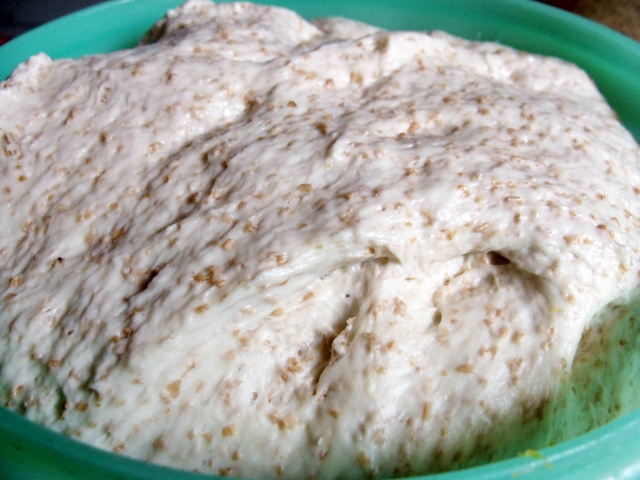
The following pictures are of the No-Knead version:
 |


Now, you can “knock it back”, as Brits say (poke it until it
collapses), cover again as above and refrigerate for up to two weeks, or you
can use it right away. (Tip:
Refrigerated dough is easier to handle if you use the No-Knead version.)
You can use some of it right away, and keep the remaining dough in the fridge
for other uses—that’s the beauty of this recipe!
If you are using refrigerated dough, there is you don’t need
to bring the dough to room temperature before shaping—another plus! But your oven or pan must be hot, or at
least heating up while you shape the flatbreads. Flatbreads can rise for a few
minutes, but pizza should immediately be topped and placed in a very hot oven
(500-550ºF).
TIP: I generally shape
flatbreads on a piece of baking parchment spread over the surface I’m using, or
on a silicone mat. You can get away with less flour that way. Parchment is handy because, if your dough
sticks to it just cut away the excess around your flatbread and bake it with
the parchment attached! It will come
away just fine after baking. I generally top pizza dough which is on parchment
and then transfer the pizza (using a pizza peel) to the hot pan or stone in the
oven, parchment and all!

BASIC FLATBREADS:
NOTE: Even though this is a yeast dough, you can
use thin flatbreads like a tortilla or sandwich wrap, or a stuffed bread (see
Piadine photos above).
Pinch or cut off golf-ball-sized pieces of the dough (or
larger, depending on the size of the flatbreads you want). Roll them to less than 1/4” thick—they can be
round, oval, or odd-shaped; it doesn’t matter! (See Pita and Pizza entries below for tips and resources re rolling out
the dough.) Now, you “bake” them in a hot skillet on the stovetop on at a
time. (I often quickly make 2, 3 or 4 for lunch or breakfast with my
refrigerated dough and it takes only minutes once you’ve done it a few times.)


To cook on top of the stove, heat a heavy cast iron skillet or griddle or hard-anodized skillet (9-12”) over high heat until the pan is very hot. (You can turn on your stove fan or open a few windows!)
Flip one flatbread at a time
onto the hot skillet and cook a minute or two, until it’s bubbling up and has
brown spots on the bottom. Flip it over
and cook until there are brown patches on the second side.

NOTE: You may have to turn the heat down on your stove, or adjust the heat as you go-- stoves vary. You don't want the breads to burn right away. After you've done a few, you'll know how to handle your stove next time!
(Alternative method: You can bake a bunch of them at one time like pita in the oven, but prick the dough all over with a fork before baking so the dough doesn’t puff up so much. Watch carefully so they don’t burn. )
If you are eating them right away, you can brush or spray each bread with a little olive oil (infused with garlic is yummy!) and sprinkle with any toppings you want (see text above). If they are not to be used right away and you want to keep them softened (for a wrap, perhaps), cool them in an open paper bag. To keep them more crisp, cool on baking racks.
| Nutrition Facts for 12 flatbreads or pitas: (This is about the same calories, etc. as 2 slices of bread.) | ||
Nutrition (for 1 flatbread of 12): 163.2 calories; 15% calories
from fat; 2.9g total fat; 0.0mg cholesterol; 284.6mg sodium; 139.4mg potassium;
30.5g carbohydrates; 4.0g fiber; 0.9g sugar; 26.5g net carbs; 5.3g protein; 2.7
points.
|
********

PITA: See this post for shaping and baking: http://veganfeastkitchen.blogspot.ca/2006/08/5-foods-you-have-to-eat-before-you-die.html If you don’t have a pizza stone, you can use
a cast iron skillet or griddle. If you have
neither, heat baking sheets in the oven and use those. Cool the pita in an open
paper bag so that they stay flexible.
| Nutrition Facts for 12 pita: (This is about the same calories, etc. as 2 slices of bread.) |
| Nutrition (for 1 pita of 12): 163.2 calories; 15% calories from fat; 2.9g total fat; 0.0mg cholesterol; 284.6mg sodium; 139.4mg potassium; 30.5g carbohydrates; 4.0g fiber; 0.9g sugar; 26.5g net carbs; 5.3g protein; 2.7 points. |
*****

PIZZA: I generally roll or pat the dough into an 8" circle (on a lightly-floured piece of baking parchment or silicone baking mat) and
then use the weight of the dough to stretch it into a thinner round by draping
it over an over-turned mixing bowl. Then
I place the dough on baking parchment which is sitting right on the pizza peel
(see paragraph directly above).
See this post for instructions and a photo, as well as baking instructions: http://veganfeastkitchen.blogspot.ca/2006/05/vegan-pizza-night.html You drape the dough over an over-turned bowl and gently stretch it until it is the right size, using the weight of the dough stretch it. Work slowly so that you don’t tear the dough. If it does tear, by some chance, you can patch it and seal it again. The pizza does not have to be absolutely round! You can use a rolling pin instead, but Neapolitans are of the opinion that stretching the dough rather than rolling it makes a flatter and less chewy crust.
See this post for instructions and a photo, as well as baking instructions: http://veganfeastkitchen.blogspot.ca/2006/05/vegan-pizza-night.html You drape the dough over an over-turned bowl and gently stretch it until it is the right size, using the weight of the dough stretch it. Work slowly so that you don’t tear the dough. If it does tear, by some chance, you can patch it and seal it again. The pizza does not have to be absolutely round! You can use a rolling pin instead, but Neapolitans are of the opinion that stretching the dough rather than rolling it makes a flatter and less chewy crust.
Here’s a post with instructions for using a cast iron skillet or griddle to
make great pizza: http://veganfeastkitchen.blogspot.ca/2011/10/cast-iron-skillet-pizza-perfect.html
| Nutrition Facts |
| Nutrition (for 2 slices of one large pizza [cut into 6 ], crust only): 217.6 calories; 15% calories from fat; 3.9g total fat; 0.0mg cholesterol; 379.5mg sodium; 185.8mg potassium; 40.7g carbohydrates; 5.3g fiber; 1.1g sugar; 35.4g net carbs; 7.1g protein; 3.9 points. |
**********************************************************************
MY VEGAN RICOTTA RECIPES:
(Both from my book “Nonna’s Italian Kitchen: Delicious Homestyle Vegan Cuisine” (The Book Publishing Co.,Summertown , TN
NOTE: If you make your own soymilk and/or tofu, or have access to fresh okara (the leftover soy pulp), you might like to try my recipe for Okara/Cashew Ricotta at this post.
Printable Copy
MY VEGAN RICOTTA RECIPES:
(Both from my book “Nonna’s Italian Kitchen: Delicious Homestyle Vegan Cuisine” (The Book Publishing Co.,
NOTE: If you make your own soymilk and/or tofu, or have access to fresh okara (the leftover soy pulp), you might like to try my recipe for Okara/Cashew Ricotta at this post.
Printable Copy
BRYANNA'S RICOTTA DI SOYA (TOFU RICOTTA)
Makes 3 1/2 cups
Makes 3 1/2 cups
This mixture is very similar to the creamy full-fat ricotta
used in Italy ,
which bears little resemblance to the watery, grainy ricotta available to most
North Americans. It's so creamy that you
can use it as a spread on bread, or a filling for crespelle (crepes), or even
in desserts.
2 (12.3 oz.) boxes extra-firm SILKEN tofu, crumbled
1/2 cup + 2 tablespoons raw cashew pieces, ground very fine in a coffee/spice mill or mini-chopper
2 tablespoons
plus 1 teaspoon fresh lemon juice
1/2 teaspoon salt
In a food processor, mix about 3 cups of the crumbled tofu,
the ground cashews, the lemon juice and salt until they are VERY smooth. Then crumble in the remaining tofu and
process again. The resulting mixture
should be mostly smooth, but with a little graininess-- it doesn't have to be
like cream cheese.
Scoop the "ricotta" into a plastic container and
refrigerate. It firms up when chilled.
| Nutrition Facts |
Cooking Tip
For a quick tofu ricotta to use in lasagne or other pasta dishes, you may prefer to use this simple mixture: Mash 1 lb. very fresh drained medium-firm tofu, reduced-fat if possible, with 6 T. soy, nut or rice milk and 1/2 tsp. salt. This makes 2 generous cups.
BRYANNA'S ALMOND “RICOTTA”
makes about 2 1/2 cups Soy-Free
This is a tasty vegan "ricotta"-- the almond milk
has a clean, mild taste.
1 cup hot water
1/2 cup whole blanched almonds
1 cup cold water
4 teaspoons fresh lemon juice
4 tablespoons
cornstarch (if you’re allergic to corn, you can use wheat starch, or use 6 tablespoons white rice flour), [organic cornstarch is available]
1 tablespoons
oil
1 teaspoon maple syrup
1/2 teaspoon salt
Place the hot water and almonds in a blender and blend
until a very smooth "cream" results-- be patient! It cannot be
grainy. Add the rest of the ingredients and blend again well.
Pour the mixture into a medium, heavy-bottomed saucepan and
stir constantly over medium-high heat until it thickens and comes to a boil.
Turn the heat down to medium and cook 1 minute more, stirring.
MICROWAVE OPTION: Pour the mixture into a large microwave-safe bowl or beaker. Cook in microwave oven for 2 minutes at 100% power. Whisk. Microwave 1
to 2 minutes more, or until thickened.
Scrape the mixture into a container and let it come to room
temperature. Beat it with a whisk or electric hand mixer. Cover and chill. When it
is chilled and firm, mash and stir it with a fork, until it has some texture.
Refrigerate.
| Nutrition Facts |
| Nutrition (per 1/2 cup): 137.9 calories; 62% calories from fat; 10.1g total fat; 0.0mg cholesterol; 194.7mg sodium; 107.6mg potassium; 10.0g carbohydrates; 1.6g fiber; 1.6g sugar; 8.4g net carbs; 3.2g protein; 3.3 points. |
***********
Enjoy and have fun inventing your own variations!


Thursday, May 30, 2013
A BRIGHT SPRING STIR-FRY

I hope you'll try it and enjoy it!

Printable Recipe
BRYANNA'S SPRING STIR-FRY WITH ASPARAGUS, SNAP PEAS, MANGO AND MINT
Serves 3 to 4
NOTE: I used Soy Curls for the protein, but you can use any kind of vegan "chicken strip", reconstituted textured soy protein slices or chunks, or strips of seitan, marinated tempeh or tofu-- your choice!1 tablespoon dark sesame oil
2 cups (400 g) reconstituted Soy Curls (read about them here) OR any of the alternatives noted above
8 oz. asparagus spears, tough ends snapped off, cut into about 3-inch lengths
8 oz. sugar snap peas
4 cloves garlic, chopped
zest of 1 large organic orange
1-inch knob of ginger, peeled and slivered
1/2 teaspoon chile flakes
1 large ripe mango, pitted, peeled and sliced
Cooking Sauce: (Mix together in a cup)
1/4 cup vegan broth
2 tablespoons low-sodium soy sauce
2 tablespoons medium dry sherry or rice wine
1 tablespoon agave nectar
Additional:
a handful of fresh mint leaves, chopped
Heat the sesame oil in a large, well-seasoned stir-fry pan (flat-bottomed wok) or skillet (cast iron, carbon steel, or stainless steel) over medium heat. When the oil is heated, add the Soy Curls (or alternate) and saute, scraping the bottom of the pan frequently with a spatula and keeping the Soy Curls moving. When they are browned a bit, scrape them out of the pan into a bowl and return the pan to the heat.
Add the asparagus and snow peas to the pan and keep them moving (over medium-high heat in a cast iron pan; otherwise, over high heat), adding a splash of water when necessary to keep the vegetables from sticking. When the asparagus is getting tender, but still has a bit of a bite to it, add the garlic, orange zest, ginger and chile flakes. Stir-fry for another minute. Add the mango slices and the cooking sauce and bring to a boil. Add the mint and toss the mixture for a few seconds, then serve immediately with rice.
Enjoy!
Thursday, May 23, 2013
"WHOLE GRAIN VEGAN BAKING" BLOG TOUR-- REVIEW, BOOK GIVEAWAY, & A RECIPE, OF COURSE!

BLOG TOUR SCHEDULE (CHECK OUT THE OTHER BLOG POSTS ON THE TOUR FOR MORE SAMPLE RECIPES, REVIEWS AND PHOTOS)
WIN A COPY OF THIS BOOK! Comment on this post and 2 contestants will be chosen randomly to receive a copy (US and Canada only, I'm afraid). CONTEST IS NOW CLOSED! THE WINNERS ARE CLAUDIA AND VEGINTRAINING-- I'LL BE IN TOUCH!
If you are laboring under the impression that whole grain baked goods are dark, heavy, and too "healthy" to actually taste good, and that VEGAN whole grain baked goods must be even moreso, "Whole Grain Vegan Baking" will change your mind in a hurry! The authors are both experienced and innovative vegan bakers, so you will be in capable hands! (Celine Steen is the co-author of “Vegan Sandwiches Save theDay!”, “500 Vegan Recipes”, “The Complete Guide to Vegan Food Substitutions”,
and “Hearty Vegan Meals”. She is the founder of the award-winning blog Have Cake, Will Travel.
Tamasin Noyes is the co-author of “Vegan Sandwiches Save theDay!” and author of “American Vegan Kitchen” and “Grills Gone Vegan”. She is
the founder of the blog Vegan Appetite .)
I was honored to be invited to participate in this "Blog Tour" for Celine and Tamasin's new book, but it was difficult to select a recipe for this post from such an array of goodies! The breakfast chapter alone beckoned with delectable recipes, from Lemony Spelt Scones to Chocolate Sesame Granola and Chocolate Stout Spelt Doughnuts, to Breakfast Pie Pastries, to yeasted Lemon Ginger Rolls (can you tell that I love chocolate and lemon?). But there were still chapters of quick loaves and muffins; artisan yeast breads, rolls, bagels, pretzels and pizza; a jam-packed (not to make a pun) snack chapter of crackers, quiches & tarts, flatbreads, bars and cookies; and the one many of us may open first, "Perfectly Wholesome Desserts". Lots of photos, too-- groan!
You know that I am not a "purist" when it comes to baking-- I have nothing against some unbleached white flour once in a while! I use a great deal of whole grains and whole grain flours because they are nutritious and full of flavor. But this book is so full of variety that I'm sure it will move you (and me) well beyond whole wheat flour and oats.
I almost had to do the eeny-meeny-miney-mo thing to choose my recipe for the Blog Tour, but, in the end, I chose the following cornbread recipe for this post. It's jazzed-up with jalapeño peppers and one of my favorite baking additions, dried cranberries. I sincerely love cornbread and this one not only sounded interesting, but it contains only 1 tablespoon of oil! I also liked the combination of whole wheat pastry flour, cornmeal and corn flour, which is finely-ground cornmeal. (Chapter One is full of baking tips and information about the various flours and other ingredients.) Using the two varieties of corn products gave the bread a smoother texture than most cornbread, but still with a bit of graininess.

We enjoyed this cornbread with some of my vegan Habitant Pea Soup for a hearty supper. It was moist and very flavorful (and yummy heated up for breakfast the next day with a drizzle of maple syrup!). Now I have lots of experimenting to do with more than 100 recipes in this book-- poor me!
Bravo to Celine and Tami for producing such a lovely, inspiring and user-friendly cookbook!


SPICY CRANBERRY CORNBREAD (WITH MY NOTES: BCG)
From "Whole Grain Vegan Baking" by Celine Steen & Tamasin Noyes
Yield: 6 servings
A wee bit sweet,
a wee bit spicy, and all very savory, this cornbread has the perfect crust thanks
to the hot cast-iron skillet. Cornmeal is packed with nutrients, minerals, and
amino acids. Plus, it tastes great! Start with this recipe, then tweak it to
your taste. Double the scallions, jalapeños, or cranberries to make it your
own.
11⁄2 cups (355 ml) unsweetened
plain vegan milk, more if needed (I used soy milk: BCG)
1 tablespoon (15 ml) apple
cider vinegar
60 g (1⁄4 cup) unsweetened
applesauce
2 tablespoons (30 ml) pure
maple syrup
18 g (3 tablespoons) minced
scallion (I didn't have any, so I used minced leeks, green & white parts: BCG)
18 g (2 tablespoons) minced jalapeño peppers (I used rinsed pickled jalapeños: BCG)
15 g (2 tablespoons) dried
sweetened cranberries, chopped
1 tablespoon (15 ml)
neutral-flavored oil
120 g (1 cup) whole wheat pastry flour
60 g (1⁄2 cup) corn flour (see
page 10) (grind some yellow cornmeal to flour in a clean, dry coffee/spice grinder if you don't have any: BCG
88 g (1⁄2 cup plus 2
tablespoons) coarsely ground cornmeal
1 teaspoon fine sea salt
1⁄4 teaspoon ground black
pepper
12 g (1 tablespoon) baking
powder
Nonstick cooking spray (or oil from a pump-spray bottle: BCG)
Put an 8-inch(20 cm) cast-iron skillet in the oven and preheat the oven to 400°F (200°C, or
gas mark 6).
Combine the milk
and vinegar in a medium-size bowl: The mixture will curdle and become like
buttermilk. Stir in the applesauce, syrup, scallion, jalapeño, cranberries, and
oil.

Combine the
flours, cornmeal, salt, pepper, and baking powder in a second medium-size bowl.
Whisk to combine. Pour the wet ingredients into the dry and stir until
combined, but do not over-mix. If the mixture is too dry, add additional milk 1
tablespoon (15 ml) at a time as needed. (I didn't need to add any extra: BCG) The mixture should be pourable.

Carefully take
the skillet out of the oven and coat it with cooking spray.
Pour the
cornbread batter into the skillet and put it back in the oven.

Bake for 33 to
38 minutes, until a toothpick inserted into the center comes out clean. Let
cool slightly before serving.


Enjoy!
Monday, May 20, 2013
VICTORIA DAY WEEKEND FAMILY MEALS AND VISITING

Cinnamon Focaccia for Victoria Day brunch-- see below for details
I'm working on my flatbread experiments, plus a recipe for a virtual potluck blog post this coming Thursday, and testing a recipe or two for another author friend -- delayed due to 4 lovely days of family visiting.
My youngest daughter and her husband and son came from Vancouver to stay for the whole long weekend. We don't get to see them very often, so it was wonderful to spend time with them, despite the variable weather. My daughter's siblings all came to spend time, as well, on different days. So, there was lots of conversation and, of course eating.
Several days ahead, I made some of my no-knead crusty bread dough (4 loaves-worth) to store in the refrigerator and bake fresh when we needed it. It came in handy! Most of the meals I made over the weekend were decided on pretty much on the spot because my plans to make up the menus ahead of time were thwarted by time taken up by shopping, cleaning house, etc. (that's my excuse, anyway!). But we managed to eat well, nonetheless.
I should have taken more pictures of the food, but I forgot to most of the time, in the rush to get everything on the table at the same time and everyone to the table,etc. But here are a few pics and menus...
For Friday night, my husband made his famous spaghetti sauce, so we had delicious pasta and green salad and crusty no-knead bread (from my book "World Vegan Feast") for dinner, and Chocolate Mudpie Cake with vegan Coffee Buttercream Icing for a little birthday celebration for my youngest grandson, who turned 9 a few days earlier.

Homemade crusty no-knead bread

Saturday morning we all had whatever we felt like for breakfast-- whether it be toast, cereal, fruit, etc., along with my husband's great coffee for lattes.
My daughter brought me a big bag of whole yellow dried peas from Vancouver (they are expensive around here, when you can find them), so I made some of my vegan French Canadian-Style Pea Soup for lunch...

We had what my son-in-law termed a "truly Canadian multi-cultural meal", since the soup was accompanied by Armenian flatbread that they brought from Vancouver, along with my homemade hummus and Turkish Muhammara (a delicious roasted red pepper, walnut, garlic and pomegranate molasses spread from my book "The Fiber for Life Cookbook").

We visited friends in the afternoon (sharing some of the leftover birthday cake with them), and before I knew it, it was dinnertime! We had more pasta, in the form of bowtie pasta (farfalle) in a vegan creamy sauce with mushrooms, Field Roast Smoked Apple Sage vegan sausage and Soy Curls, wine, fresh spinach, garlic, basil and vegan parmesan, with some Daiya mozza stirred in. It turned out very well for a made-up-on-the-spot dish.
Sunday was a glorious sunny day! After a another simple breakfast (too much food the day before!), my oldest daughter came over from our sister island to the east, and we headed out for a family hike with the dogs. The island is so green and lush right now and we saw eagles, hawks and ravens and, I hope, walked off a few calories!
Grampa and youngest grandson leading the family hike on Sunday

Ringo sunning his belly on a sunny Sunday afternoon...

Lunch on Sunday was a spicy beans soup with sweet potato and kale, from this blog, which I made with red beans instead of blackeyed peas this time, along with more crusty bread...

Cousins playing cards...


Sunday's dinner was steamed brown basmati rice with two stir-fries-- asparagus, onions, portobello mushrooms and marinated tofu in a vegan "oyster sauce" (actually made with mushrooms)-flavored cooking sauce, and a spicy Chinese mock "roast duck" and bell pepper dish with black bean sauce.
This morning we had a brunch with my daughter and 3 granddaughters coming over from "the big island" (Vancouver island) and my son and his daughter. I made my favorite tofu scramble, with the addition of a can of ackee that my daughter had brought from Vancouver. Ackee is actually a Caribbean fruit that makes a wonderful egg substitute! I don't get a chance to use it very often because it isn't available where i live, as far as I know.
Ackee

With it we had oven-broiled hashbrowns, fresh pineapple and mango, and a spur-of-the-moment sweet bread-- cinnamon focaccia!


My son chatting with his daughter and his sisters on a sunny holiday morning

Cousins chatting...

Now the house is quiet and I'm off to my dance practice. I'm going to miss my family until the next time we get together!
Enjoy!
Monday, May 13, 2013
FUSION NAAN PIZZAS AND MESSING AROUND WITH FLATBREADS
 |
| Naan Pizza |
 |
| Leek and vegan cheese flatbreads for dinner last night-- so good! |
All this ruminating on bread reminded me of a recipe I developed for my old newsletter, The Vegan Feast, a few years ago-- a sort of pizza with a base of vegan naan and an Indian-style pea/tomato sauce, topped with vegan cheese and rich-tasting browned onions. So, I offer it to you here while I make a few more flatbread discoveries for the next post. Bon appetit!

Printable Recipe
BRYANNA'S FUSION NAAN PIZZAS WITH INDIAN TOMATO SAUCE WITH PEAS, ARUGULA, VEGAN MOZZA, AND CRISPY BROWNED ONIONS
Serves 12 Yield: 6 pizzas
I
wanted to have a casual Indian fusion meal for friends one evening a few years ago, and this is
the main dish I was thinking about for days before. It turned out to be a big hit, and a good choice for a casual company meal, because all of the components can be made either
early in the day, or even a day or two ahead of time.
NOTE: Naan for pizzas can be baked several
hours ahead of time. Bake them for only
3 minutes or so, or until they are risen and set, and starting to become
golden. You need to underbake them because they will bake again with the
toppings. Remove them with a peel or long-handled spatula. Place them inside of
an open paper bag until time to make the pizzas.
6 Vegan Naan Bread, slightly under-baked
(see my book "World Vegan Feast" for my vegan recipe)-- mine are
about 9 x 7-inches
OR use
commercial naan (if you can find some without dairy) OR vegan pita (uncut)--
you may need to use 1 or 2 more of these
UPDATE: or use one of these flatbread doughs: My 1st flatbread dough; my 2nd flatbread dough-- both no-knead.
UPDATE: or use one of these flatbread doughs: My 1st flatbread dough; my 2nd flatbread dough-- both no-knead.
Crispy Browned Onions: **You can make these ahead of time, even the day before.**
4 large onions, thinly-sliced
2 tablespoons olive oil
1 teaspoon salt
Indian Tomato Sauce with Peas:
2 tablespoons grated fresh ginger
1 tablespoon chopped garlic
1 medium onion, minced
1 teaspoon salt
1 teaspoon turmeric
1 tablespoon garam masala or curry powder
1 teaspoon ground coriander
1 pinch cayenne
1/4 cup water or vegetarian broth
1/ 14 oz can tomatoes with juice, mashed
with your fingers
1 1/2 cups frozen petit pois (young green
peas)
1 teaspoon sugar
Additional:
2 cups raw arugula (approximately)
Crispy Browned
Onions: Heat the olive oil in a large well-seasoned skillet over high heat. Add the thinly-sliced onions and salt. Saute for several minutes, then reduce the
heat to medium. Cook the onions,
stirring often, for about 15 minutes.
You want them to be deep brown and a little crispy. When the are done, set the pan aside, off the
heat.
Indian Tomato Sauce with Peas: Add the ginger
and garlic to a large well-seasoned skillet over high heat, and stir-fry with a little bit of water
for a minute. Add the onion and stir-fry until it is soft, about 5 minutes,
adding a squirt of water as needed to keep from sticking. Add the seasonings
and 1/4 cup of water or broth, stirring around well, then add the tomatoes,
peas, and sugar, and simmer for 10-15 minutes.
Set aside.
Assembling and Baking the Pizzas: About 1/2 an
hour before you want to serve the pizzas, set an oven rack in the
upper-middle rung. Place a large baking stone (or 2 or more smaller ones) or baking tiles (leaving a 1-inch gap around the border), or a large cast iron skillet (or 2 smaller ones), or griddle or pizza pan , on the oven rack. Heat the oven to 450°F.

My homemade Naan
Place the naan (or pita) on your work surface
and cover all them evenly with the Indian Tomato Sauce. Distribute the shredded mozza evenly between
the pizzas.


Place the raw arugula
over the mozza. Top with the Crispy
Browned Onions.

Place the pizza on a baking peel, a large dough scraper/bench knife, cake or cookie lifter, or a small rimless baking sheet-- whatever
you are using to transfer the pizzas to the baking stone or alternate. Transfer
to the baking stone and bake as directed below.
To use a peel, or alternate, dust it lightly
but thoroughly with flour, cornmeal or semolina, gently pull the pizza onto it, letting one edge hang off the rim a bit, if necessary. As you place the front tip of the peel AT THE BACK
END of the hot stone or skillet, etc., pull the peel out sharply, and the pizza will slip onto the hot surface. Close the oven door quickly. If your
stone is big enough, add a second pizza.
Bake each pizza (or pair of pizzas)
for 3-5 minutes each, remove immediately and repeat until the others are
cooked. Cut them in half and serve
immediately!
Nutrition (per serving): 338.0 calories;
36% calories from fat; 13.8g total fat; 0.0mg cholesterol; 900.6mg sodium;
281.2mg potassium; 45.0g carbohydrates; 3.8g fiber; 5.5g sugar; 9.3g protein;
7.1 points.
Enjoy!

Friday, May 3, 2013
SOY CURLS WITH LEMON-RHUBARB SAUCE

We planted two rhubarb plants last year and this year they have grown amazingly! Yesterday I picked several stalks and then had to decide what to do with it. I didn't feel like making a dessert , so I decided a savory dish with rhubarb added for some tang was just the ticket. Rhubarb (which is actually a vegetable) is used in savory dishes in Iran, Afghanistan, India (three cuisines which continue to intrigue and delight me), and also Eastern Europe, where it is often paired with potatoes (which actually makes alot of sense to me), and used in soups and even salads. Lots of inspiration here, which I may need if these plants keep producing at this rate!
Some time ago, I had seen a recipe from Bon Appetit magazine for rhubarb-stuffed chicken breasts and a lemony rhubarb sauce. The sauce sounded delightful and, since I had just received a case of Soy Curls™ (see about this versatile product, made with the whole soybean, here), I thought I could make a simpler, vegan version with them-- a little less sweet and using less fat, but keeping some of the richness to complement the tangy quality. We enjoyed the results immensely, and the leftovers were even more delicious for lunch today!

Printable Recipe
BRYANNA’S
SOY CURLS™ WITH LEMON-RHUBARB SAUCE
Serves 4
This was loosely adapted and “veganized” from a recipe in the February 2007 issue of Bon Appetit magazine.
8-ounce package Butler Soy Curls™
(If you prefer, substitute 4-5 cups strips of any chicken sub you like.)
4 cups boiling vegan “chicken-y” broth
1 tablespoon olive oil
1 small onion, minced
4 1/2 cups diced rhubarb, divided
1 tablespoon fresh lemon juice
2 teaspoons lemon zest
2 tablespoons vegan butter (try my homemade vegan palm oil-free Buttah)
1/2 cup sliced fresh ginger (don't bother peeling)
1/2 cup agave nectar
1/2 cup dry sherry (or white vermouth)
4 cups vegan “chicken-y” broth
one whole star anise
1 bay leaf
salt
freshly-ground black pepper
Accompaniment:
Steamed rice
Garnish:|
Chopped fresh parsley
Lemon slices
Reconstitute the Soy Curls™ by soaking
in the 4 cups boiling broth while you prepare the onions, etc. When they are tender (this takes only about
10 minutes), drain them. (You can use
any leftover broth as part of the second 4 cups of broth further down in the
recipe.)
Sauté 1/3 of the
onions and 2 cups of the rhubarb in the olive oil in a medium non-stick, cast iron or hard-anodized skillet
for about 5 minutes, or until the onion is just beginning to soften. OR, you can microwave
the mixture on 100% power in a covered microwave dish or casserole for about 3
minutes. Stir in the lemon juice and zest. Season with salt and pepper and set
aside.
Melt the vegan butter in a heavy non-stick, cast iron or hard-anodized pot. Add the remaining onions, rhubarb and ginger slices and sauté for about 10 minutes. Add the agave nectar and sherry, bring to a boil and boil hard for one minute. Add the “chicken-y” broth, star anise, and bay leaf, and simmer over medium heat (un-covered) for about one hour, or until the broth has been reduced by about half. Strain the sauce through a sieve, discarding the solids. You should have about 2 cups of broth left.
Return the strained sauce to the cleaned pot, add the reserved rhubarb/onion/lemon mixture and the drained Soy Curls™ . Heat through and taste to for salt and pepper.
Serve over hot steamed rice, garnished with parsley and lemon slices.

Enjoy!
Subscribe to:
Posts (Atom)